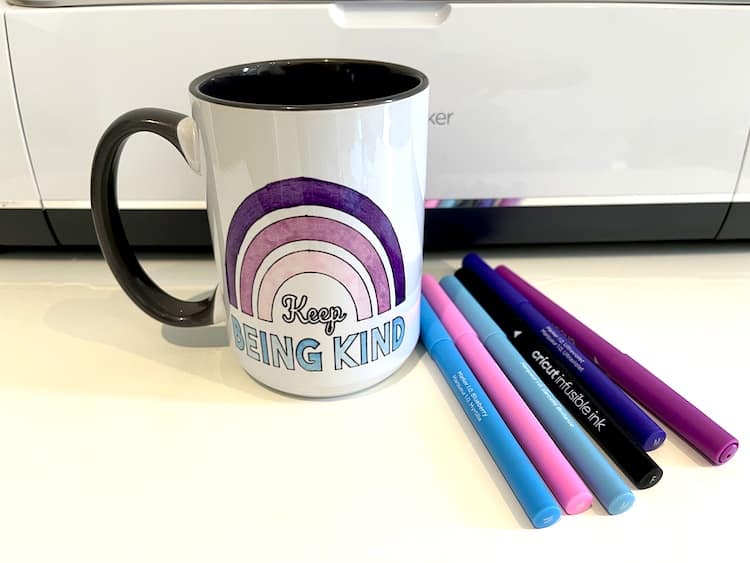
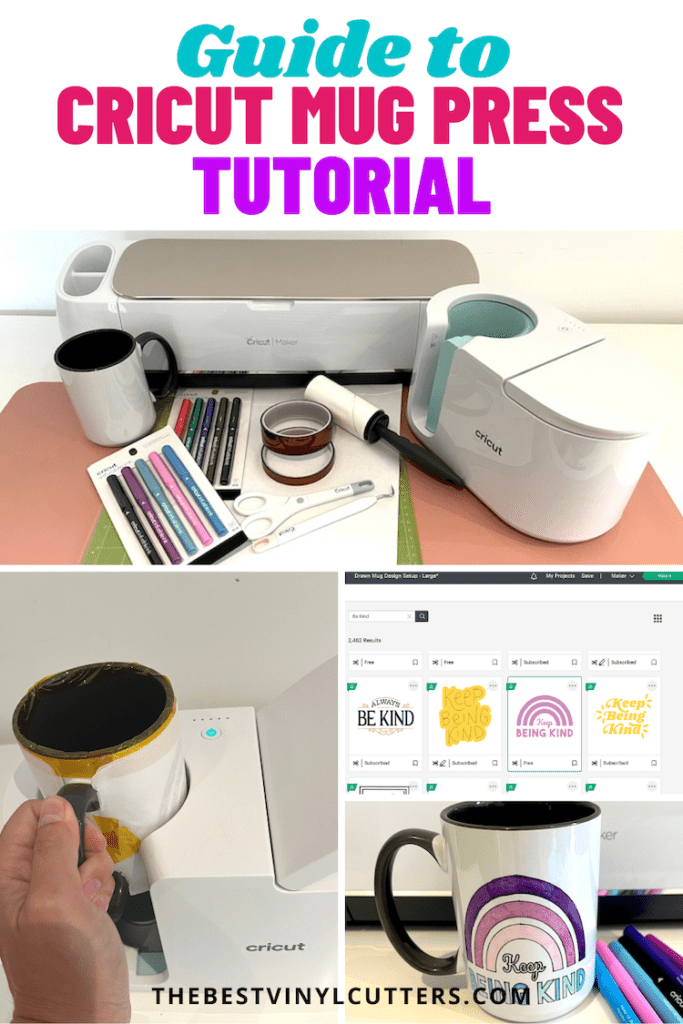
Creating beautiful mugs using your Cricut machine, Cricut Infusible Ink Pens, and a Cricut Mug Press is quick and easy!
Once you know how easy it is to create a Cricut Infusible Ink Pen mug, you will love making custom mugs for friends and family.
If you want to know more about Cricut Infusible Ink, you can read our beginners guide to Cricut Infusible Ink which answers everything about this great product.
We will also be using a Cricut Mug Press in this tutorial, however, if you do not have a Cricut Mug Press you can use any mug press that you may already have available.
How to Make Cricut Infusible Ink Mugs with Infusible Ink Pens
Here is our tutorial on making Cricut Infusible Ink Mugs using Cricut Infusible Ink Pens and a Cricut Mug Press.
Supplies Needed:
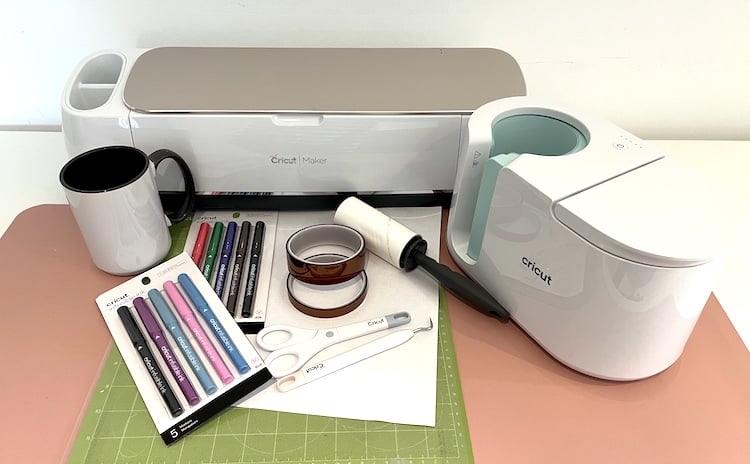
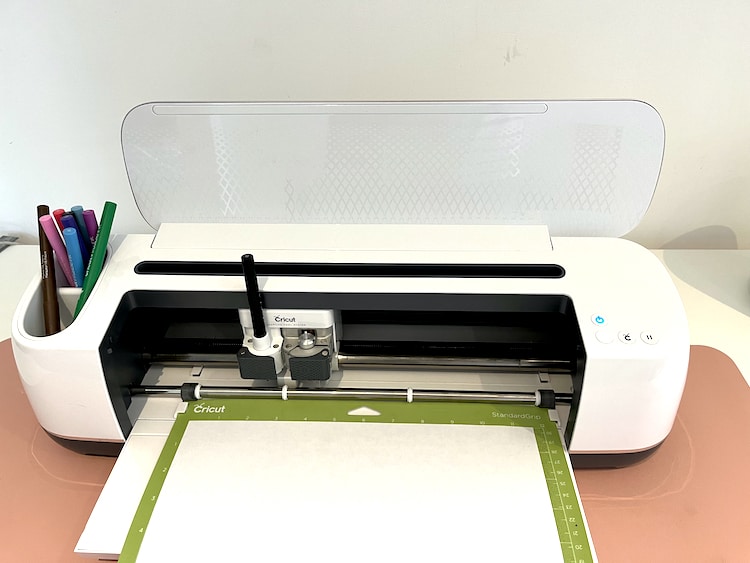
- Cricut Cutting Machine (I used a Cricut Maker)
- Cricut StandardGrip Cutting Mat
- Cricut Mug Press (Best way to buy one is by investing in a Cricut Mug Press bundle)
- Cricut Ceramic Mug Blank or other compatible Cricut Infusible Ink mug blanks
- Cricut Infusible Ink Pen Set – we used 1.0 point for the solid colors and the fine point black pen 0.4 to achieve a fine thin line for text or intricate outlines
- Laser Copy Paper
- Butcher Paper
- Heat Resistant Tape
- Lint Roller
- Scissors (you can also use the scissors in the Cricut Basic Tool Set)
Step 1: Create Your Design
Below you will find the step-by-step instructions on how to prepare your Cricut Mug design. We have provided the link to the Cricut Design Space project however you can of course choose to use a different design or even upload designs you purchased.
If you wish to use our project you can do so by starting your project by clicking on this link. Choose either “Customize” to change the design or “Make It” if no changes will be made. Note: The designs are obtained through the Cricut Assess profile.
Below are the steps we used to create this design.
- Open Design Space and click “New Project”
- Once in a new blank canvas click on “Projects”
- Search “Drawn Mug Design”
- Scroll and find the project named “Drawn Mug Design Set-up”
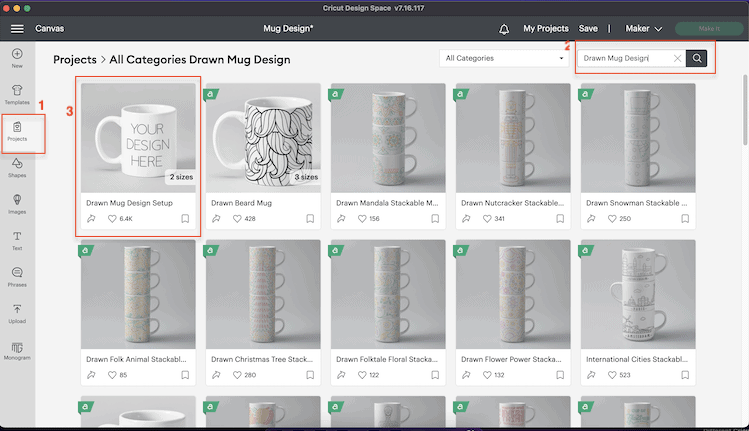
- Select the correct size of the mug. I'm using the “Large Drawn Mug: 15oz/425ml Mug Blank”.
- Once you have your mug size selected click “Customize”
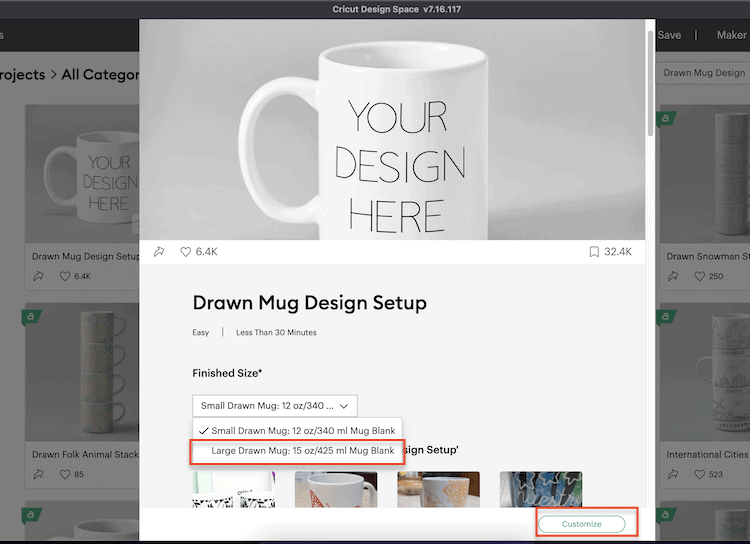
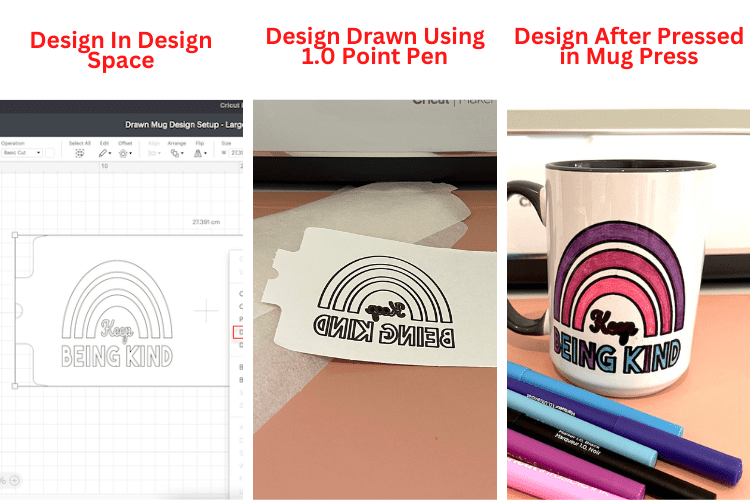
- The Drawn Mug Design Template will now be on our canvas.
- To add your image click on “Image” and click on “Browse All Images” or you can find a particular image by adding text in the search bar.
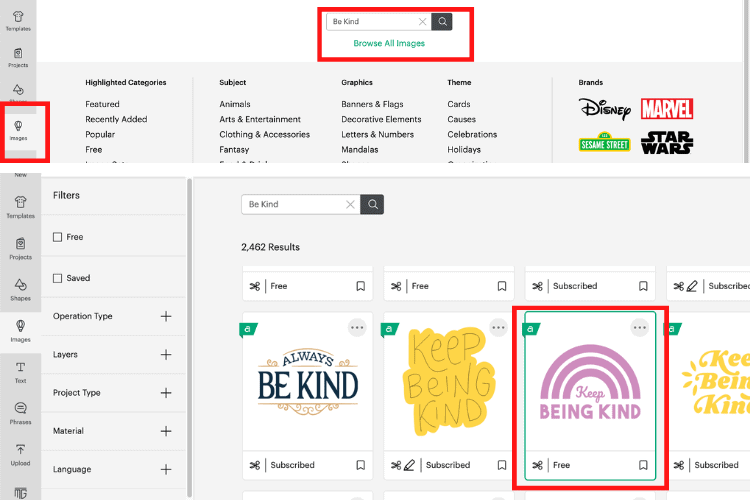
I have used Image Number #M1ECE0E7C. I typed in “Be Kind” in the search bar to find an image.
- Once you have got your chosen designs click on “Add To Canvas”
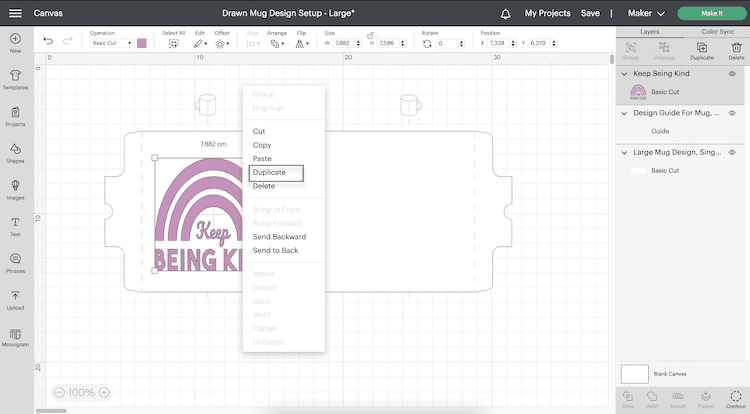
- Resize and position your image where you would like it using the red mugs and lines as a guide.
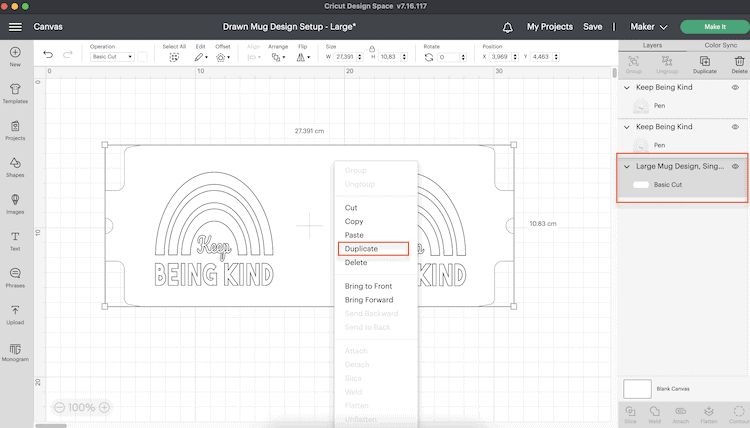
- Duplicate the image if you want to have the same image on both sides of the mug or add a different image or phrase. Right Click on Image and the menu will pop up. Select “Duplicate”
- As the image is a Cut operation, we need to change the Operation to Draw.
- Select the images, click on “Operation” and select “Pen” under the Draw section.
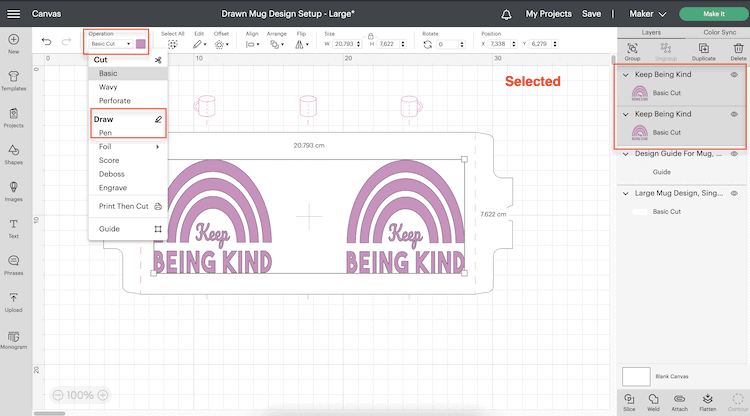
- You will now notice that the images are outlines of the original image.
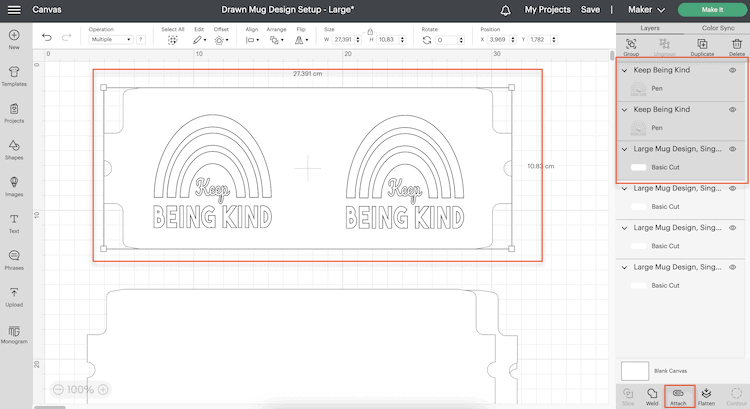
- To finish creating our design delete the red guidelines layer.
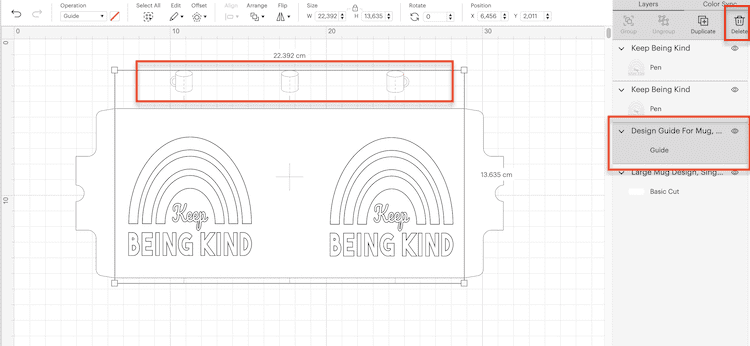
- Before we send the design to be drawn and cut, we need three extra blank mug templates cut. This is because the Infusible Ink will bleed through our one layer of paper and would leave an imprint on the Mug Press unless we protect it.
- Select the mug template layer in your layers, right click on the template panel and select duplicate from the drop down menu. Repeat this two more times.
- All that is left to do now is to select the elements of our design, the images, and the mug template and, click “Attach”.
Step 2: Draw and Cut Your Infusible Ink Mug Press Design
Now we are ready to cut the design.
- Make sure to turn your Cricut Machine on.
- Hide the duplicate layers of the mug template layer by clicking the eye icon for each of the extra three mug template layers.
- Select “Make It”.
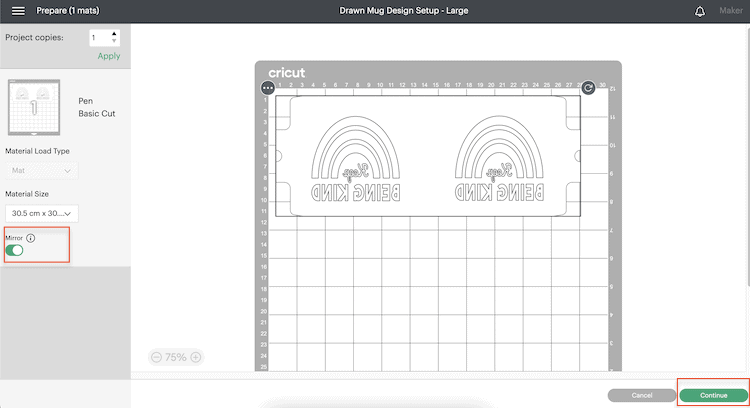
- You will now see the project mat with the design on. Select “Mirror” for the design as it contains text. If you are not using any text you may not need to mirror your image.
- Select “Continue”
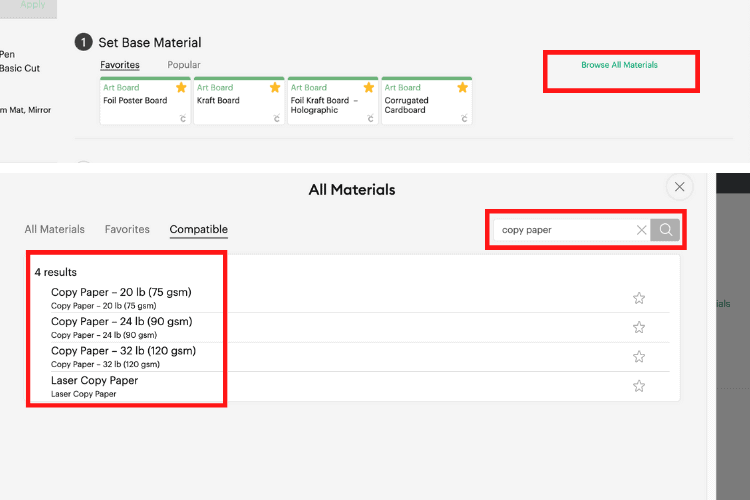
- Now change your Material Type to Copy Paper by clicking on Browse All Materials and typing in Copy Paper.
- Select the relevant weight type of the paper you will be using and click on “Done”.
- Insert your Cricut Infusible Ink Pen in Clamp A and your Fine Point Blade in Clamp B.
We are using a black pen as we will color in some of the design once it has been drawn and cut. If you wish not to color in some of the design, you can choose any color Infusible Ink pen to draw the image.
- Place your piece of Laser Copy Paper onto your Green StandardGrip Cutting Mat.
To make sure your paper is stuck to your mat, you can use a Cricut Brayer to press the paper down more.
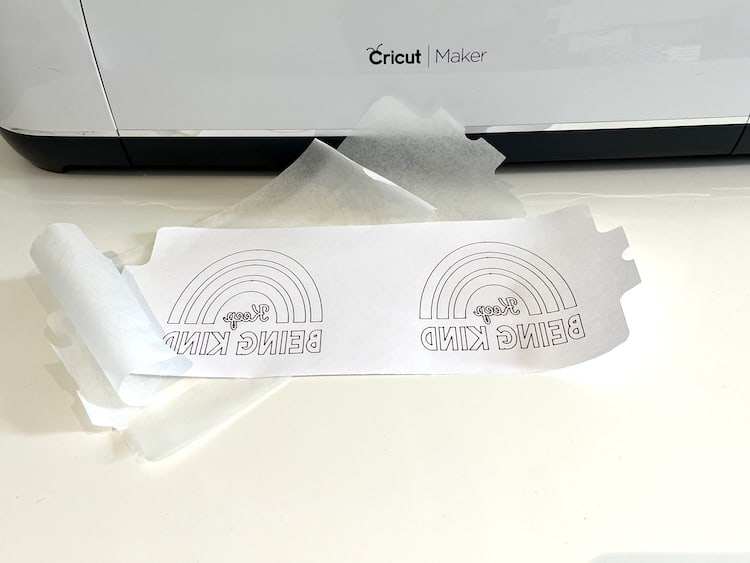
- Load your mat into the Cricut machine and press “Go” on your machine.
- Your Cricut machine will now draw and cut out your design on the Laser Copy paper for you. Follow the prompts in Cricut Design Space to change the Cricut Infusible Ink Pen if you use more than one color in your design.
- Return to your project canvas, and hide the mug template with your design layer.
- Unhide the three plain mug templates.
- Repeat the steps to cut out the additional three plain mug press design templates.
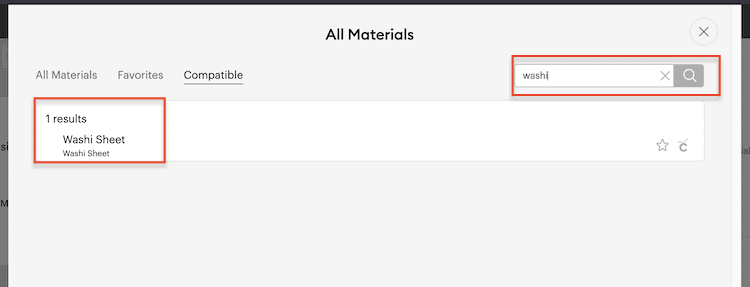
You will not find Butcher Paper in the materials list. Use the Washi Material setting as it will not tear the sheet when cutting.
Step 3: Weed & Finish Your Design
- Remove the cut design from your cutting mat (I roll my mat away from the paper rather than trying to pull the paper sheet up).
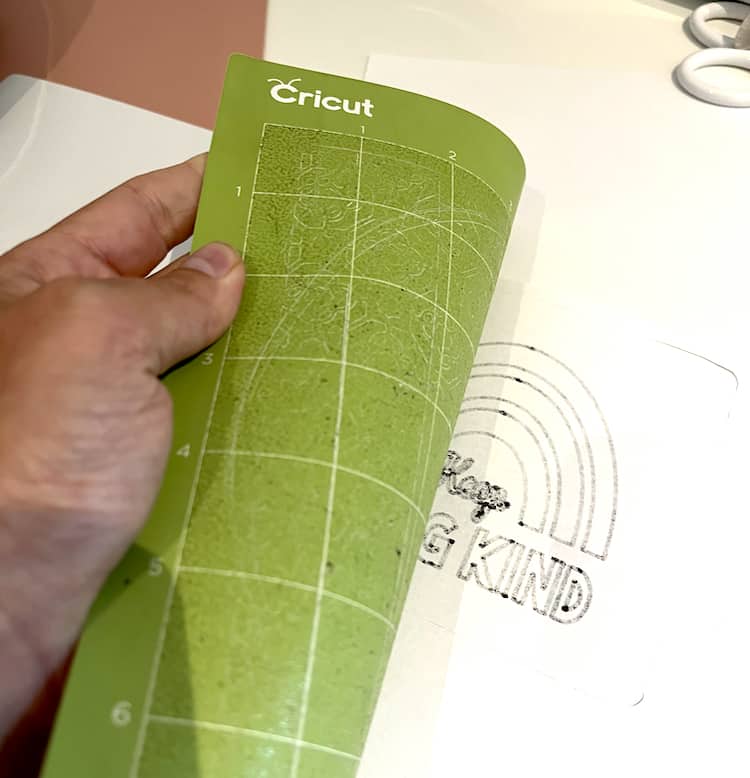
- If your machine has not cut out the mug template design fully, use your scissors to trim away the unneeded parts of the laser paper.
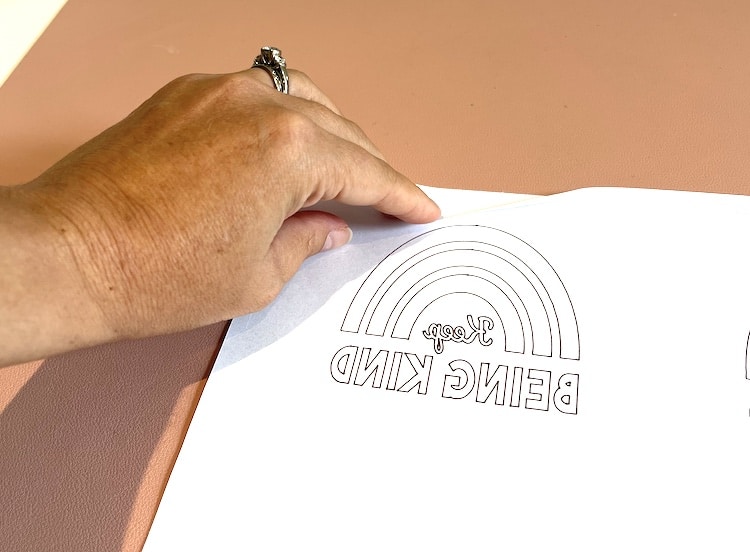
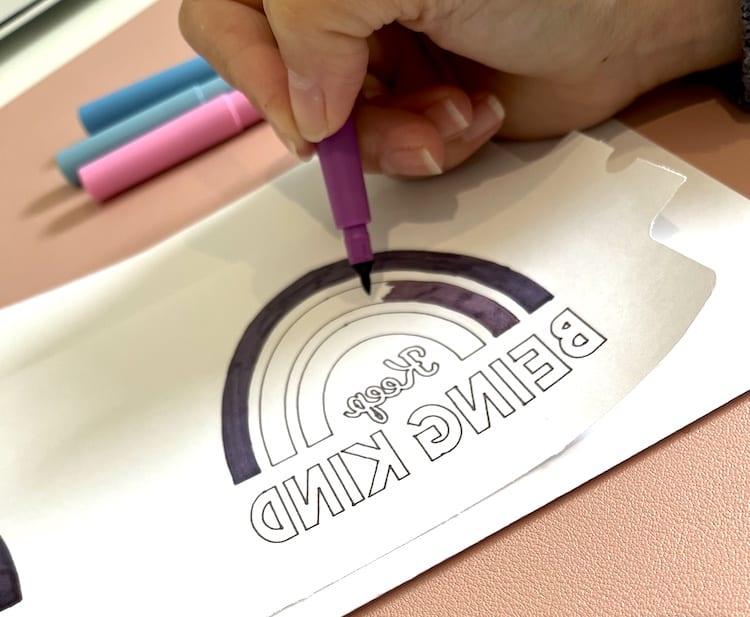
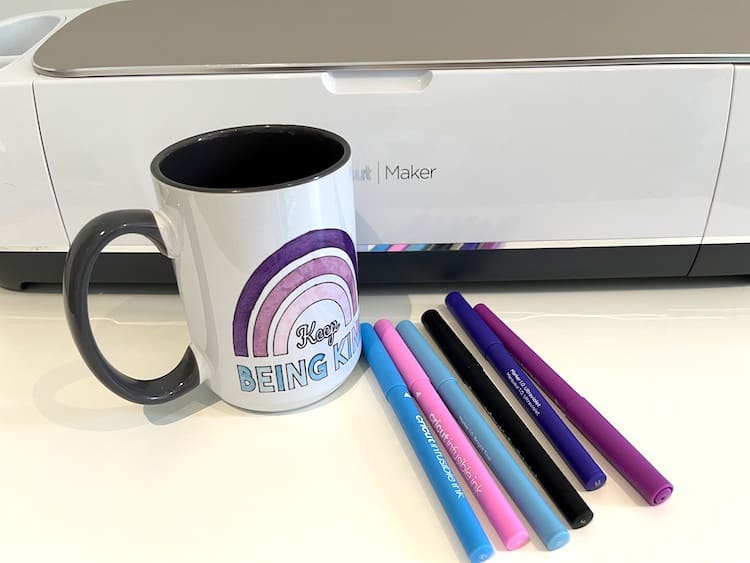
- We want to add some color to our design so using different color Cricut Infusible Ink Pens we have colored in the design.

Step 4: Prepare the Mugs for Pressing
Now is a good time to switch on your Cricut MugPress so it can start heating up.
NOTE: Unlike Cricut EasyPress machines, the Cricut Mug Press temperature cannot be changed.
- Lift the lever and press the on button on the mug press. The button will be orange and the press will beep.
- Use a lint roller to remove any dust, fibres and fingerprints from the mug surface.
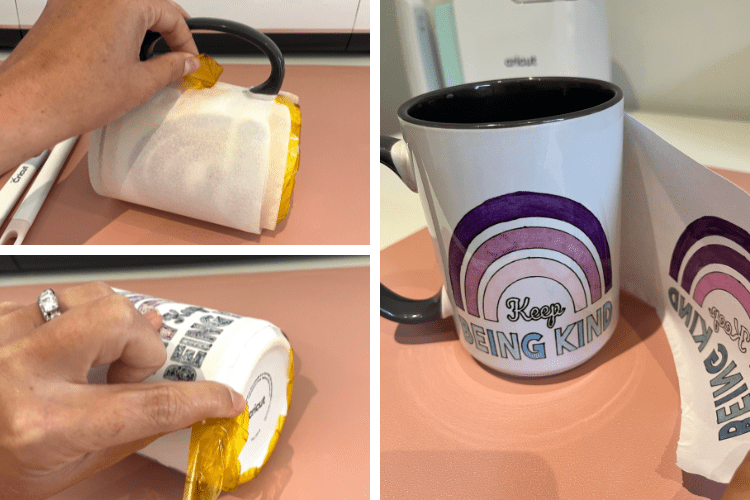
- Wrap your design around your clean mug with your ink facing the mug. Use the heat resistant tape to stick your design to the mug.
- I like to wrap my design tightly. Do this by taping one edge of the cut design to the mug and then wrapping the design around and taping the other edge down. Now tape both the top and bottom of the design to the mug.
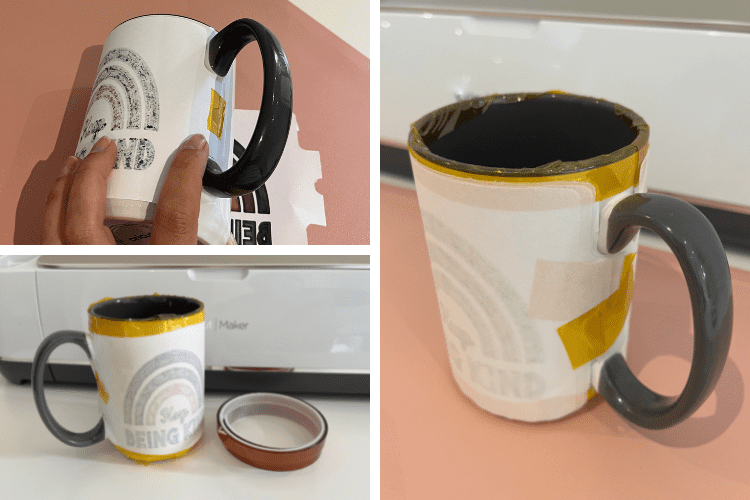
- Add the plain cut templates on top and secure in place with heat resistant tape.
Step 5: Apply the Infusible Ink to the Mug
- When the press is ready, the on button will turn green.
- Place your mug into your pre-heated Mug Press and close down the lever. Ensure that the press covers the sides of the design.
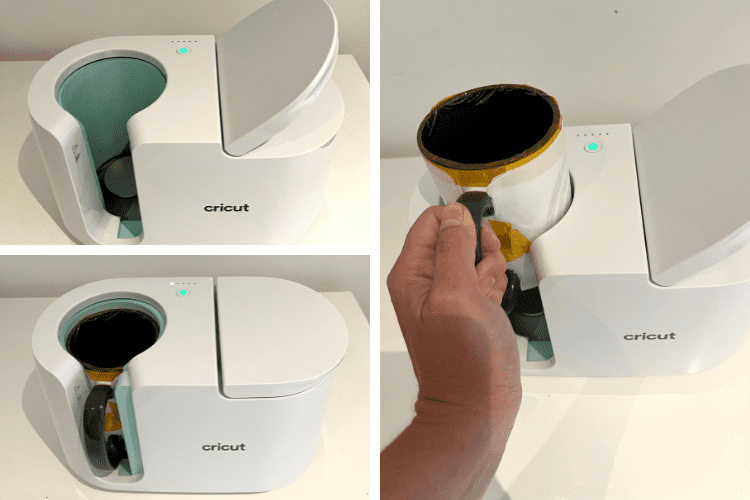
- When all the lights on the Mug Press flashing together and it beeps, lift the lever to release the mug from the press. Be careful as the mug may be hot.
- Slowly lift the mug out of the press.
- Switch off your press.
CAUTION: Mug will be very hot so let it cool completely before removing the laser paper from the mug. This will also prevent the design from ghosting or marbling.
- Once the mug is completely cooled, slowly remove the laser copy paper from the mug by removing the heat-resistant tape. Your layers of paper will simply move away from the mug.
TIP: Do not throw away the pieces of butcher paper that do not have any of the Infusible Ink on after pressing as you can reuse these for another mug project!
And just like that, you have your very own designed mug made with Cricut Infusible Ink pens and a Cricut Mug Press.
TIP: We recommend using the fine point pens 0.4 to achieve a fine thin line for text or intricate outlines as this will ensure words that are drawn are visible and do not blend into solid lines.
Now that you know how easy it is you can create Cricut Infusible Ink Mugs for gifts. If you have any EasyPress you can create matching Infusible Ink coasters using either your Cricut Infusible Ink Pens or Infusible Ink Transfer Sheets.
If you are loving the use of Cricut Infusible Ink why not create more great projects like this Infusible Ink multi-color t-shirt or an Infusible Ink puzzle.
If you want to learn more about what Infusible Ink shirts you can use, read our comprehensive guide all about t-shirt blanks for Infusible Ink.
>>> Want More? Read our complete guide to Cricut Infusible Ink – perfect for beginners!