In a recent tutorial using Cricut Infusible Ink we made cosmetic bags, and today we are tackling Cricut Infusible Ink coasters!
Of all of Cricut’s Infusible Ink blanks, I was most excited to try the coasters. I’d heard that they sublimate well and I wanted to see it for myself.
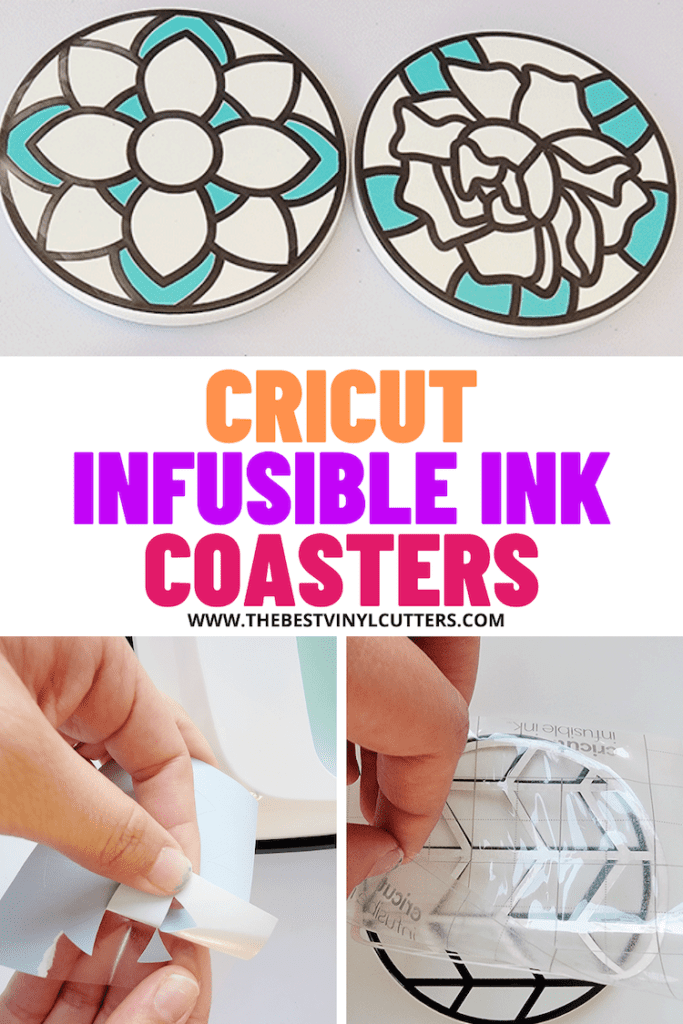
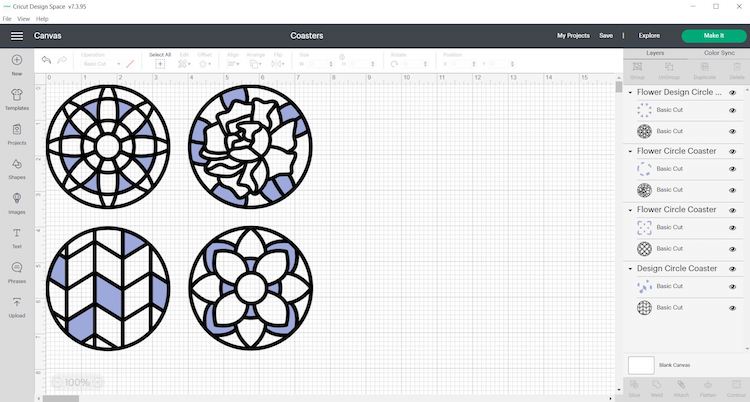
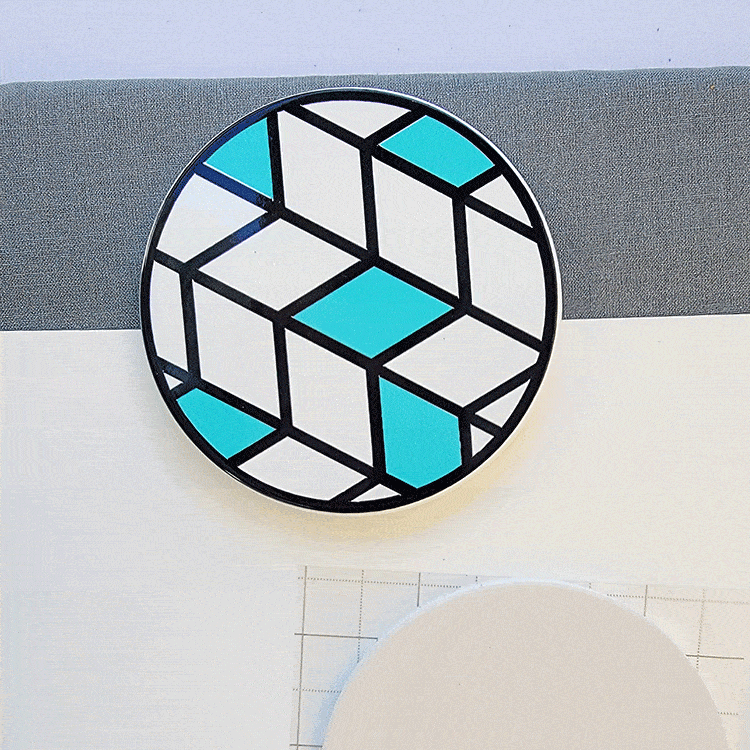
It took me a long time to decide on what to actually put on my round coasters. For this project and tutorial we decided to keep it simple and learn how to use a layered approach using Cricut Infusible Ink.
>>> Want to Learn More about Infusible Ink? Read our Ultimate Beginners Guide to Cricut Infusible Ink!
How to Make Cricut Infusible Ink Coasters with Infusible Ink Transfer Sheets
Here is our tutorial on how to make Cricut Infusible Ink Coasters with Transfer Sheets.
Supplies Needed:
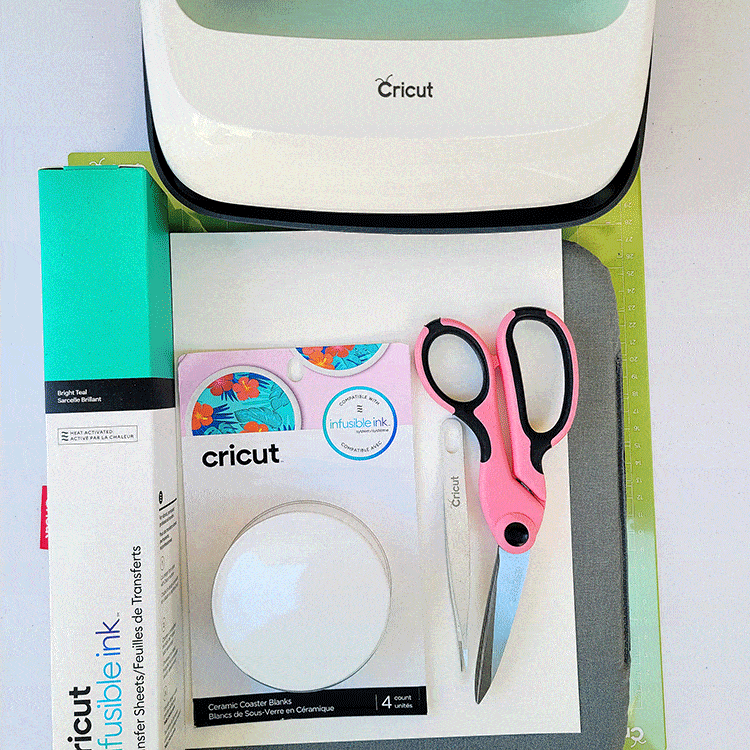
- Cricut Cutting Machine (I used a Cricut Explore Air 2)
- Cricut StandardGrip Cutting Mat
- Cricut EasyPress 2 (You can also use the Cricut EasyPress Mini)
- Cricut EasyPress Heat Mat
- Cricut Ceramic Coaster Blank (Compatible with Infusible Ink)
- Cricut Infusible Ink Transfer Sheet
- Butcher paper (included in Cricut Infusible Ink Box)
- Cardstock (80 lb.) 12” x 12”, White (colored cardstock not recommended)
- Lint-free cloth
- Scissors (you can also use the scissors in the Cricut Basic Tool Set)
- Cricut Tweezers (can be bought in Cricut Basic Tool Set)
Step 1: Download Design
Find below the step-by-step instructions on how to prepare your ceramic coaster design. You can of course also choose to use a different design or even upload designs you purchased.
- Start your project by clicking on this link.
Note: The designs are obtained through the Cricut Assess profile.
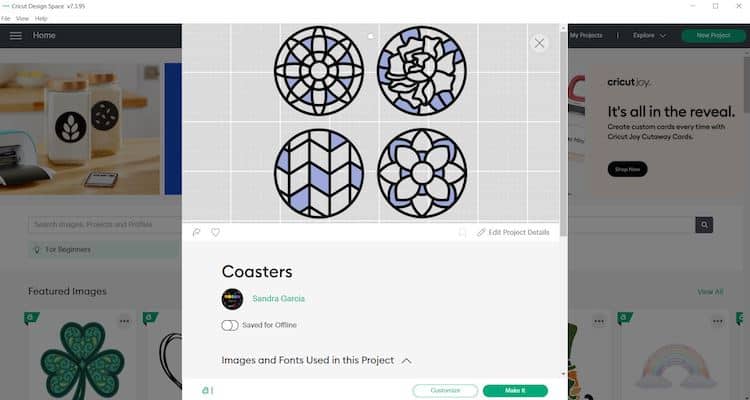
- Next select “Open in App” and “I agree to Cricut Terms of Use and Privacy Policy”.
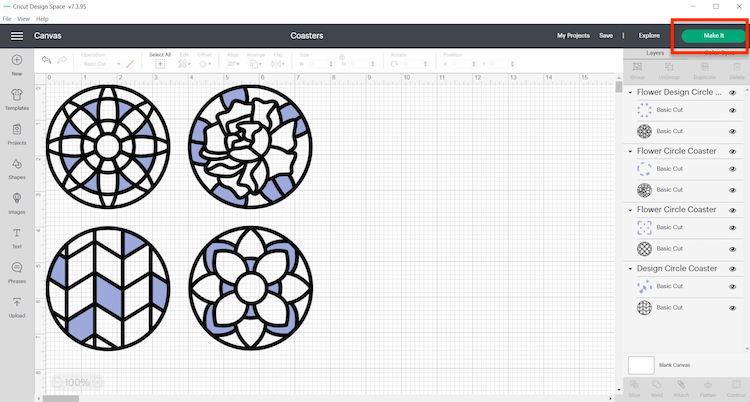
- From there you can select “Customize” or “Make It”.
Note: Select “Customize” if you want to change the color and size. For this project we kept the size to 3.5in.
- Once you are satisfied with the design you may move forward with cutting the design.
Step 2: Cut Your Infusible Ink Transfer Sheets
Now we are ready to cut your design in the Infusible Ink transfer sheet. This project will have you load the project into two different mats.
Note: Before handling Infusible Ink materials, be sure that your hands are dry and free of any oils or lotions to avoid the ink from smudging.
- When you are happy with the size and color of your design click on “Make It”.
- Make sure to select “Mirror” in Design Space.
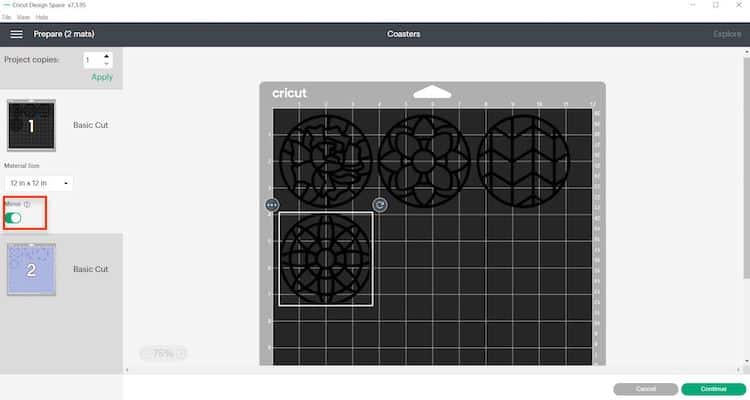
- Select continue and connect your Cricut machine.
- You will now be able to pick your material and cut settings.
- If you have an Explore Air 2 – Select “Custom” on your material dial for the Infusible Ink.
- Select Infusible Ink Transfer Sheet from the list of materials in Design Space.
- Place Infusible Ink Transfer Sheet onto your StandardGrip cutting mat, liner side down.
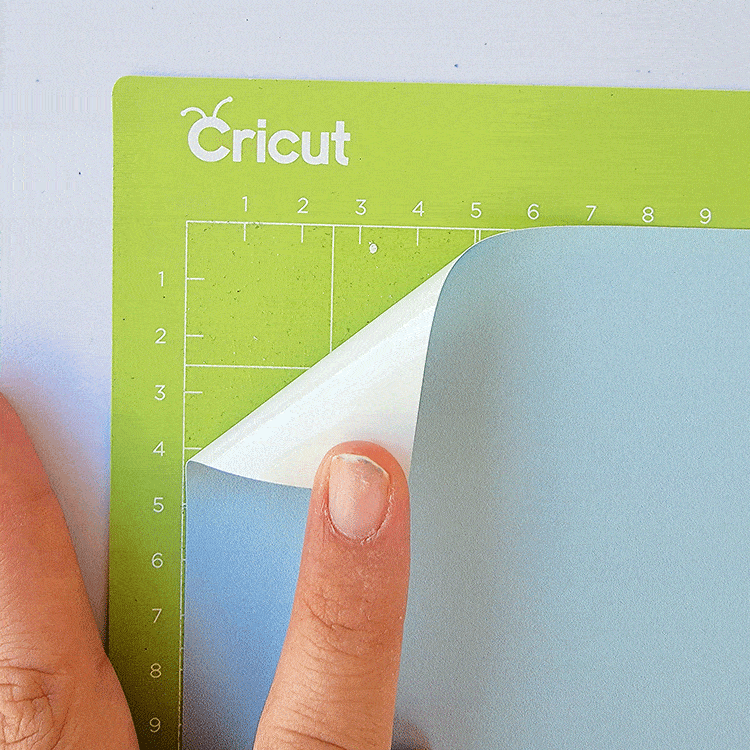
- Load mat into machine, then press Go.
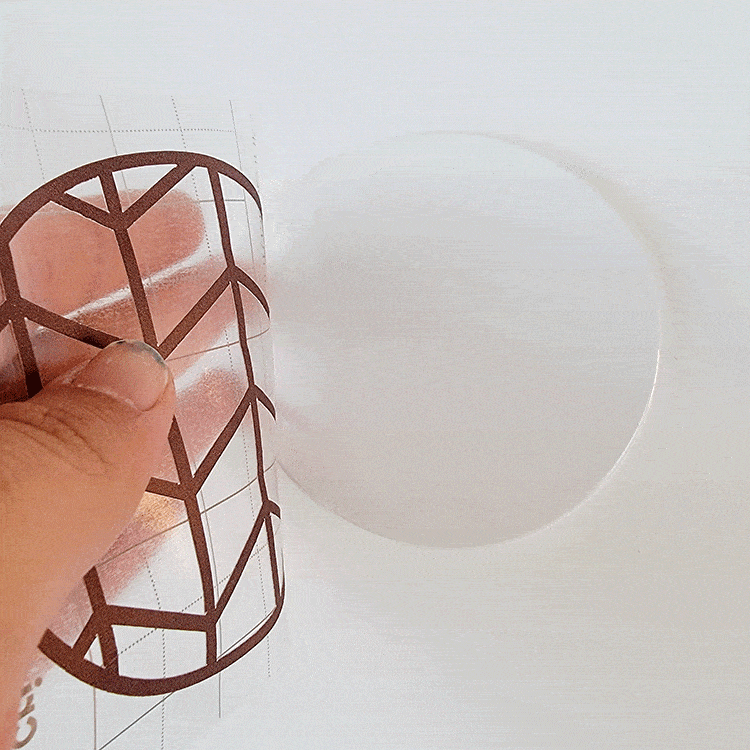
Step 3: Weed your Design
- Remove cut design from mat (I prefer to roll my mat away from my transfer sheet rather than try to pull the sheet up) and trim away unused area of sheet.
- Gently roll cut design so cut lines separate and are more visible. “Cracking” the cut this way makes it easier to remove excess paper from in and around your design. You can also give it a bit of squeeze as well.
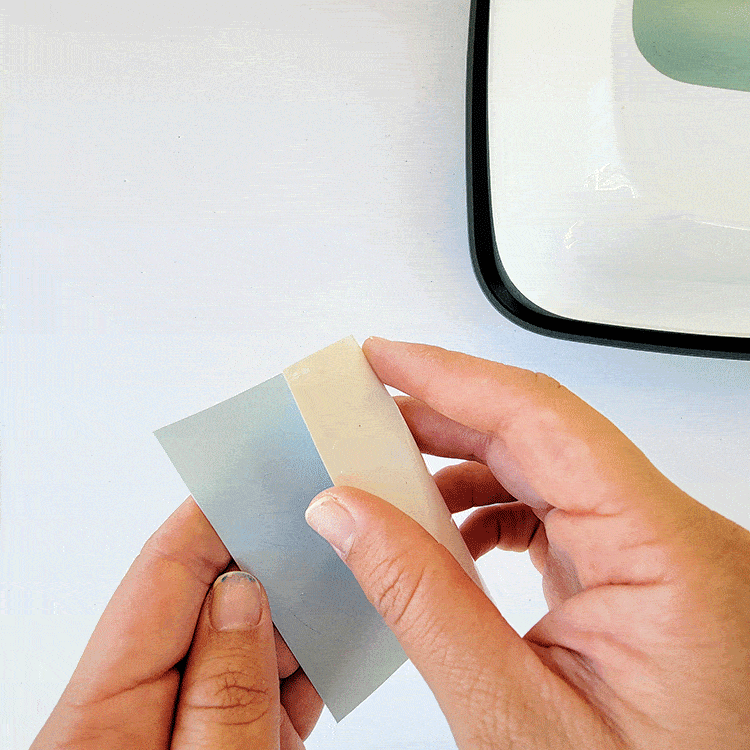
- Use your fingers (I find it easier to use my fingers and just to bend the transfer sheet to lift up edges of the design) or tweezers to carefully remove negative pieces from in and around your design, leaving design on liner.

- Trim clear liner so that it does not extend beyond the Cricut EasyPress heat plate. It is highly recommended that the design is no larger than your press as it might cause ghosting if you need to press multiple times. If you are using a mini press make sure you keep moving the press at all times.
Step 4: Prepare the Coasters
Now is a good time to prep your Cricut EasyPress. For precise temp, time, and pressure settings for your project, always refer to the Cricut Heat Transfer Guide, or use our handy Cricut cheat sheets (you get 80 sheets!) that contain all the settings for EasyPress machines.
- Set the Cricut EasyPress 2 to the correct temperature. For this project, set Cricut EasyPress 2 to 360°F.
- Use a lint-free cloth to remove any debris and fingerprints from the coaster.
- Next, lay down your heat mat on a sturdy surface (we really do not recommend you use a towel – sorry!). Lay a white cardstock (or a few sheets of printer paper) on top of the mat (this is to protect it from unwanted ink transfer).
Step 5: Apply the Infusible Ink to the Coaster
- Place design face down on coaster, clear liner on top.
- Flip coaster so bottom is facing up (top of coaster with attached design will rest against cardstock and mat).
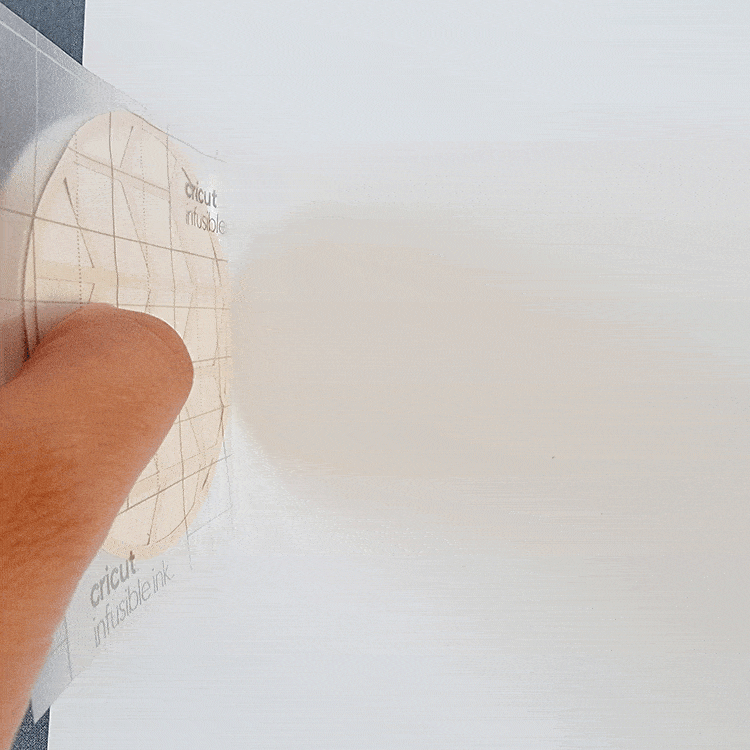
- Cover the coaster with butcher paper. Note: Butcher paper comes in each package of Infusible Ink Transfer Sheets.
- To complete this project using Cricut EasyPress 2, press at 360°F for 30 seconds using no added pressure.
- When the time is up, slowly lift the press. Try not to move the stack, including butcher paper.
CAUTION: Coaster will be very hot. Let cool completely before handling.
- Then slowly remove the butcher paper and liner.
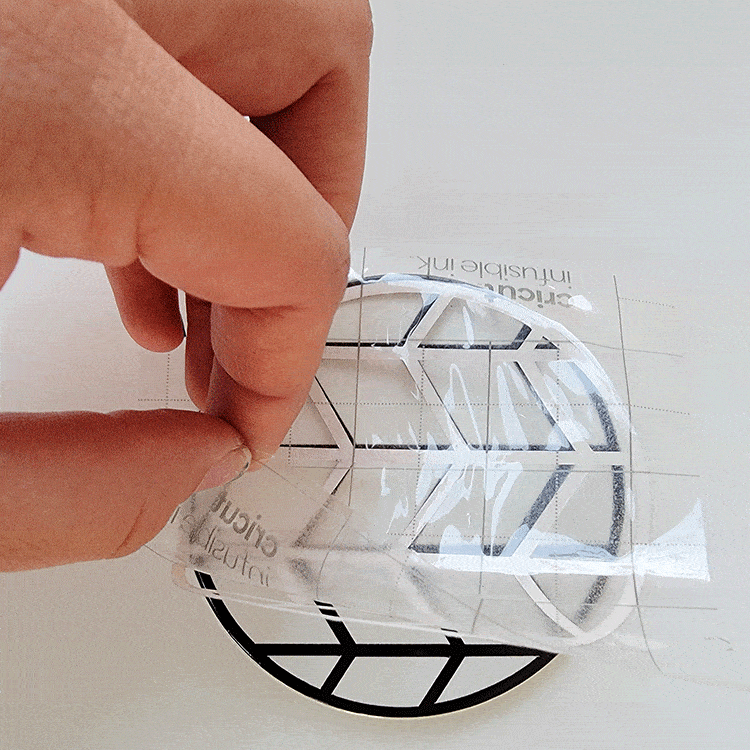
Important: If the design separates from the liner and remains on the blank, remove the Infusible Ink transfer with tweezers. Do not remove it using your fingers. This could cause unwanted effects, like ghosting or marbling.
- Next repeat the above steps to add the color highlights to the coaster.
- And then rinse and repeat the steps to create your remaining coasters until your whole set of coasters are complete.
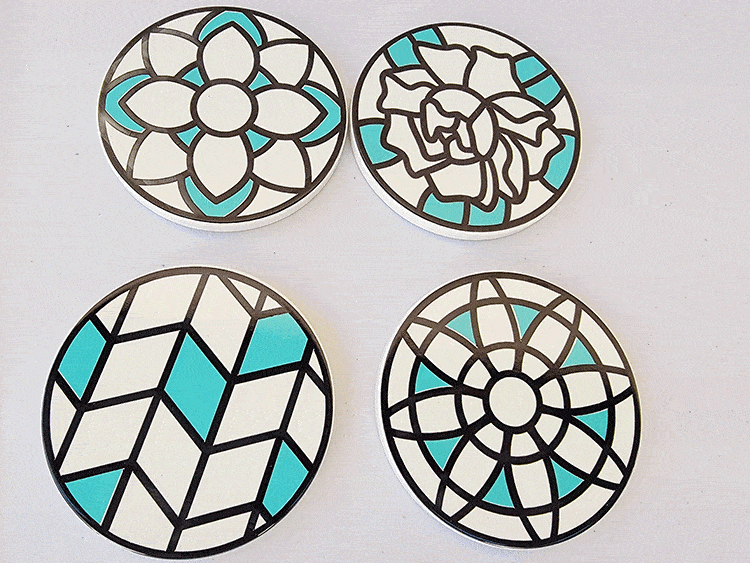
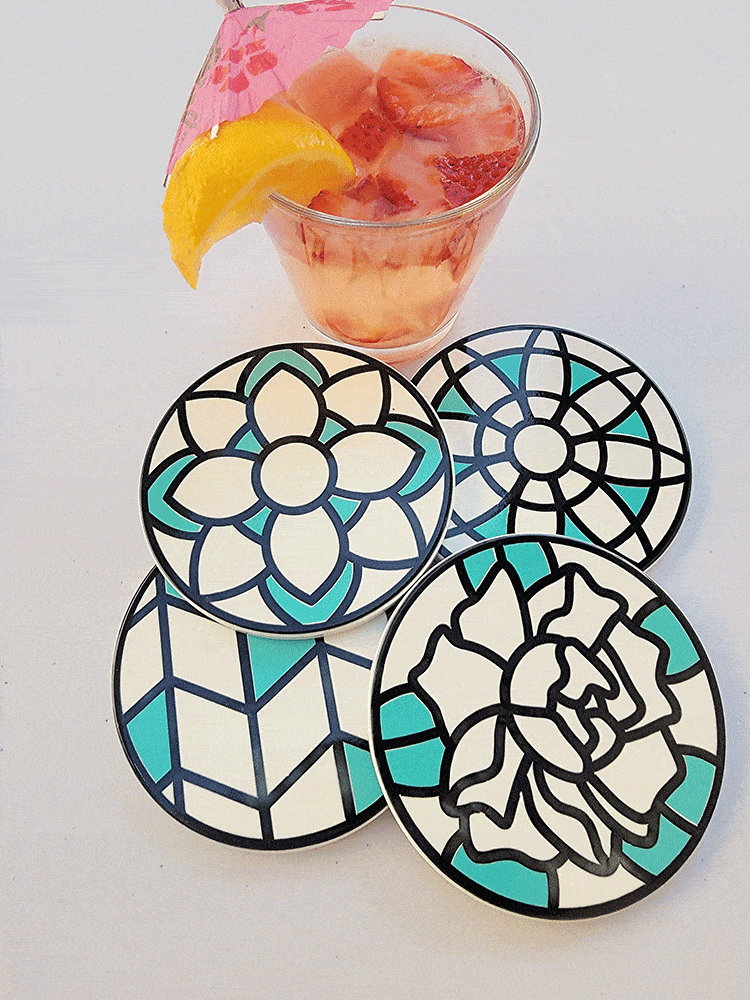
And just like that you have your very own ceramic coaster made with infusible ink. You can create Cricut Infusible Ink coasters for gifts and you can even add to the gift by repeating the design on a Cricut mug if you have the Cricut Mug Press!
If you are loving the use of Cricut Infusible Ink why not create more great projects like this Infusible Ink multi-color t-shirt or an Infusible Ink puzzle.
If you want to learn more about what Infusible Ink shirts you can use, read our comprehensive guide all about t-shirt blanks for Infusible Ink.
We think these coasters make great Cricut gifts and if you more inspiration for gift ideas for using a Cricut, be sure to check out our post with these gorgeous personalized Cricut gift ideas for her.