You might be trying to figure out how to put your designs on t-shirts and other mediums.
Well, a heat transfer press machine will give you numerous opportunities to create and display your artwork and logos via heat press printing (one of the most popular types of t-shirt printing).
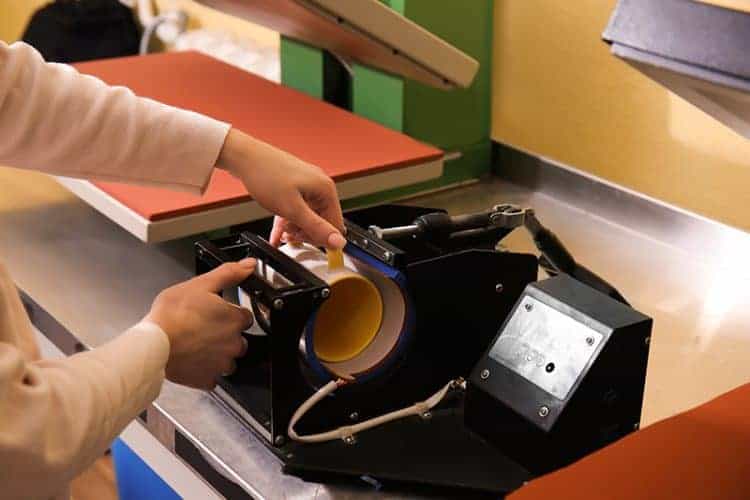
The heat press machine not only works to transfer designs and logos to t-shirts but, you can also buy additional attachments to work on different mediums such as caps, mugs, ceramic plates and more.
So the question remains -“how does a heat press machine work?”
Find below more information, as well as instructions on how to set up and use your heat press machine.
What is a Heat Press Machine?
A heat press machine is essentially an iron press machine which enables you to transfer creative designs by applying pressure and heat to different materials, such as t-shirts and more.
They come in a variety of sizes, depending on the size of the garment that you wish to work with.
You can also get attachments to make your life of printing onto mugs or caps easier. Or if you prefer you can find machines that are dedicated mug heat press machines or hat press machines.

Essentially a heat press is like a home iron, except you can have precise control over the pressure, temperature and time that is required to apply the transfer properly, which will result in quality long-lasting results.
A heat press is a cost-effective solution for most businesses and individuals who are looking to go into the t-shirt business (see how much a heat press machine costs these days). They are easy to use and you can use them to mass-products products that you can sell.
Find below our step-by-step instructions for using a heat press properly.
If you don't know which heat press to purchase, we recommend you visit our guide to help you find the best heat press machine for beginners.
On top of a machine you will also of course need some basic heat press supplies as well.
How to Use a Heat Press Machine Step-by-Step Guide
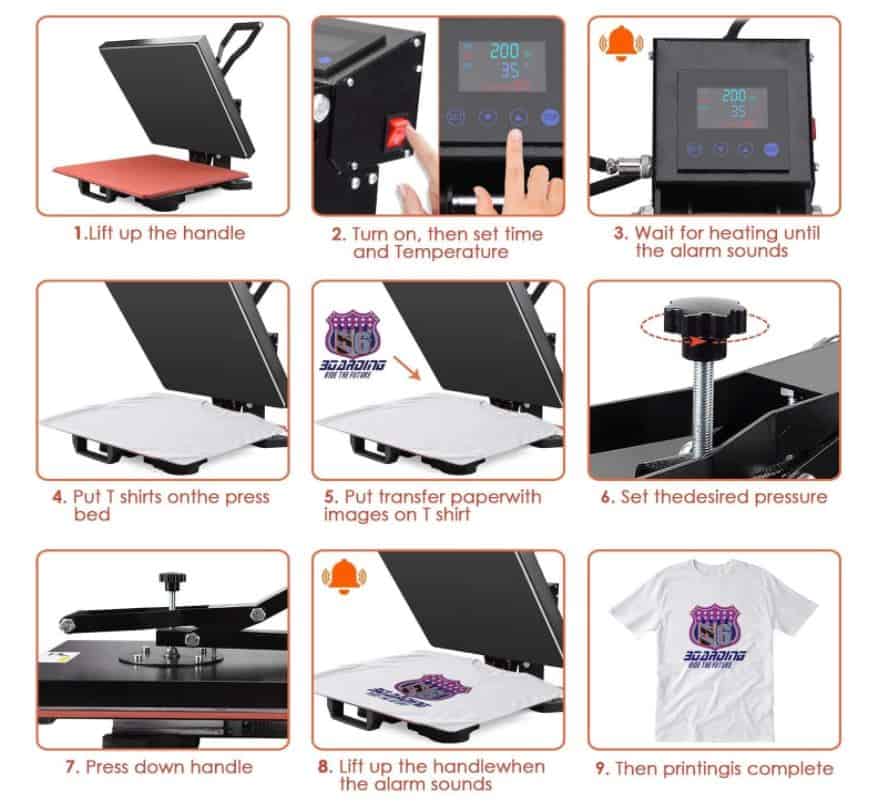
How does a heat press work? The formula for applying heat transfer to a tee is temperature, time, and pressure. Ultimately the use and setup is pretty straightforward. The step-by-step guide below will teach you how to use a heat press machine.
Step 1 – Adjust Temperature:
Time to set your temperature that is required to heat press your garment. Scan over the instructions that are printed on the heat transfer vinyl to find the accurate temperature that's best (you might have to Google it if the instructions are not included – it is crucial to have the right settings. Different types of vinyl require different settings).
- Turn the thermostat knob in a clockwise direction (you might have an electronic display screen to set temperature instead of a knob) until you see the red heating light.
- Wait for your machine to heat up to your required temperature.
- A flashing light will indicate that the heat press is adequately heated.
- At this point, you should turn the knob counterclockwise until the flashed light turns off.
Don't be alarmed when the light switches on and off during your heat press. It is an indication that your machine is regulating your desired temperature.
Step 2 – Set Up your Tee & Design:
Open the heat press by lifting the front handle of the machine. If you bought a clamshell machine, your upper platen will move upwards. If you bought a swing-away press, your upper platen will swing out to the side.

- Pop your garment on the heat press (ensure that you buy quality t-shirt blanks). The side that is being printed on should be facing upwards.
- Close the lid for a few seconds to warm up the material. This step will remove creases and moisture which will result in a better press.
- Open the lid and lay the vinyl design (which should be weeded at this point) face down on the garment.
- Bring the handle down and make sure it locks firmly in place.
Step 3 -Pressure:
You might need to adjust the pressure on the machine. The amount of pressure that needs to be applied is dependent on the type and thickness of the material of the item as well as the type of HTV that you are using.
For example, a garment that is 100% polyester requires less pressure than other materials due to the fact that the fabric is so smooth.
- On cheaper machines: Turning the pressure adjusting-knob clockwise so that you can correctly increase the pressure. (By turning the knob counterclockwise you can decrease the amount of pressure).
- On professional machines: More expensive machines have a really handy pressure gauge. A pressure gauge will typically have a range from one to nine. For light pressure, choose a setting from 1-3. For medium pressure trial out setting 4-6 and for heavy pressure choose from 7-9.
Pressure is probably the trickiest of the heat pressing elements to master. You might feel more comfortable doing a test run to find the best setting for your fabric.
Step 4 – Time:
- Set the time that will be required to press the HTV (information about the time required can be found on the vinyl packet instructions or via a quick Google search).
- Press the start button to start the heat press timer.
- When the timer alarm goes off, simply lift the handle to open the machine. (Press the timer to reset it for the next press)
Check your instructions to see whether your iron-on vinyl is a hot-peel (peel while the design is still hot) or a cold-peel (leave the design to cool down before peeling).
Remove the peel off of the transfer to reveal the awesome printed graphic on your garment.
Helpful Tips and Tricks on How to Heat Press an Item
Whilst the instructions above are simple and easy to follow, you might find that you are still struggling to get that perfect printed graphic. Heat pressing is truly about trial and error and before long, you will find that you are an expert at it.
Below we share some of our most nifty tips and tricks to help ensure that your first press goes as smoothly as possible.
1. Where to get your Graphic
You can either find an SVG file download online, or you might prefer to design your own graphic. There are many beautiful SVG's available to purchase (and they often include commercial licenses).
You will need to decide whether you would like to either cut out the vinyl that you want to press or if you would prefer to print it out via a printer instead.
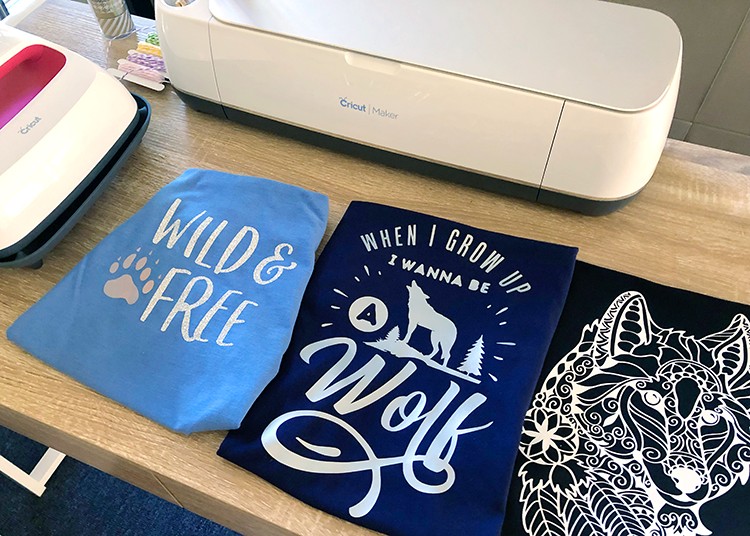
The easiest, in my opinion, is to cut it out with a vinyl cutting machine. To learn more about these machines, why not browse through our vinyl cutting machine reviews here.

The second option is by printing a design, that you created through software like Corel or Adobe Illustrator, by using an inkjet printer onto transfer paper. You can find instructions on how to print on vinyl here.
2. Which Transfer Paper/Vinyl to Choose
If you will be printing your designs, you will need to ensure that you choose the right transfer paper for your printer. Most transfer papers are for inkjet printers. It is also important to think about whether you will be working on a white, black or color tee.
Again, as with many other aspects of heat pressing, you will most likely have to go through a process of trial and error to find the type of paper that you love working with the most.
We love both NuFun Activities Inkjet Printable Iron-On Heat Transfer Paper or Avery 3279 Printable Heat Fabric Transfer PaperAvery 3279 Printable Heat Fabric Transfer Paper for dark fabrics, and Printworks Dark T-Shirt Transfers for Inkjet Printers, for light-coloured 100% cotton/poly blend fabrics.
If you will be using iron-on vinyl, then I suggest you visit our post to help you find the best heat transfer vinyl to use.
3. Which Fabric to Choose
You can't just grab any t-shirt and expect to heat press on it. Do stay away from synthetic material as well as thin material as they can easily melt. The most popular types of fabric for t-shirt printing include cotton & polyester. But you can also use nylon, spandex and Lycra.
4. Test Prints
We highly recommend that you do a test print before you apply your larger designs. Simply cut a t-shirt into smaller pieces, create a small design on the transfer paper and give it a test run to ensure that temperature, timing and pressure is properly set.
Another good habit to get into is to print your design out on paper. Roughly cut the design out and lay it down on your t-shirt to ensure that the design is the correct size and that it doesn't run over any seams, buttons or pockets.
5. How to Get a Straight Print

It is crucial that you ensure that your shirt if laid down straight onto your platen. Nobody likes a crooked graphic! Tricks to ensure that your design is straight includes using grides, lasers or simple rulers. I prefer using T-Shirt placement guides.
Whatever method you choose to use, do ensure you take the time to position your design before you apply the heat.
6. The Importance of Correct Pressure
The right amount of pressure is incredibly important to the quality of the finished product. Too much pressure and you can push the ink or vinyl too far into the fabric, which will result in a dull color and vibrancy of your completed design.
Too little pressure could lead to the heat transfer not adhering properly. You might also find that the fibres on the shirt might stick through your design, which will lead to a fuzzy-looking graphic.
The right amount of pressure is important in order to allow the inks/vinyl to cure and to securely link. This will ensure that the bond will outlast hundreds of washes and will outlast the life of the t-shirt.
As a newbie, you can feel quite stressed out about finding the right setting for your shirt. We recommend that you start out with light pressure for cotton, polyester and nylon fabrics. Before long, you will know exactly what pressure is required for any type of item.
Trial and error might be frustrating, but it is the only way to learn in order to become an expert at t-shirt design.
7. Caring for Heat-Pressed Tees
The last thing we want is to have our design detach after only a few washes. Here are a few nifty tricks to ensure that your heat pressed tee lasts longer:
- Turn them inside out before washing
- Hang the out, don't tumble dry
- Avoid using hard detergents
Heat pressing is a pretty addictive craft! Before long you will find that you have heat pressed graphics onto anything in sight – cups, plates, umbrellas, shopping bags and more!
Others might even find that once they turn into an expert that they would like to start their own business to sell items with their own unique art, branding and/or logos.
We hope you found our guide on how a heat press machine works educational.
Enjoy the craft! Please leave us any comments or questions below.