The Cricut Maker is the latest Cricut cutting machine on the market and we are having SO MUCH fun whipping up all sorts of different projects with this versatile cutter. One of our latest creations involved leather.
If you have never cut leather with the Maker before, you might like our post on cutting leather with the Cricut Maker here.
We decided to keep these really simple, I didn't want a project that involved sewing and neither did I have any tools on hand for creating fancy closures for the wallet.
Fortunately, I managed to find a really easy fold and glue leather wallet in the Cricut Design Space. In actual fact, you might recognize this wallet as it is featured on the packaging of the Genuine Leather.
Today we wanted to walk you through the steps on how to create this super easy DIY leather wallet with a Cricut Maker. I will also show you how you can take the wallet to the next level with a little bit of HTV magic.
DIY Leather Wallet with the Cricut Maker
Find below the supply list and the steps to follow in order to create your very own stunning leather wallet.
Supply List:
- Cricut Maker
- Cricut Genuine Leather (I used the red)
- Cricut StrongGrip Cutting Mat
- Brayer
- Cricut DeepPoint Blade
- Cricut EasyPress 2
- Cricut EasyPress Heat Mat
- Cricut HTV Pewter Foil
- Helmar 450 Quick Dry Adhesive (or similar leather glue)
- Cricut Weeding Tools
Tip: If you don't have any leather supplies, I totally LOVE this fabulous leather cutting bundle on Amazon.

It includes two different types of leather, your deep-point blade and your purple StrongGrip mat.
Instructions on How to Create a Genuine Leather Wallet with Cricut
Find below our steps on creating a leather wallet with your Cricut Maker.
Step 1:
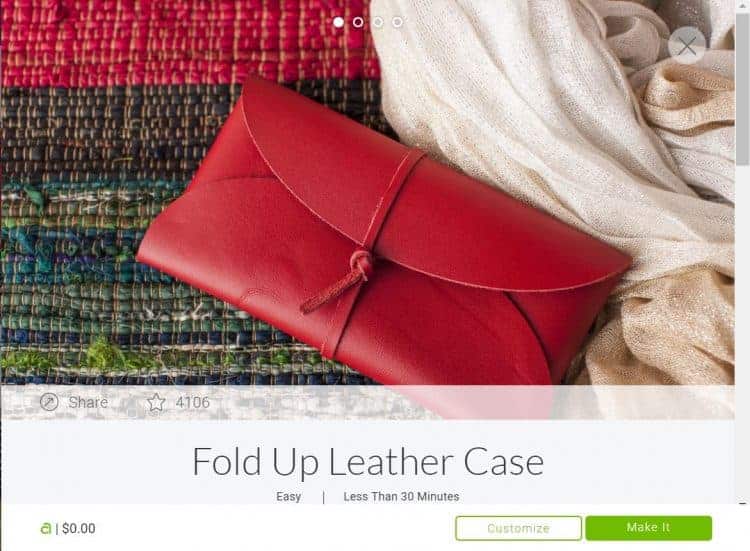
Open up your Cricut Design Space and click on search to find the “Fold Up Leather Case” project. The project has the cutting template for the foldable leather wallet as well as the strip that needs to be cut out for the tie. So it is super easy!
Click on “Make It” to get it loaded up.
Step2:
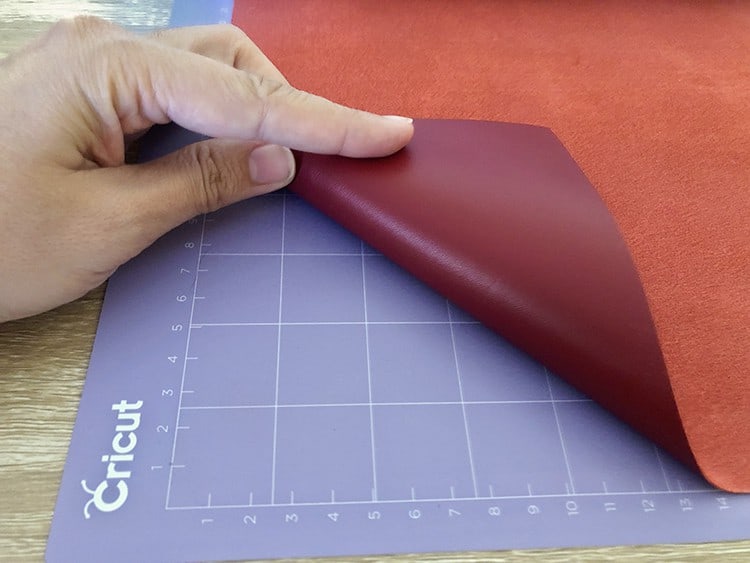
Place your Cricut genuine leather FACE DOWN onto a clean Cricut StrongGrip cutting mat.
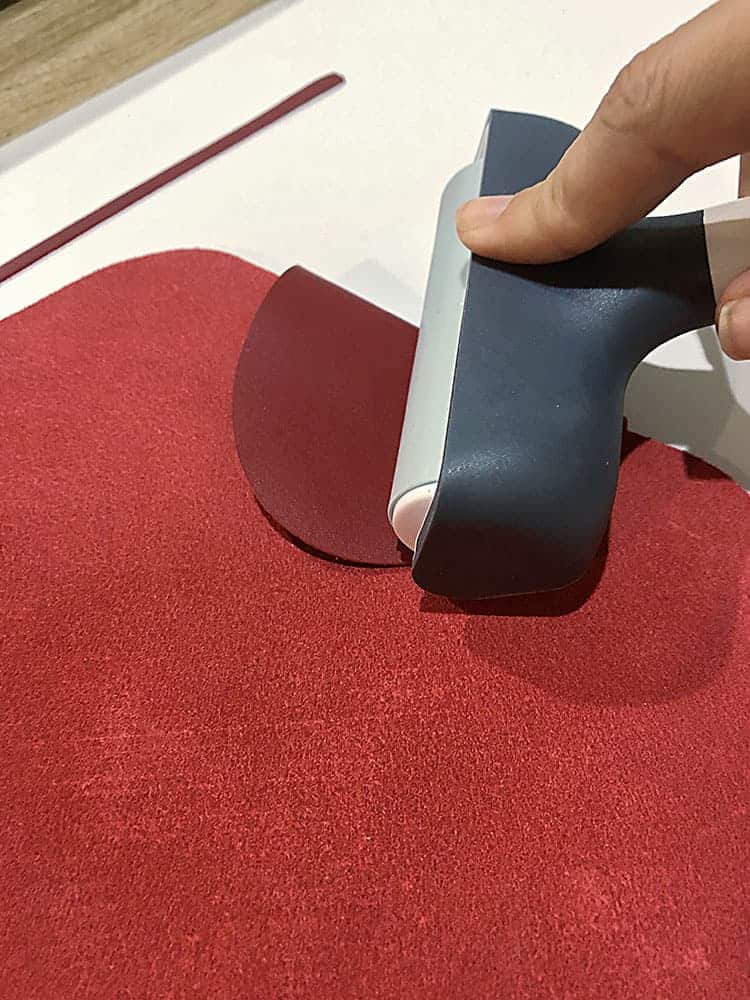
Step 3:
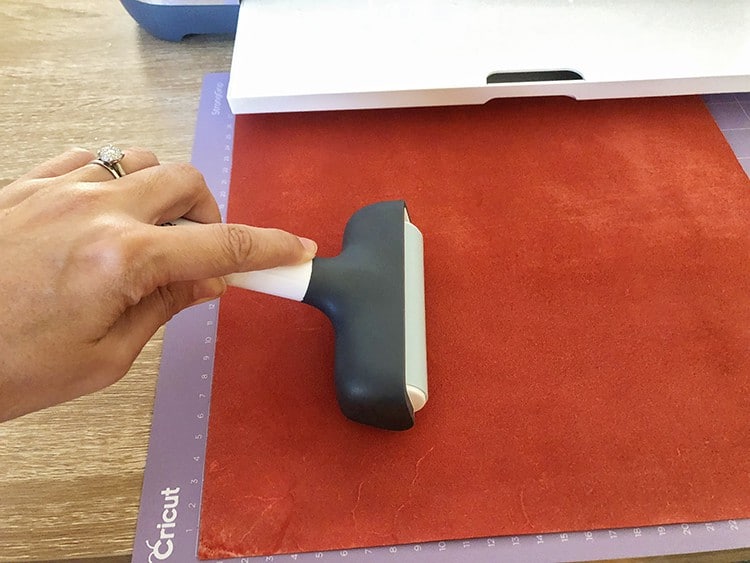
Toll a brayer over the leather to ensure that you have a lovely and firm bond between the leather and the mat.
Step 4:
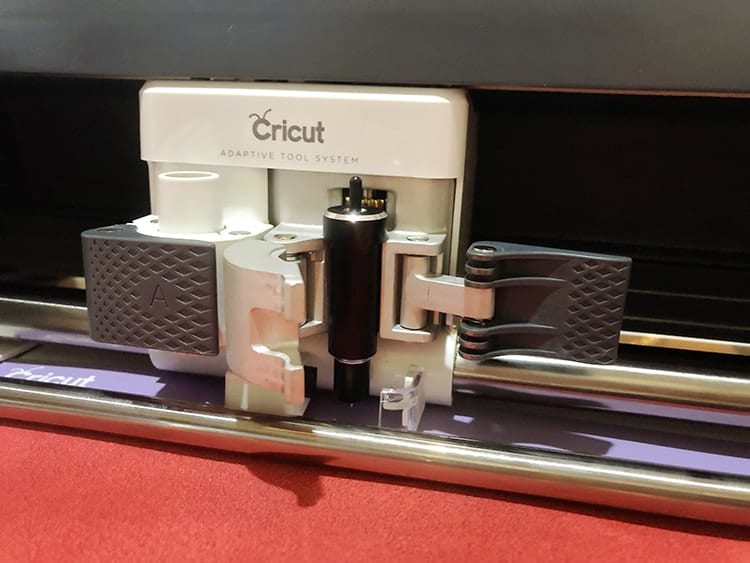
Next, you will need to move all of your white star wheels (rings) all the way to the right.

If you forget to do this, the star wheels might actually leave an imprint on your beautiful leather, so we need to ensure that they are out of the way.
Step 5:
Load the mat and leather into the machine by clicking on the flashing “C” button.
Step 6:
Go back to Design Space. Click on “Browse all materials” and then choose “Genuine Leather” for your setting. Load up the Cricut Deep Cut blade and then cut out your design.
Step 7:
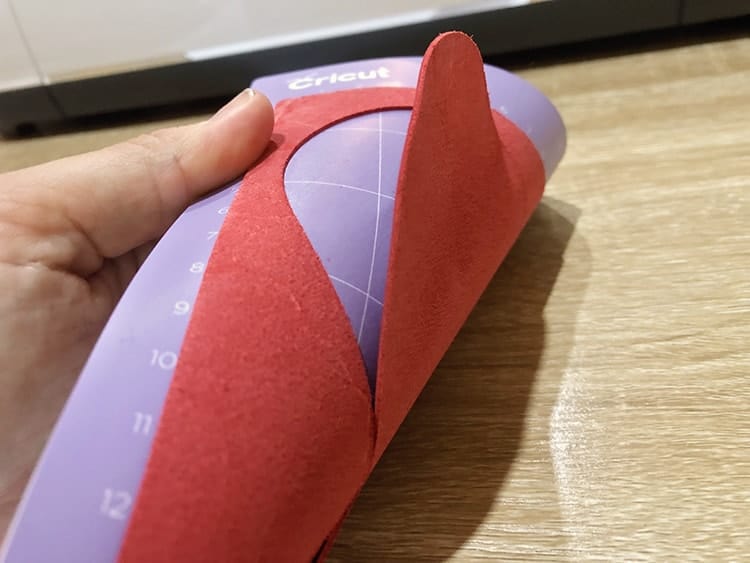
Check the cut was successful before unloading the mat. If you are happy to unload the mat and carefully remove your pieces from the cutting mat.
Step 9:
Before you forget, make sure to re-adjust those white star wheels so that they are ready and in position for your next project.
Step 10:
Next, you will need to fold your wallet. I read that you should be wetting the leather, folding it up and then letting it dry in that shape. However, I'm impatient, so I used my brayer and rolled it over the folds instead.
If you want to be more official, here is a great tutorial on how to wet your leather for folding.
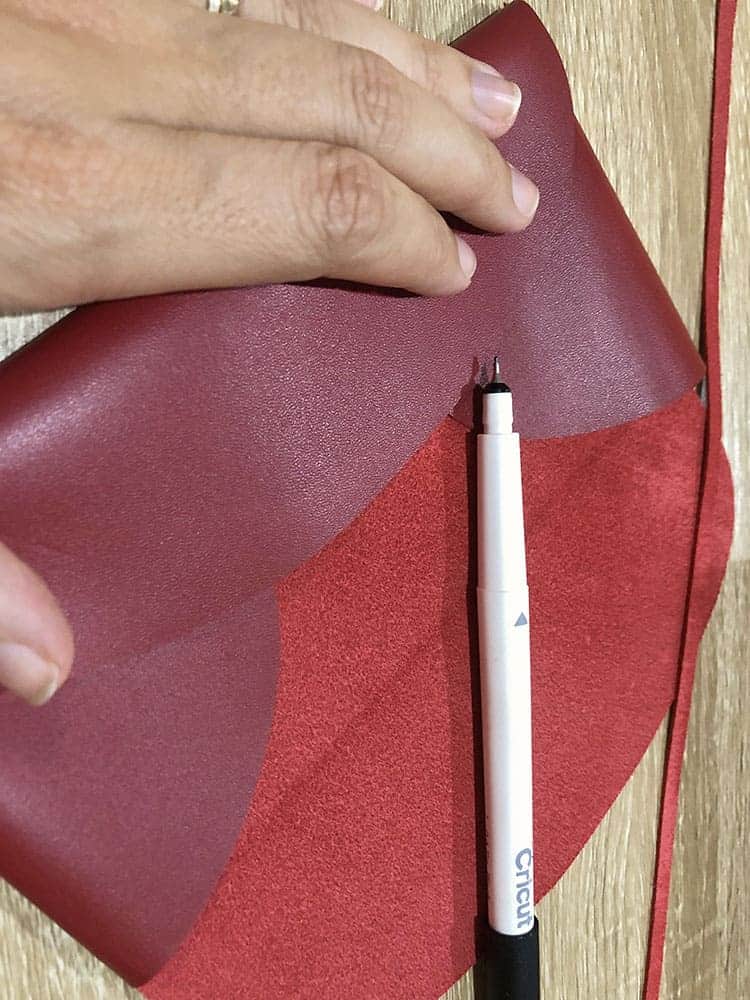
Once folded, I used my Cricut pen to gently trace around the flap. It was the only way to figure out how much glue I would need.
Step 11:
Glue your flaps together to create the envelope shape for your wallet or pouch. I didn't want to buy special glue for my leather, but I probably would suggest that you do so.
Some people recommended using a hot glue gun, but it didn't work for me. In actual fact it was so crappy that I can pull it straight off the leather once it had cooled, it was also way too thick and lumpy for the project.
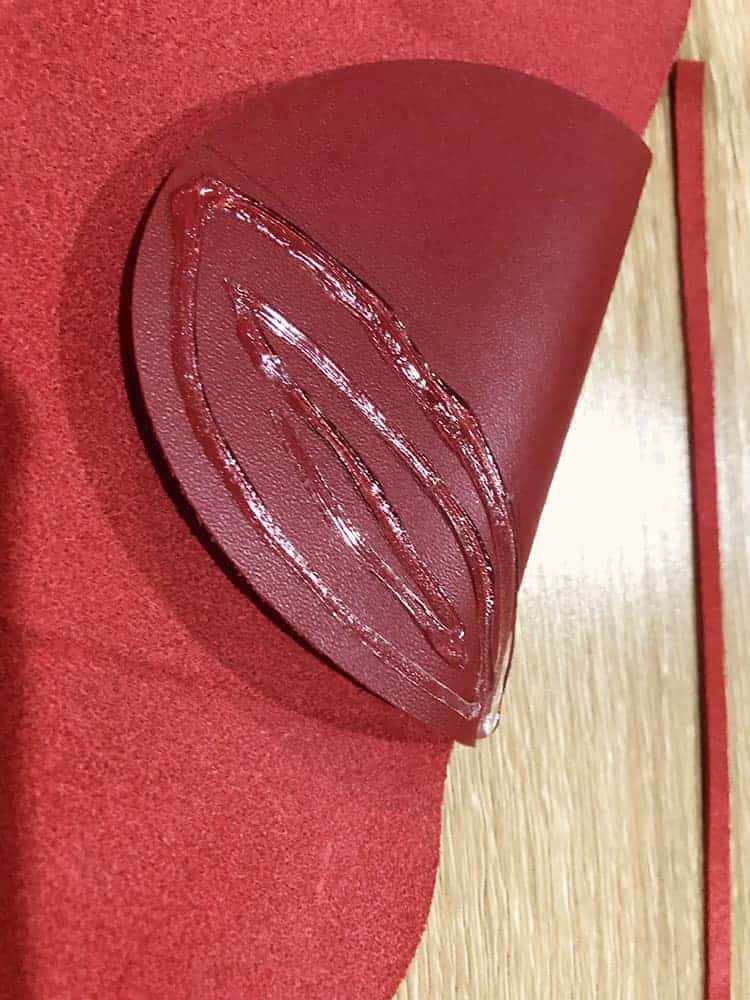
I used glue that I had on hand and it did work really well. Whichever glue you end up using, ensure that it is a quick-dry glue and that dries clear and also has a strong bond.
I simply placed my EasyPress on top of the wallet whilst I waited for all my bits to dry. You can use anything that is heavy.
Step 12:
Next, design or upload the iron-on design that you wish to use.
Measure out the area on the wallet that you want your design to fill.
Step 13:
Next click on “Make It”.
Remember to mirror-flip your image seeing as we are working with iron-on vinyl. Select your vinyl from the material list and ensure that your standard blade is installed and ready to go.
Place your HTV FACE DOWN on the cutting mat and load it up.
There are loads of different types of vinyl on the market. You can find out what the best iron-on vinyl is in our guide here. I typically prefer to use Siser HTV vinyl, but for this project, I really loved the elegant feel of the Cricut Foil Iron-On range.
Step 14:
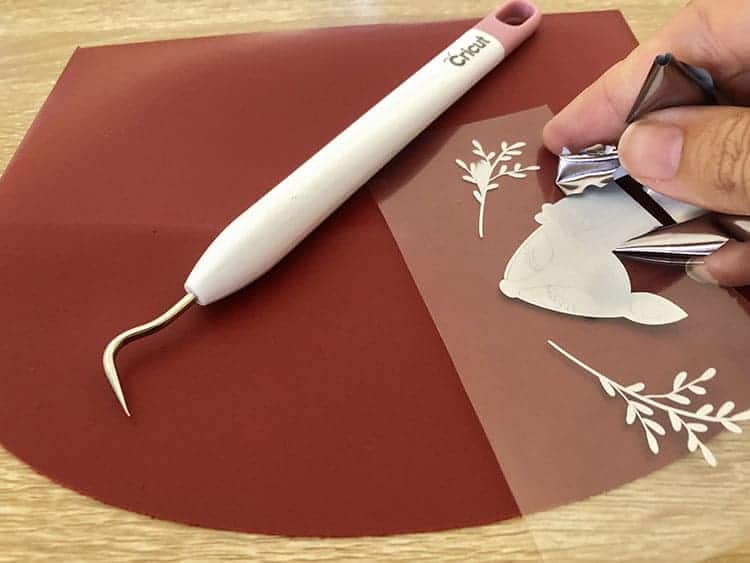
Next, is the weeding of course. Here is our tutorial on how to weed vinyl if this process is new to you.
Step 15:
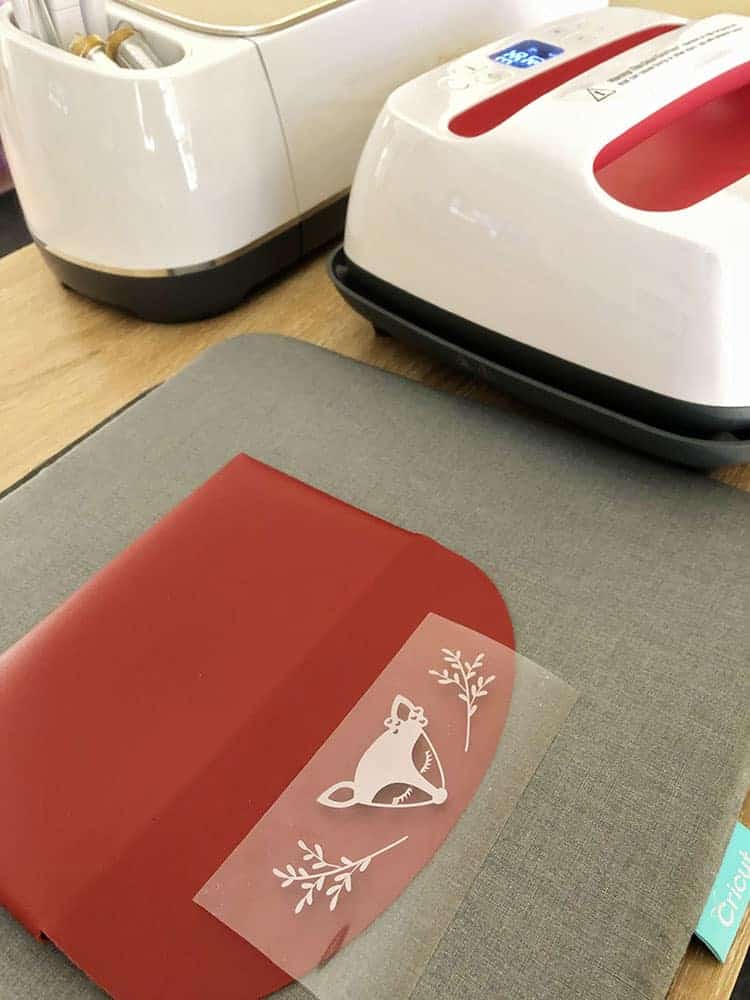
Open your leather wallet. Place the flap on a Cricut heat mat. Place your design on the wallet. Place some baking paper over the design – I'm not too sure if this is needed but I thought it best to protect my leather from the heat of the heat press.
Step 16:
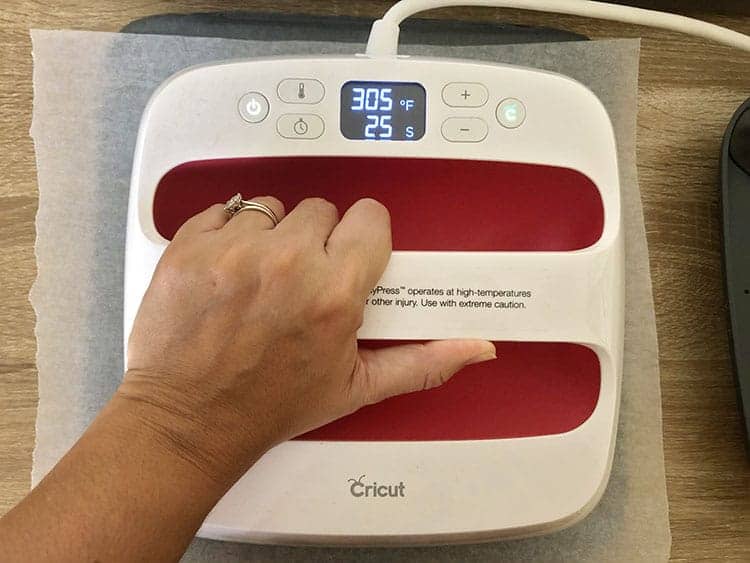
Heat up your Cricut EasyPress or Heat Press Machine. Check the temperature and time settings for your specific type of HTV Vinyl.
When your heat press is ready, press your design for 30 seconds on the front, and then another 15 seconds on the back. Please make sure to check out whether the design has properly melded with the fibres of the leather.
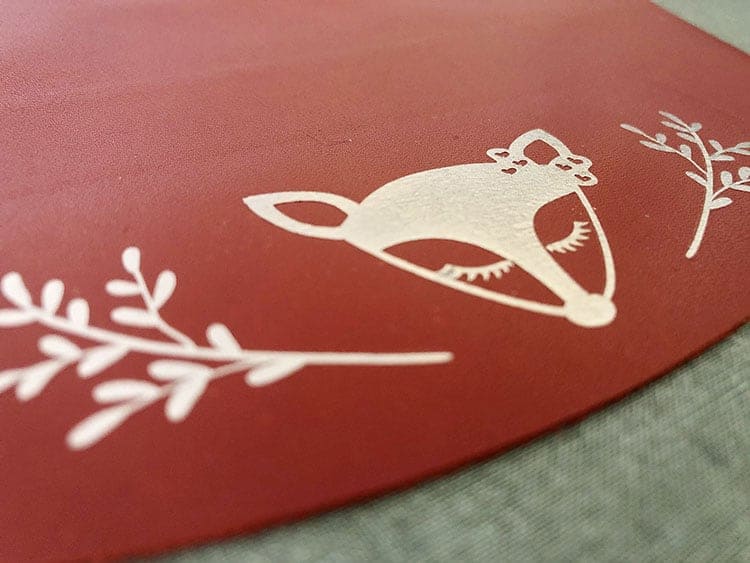
If you are happy, wait for the design to cool down as you should cold peel your Foil HTV.
Step 17:
Slip your leather tie through the cut slits and tie it up in a knot.
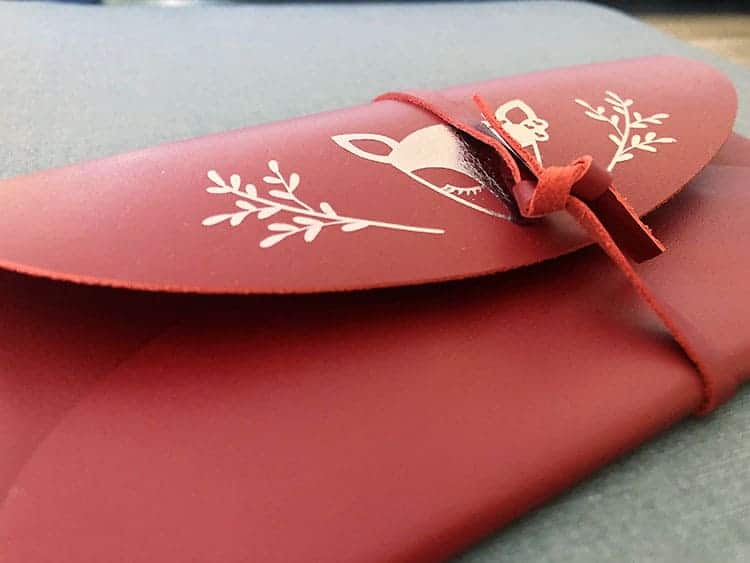
I gave this wallet to my daughter and was worried about her ability to tie the strip (because it felt a bit short for me). So I have chosen to not use the slits in the wallet and instead just tied the strip around the wallet. That way she can easily slip the tie strip off the wallet and pop it back on without having to untie and retie – bonus!
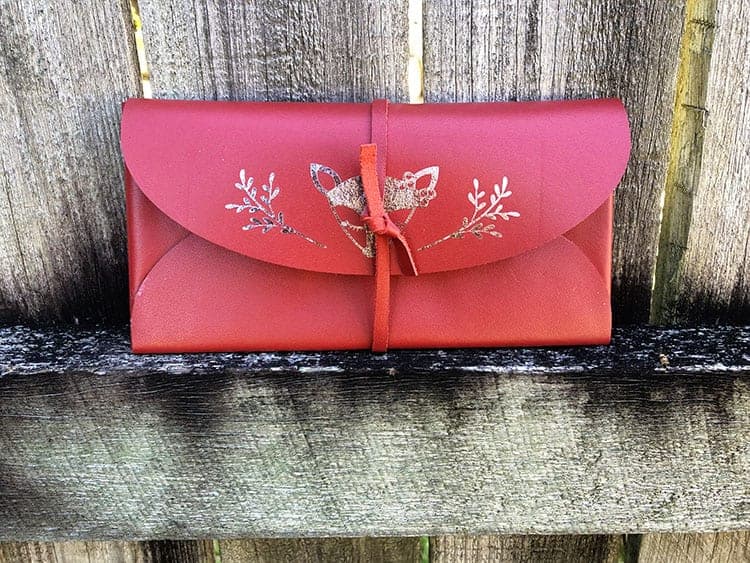
And there you have it – super easy and simple foldable leather wallet with the Cricut Maker. We hope you are feeling more confident to jump straight into your first Cricut leather project.
Do you run an Etsy shop? These leather wallets sell really well on Etsy. You can also find a list of other Cricut projects to sell on Etsy here.
Have fun and do let us know if you have any questions for us. Click here to grab even more inspiration on Cricut leather projects.
We have plenty of Cricut Arts and Crafts Resources here, as well as loads of DIY Craft Project tutorials on our blog here.