The Cricut Maker is one of the newest Cricut Machines on the market and we are all collecting going through the learning curve of getting to know this cutter.
We all know that the Cricut Maker is a super versatile cutting machine. It can cut over 100+ materials which are incredible, but can Cricut cut leather??
Cutting leather with a Cricut machine is actually pretty easy and kinda super fun!
Learn more about what types of projects you can make with the Maker here
Whilst I typically work with either vinyl or cardstock, I have been having some fun trying out various other types of material.
I wanted to talk to you about how to cut leather with the Cricut Maker – specifically looking at genuine leather as different types of leather will require different settings and different blades.
Today we wanted to walk you through the steps on how to cut leather with a Cricut Maker.
Cutting Leather with the Cricut Maker
Find below the supply list and the steps to follow in order to get started with Cricut genuine leather projects.
Supply List:
Tip: If you don't have any leather supplies, I totally LOVE this fabulous leather cutting bundle on Amazon.

It includes two different types of leather, your deep-point blade and your purple StrongGrip mat.
Step-by-Step Instructions on How to Cut Cricut Leather
Find below our steps on how to cut leather with the Cricut Maker. We will also be whipping up a step by step tutorial on how to make this leather wallet with a Cricut cutter as well.
Step 1:
Place your leather FACE DOWN onto a clean Cricut StrongGrip cutting mat.
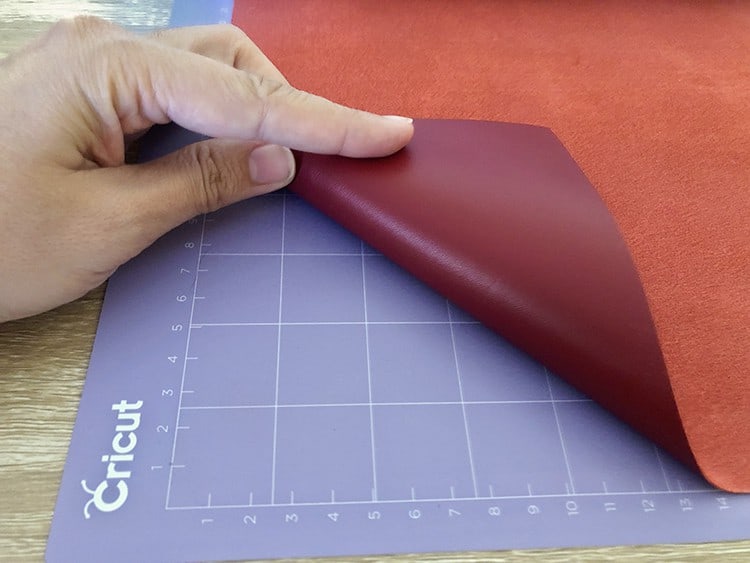
We really want to ensure that the mat you will be using still has a lovely strong adhesive on it, so best to use a new mat or give your Cricut mat a wash prior to use. This will ensure that the leather stays adhered in place which will, in turn, ensure that your cuts are nice and clean.
Step 2:
To help ensure that there is a lovely and firm bond between the leather and the mat, we also highly recommend that roll a brayer over the leather.
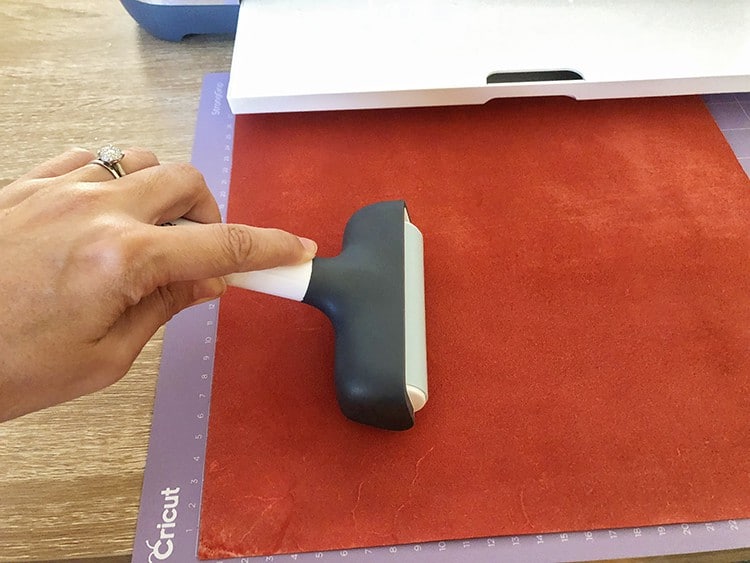
You could also use other tools such as a scraper or a baking rolling pin to achieve the same effect, or if all else fails just apply some hand pressure to ensure it is stuck on properly.
Step 3:
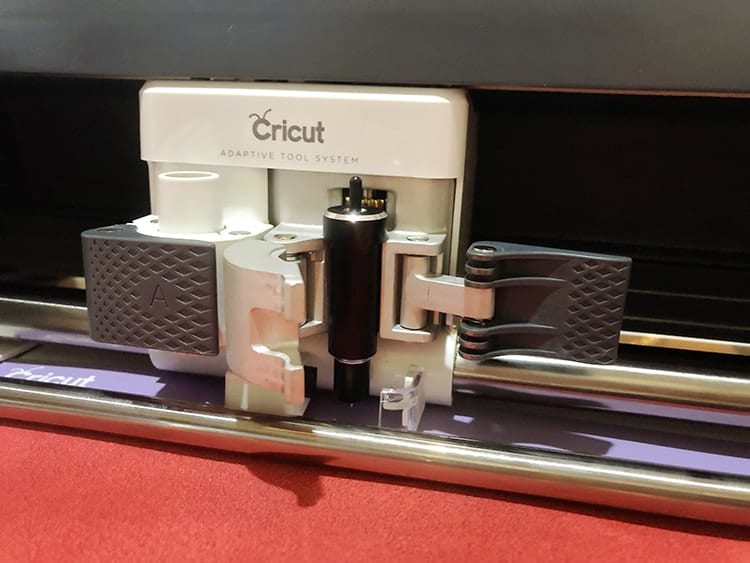
Next, you will need to move all of your white star wheels (rings) all the way to the right.

If you feel the wheels with your fingers you will realize that these are pretty sharp. This normally helps to keep your materials from shifting, however in this case, the wheels might actually leave an imprint on our beautiful leather, so we need to ensure that they are out of the way.
Step 4:
Load the mat and leather into the machine by clicking on the flashing “C” button.
Step 5:
Now it is time to get cutting. Go to your Design Space where you have been designing your image or template. Your first step is to select the material. Click on “Browse all materials” and then choose “Genuine Leather”.
Step 6:
Next, the Maker will tell you to install your Cricut Deep-Point Blade. So, install the blade and then cut out your design.
Step 7:
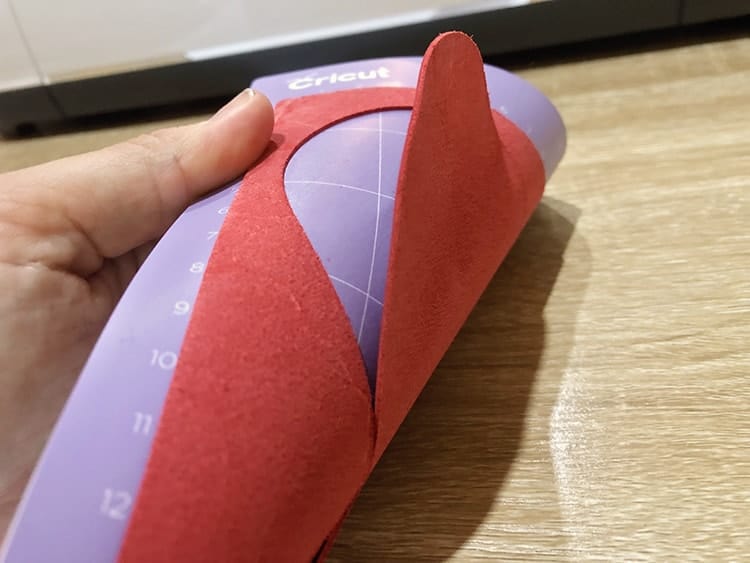
Before you unload the mat, do a quick check to ensure that it is cut through. If you used a sharp blade, you should have a beautifully clean and sharp cut.
Step 8:
Before you forget, make sure to re-adjust those white star wheels so that they are ready and in position for your next project.
And there you have it – super easy and simple once you know exactly how to cut leather with the Cricut Maker. We hope you are feeling more confident to jump straight into your first Cricut leather project.
To finish off your design look into adding some gorgeous HTV details. You can find our blog post on how to apply heat transfer vinyl to leather here. And find loads more faux leather Cricut projects here.
We would love to hear your ideas of what you created, so please share your thoughts in the comments below.
We have plenty of Cricut Machine Resources here, as well as loads of DIY Cricut Project tutorials on our blog here.