THIS POST MAY CONTAIN AFFILIATED AND/OR COMPENSATED LINKS. FIND MORE INFO IN MY DISCLAIMER.
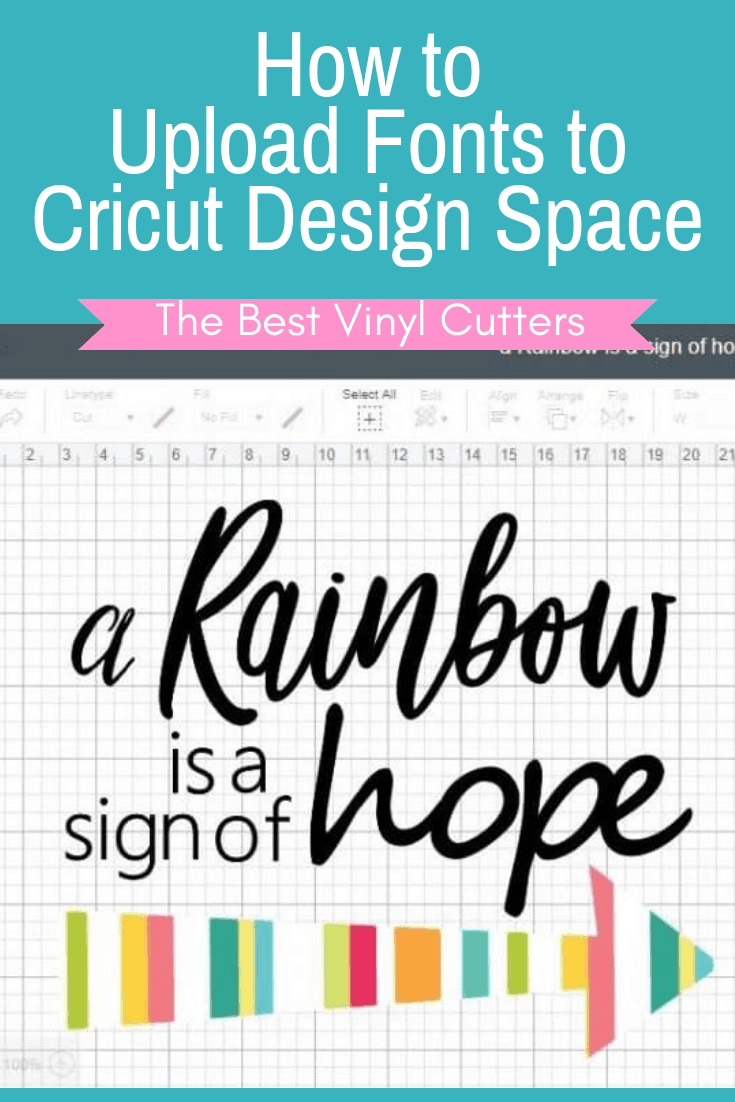
Home » How to Upload Fonts to Cricut Design Space [Desktop Tutorial]
Wondering how to upload fonts to Cricut Design Space on desktop (laptops or computers)? (Find our tutorial on how to add fonts to Cricut Design Space on iPad or iPhones here)
We have a fabulous tutorial for you, but before we start I wanted to clarify one thing.
The term “upload” fonts to Design Space is kind of misleading. Fonts are actually “accessed” on Design Space. Design Space accesses your font files on your computer, but it doesn't store it on Design Space.
This means that whilst your Cricut fonts live on Cricut Design Space, your downloaded system fonts for Cricut, actually live on your device you installed it on (more about that below).
It really isn't much of an issue, but it is important to understand. Once you get the hang out of working with downloaded fonts, it really gives you a ton of flexibility when creating your Cricut designs.
Trust me you will get addicted!
So here is our full guide on working with downloaded fonts for Cricut Design Space.
Can you Add Fonts to Cricut Design Space?
Short answer – Yes! Cricut Design Space uses installed fonts, so what we can do is to install the font on our systems and then reload Design Space.
Unfortunately, though not every font you install will be compatible with Cricut Design Space.
Cricut says: “Because system fonts are not designed by Cricut, some of them may have design components that are not compatible with Cricut Design Space. This may result in a failure to import into Design Space, or unusual behavior when used in Design Space.”
Now, because it is so quick and easy to download and install fonts, I always give it a try anyway and more often than not the font gets picked up perfectly fine.
You can always get a Cricut Access Subscription if you wanted to use all the fonts on CDS, but sometimes it is nice to just use something that caught your eye that is NOT on CDS.
The Problem with Adding Fonts to Cricut Design Space
Before we continue I really have to point out that you don't actually upload the font TO Design Space itself.
The fonts you download are called system fonts. System fonts are specific to the device you’ve installed it on. So if you download and install a font to your computer, it will only work on Design Space when you are on the computer.
If you use different devices with your Design Space, I would recommend that you install your favorite fonts across all your systems.
Another factor I wanted to talk about is that not every font out there is cut-friendly. Your Cricut cutting machine is really designed to work with clean lines and simple designs.
So have a good think about whether your machine will be able to handle the font you wish to use.
This font above, for example, might be arty and interesting, but it really isn't a good fit for vinyl designs and I bet even your draw function would struggle with this one a little bit. So find one that has smooth curves and straight lines.
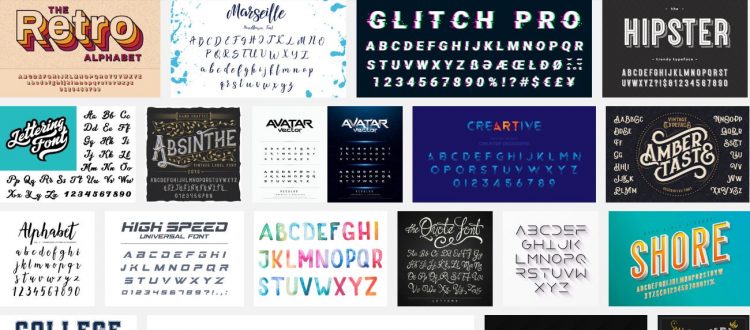
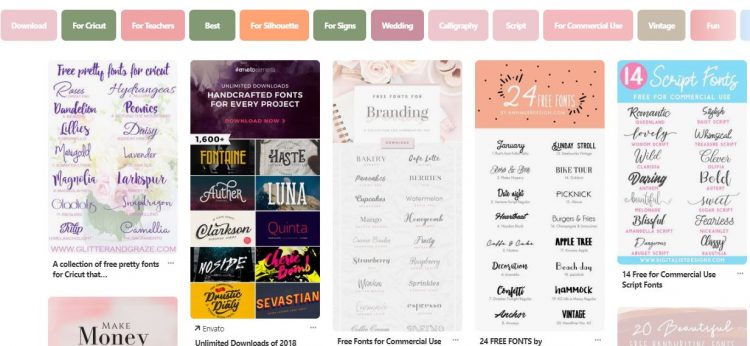
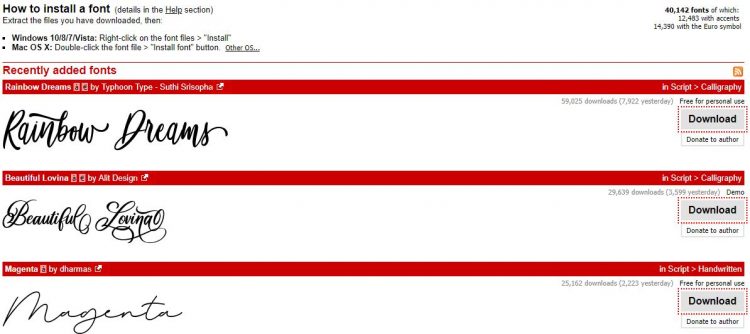
Where to Find Free Fonts for Cricut Design Space
You can find free fonts easily. Here are some of my favorite sources:
You can also purchase fonts. The benefit of purchasing a font is that it will come with a commercial license. If you plan on selling your projects, you will need to get commercial free fonts or buy a font with a license.
Okay, so now that you might have a font, let's look at how to download fonts to Cricut Design Space. So first things first, remember that the font will actually live on your computer/tablet.
Step 1: Download and Install Font on your Device
Simply download the font from your chosen site. Most sites have instructions or a quick download button and save it to your computer.
Find the file on your computer. The file will be zipped, so unzip the folder.
Next, click on the font file with the .ttf extension and click on install.
Step 2: How to Install Fonts on Cricut Design Space
Now that you have the font on your computer, you might be wondering how to import fonts into Cricut Design Space? Really easy.
Simply start up (or close and restart) Design Space and it will automatically load your new font.
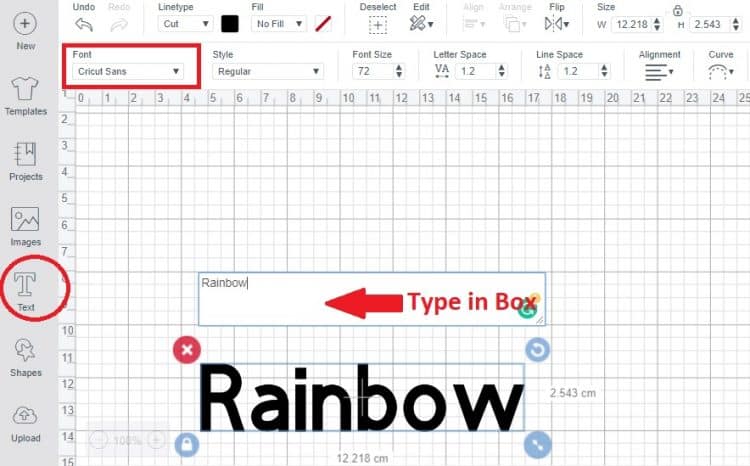
Step 3: How to Customize your Font in Design Space
Click on the “Text Tool” and type your word. Go the “Font Selection” option and simply search for your font.
Tip: Cricut also sells fonts in Circut Design Space.
I once downloaded a font that they also had for sale and didn't notice it when I picked my font – and then Cricut wanted me to pay $4.99 before I was able to cut.
It confused me for a bit, so look out for that and be sure to pick your free font.
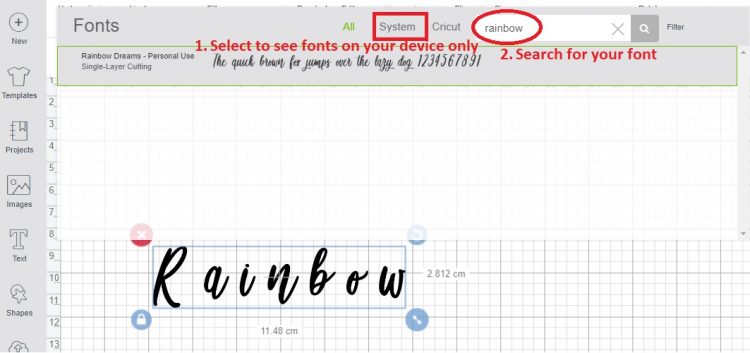
The easiest way to find your font is to select “system” and then simply type the name of your font into the search box.
Now, depending on what you are cutting for, you might want to customize this word even more. Here are some ways in which you can customize your font:
Change the size of the font
Increase or decrease the space between letters
Ungroup your text to individual letters so that you can manually move each letter
You can add a curve to your word
Weld the letters together to form one image
Step 4: Prepping Font to Be Cut
I love to go the extra mile and make it really easy for Cricut to cut my fonts. The reality is that Cricut is so amazing that it can even handle super thing and delicate individual letters – see my Easter Eggs as an example, so delicate.
But it sure makes life easier when your flowing font does indeed touch and I also suggest you weld the letters to make one image.
Here is how you do that:
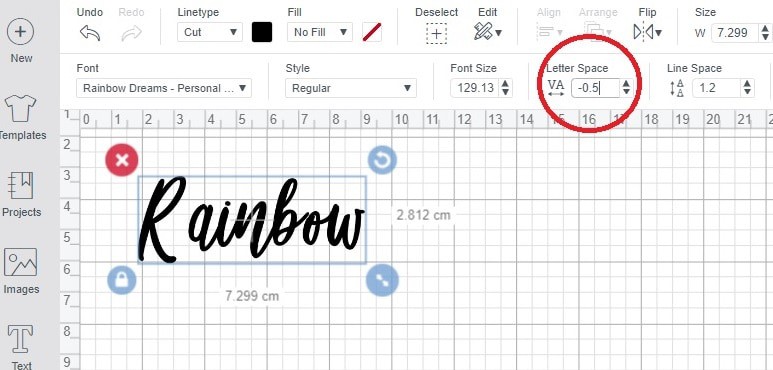
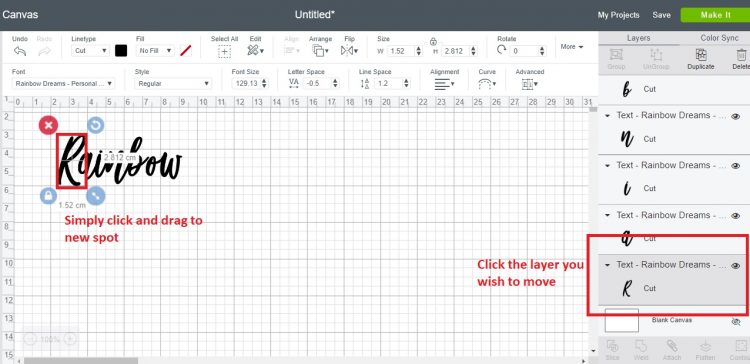
1. Decrease the letter spacing to -0.5 so that the letters touch.
2. Now, you will notice that all my letters touch nicely, except for that “o”. I would also like to move the capital “R” closer to the other letters as well.
So simply ungroup the letters, click on the letter layer you want to move and reposition the letter – and then group them together again.
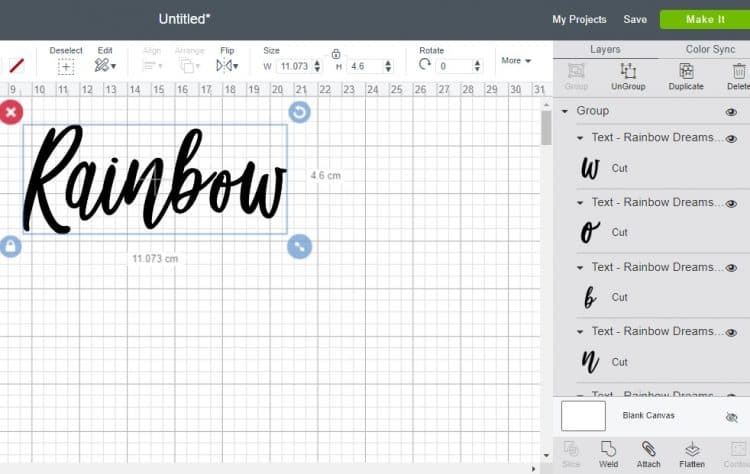
3. Lastly, click on your word and then click on the weld in order to “glue” the letters together.
Cricut does an excellent job at making sure the word is cut-ready and basically created one image by removing any overlapping cut lines.
Step 5: Cut your Image
And now you are ready to cut or draw your image. See Easy!
Here is Why Welding is Important
It is really important to weld your letters into one image when letters or shapes actually touch each other. Welding removes unnecessary cut lines and makes the image a lot simpler for your machine to work with.
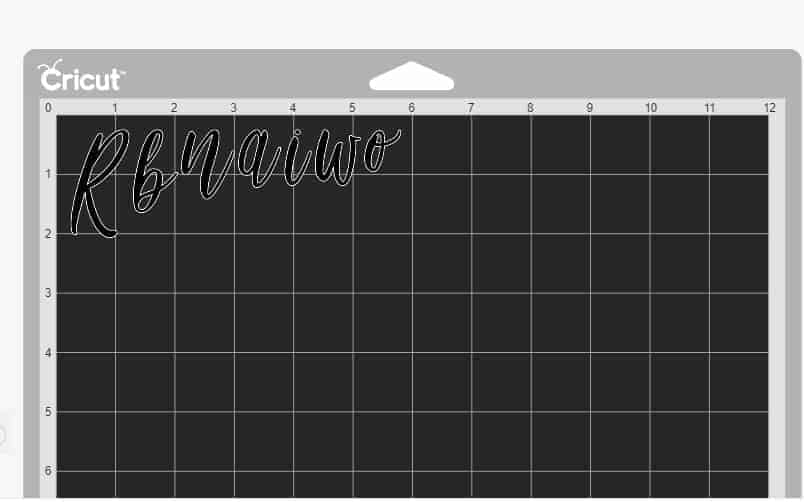
Before welding, you will basically have many layers of individual letters and when you click on ‘MAKE IT' the machine will cut each letter out separately – which is not what we want – especially not with flowing text.
Here is an example of what Design Space did to my word before I welded the letters.
Even though I had the letters grouped, the software still saw them all as individual letters and mixed them up (you won't have this issue if you didn't have to ungroup your letters) – seems like a BIG job if you are working with vinyl.
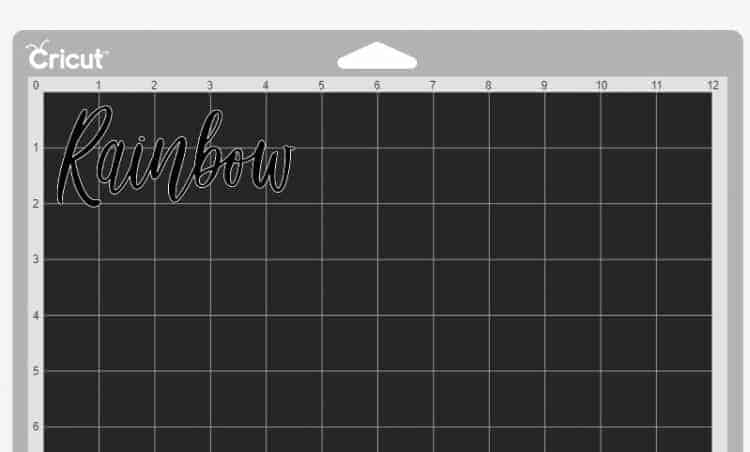
To make your life SO MUCH easier when you have letters that touch, you can simply “WELD” the letters together. You will notice all the layers will combine to form one image only.
Now click on “MAKE IT” and you can an image that looks much easier to weed and work with.
So much easier and smoother right!? Your font is now ready to cut or draw.
And there you have it. Our detailed guide to working with system fonts and Cricut Design Space.
Where to next?
We have plenty of tutorials, reviews, guides and project ideas for you to browse in our Cricut Blog. Hop over and check it out. You might also like our tutorial on Further reading for Design Space Tutorials and Functions:
Hi, I’m Jolene! I have a whole career based on working with all different types of crafts. Some of my work has also been featured in craft magazines. I’m passionate about helping others to unlock their creative potential and turn it into something beautiful. I don’t just provide tutorials on my website, but also inspirational ideas and advice to help kickstart your creativity.
 Short answer – Yes! Cricut Design Space uses installed fonts, so what we can do is to install the font on our systems and then reload Design Space.
Unfortunately, though not every font you install will be compatible with Cricut Design Space.
Short answer – Yes! Cricut Design Space uses installed fonts, so what we can do is to install the font on our systems and then reload Design Space.
Unfortunately, though not every font you install will be compatible with Cricut Design Space.
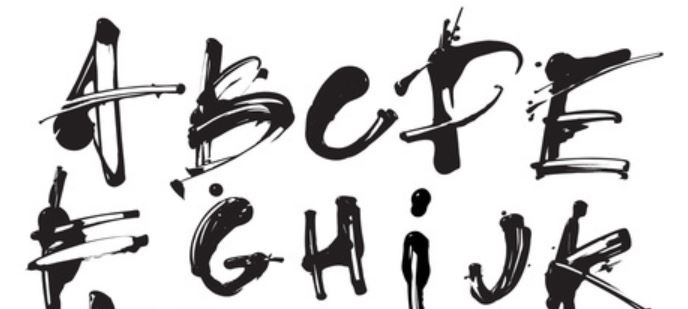 This font above, for example, might be arty and interesting, but it really isn't a good fit for vinyl designs and I bet even your draw function would struggle with this one a little bit. So find one that has smooth curves and straight lines.
 You can find free fonts easily. Here are some of my favorite sources:
You can also purchase fonts. The benefit of purchasing a font is that it will come with a commercial license. If you plan on selling your projects, you will need to get commercial free fonts or buy a font with a license.
You can find free fonts easily. Here are some of my favorite sources:
You can also purchase fonts. The benefit of purchasing a font is that it will come with a commercial license. If you plan on selling your projects, you will need to get commercial free fonts or buy a font with a license.
 Okay, so now that you might have a font, let's look at how to download fonts to Cricut Design Space. So first things first, remember that the font will actually live on your computer/tablet.
 Simply download the font from your chosen site. Most sites have instructions or a quick download button and save it to your computer.
Find the file on your computer. The file will be zipped, so unzip the folder.
Next, click on the font file with the .ttf extension and click on install.
Simply download the font from your chosen site. Most sites have instructions or a quick download button and save it to your computer.
Find the file on your computer. The file will be zipped, so unzip the folder.
Next, click on the font file with the .ttf extension and click on install.

 Now, depending on what you are cutting for, you might want to customize this word even more. Here are some ways in which you can customize your font:
 But it sure makes life easier when your flowing font does indeed touch and I also suggest you weld the letters to make one image.
Here is how you do that:
1. Decrease the letter spacing to -0.5 so that the letters touch.
But it sure makes life easier when your flowing font does indeed touch and I also suggest you weld the letters to make one image.
Here is how you do that:
1. Decrease the letter spacing to -0.5 so that the letters touch.
 2. Now, you will notice that all my letters touch nicely, except for that “o”. I would also like to move the capital “R” closer to the other letters as well.
So simply ungroup the letters, click on the letter layer you want to move and reposition the letter – and then group them together again.
2. Now, you will notice that all my letters touch nicely, except for that “o”. I would also like to move the capital “R” closer to the other letters as well.
So simply ungroup the letters, click on the letter layer you want to move and reposition the letter – and then group them together again.

 3. Lastly, click on your word and then click on the weld in order to “glue” the letters together.
Cricut does an excellent job at making sure the word is cut-ready and basically created one image by removing any overlapping cut lines.
3. Lastly, click on your word and then click on the weld in order to “glue” the letters together.
Cricut does an excellent job at making sure the word is cut-ready and basically created one image by removing any overlapping cut lines.
 To make your life SO MUCH easier when you have letters that touch, you can simply “WELD” the letters together. You will notice all the layers will combine to form one image only.
Now click on “MAKE IT” and you can an image that looks much easier to weed and work with.
To make your life SO MUCH easier when you have letters that touch, you can simply “WELD” the letters together. You will notice all the layers will combine to form one image only.
Now click on “MAKE IT” and you can an image that looks much easier to weed and work with.
 So much easier and smoother right!? Your font is now ready to cut or draw.