Cricut Design Space can be a little daunting and understanding the many functions you can use can be confusing and frustrating.
In particular, you may have come across Weld and Attach, and at first glance, they appear very similar, however, they will give you very different results when you send your design to be cut. So what exactly is the difference between Cricut Weld vs Attach? When should you use which one?
In this post, we are going to look at the functions Weld and Attach as these two functions cause the most amount of confusion for Cricut beginners!
You will know when to use Weld and when to use Attach which will help you to create new designs in Design Space more quickly and effectively!
Let's start off by having a closer look at the Weld function.
You can also grab the one-page cheat sheet of how to do all of this when you buy our best-selling book which is full of tutorial pages on how to do everything and anything in Cricut Design Space.
You can grab loads of more information as well as a FREE sample page from The Complete Guide to Cricut Design Space here.
Cricut Weld Function
Let's start by understanding or defining what Weld means in Cricut Design Space.
Designs, images, shapes, or graphics are made up of layers in Design Space.
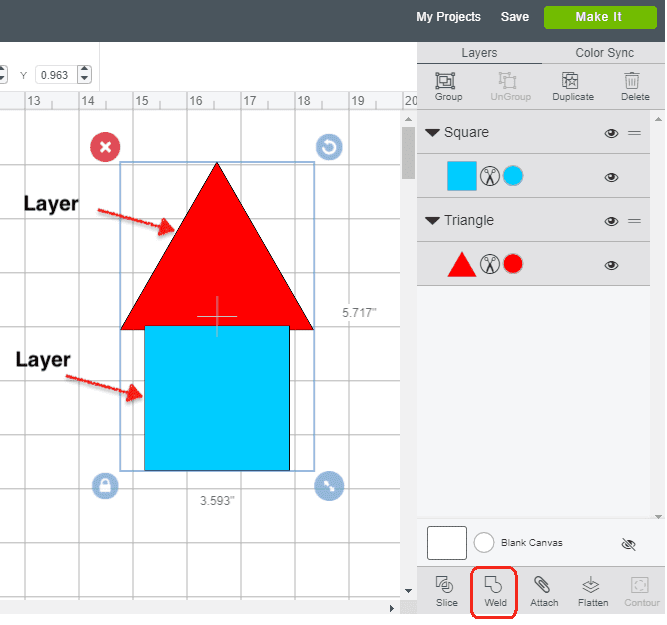
You want to use Weld when you want to simplify a design or keep the letters of a word connected or combine shapes to create new designs and one single shape.
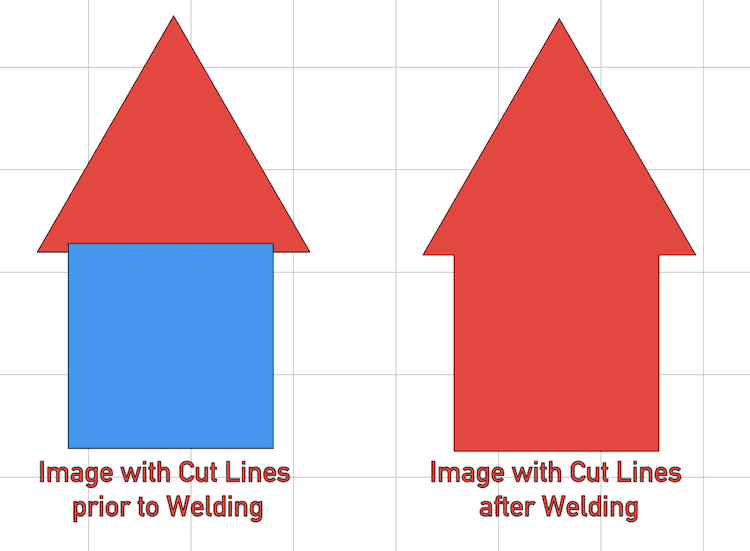
When you use the Weld function, your shapes or letters are joined to create a single customized image or layer by removing any overlapping cut lines i.e they fuse together to make one item.
The best way for me to explain welding is to think about someone using a welding machine to weld one piece of metal to another. At the start, there were two pieces of metal, but after the welding process the pieces are melted together and you can't see where one starts and the other ends anymore.
NOTE: There is no way to unweld the design, image, or letters. Weld is a permanent function in Design Space. You can however use the undo button to undo welding if you recently welded as part of your steps.
Tip: When you are using or have multi-layered images in Cricut Design Space, it may be best to ungroup the layers to arrange them separately before welding.
How to Use Weld
Now let us have a look at how you use Weld in Design Space by going over the steps in detail.
How to Weld Shapes in Design Space
You can use the Weld Tool to join letters together or simplify an image by combining elements.
Step 1
- Insert your images onto the canvas

Step 2
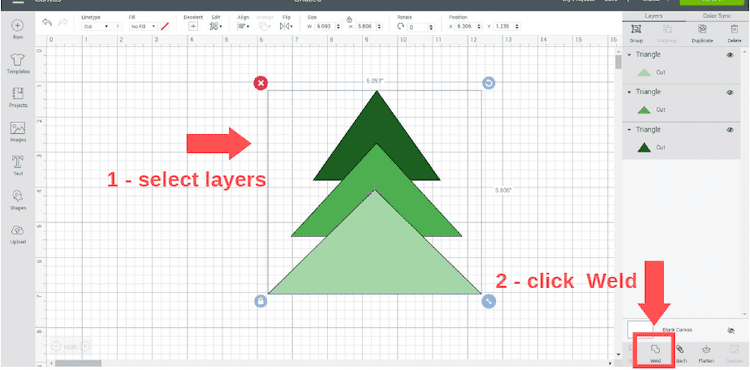
- Select the images you want to weld together
- Click the Weld Button in the Actions Panel
Step 3
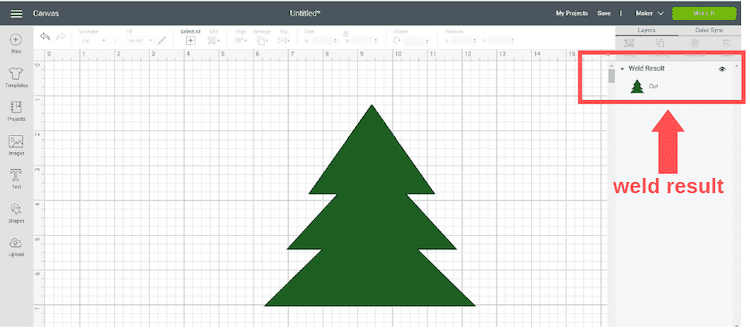
- Your images will be merged into one image by removing unnecessary cut lines] and will change to one color
- You can see the result in the Layers Panel
TIP: If you have recently welded the design and have not sent it to cut or saved or closed the project, you can unweld your design by tapping Undo until you unweld the images.
How to Weld Letters or Fonts in Design Space
Welding letters or fonts together is a great function, especially when using script fonts. Again, by using weld you remove cut lines to fuse the letters together to ensure that the whole word is cut as one layer.
Step 1
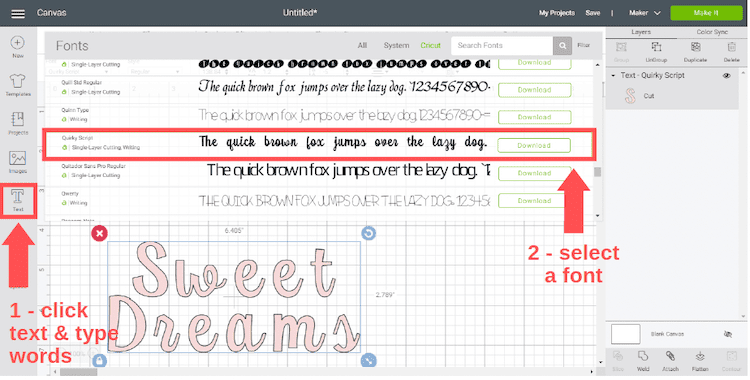
- Click text to add a text box to the canvas
- In the Text Edit Bar at the top, use the Font dropdown menu to select the font of your choice
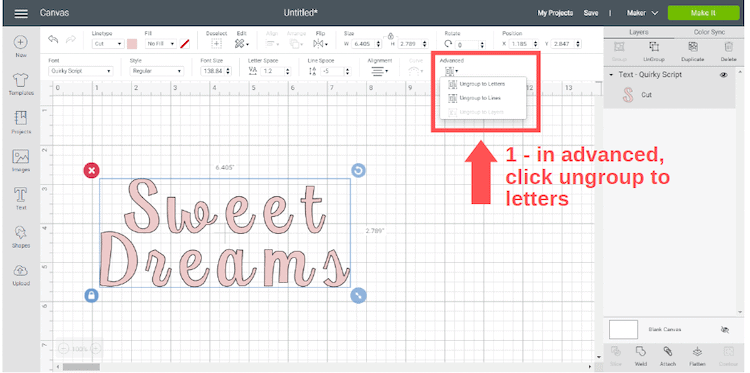
Step 2
- In the Text Edit Bar, click the dropdown menu in the Advanced section
- Click on “Ungroup to Letters”
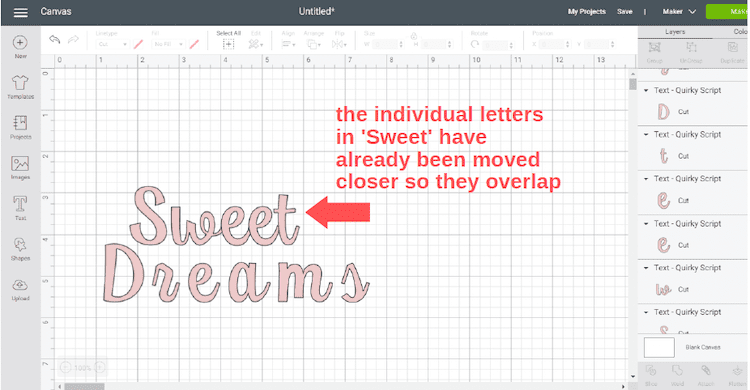
Step 3
- Now move each one individually so it is just barely touching the ones next to it
- Use the Align tool to make sure your text is straight
TIP: You can also use the grid on the canvas to visually align the letters
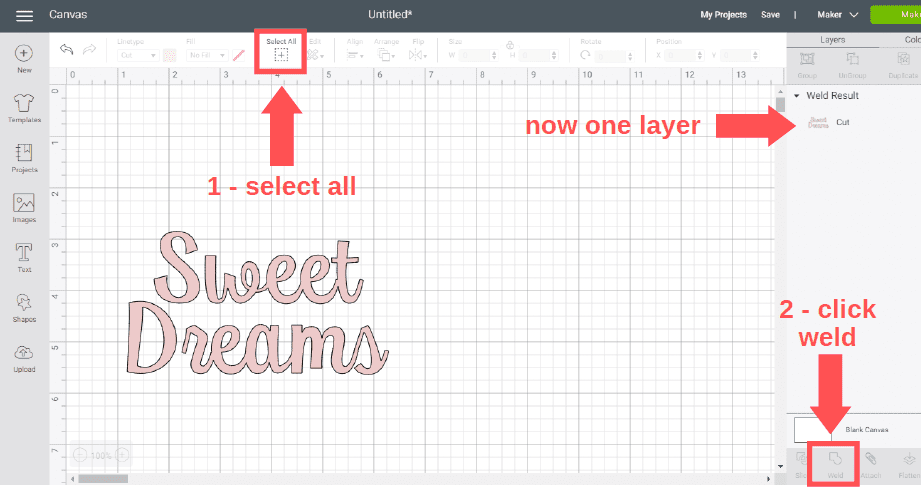
Step 4
- Once all the letters touch as if they were naturally written, click “Select All”
- Click on “Weld” function to fuse them together
- The words will now be cut as one seamless piece
Now we have covered Weld for letters and images/shapes, let's have a look at the Attach function in more detail so you can see the difference of use for these two functions.
What Does Attach Mean?
You can use the Attach tool to hold all the items you want to be grouped together so they stay exactly the same way on the mat as they look on your canvas.
I like to think about it as a paper clip. You use a paper clip to keep multiple sheets of paper together in one pile.
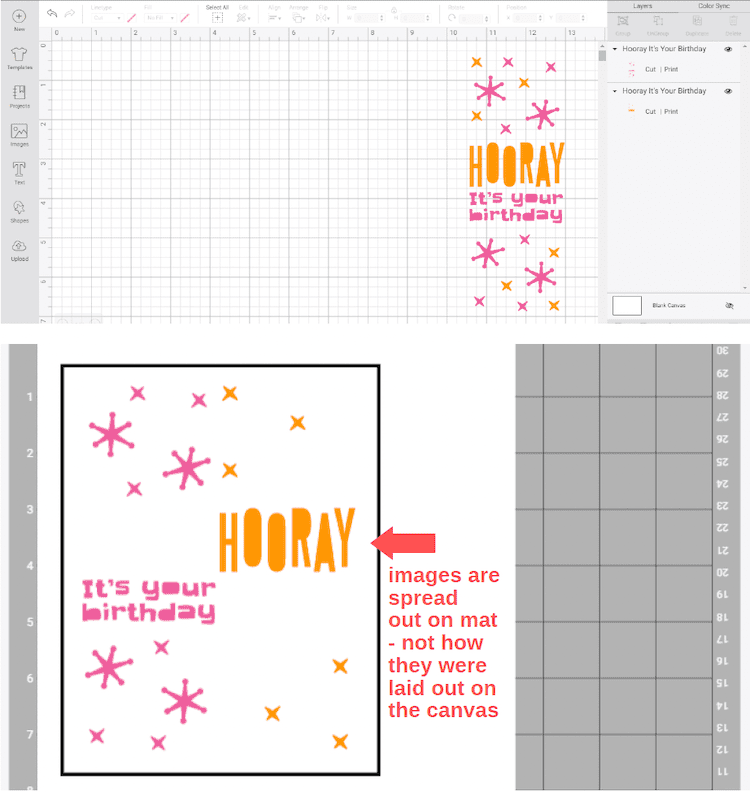
Without using attach, when you send your design to be cut the elements are separated on the mat instead of together the way they were on the canvas.
Be sure to use the Attach Tool anytime you add Draw, Score, Perforation, Deboss, Engrave, or Foil Linetypes.
You will also use attach anytime you want to hold the image placement on your mat.
How to Use Attach
Attach is a great function to use in Design Space that ensures when attaching images or items together the end result is not permanent and changes can be made.
How to Attach in Design Space
Now let us have a look at how you use Attach in Design Space by going over the steps in detail.
Step 1
- Select all elements that you want to attach by left-clicking and holding th mouse button down while dragging across the elements
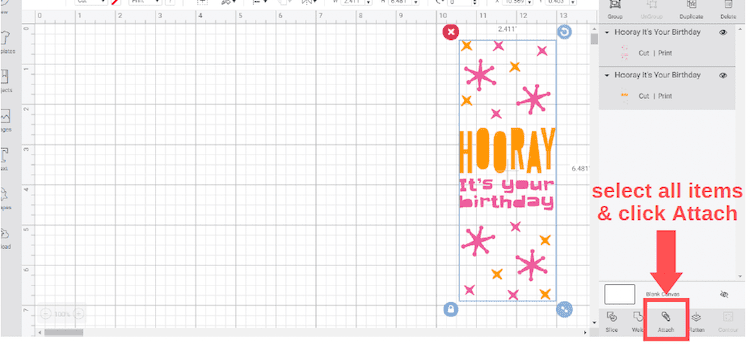
TIP: You can also select by clicking all the elements in the Layers Panel by clicking each layer & holding CTRL to select another (Use CMD if using a Mac).
Step 2
Click the “Attach” button at the bottom of the Layers Panel.
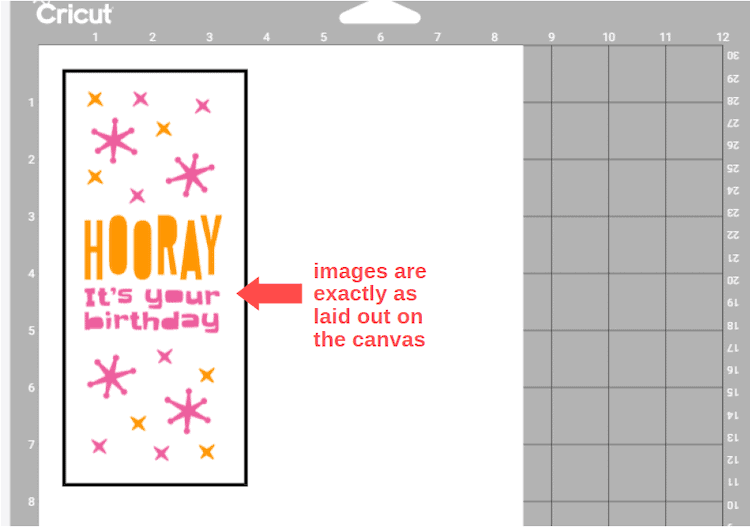
You can see the elements are together on the mat exactly how they were on the canvas.
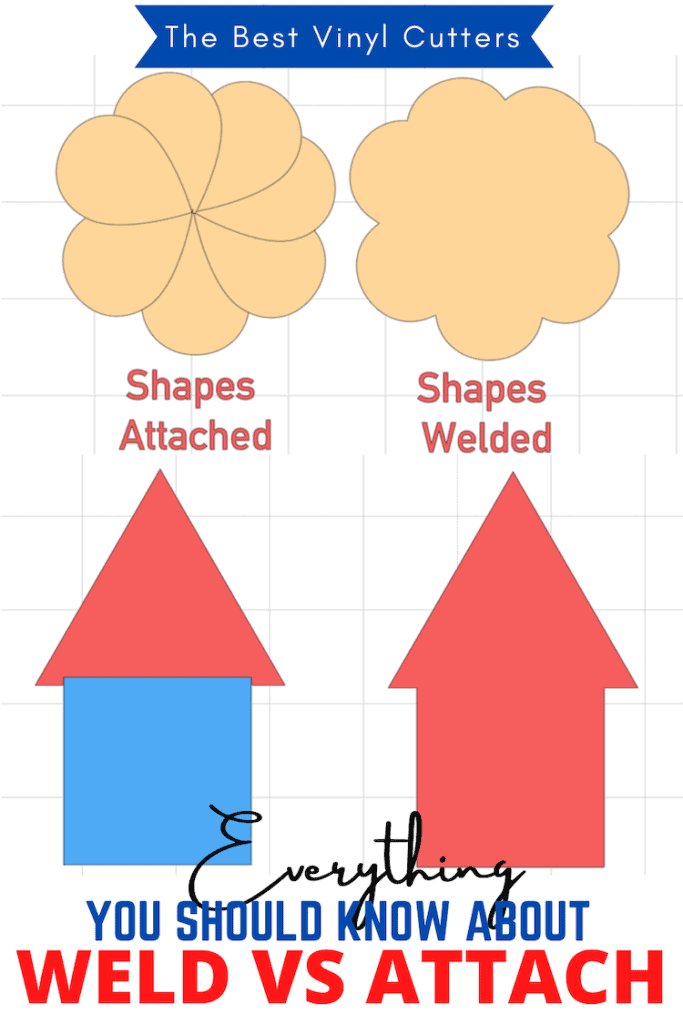
Summary of Differences: Weld vs Attach
In summary, the main point of difference is when using Attach that the shapes will remain separate pieces and in the same place on the mat as the canvas whereas with Weld the function will unite two or more separate shapes into one single shape.
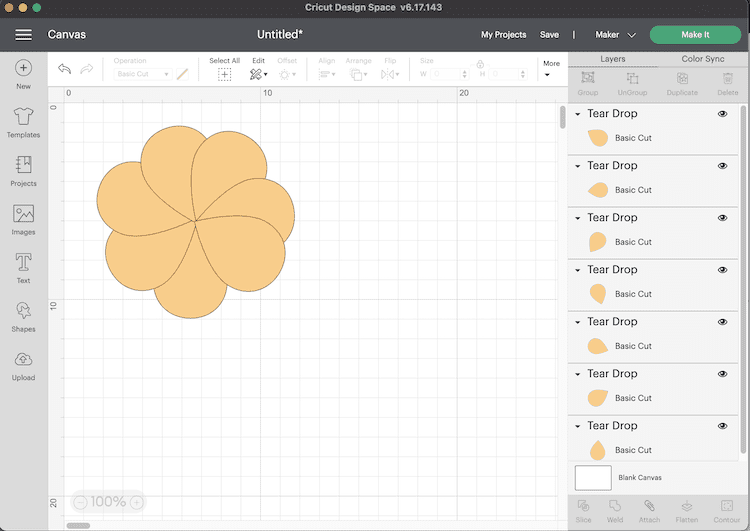
Let's have a look at another example in Design Space using some basic shapes so you can really understand what the functions do using the Attach and Weld tools
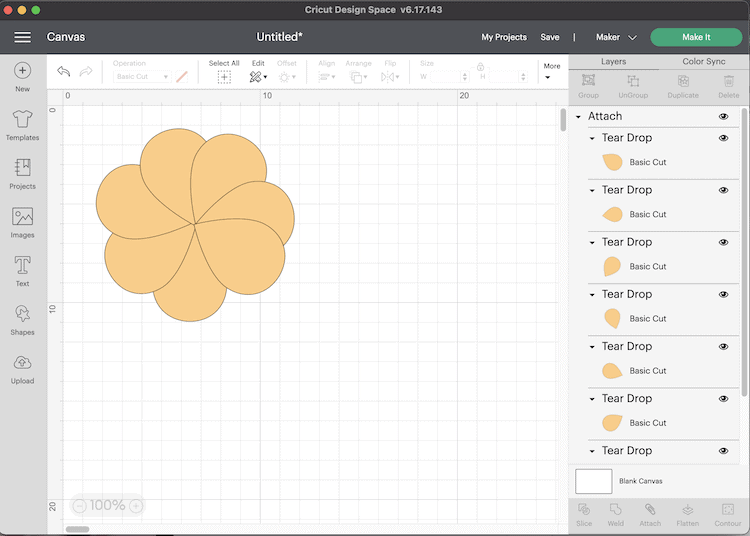
I opened up a new canvas and used the Shapes tool to add teardrops to my canvas. I resized the shapes and moved them so that they overlapped to form flower petals.
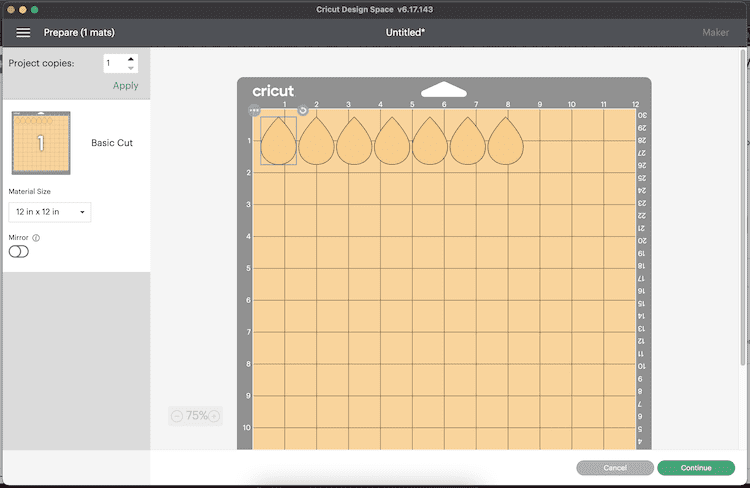
Now when I send this image to the mat to be cut to as is, you can see that the shapes are rearranged in a position that is not the same as when arranged on the canvas.
Now if I select all the shapes and click on Attach you will see that on the Layers panel it has now attached all the shapes together.
When I now send the design to be cut after attaching the shapes, you will see that they retain the flower shape/petals arrangement on the mat as they were arranged on the canvas.
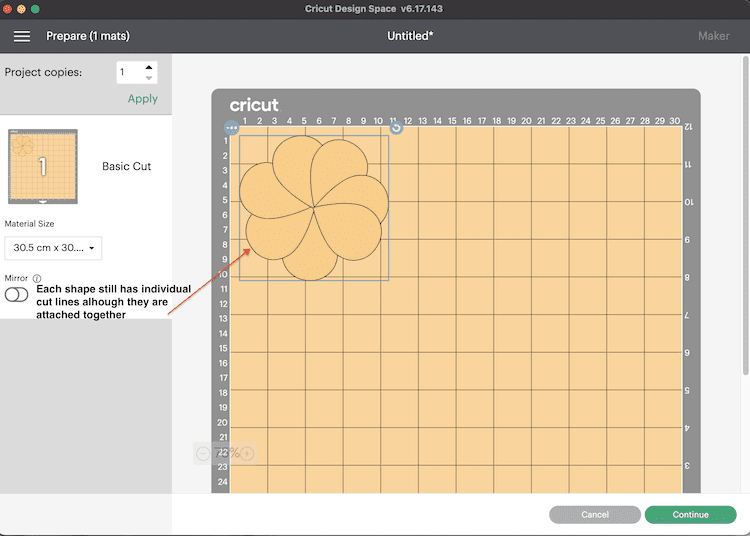
What is important to note is that even though they are together in the same shape as arranged on the canvas, when the Cricut machine cuts the design, it will cut each individual shape or petal.
So it will have overlapping cuts due to the way they are arranged and attached. Which in this situation is not ideal.
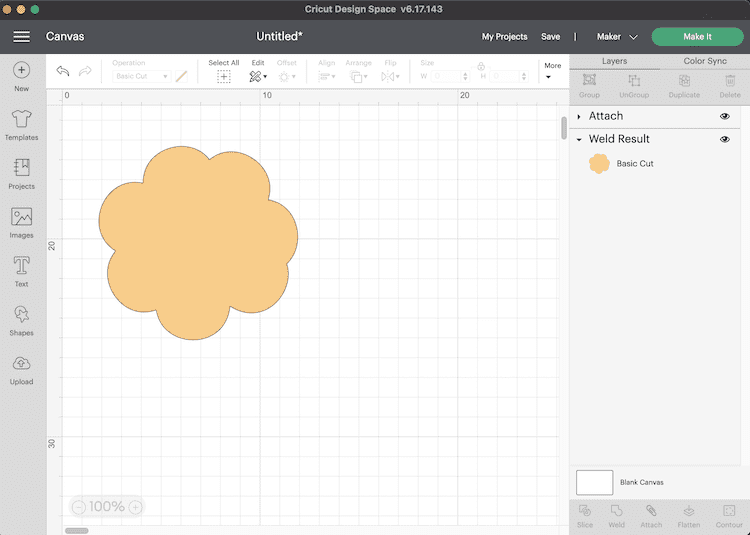
Now let's go back to the canvas and use the Weld function in order to fuse the shapes together.
You can see that the shape looks different as the shapes that looked like individual petals have now fused together to create one flower shape
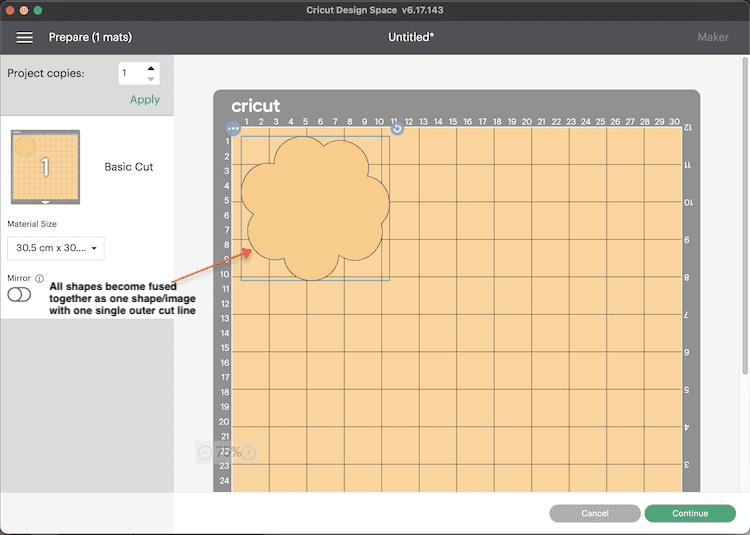
When we send the design to the mat to be cut you will see that the software sees the image as one single layer and shape and will cut only on the outer cut line.
Conclusion
That is the main difference you need to know about when and how to use Weld or Attach in Cricut Design Space.
We hope this article has helped you and if you found it useful we have other Cricut Design Space tutorials on our blog that you can follow.
- How to Download and Set-up Cricut Design Space [for Desktop]
- How to Slice in Cricut Design Space [for Desktop Users]
- How to Curve Text in Cricut Design Space [for Desktop Users]
- How to Add Fonts to Cricut Design Space [for iPad & iPhones]
- How to Upload Fonts to Cricut Design Space [Desktop Tutorial]
Grab our tutorial book that covers every single action, function, and button in Cricut Design Space. Have it all in your hands, ready to go (no more searching on the internet to find a tutorial!). Click here to read more about our digital book: The Complete Guide to Cricut Design Space.