One Cricut Design function that I used a lot is the “Slice” tool. It is one of those types of tools that will become a staple in your design work.
So it is really important for you to understand what Slice does and how to use it to tweak or create the designs you want.
Our tutorial is a super easy and straightforward one. We also share our video on how to use Slice in Cricut Design Space as well.
Note: This tutorial is aimed at those who use a desktop (PC or MAC), however, there is loads of helpful info in here for those on Android and iOS as well.
You can also grab the one-page cheat sheet of how to do all of this when you buy our best-selling book which is full of tutorial pages on how to do everything and anything in Cricut Design Space.
You can grab loads of more information as well as a FREE sample page from The Complete Guide to Cricut Design Space here.
What is the Cricut Slice Tool and What Does it Do?
The Slice tool splits two overlapping images or text into different parts.
I can think of one good example to explain how the Slice works, it is like slicing a loaf of bread.
You have the whole loaf (one piece) and then you cut a slice with a bread knife (the Slice tool). So you end up with two pieces.
You can also use a cookie-cutter (a Shape) to cut that shape out of a slice of bread.
You can use the Slice tool to:
- Cut one shape from another shape
- Cut text from a shape
- Cut a shape out of text
- To crop images (so remove parts of an image you don't want)
To let you know more about how to use the Slice tool on Cricut Design Space, find out below.
How to Slice in Cricut Design Space [for Images]
You can use the Slice tool for any shape and image that you want. You can also use it when working with text – we have a separate step-by-step tutorial for that below.
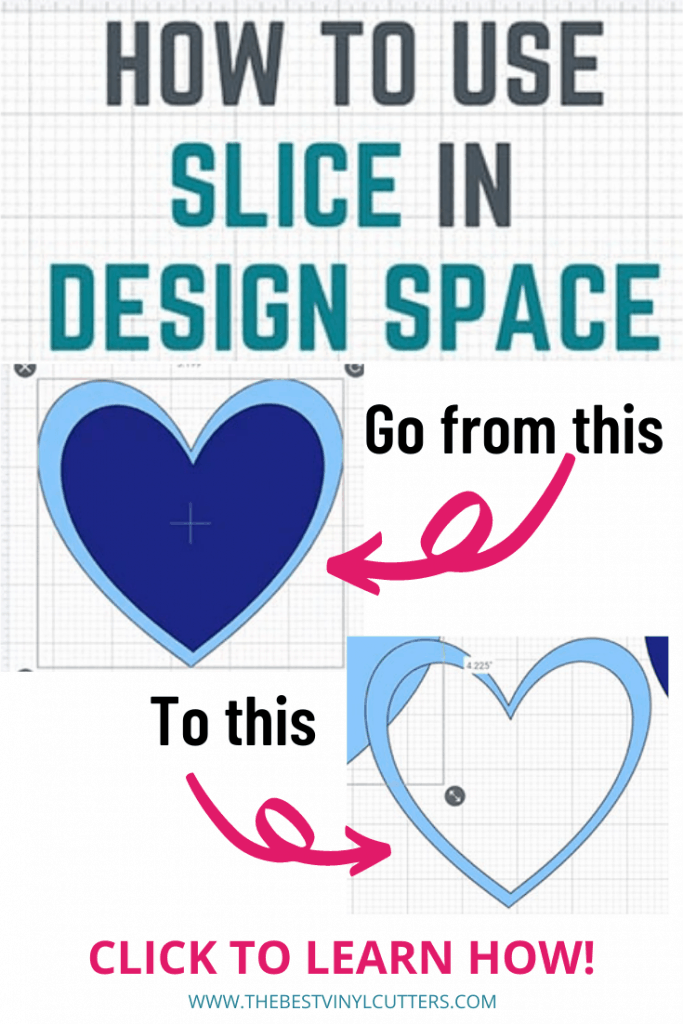
- Insert your image or shape onto the canvas. In this example, I wanted to make a heart frame. So I inserted two heart shapes.
- TIP: If you have something you want to delete from an image, you can choose the best shape that will be able to cover that area (but not cover areas of the image you wish to keep).
- Put the first shape/image over the other.
- Tip: If you are using the same shapes, it might be helpful to change the color so it is easier to see what you are doing.
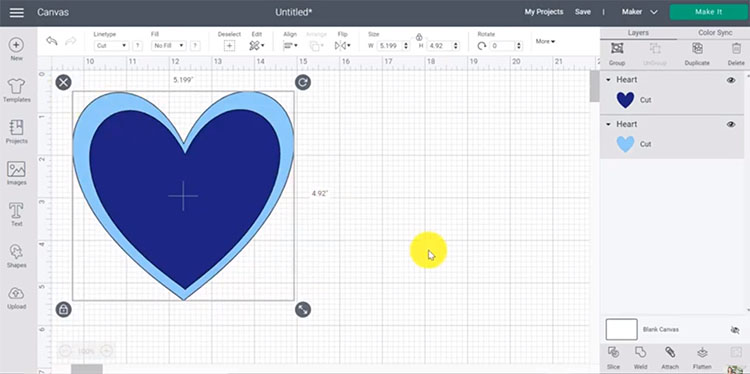
- Next select both shapes (or your image and the shape). You can either drag a box around the layers to select them, or ctrl click to select them on the layers panel. Note: You can only slice two layers at a time.
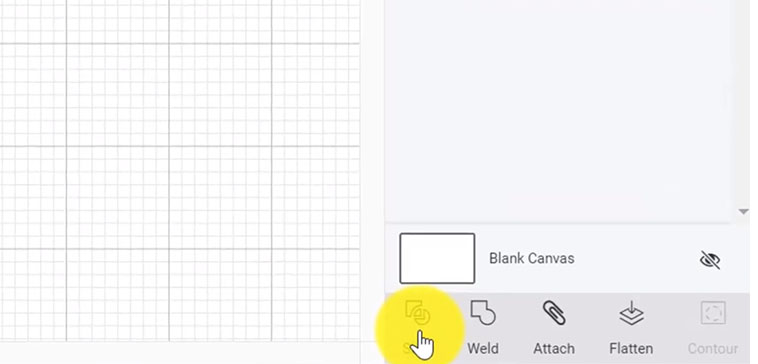
- Click Slice at the bottom of the Layers panel.
- Three Slice results are now visible in the layers panel.
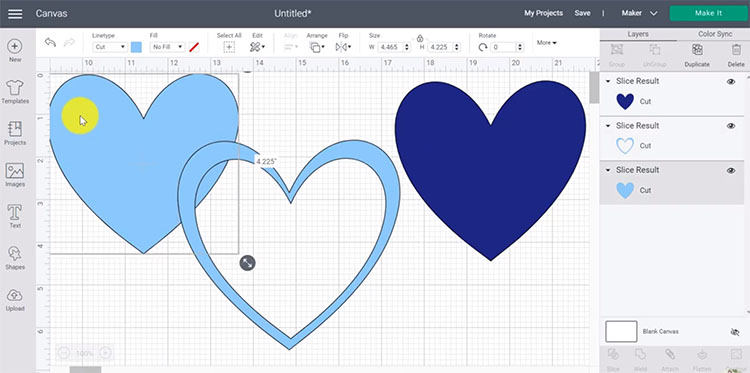
- You may now delete the other layers that you don't need.
How do you Slice in Cricut Design Space [with Text]
The Slice tool can also be used on text, just make sure to use a nice thick font so the shapes and images will be visible.
- Add some text to your canvas.
- Tip: Choose a thick font to work with.
- Choose a shape that you want to slice out of your text and pop it on top of your letters.
- Select both the text and the shapes.
- Click Slice at the bottom of the Layers panel.

- Delete the layers that you don't need.
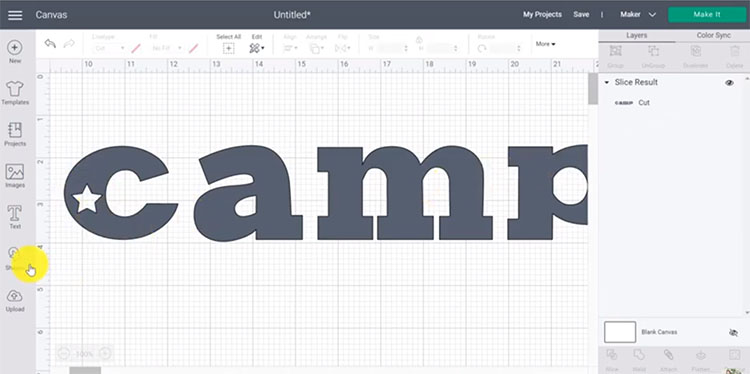
- And now you can slice shapes out of letters to make your words even more interesting! Here is an example of what you can do with the slice tool and text.

Troubleshooting: My Slice is Not Working!
Please note that you can only slice two layers at a time. If you have 3 or more layers, you can weld some of your layers together (to create one layer) or you simply need to repeat your slice steps to complete your design
There is also no such thing as Unsliced, so if you accidentally sliced incorrectly, you just need to click the Undo button.
See how easy it is to use Slice? Just remember the following when using the Slice tool.
- You can slice images, shapes, and texts
- You can only slice 2 layers at a time
- To undo slicing use the undo button
Grab our tutorial book that covers every single action, function, and button in Cricut Design Space. Have it all in your hands, ready to go (no more searching on the internet to find a tutorial!). Click here to read more about our digital book: The Complete Guide to Cricut Design Space.
I hope this tutorial helps you understand how easy the Slice tool works. For me, this is the most flexible tool and this tool helps unleash the most creative part of you.
Further reading for Design Space Tutorials and Functions:
Try to use it from now on, see how you can create more with just shapes, images, and text 🙂