One of my favorite text effects is the curved text. Why? Because you can incorporate it into any design that you want. Curved text can be formal, it can be playful and it can also be artistic.
It is perfect for logos and taglines, brand names, insignias, and any design that you can think of.
Luckily, it is super easy to curve text in Cricut Design Space – you can do it within seconds (a lifesaver for us crafters). Find out more below on how you can do it.
You can also grab the one-page cheat sheet of how to do all of this when you buy our best-selling book which is full of tutorial pages on how to do everything and anything in Cricut Design Space.
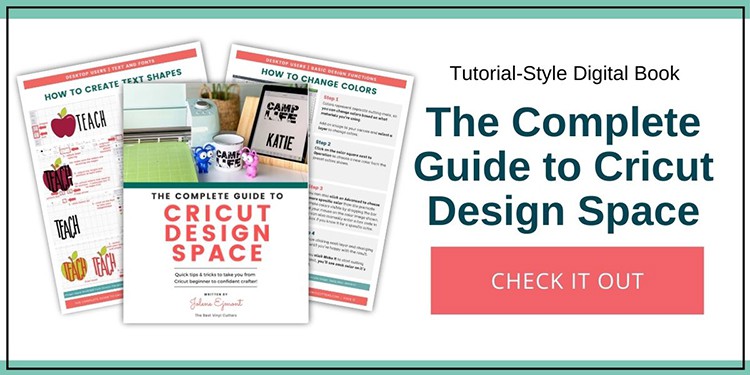
You can grab loads of more information as well as a FREE sample page from The Complete Guide to Cricut Design Space here.
Tutorial: How to Curve Text in Cricut Design Space [Desktop Users]
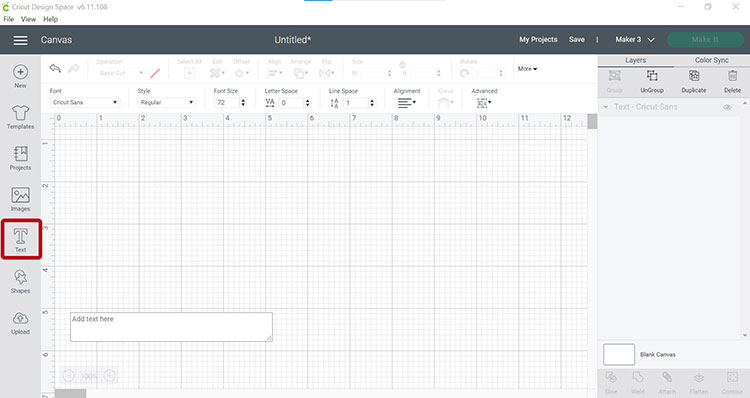
Find below the steps to follow in order to do the curve text on CDS on a desktop.
- Click the Text tool to create a new text box. You will find the text tool on the design panel at the left side of the canvas.
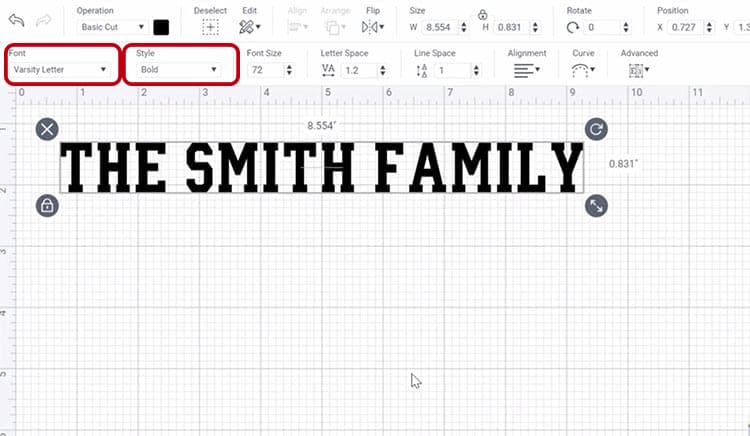
- Type your text then choose the fontstyle that you want to use (In this example, I used the Varsity Letter font in Italic). You may also change the text color and size if you want bigger or smaller text.
Tip: You can learn how to add new fonts to Cricut Design Space here.
Tip: You can only curve one single line of text at a time so make sure that your text is in one single line. The curve text tool will be grayed out (disabled) if your text is not in a single line.
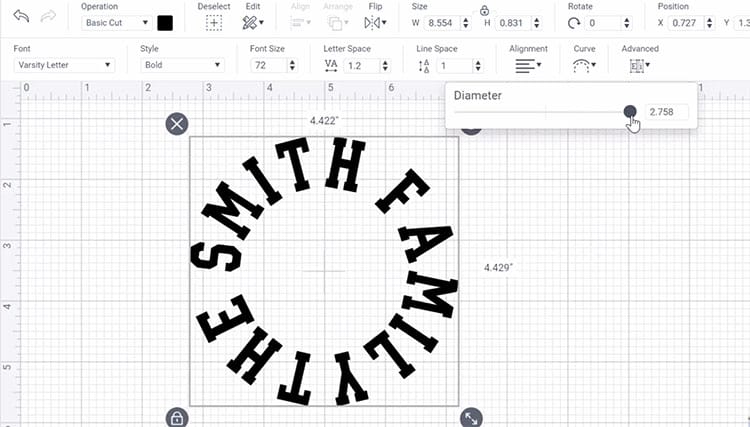
- Click the Curve tool. The curve tool is located at the top of the design panel.
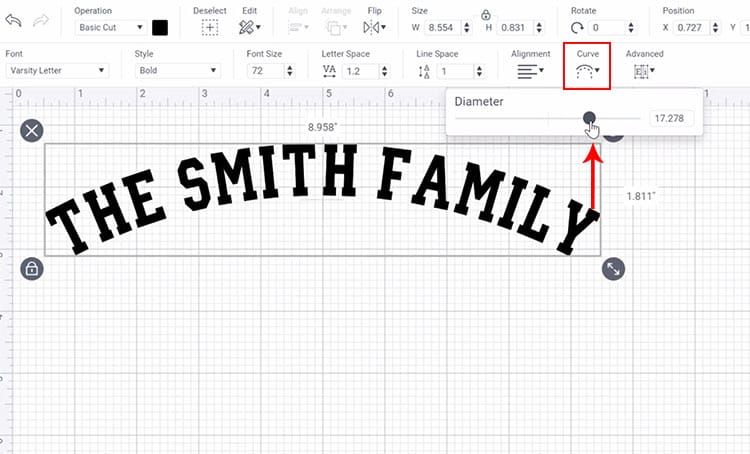
- A slider with the diameter and a number field will appear, this is where you can adjust how you want your curved text to look like.
- Adjust the slider, drag the slider to the right if you want to curve your text downward or to the left if you want to curve your text upward. You can also create a full circle (if you adjust the slider to 0 or the maximum) or half circle of your text whichever you want it.
- Curved text can make the letters seperate out and it can be a little bit tricky to read if you have multiple words – so you might need to adjust the spacing of the letters.
Tip: You can adjust the letters by decreasing the “Letter Space” or ungrouping the text at the Layers panel and move the letters manually. You can also rotate the letters by adjusting the arrow icon if you want to adjust the angle of the letters.
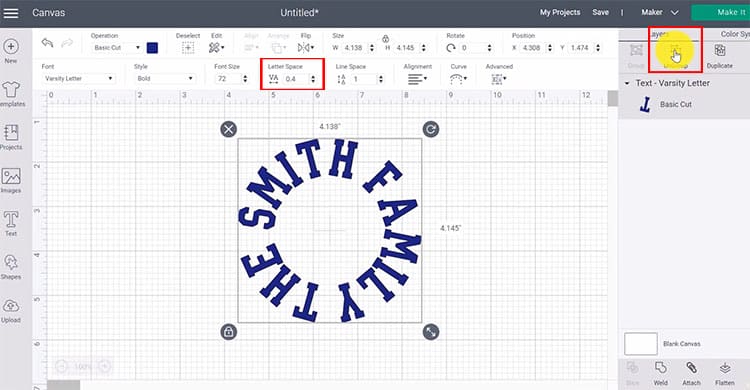
- Once you are satisfied with the spacing, click and drag to select all your letters.
- Go to Layers panel at the bottom right of the screen and click Weld to make the text one single image again.
See, it's done! That's how you create easy and simple curved text on Cricut Design Space.
Grab our tutorial book that covers every single action, function, and button in Cricut Design Space. Have it all in your hands, ready to go (no more searching on the internet to find a tutorial!). Click here to read more about our digital book: The Complete Guide to Cricut Design Space.
Create shirts, hoodies, or mugs for your whole family using this curved text (like the example above) to use on your next family gathering. How cute is that having matching shirts?
Further reading for Design Space Tutorials and Functions:
Don't forget to share your projects with us, I'm very much excited to see your creations 🙂