One of the devices I frequently use when working on Cricut Design Space is my iPad. Since it is mobile and lightweight, I can work anywhere I want at any time of the day.
You can also do almost everything you can on a desktop or a laptop on your iOS device. One of these is downloading your desired font from Google or a font site to use on your designs.
You can download a font using an app then use it on Cricut Design Space, amazing isn't it? It's super easy, you don't need to be a techy person to be able to do it, it's my pleasure showing you how I did it.
Here is our tutorial to show you how to add fonts to Cricut Design Space on iPad or iPhone.
Want to know what functionalities of Cricut Design Space work on your device and how to use them?

We have a book perfect for you! It is called The Complete Guide to Cricut Design Space and you can buy the book here.
How to Add Fonts to Cricut Design Space on iPad & iPhone
Find below the steps to follow in order to download and install fonts on your iPad or iPhone using an app that can be downloaded via the App Store.
You can also find our tutorial on how to add fonts to Cricut Design Space on desktops here.
Tip: If you have updated to IOS14 you will have trouble using fonts, make sure your device is updated to IOS14.2 to use fonts again.
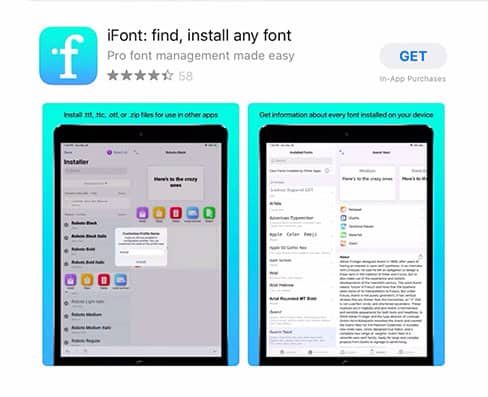
Step 1: Let's Download the Font App
First, we need to download the app on the App Store. It is called iFont, an app exclusive to iOS only.
- Open the App Store
- Search for the app iFont, type it on the search bar.
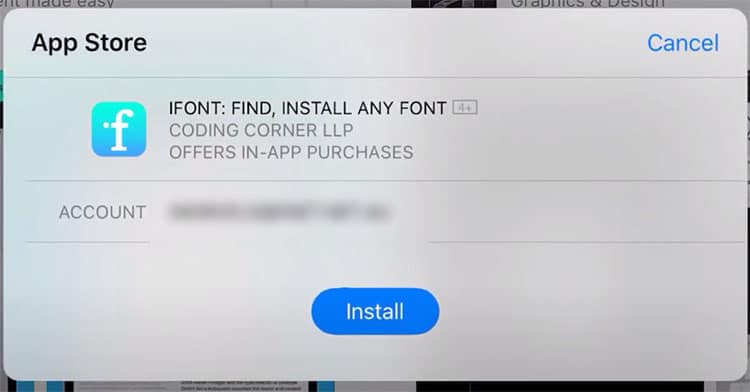
- Once you see the app, tap Get to download.
- A prompt to install the app will appear, tap Install.
- Sign in with your Apple ID if needed.
- Once the installation is complete, a prompt with Done and checkmark will appear.
- You can now see the iFont icon on your iPad/iPhone.
Step 2: Navigating the iFont App
Let's take a look at what's inside the App and how you can use it to add fonts to your iOS device.
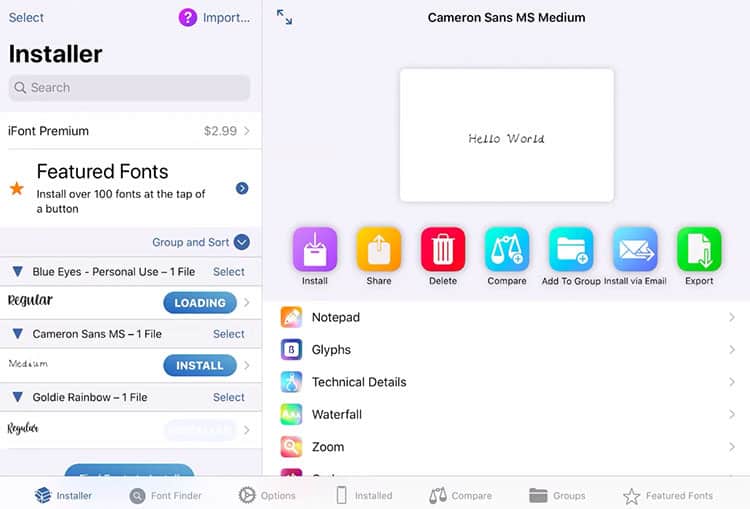
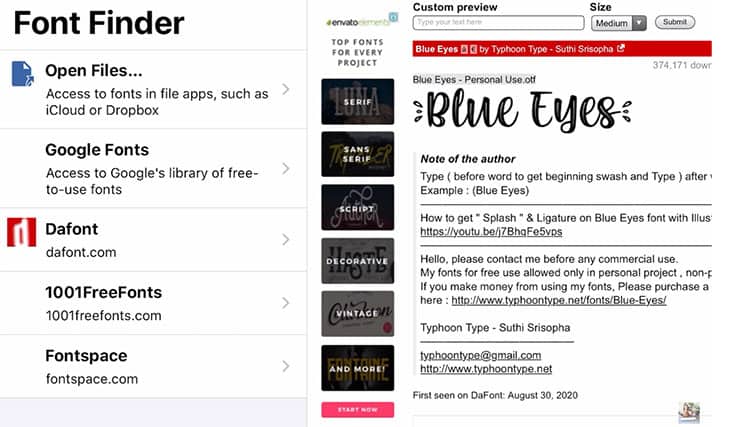
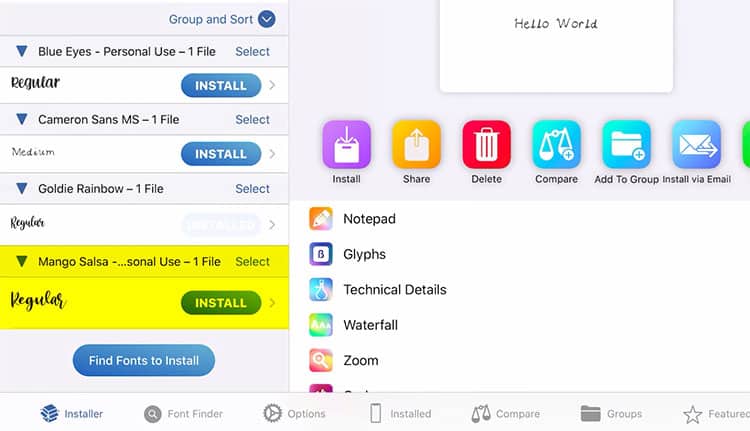
- Once downloaded, find the new app icon. Tap the iFont icon to open the app. Here is what the inside looks like.
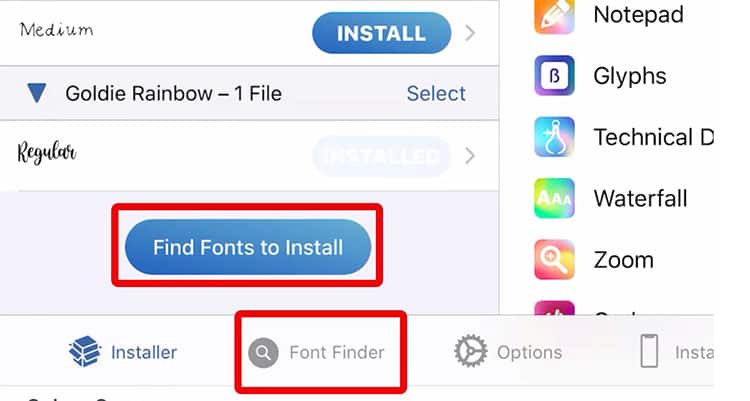
- To search for fonts, tap on the Font Finder.
- Tap Find Fonts to Install.
- You can see a list of the most popular font sites. Tap on the site that you want, I chose dafont.com in this example.
Step 3: Downloading and Installing the Font
Using the dafont.com site, we can now search for the font that we want to download and install.
- Search for a font that you want. In this example, I chose from the category Top fonts which will show the popular fonts at the moment.
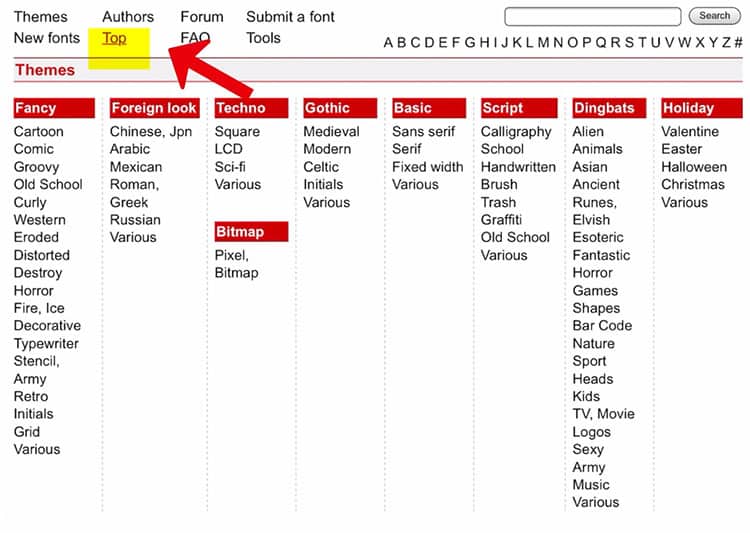
Tip: You can also search fonts by using the Search bar if you know the name of the font that you want to download or just simply tap the Themes and you can browse through the themes for the font that you like.
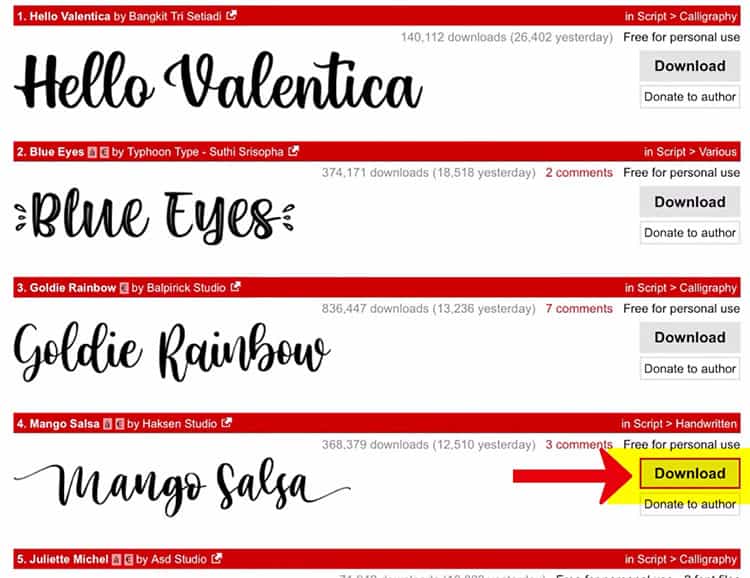
- I chose a font named Mango Salsa and tap on download. It will download a zipped file.
Tip: The app will automatically open up the file for you so you don't need to unzip the downloaded font file.
- Tap Import to iFont.
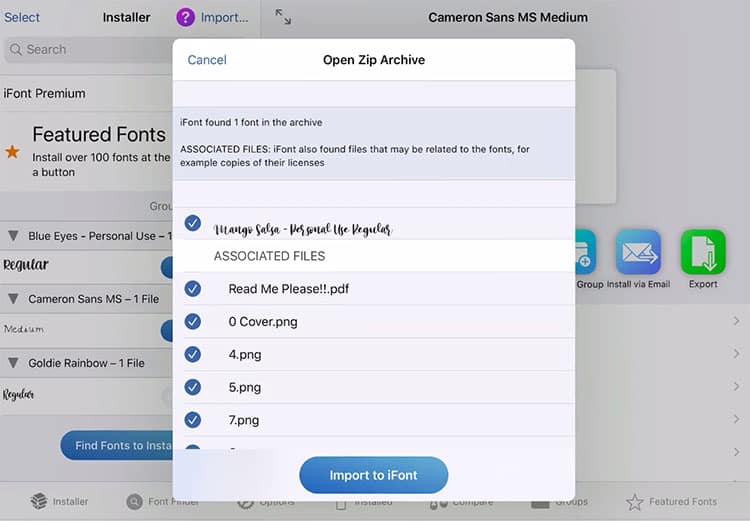
- You will notice a red number 1 in the Installer which means there is 1 downloaded font that needs to be installed.
- Tap on Installer, you will see the list of the fonts downloaded via iFont.

- Look for the Mango Salsa font that you have downloaded. Tap Install located beside the font sample.
- A popup message “This website is trying to download a configuration profile. Do you want to allow this?” will appear. Tap Allow.
- Another popup message “Profile Downloaded” will appear. This tells you that you need to review the profile in the settings and allow to install it. Tap Close and then Done.
Step 4: Install Profile from the Settings
- Go out of your app then tap the settings button on your iPad (this is the gear icon). You will notice an additional option there that says Profile Downloaded, tap on it to install the profile.
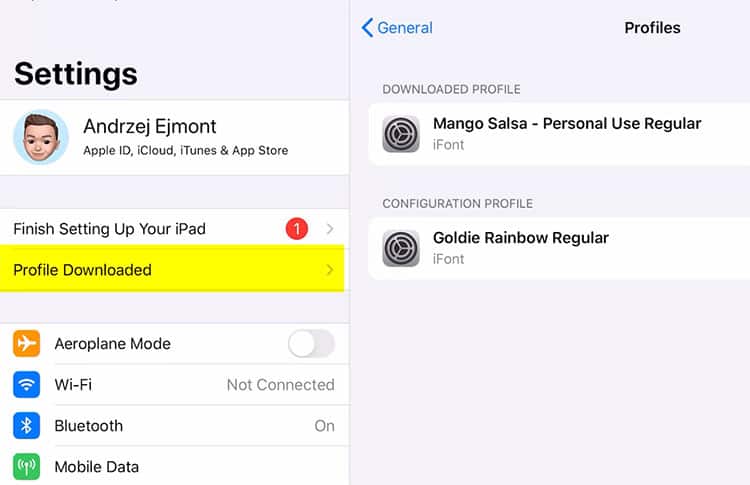
- A popup message “Install Profile” will appear. Tap on install.
Tip: Another popup warning message will appear that says “The profile is not signed”. Just ignore this and continue to tap install then done.
Step 5: Check the Cricut Design Space App
- Open your Cricut Design Space app on your iPad.
- Make sure to sign out first then sign in again to your profile.
Tip: Signing out then signing in again to your Cricut Design Space profile will refresh your app and will pick up those additional fonts that you have installed in your system. By not signing out, you will still pick up the settings that you have before you downloaded and installed the fonts.
- Create a new project.
- Tap Text, then it will show you all the fonts from the Design Space.
- For you to see the new font installed, Tap System on the top (at the middle of Cricut and All). This will show you all the fonts installed on your device.
- You can use the search bar to search for the fonts. Type Mango Salsa on the search bar.
- Tap the Mango Salsa font to use it.
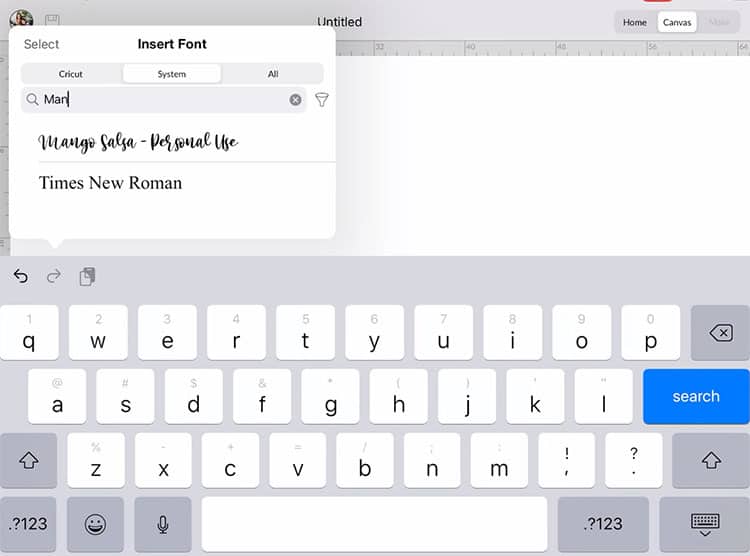
- You can now type a text with a Mango Salsa font that you have downloaded. Edit the text as you desire.
Tip: In a script font (or cursive font), the letters should be closer together to create a nice flowy text but in this case, the letters are separated so you need to manually bring those letters together.
You can either use the Letter Space on Edit Panel and set it to 0 (or negative) or use Ungroup from the Action Panel to ungroup the text to move the letters one by one freely.
For more info on how to do this (plus LOADS of other step-by-step tutorials), see our incredibly popular Cricut Design Space Book.
- Tap Weld on the Action Panel to change back the text into 1 layer.
Tip: Make sure that the letters are not too close especially those letters with close counters like A, B, D, O, P, Q, R, a, b, d, e, g, o, p, and q because the close counter will be filled in black if the letters are too close.
If this happens, just click on Undo then move the letters a little bit further away then click on Weld again.
Here is another way to download fonts on your iPad if you wish to download font from sites not included in the Font Finder on iFont App.
Step 1: How to Download Fonts From Other Websites That Are Not Listed on iFont
- Go to the website URL that you want to download your font. I use thehungryjpeg.com for this example.
- Choose the font that you want to download and download it to you iOS device.
- To check your downloads, go to Files (App with a blue folder) on your iPad/iPhone. All downloads you did to your iPhone or iPad go to this Files folder.
- On the left side, you will see the Downloads section where all your downloads are going and on the right side you can see the downloaded folder but it is in the zipped format.

- In order to unzip, you need to click it and hold it. Go to the bottom part and tap Decompress.
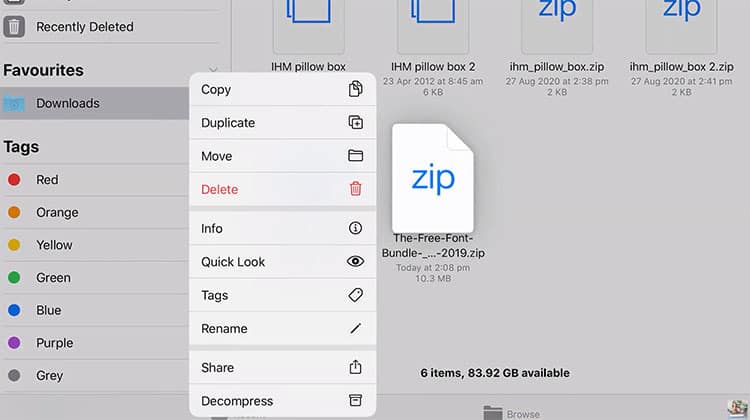
- It will create another folder where you can see the files or fonts that need to be installed.
Step 2: Install Fonts Downloaded
- Go back to the iFont app to install the downloaded fonts.
- Tap the Font Finder.
- This time, I'm opening the Files folder to search for the downloaded fonts. Choose Open Files.
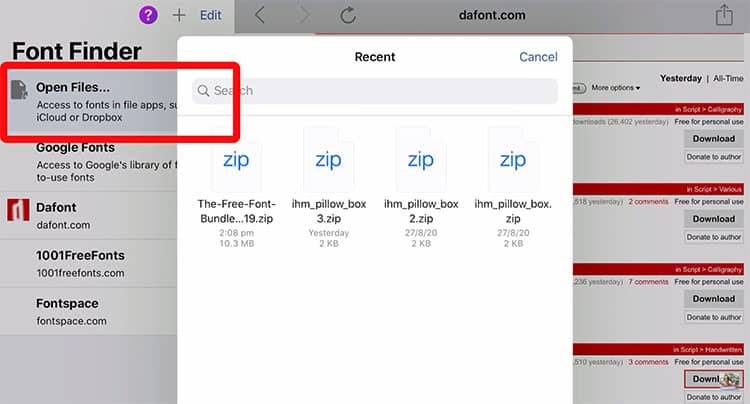
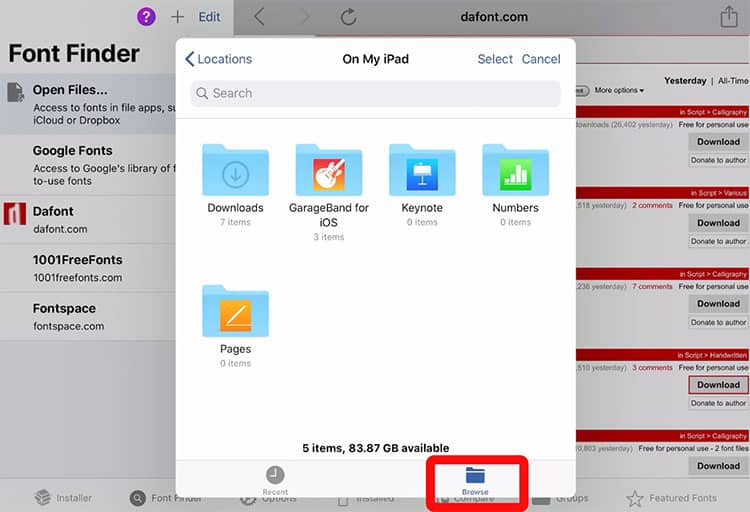
- Tap Browse at the bottom so you can see all the folders.
- Tap the Downloads folder where the unzipped folder for your downloaded font is located.
- There are other folders inside so you need to look for a folder named Fonts, tap it.
- Once it is open, tap the folder named All Fonts.
- From here you can see the folders of the fonts that you have downloaded, choose 1 font that you want to install. In this example, I chose the font Bearley.
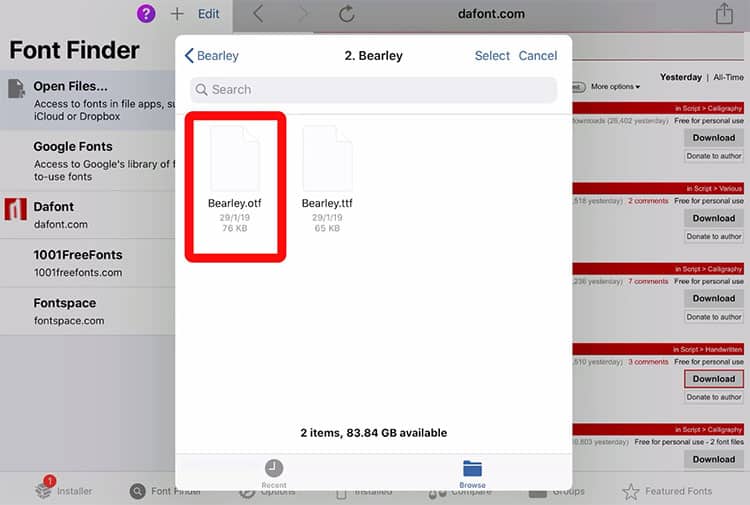
- Proceed in installing the font. Tap on Installer, you will see the list of the fonts downloaded via iFont.
- Look for the Bearly font that you have downloaded. Tap Install located beside the font sample.
- A popup message “This website is trying to download a configuration profile. Do you want to allow this?” will appear. Tap Allow.
- Another popup message “Profile Downloaded” will appear. this tells you that you need to review the profile in the settings and allow to install it. Tap Close and then Done.
- Repeat Step 4 and 5 above then you're done. You have a new font installed on your iPad.
The Complete Guide to Cricut Design Space Book
Now if that was a little hectic to follow in blog post format, you will be happy to know that we have a super handy ‘font cheat sheet' that walks you through everything (with screenshots) in our book: The Complete Guide to Cricut Design Space.
The book covers everything that you can do in Cricut Design Space on an iOS device. All the tutorials are there – it is such a super handy to book to have on hand!
Click here to grab The Complete Guide to Cricut Design Space book.
See how easy it is?
Now remember that you can always get a Cricut Access Subscription if you wanted to use all the fonts on CDS (which is much easier to do), but sometimes it is nice to just use something that caught your eye that is NOT on CDS.
With this tutorial, you will now be able to download your favorite fonts on your IOS devices and use them on Cricut Design Space.
Find more Cricut Blog Posts here.