So you want to make some beautiful pillow boxes? Don't you love how easy they are to create when you have a nifty electronic cutting machine?
Today I will walk you through the steps on how I created some beautiful pillow boxes with my Cricut Maker. You can easily follow the same steps for a Cricut Explore Air 2, Silhouette Cameo or another similar cutting machine.
I have also included a link to a free Cricut box template that you can use for your cutting file and I will show you how to change your settings in order to score one of the layers with your machine.
So let's get started, shall we?!
DIY Pillow Boxes [Full Tutorial and Template]
Find below the steps to follow in order to whip up these adorable pillow gift boxes.
DIY Pillow Box Supply List [Essentials]:
- Box Template (see below)
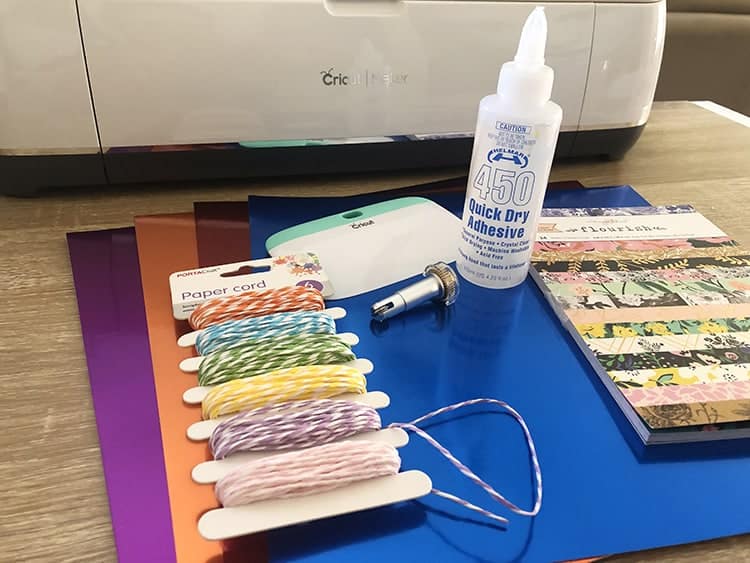
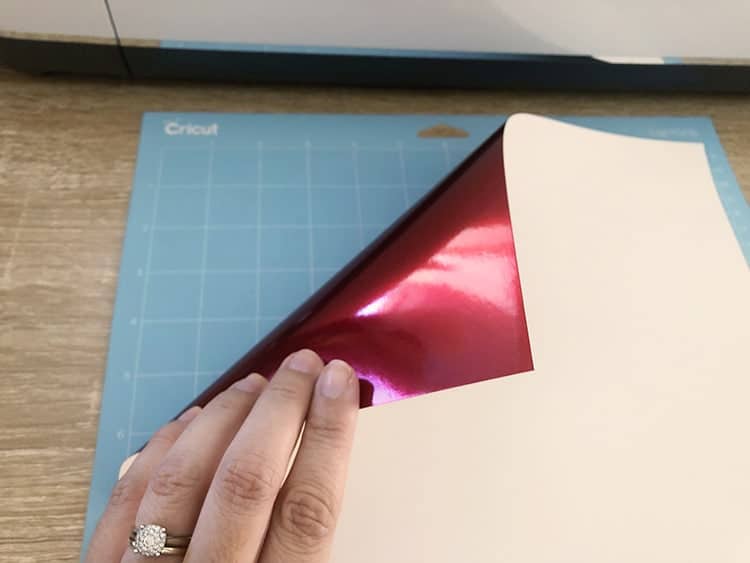
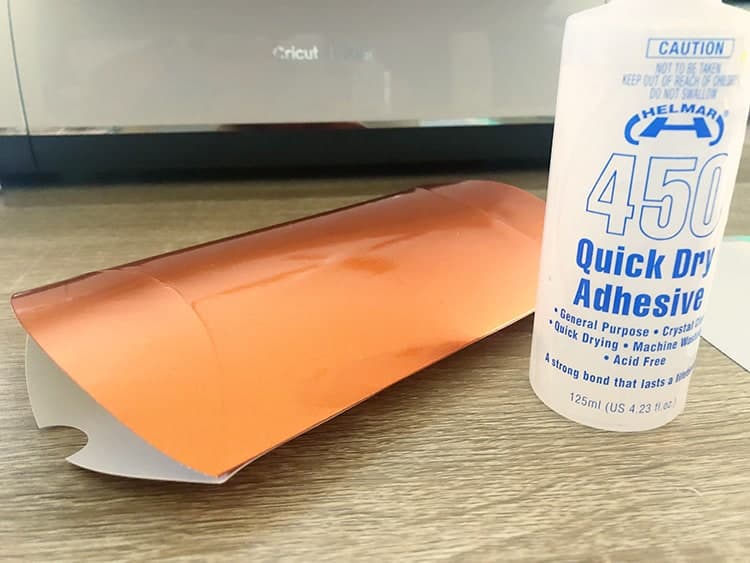
- Cardstock/Poster Board (I used the Cricut Foil Poster Board – sooo pretty!)
- Glue (I love Helmar 450 Quick Dry Adhesive, but you can use a Hot Glue Gun too)
- Patterned Paper (I used Maggie Holmes Flourish)
- Matching Paper Cord
- Cricut XL Scraper
- Cutting Machine such as Cricut Explore Air 2, Cricut Maker (or similar)
- Blue LightGrip Cutting Mat
- Cricut Scoring Wheel or Cricut Scoring Stylus
Grab the Pillow Box Template:
Grab your FREE Cricut Pillow Box Template by Bird's Cards.
How to Prepare and Cut your Cricut Pillow Box Template
Upload the template into Cricut Design Space.
Resize the pillow box. You can either make it smaller to have a small pillow box perfect for small gifts or enlarge it to make a large pillow box.
I'm filling my box up with rolled up dollars, so I wanted to make mine slightly larger, so that I could fit a small card as well.
I resized mine to 7.5″ in width.
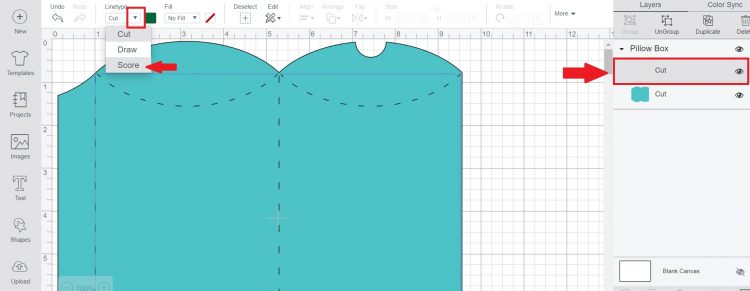
Step 1: Change the Top Layer to Score
You will notice that you have two layers on your mat. Currently, both layers are set to “cut”, but we need to change the dashed line template to “score” instead.
When you ask Cricut to “score” you are essentially asking it to created indented lines in your card which makes folding so much easier!
To change the layer to score, click on the top layer, next change to “Score” on the drop-down menu under “Linetype”.
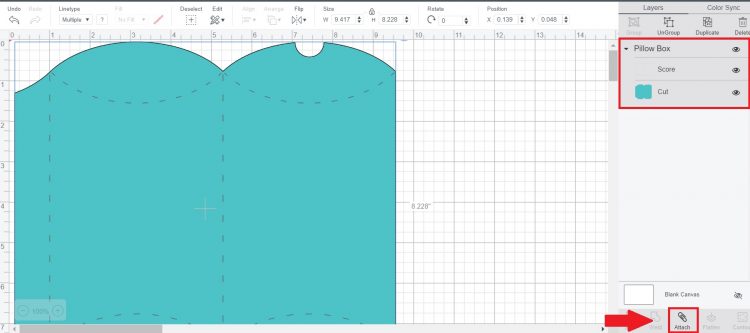
Step 2: Attach the Two Layers Together
Because we want the Cricut Software to see these two layers are separate but yet one object, we want to use the “attach” function.
This means that the machine will be able to cut and score this template as a single image rather than two separate layers.
If you don't use the attach option, the software will rearrange your layers on your mat according to what saves the most amount of space. This causes problems because your score lines might end up on the wrong spots on your template.
Go ahead and select both layers and then click the “Attach” button on the bottom right of your screen.
Step 3: Let's Cut the Box
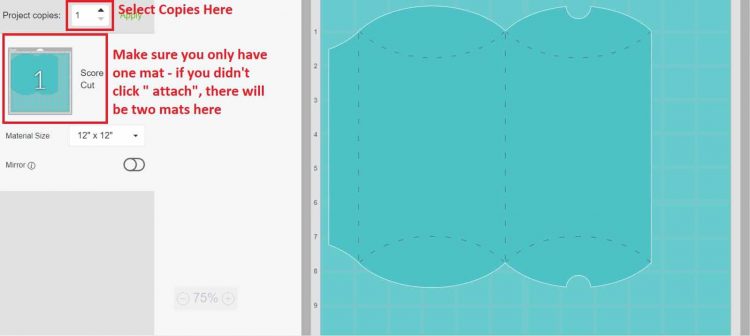
Click the ‘Make It‘ green button on the top right section of the design space.
Now important to note that there should only be ONE mat on the left-hand side here. Because we chose to attach the layers, the software knows that we want to do two things to one image – score and then cut.
If you have two mats here – you need to go back and attach those layers together first.
You can also set the number of copies you wish to cut on the left-hand side as well.
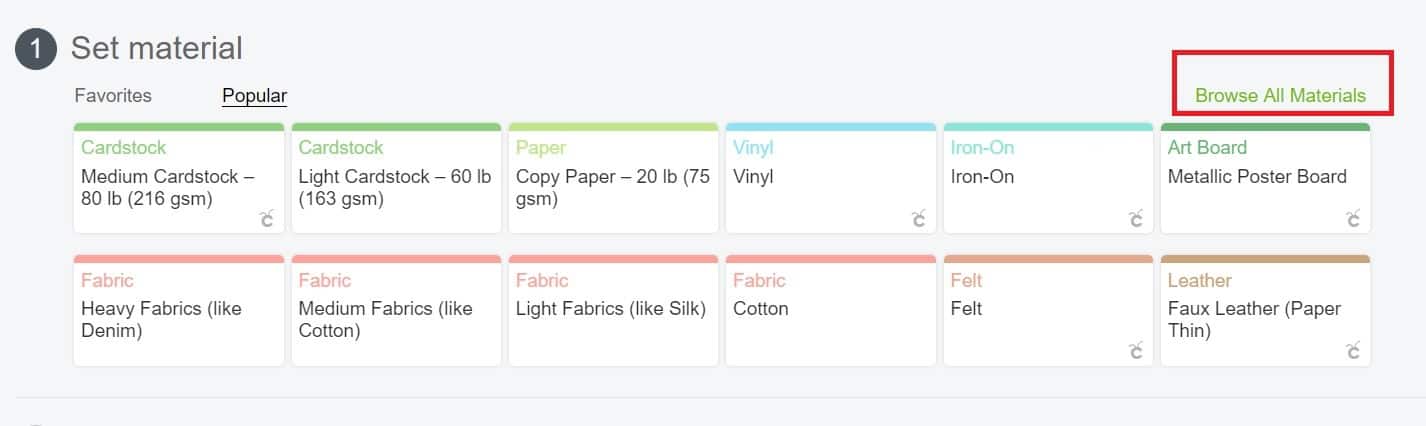
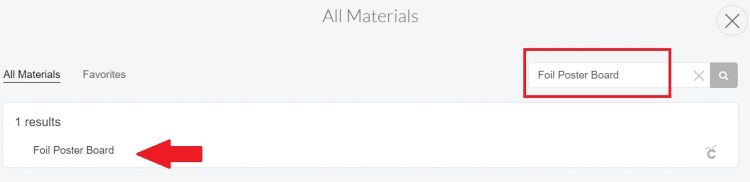
Next, select your material. If you are using cardstock, you should find your option on the first screen. If like me you are working with the pretty Cricut Foil Poster Board, you will need to click on “Browse All Materials“.
Type “Foil Poster Board” in the search box and simply click on the option that comes up.
We are nearly there – hang tight.
Next, we need to make sure that we are using the correct tools. Cardstock should be cut on the Green StandardGrip mat. For Foil Poster Board I HIGHLY recommend you use the Blue LightGrip Mat.
I also recommend that you place the poster board shiny side down, so that the scoring lines happen on the back.
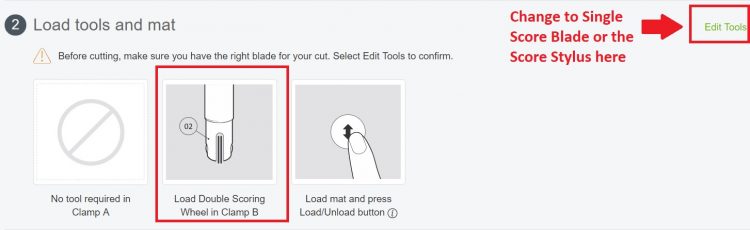
Lastly, ensure that the software has selected the right blades. Cricut Design Space suggested I use the Cricut Double Scoring Wheel – but I don't have one, so I simply clicked on “Edit Tools” and selected the “Single Scoring Wheel” from the options.
If you don't have the scoring wheel, you can also choose to use the “Scoring Stylus” here.
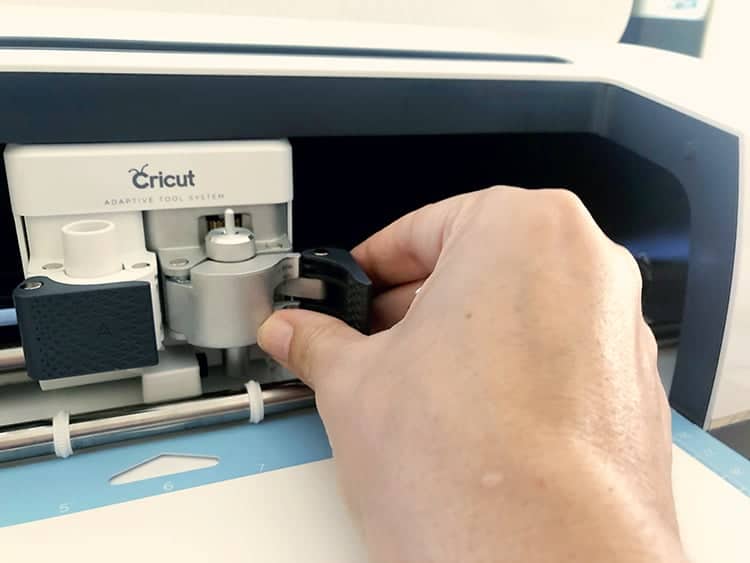
Step 4: Changing the Blades on the Cricut
Next, you will see that the software will instruct you to load up the scoring wheel into your Cricut Machine.
To do so, simply open the clamp on your “B” accessory and remove the current blade. Pop the scoring wheel into the spot and simply close the clamp again.
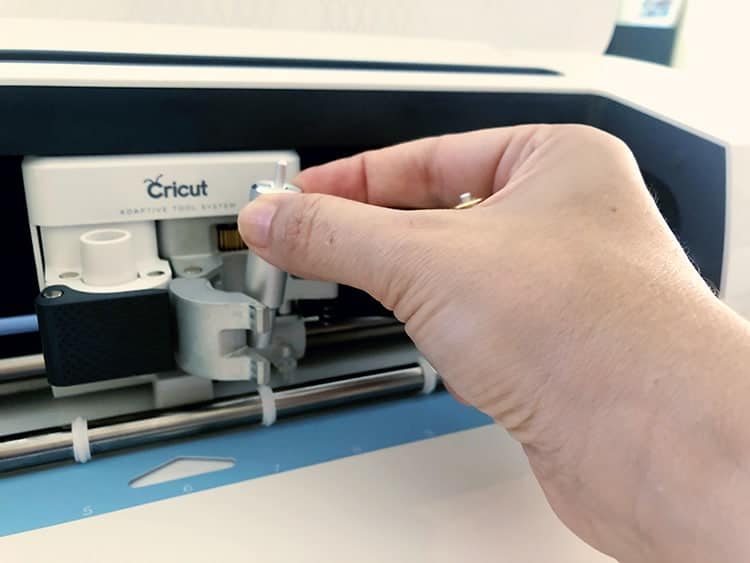

Once the machine has scored the card, it will stop and instruct you to replace the scoring wheel with the fine cut blade. To do so simply repeat the steps above.
How to Make a Pillow Box [Step-by-Step Tutorial]
Find below the step-by-step instructions on how to fold and decorate your pillow gift box.
Step 1:
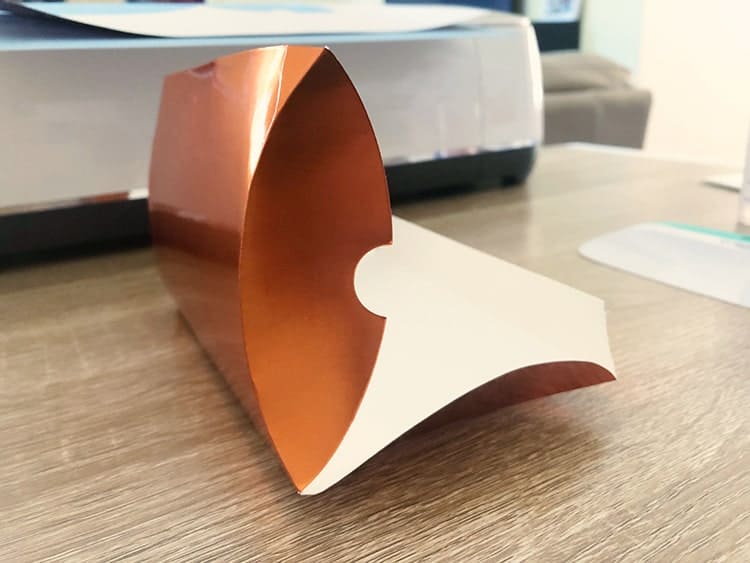
Carefully lift up your cut-out of the box from your Cricut Mat.

You should be able to see the score dash lines. Carefully fold along these lines. I use the Cricut XL Scraper to smooth down my folds. I also like folding along each score before I start glueing.

Step 2:
Use some strong tacky glue such as a hot glue gun or Helmar 450 Quick Dry Adhesive and glue along the seam fold of your box. Give it a few seconds to set and dry.
Step 3:
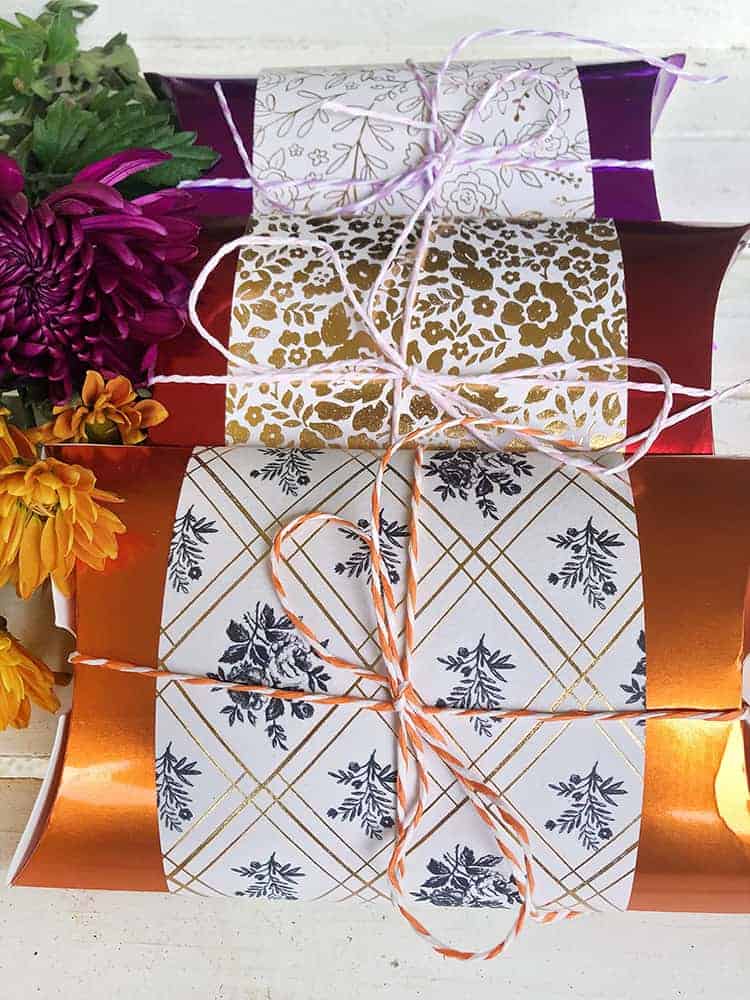
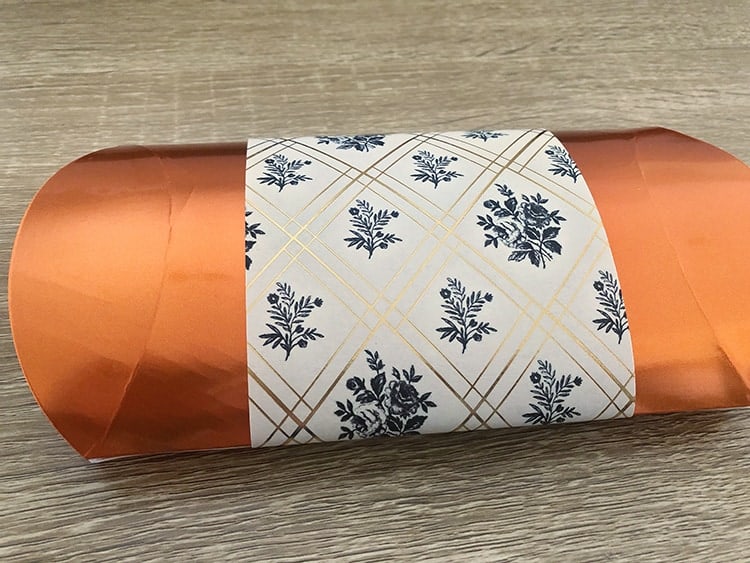
Cut your patterned paper to suit the size of the box. If you resized your box to 7.5″ like mine, you can go ahead and cut your paper to 4″ x 9″.
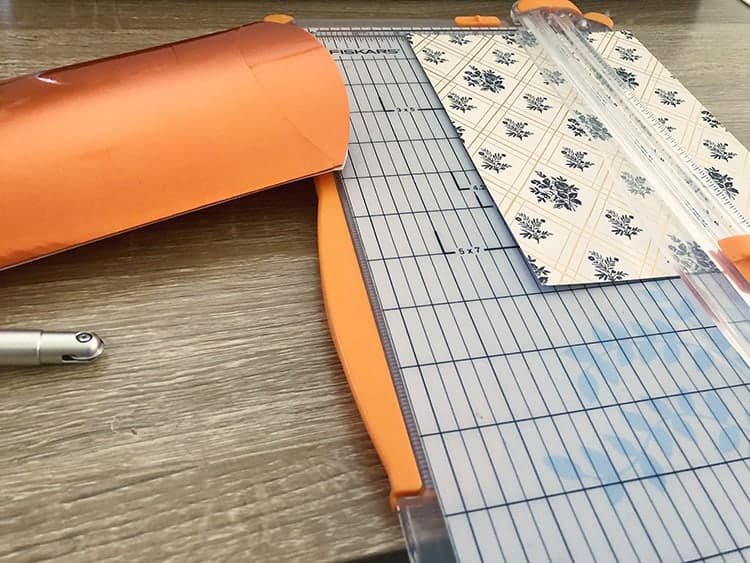
Simply use the same glue to adhere this around your box.
Step 4:
Close one side of your pillow box.
Fill your box with the gifts. This could be a gift card, cute sweets, cash, themed gifts etc. My box is for a wedding and I'm filling it with foreign currency so that they can use the cash on their honeymoon.
Close the other end of your box once you are done.
Step 5:

Next, use your paper cord and wrap it around the box and tie it up in the front with a bow. This will help to ensure that the flaps of your box stay closed till gift opening time.
Gifts to Pop in the Pillow Boxes
You can use these gorgeous pillow boxes for so many different gifts. Here are some ideas:
- I'm rolling up foreign currency to pop in the box for their honeymoon
- You could add some gift vouchers or gift cards
- Fancy chocolates
- Themed lollies (such as for Halloween)
- Make a large box for baby onesies
- Roll up some custom vinyl socks and pop them up
- Some bath salts maybe?
- A collection of nice smelling lip balms for little girls
Help me with some ideas, what are you planning on popping inside your pillow box?
Ps. Hop over to our Cricut Blog where you can find loads more tutorials and how-to posts. If you want to keep creating with cardstock, you can also find a list of Cricut cardstock crafts here.