Why it is so hard to find a great apron? If you are like me, you don't want a boring white or black apron.
Us crafters – we like things to be beautiful, and we love things that are unique. And what better way to make an apron unique than by popping a beautiful vinyl decal on it?
So if you want to create your very own custom kitchen apron, then we have the perfect HTV apron tutorial to share with you all.
You will need a vinyl cutting machine (either Cricut, Silhouette, or similar) in order to follow along with the steps of this tutorial.
You will also need an iron, EasyPress, or heat press as well.
DIY Custom HTV Kitchen Apron with a Cricut Maker

Find below the steps to follow in order to create this cheeky iron-on kitchen apron.
Supply List:
- 1 x Blank Kitchen Apron
- 1 x EasyWeed White HTV Vinyl(or similar HTV Vinyl)
- 1 x EasyWeed Gold HTV Vinyl(or similar HTV Vinyl)
- 1 x Weeding Tool
- 1 x EasyPress Heat Press (or your choice of vinyl heat press machine)
- 1 x Vinyl Cutting Machine (I use the Cricut Maker Machine)
- 1 x Watch Me Whip SVG
Preparing Your Cut File for Cutting
Find below the step-by-step instructions on how to prepare your Kitchen Apron SVG for cutting.
1. Prepping your Cut File
Step 1: Download the Watch me Whip SVG file
Step 2: Upload your file to Cricut Design Space.
Tip: In order to tell Cricut that you want to cut different color vinyl, you simply need to color your vinyl and group the parts of the image that you wish to cut from the same color.
Step 3: Next measure the size of your apron and resize your design to suit the apron size. When you are happy click on “Make It“.
Step 4: Select “Mirror“.
Step 5: Choose the right material from the list.
I used Easyweed HTV, so I selected “Iron-On” for my material.
Step 6: Place your HTV vinyl with the shiny side face down on your green cutting mat, load the mat and cut away.
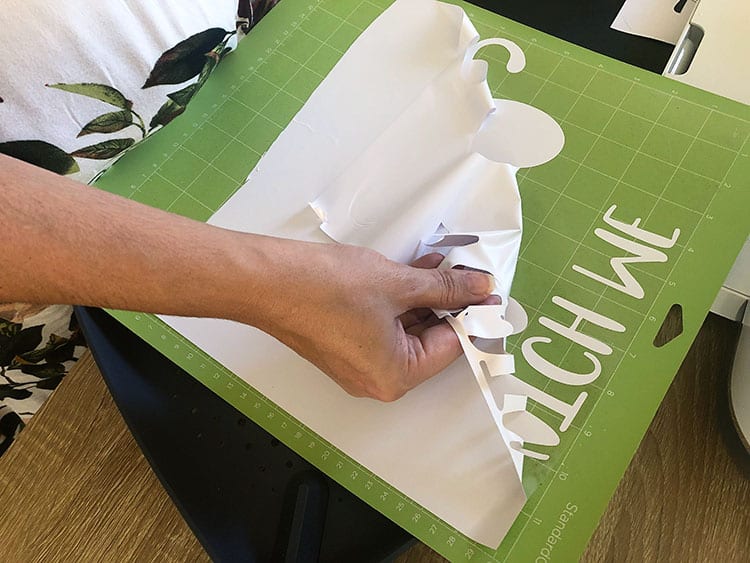
Weeding your Iron-On Vinyl for your DIY Vinyl Apron
Step 1: Next use your weeding tool and pick up the corner of the vinyl. Use your hands to peel away the excess vinyl. EasyWeed is pretty easy to work with, but always go slowly around the curvy letters.
Tip: You can learn more about how to weed vinyl here.
Step 2: Use the weeding tools and carefully weed away the inside pieces of the letters, and also of the whisk.
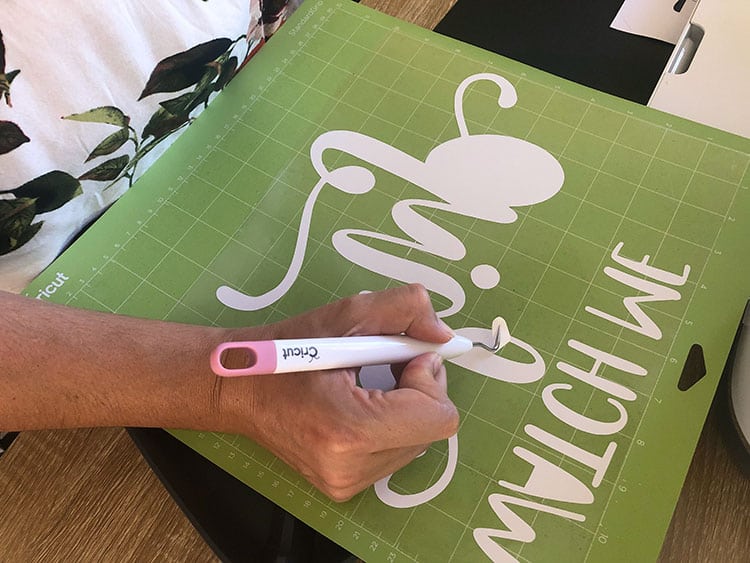
You should now have your layers ready to press.
How to Press the Vinyl Layers onto the Apron
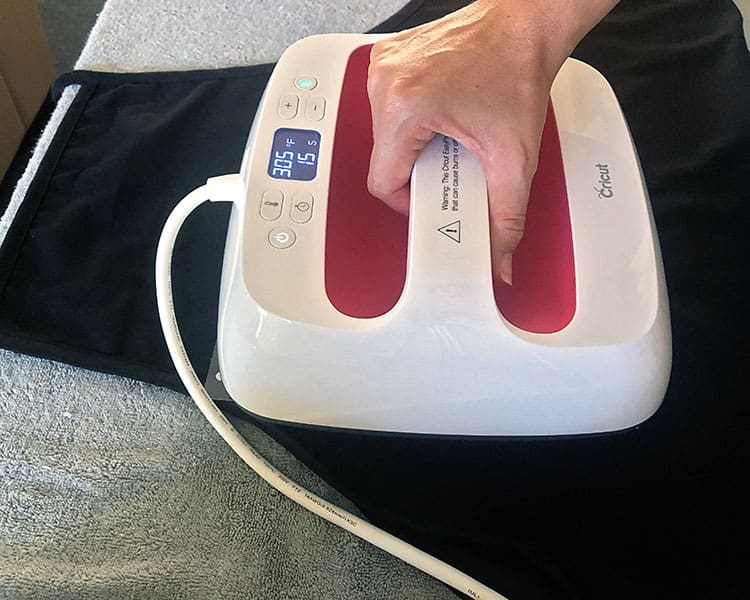
Step 1: Start preheating your Cricut EasyPress 2. You will need to check the settings for the type of vinyl you used. If you are using Siser EasyWeed vinyl like me, you can go ahead and set your temperature to 305°F/150°C and your set your timer to 10 sec.
Step 3: Pop your apron on either a heat mat or on a folder towel.
Step 4: Quickly give your apron a pre-press for around 2-3 sec. This will remove wrinkles and moisture.
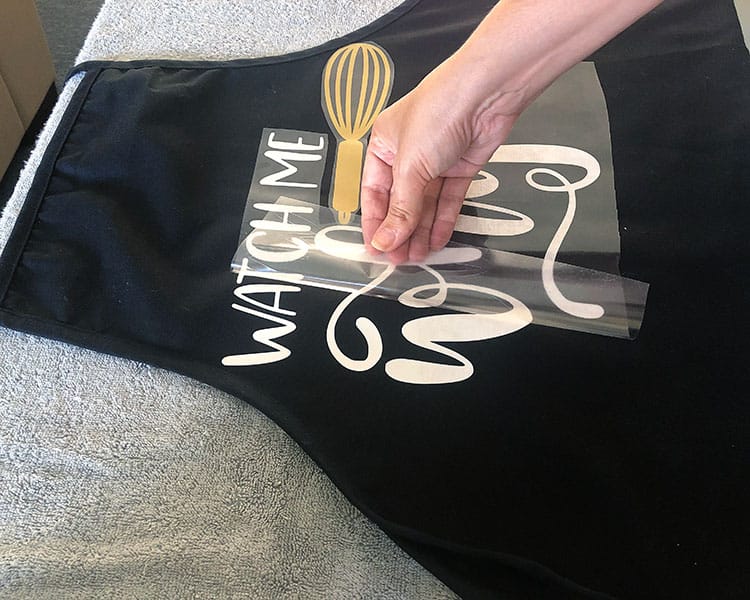
Step 5: Cut around your whisk so that you can apply both layers in one go.
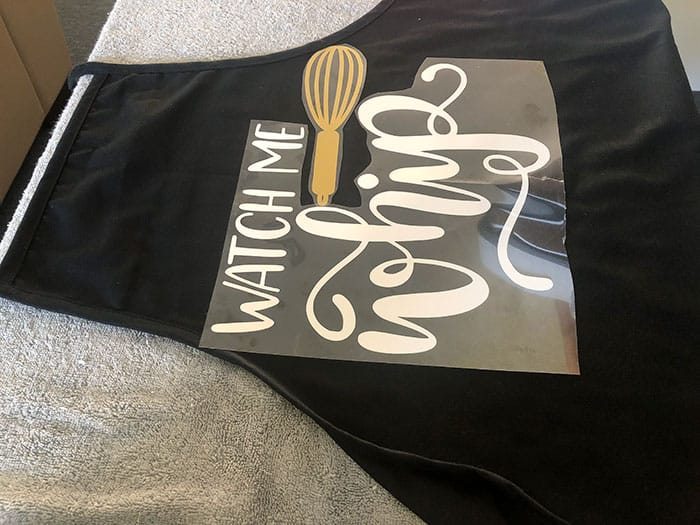
Step 6: Press for 10-15 sec with medium pressure.
Step 6: EasyWeed is super easy to work with and you can peel away the carrier sheets whilst it is either hot or cold.
And there you have your own custom kitchen apron. I am wearing the one I made, but they are also brilliant for gift-giving or selling on Etsy as well.
Remember if you made a mistake, you can always remove your HTV and simply start again.
If you are after more ideas of what to create for Valentine's Day, why check out our Cricut Valentine ideas here?
Happy Crafting
Jolene xxx