Thanksgiving is right around the corner, time for turkey, stuffing and our favorite… pumpkin pie!
Find yourself looking for the perfect holiday sign this Thanksgiving that will be sure to get a giggle from your guests?
Well look no more as today we will teach you how to make your very own “Gobble ‘til you wobble,” wooden sign. Above all this design comes with a beautiful pop of autumn colors.
Now, of course, you can follow the exact same steps to make your Cricut wood sign for any occasion, it could be for a season, a holiday or even just a simple welcome sign. The potentials are limitless. Or if you prefer you can follow along to create your very own Thanksgiving sign.
Below is the list of supplies you will need.
DIY Cricut Wood Sign for Thanksgiving [or Any Occasion]
Find below the steps to follow in order to create this cheeky Thanksgiving Wooden Sign.
Supply List:
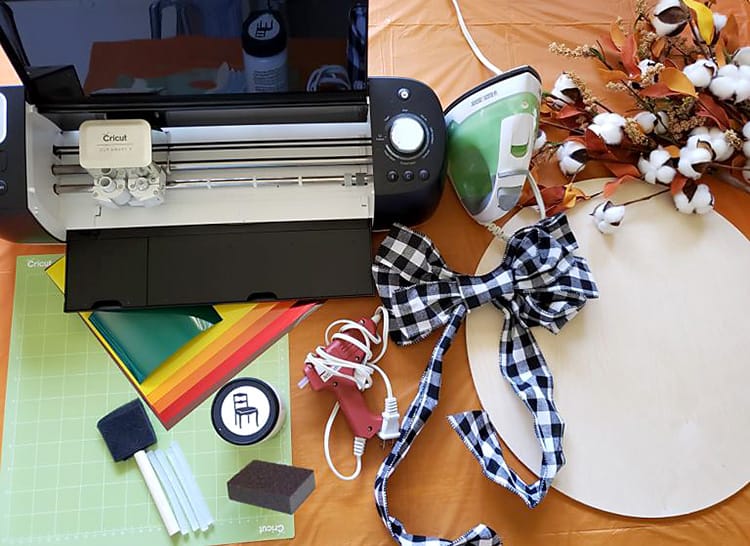
- 17” Wooden circle
- Sand block
- White chalk paint
- Foam sponge paintbrush with wooden handle
- Cricut Cutting Machine (I'm using the Explore Air 2)
- StandardGrip cutting mat
- Iron-On Vinyl (I'm using black, brown, dark orange, yellow, red, white, green and orange)
- An assortment of autumn leaves
- Black and white plaid bow
- 1x Glue gun
- Glue gun sticks
- Iron or EasyPress 2
Step 1: Preparing the Wood Round
Find below the step-by-step instructions on how to prepare your wood sign.
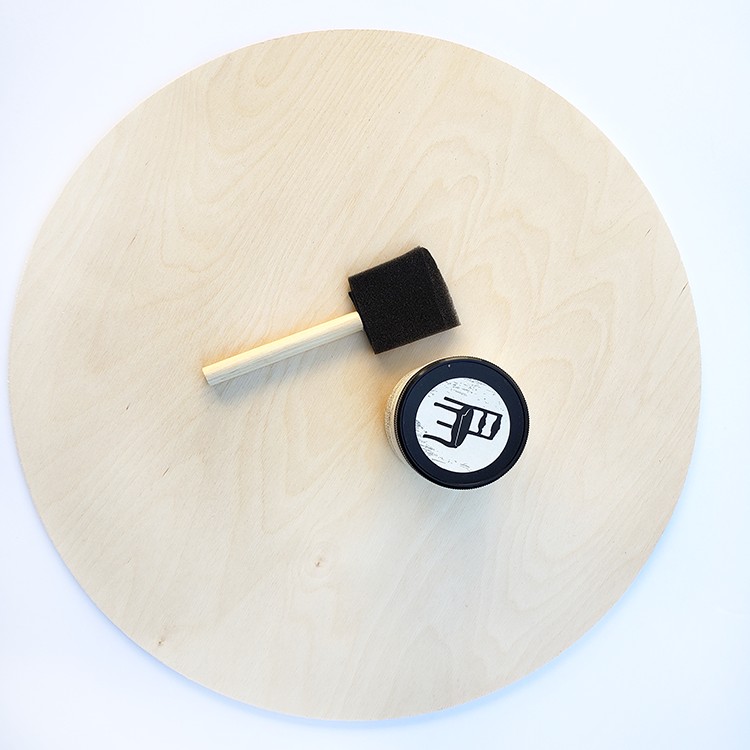
Prior to ironing on and adding the leaves or bow you must first paint the wood round.
- Begin by sanding down the wood circle. I love using a sanding block rather than sandpaper.
- Place a layer of newspaper, construction paper or table cover underneath the wood round, as painting can get messy.
- Begin painting the wood round and going over it with two coats of paint. I am using a gorgeous matte chalk paint.
- Let the paint dry for at least 30 minutes. I suggest leaving it overnight.
Step 2: Preparing Your Cut File
Find below the step-by-step instructions on how to prepare your SVG for cutting.

- Download the Thanksgiving turkey image or click here to open it up straight in Cricut Design Space.
- Upload your file to the Cricut space.
Tip: In order to tell Cricut that you want to cut different color vinyl, you simply need to color your vinyl and group the parts of the image that you wish to cut from the same color.
- Next, measure the size of your wood round and resize your design to suit the sign. When you are happy click on “Make It.”
- Select “Mirror.”
- Select “iron-on” as the material to cut.
- Place your iron-on vinyl with the shiny side face down on your green cutting mat, load the mat and cut away.
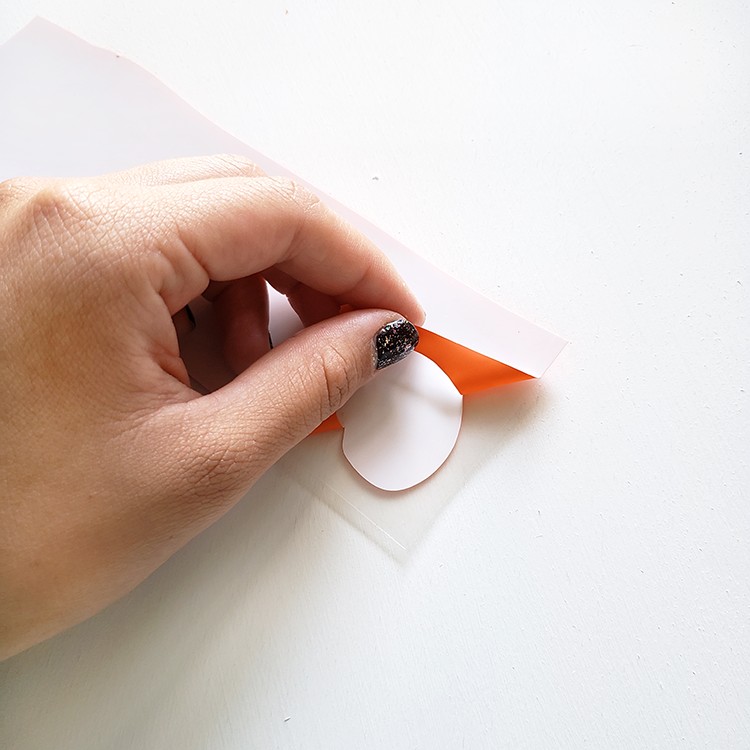
- Next, use your weeding tool and pick up the corner of the vinyl. Use your hands to peel away the excess vinyl. Go slowly around the curvy letters. Don’t forget to week out the inside pieces. (Here is a great post on how to weed.)
Step 3: Press the Vinyl Layers on to the Wood Round
Now that your image is ready to go, it is time to heat up the iron or EasyPress.
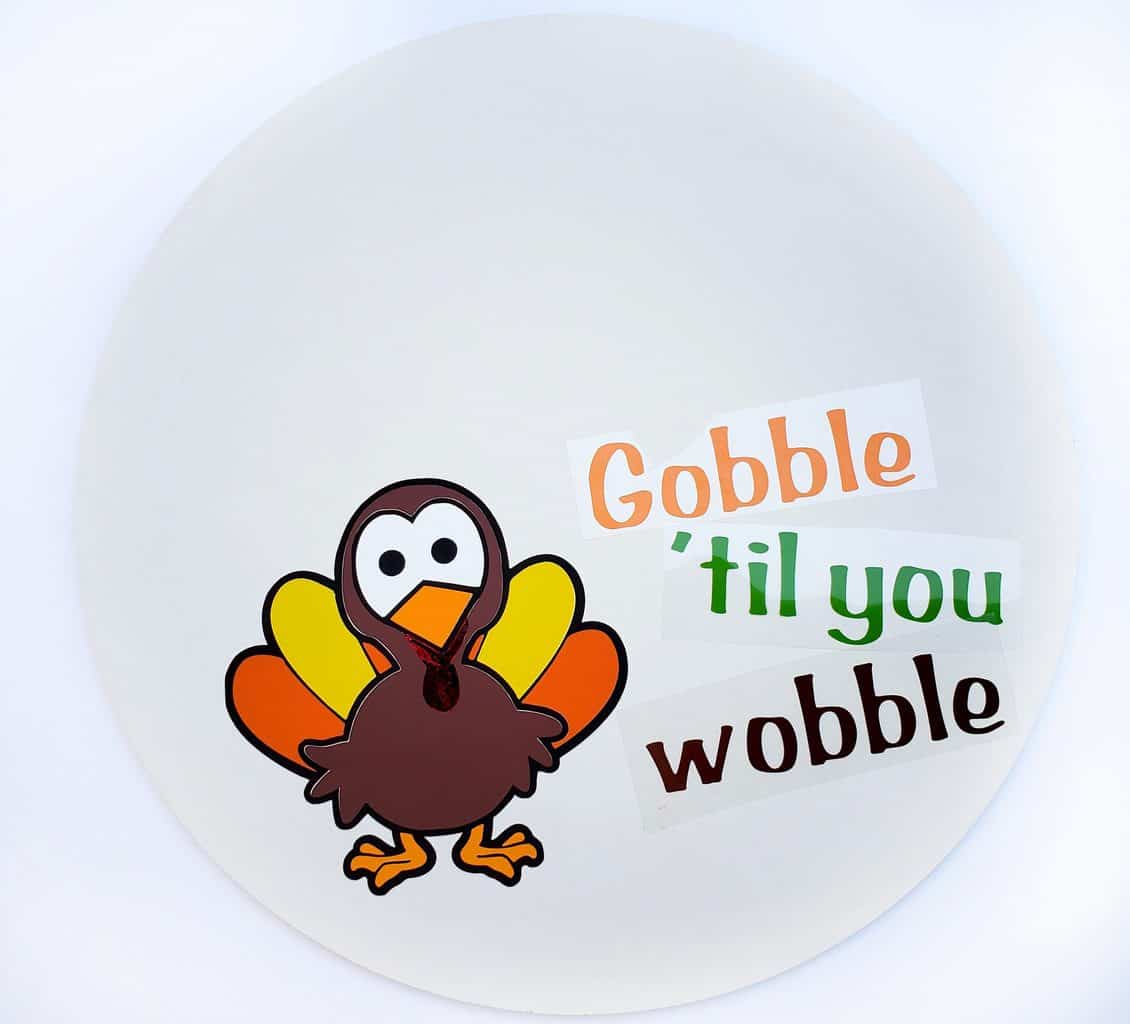
- Start by warming up your iron or EasyPress. If you are using an iron use a low setting. If you are using the EasyPress make sure to follow the time and temperature recommendations from the vinyl brand you are using.
- Place your wood round on a level table.
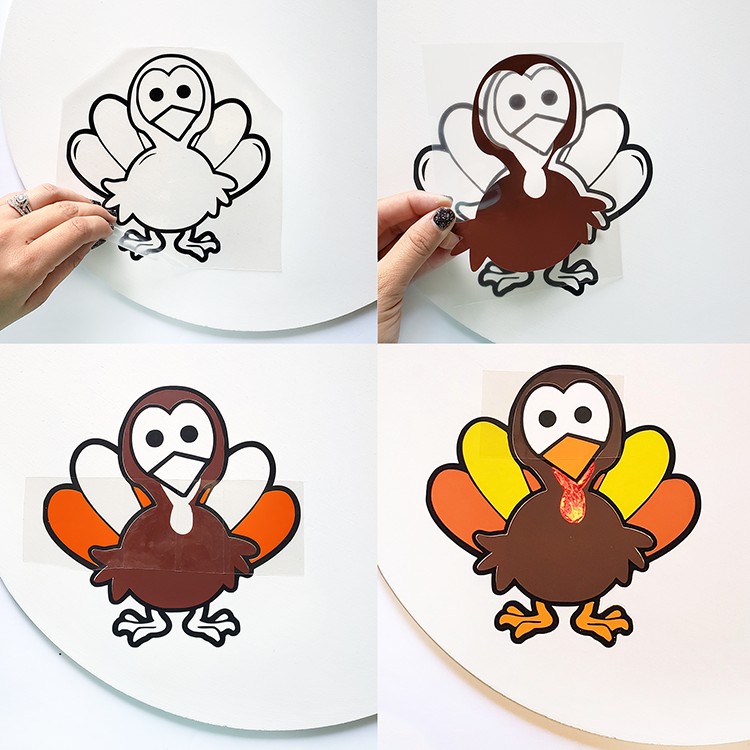
- Begin the project by placing the Turkey outline in a position you are satisfied with and iron/press on the first layer.
Tip: If you are using an iron, place a folded tissue paper over the design while ironing.
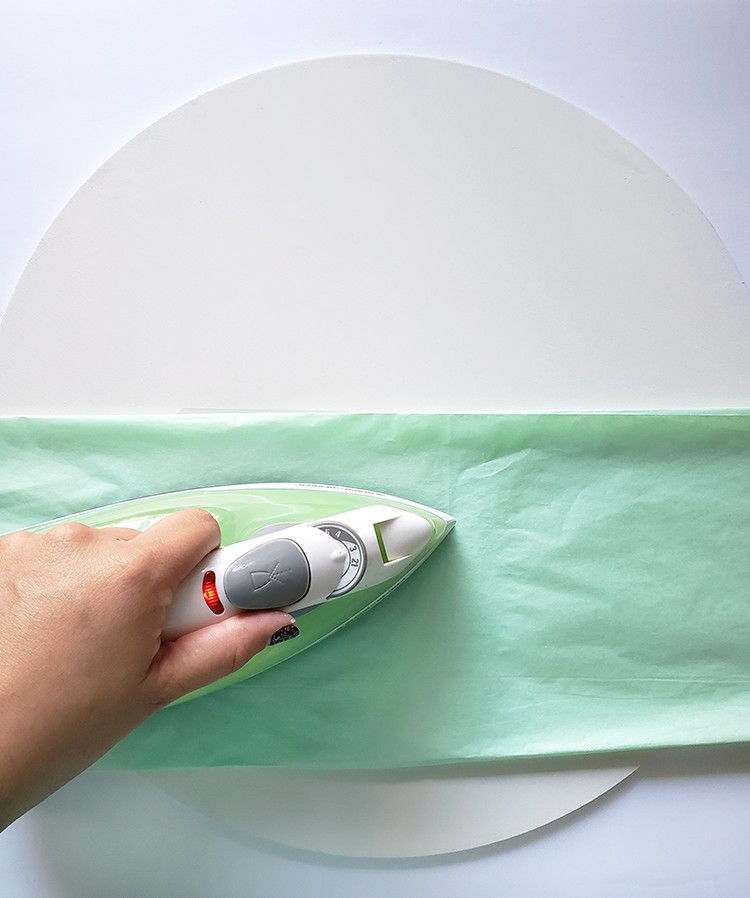
- After about 30 seconds, you may slowly remove the carrier sheet while it is cold.
- Continue with the project by slowly ironing on each layer of color for the turkey in the following order: body (brown), feathers (dark orange, then yellow), beak and feet (orange), wattle (red) and eyes (white).
- Once you are satisfied with your turkey, move on to the verbiage, placing the words in the location you desire and iron on.
Want to use Flock HTV for a Thanksgiving? Why not create our Cricut Thanksgiving Shirt or sweater by following our detailed tutorial.
Step 4: Preparing the Leaf and Bow Assortment
As a final touch, you may want to add some holiday leaves and bow to really make your sign pop. For this project, we purchased an assortment of cotton and orange leaves.
- Stretch out the assortment and separate the assortment into categories.
Tip: By separating the assortment, it will be easier for you to customize what you want from what you do not.
- Once separated, begin to group the items you want such as I have, in where I removed the cotton balls and kept the rest.
- Once satisfied, begin to hot glue gun the pieces on your wood round, slowly pressing the items directly on the sign to make sure they stick.
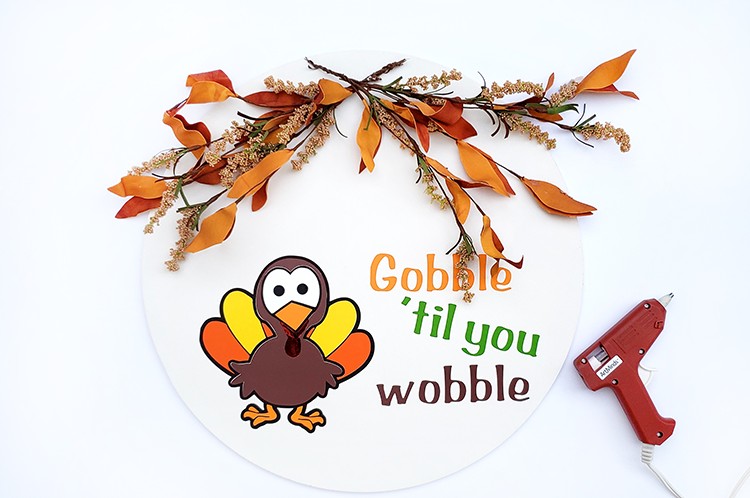
- Last, open up the bow and glue it to the middle of the sign or where you desire.

Your work is finished! I hope you enjoyed creating your very own “Gobble ‘til you wobble” Thanksgiving sign.
After more sign inspiration and would like some further reading recommendations?
- Here is our blog post full of beautiful Cricut signs that you can whip up.
- Check out our Cricut wood craft project ideas that you can create.
WANT TO REMEMBER THIS?
SAVE THE DIY CRICUT WOOD SIGN TUTORIAL TO YOUR FAVORITE PINTEREST BOARD!

This is really cool! And it seems like the perfect arts and crafts project for my kids! Thank you for the helpful break down, keep em coming!
It is definitely possible to do with the kids – they will have loads of fun! Would love to see your sign if you wanted to share it with us over at Facebook: https://www.facebook.com/thebestvinylcutters