We all know about the extensive list of materials that the Cricut Maker can cut, there are over 100+ materials!
But today I wanted to share a list of 10 materials that you might not have thought about cutting with your Cricut Maker.
Surprise Materials that the Cricut Maker Can Cut

Here are 10 ‘surprise' materials that you can cut with your Maker Cutting Machine.
1. Adhesive Backed Cork

Did you know that you can cut cork with your Cricut Maker? Whilst you can cut cork that doesn't have a backing, I find that it is MUCH EASIER working with adhesive-backed cork.
Also, try to find a cork that has a fine grain (this will help keep the edges smoother).
Use your Standard Grip Mat. Place the cork onto the mat with the backing facing up and the cork facing down. Use some masking tape to keep the cork in place.
You might have to play with the cutting settings a bit, in order to get the perfect cut. As a starting point, choose the 1.6mm Cork Preset and up the pressure to around 185.
Tip: Keep your designs super simple. Think labels or large flowers etc.
Where to find adhesive cork: You can find some pressure-sensitive, self-adhesive cork sheets on Amazon here.
2. Wood

We all know that the Cricut Maker Cutter is perfect for cutting fabric, but did you know it also has the ability to cut thick materials such as wood?
In order to cut wood, you will need to purchase the Cricut Knife Blade (read more about the Cricut Knife Blade here), as well as the StrongGrip Mat.
You can cut Balsa and Basswood, as well as heavy chipboard. You can easily create some puzzles or cut some pieces to build 3D wood models.
3. Plastic

You can cut a range of plastics with your Maker. It can cut through a plastic canvas, plastic packaging as well as Makers Plastic. You can also cut a special type of plastic that you can mold with heat (I forget the name of it).
The tricky bit is working out which material to select in Design Space because there is no plastic setting.
You could start by trying the Heavy Chipboard setting for the thicker plastics and then pause the cutter every now and then to see how it is managing the cut.
Increase pressure if you see that it hasn't cut all the way through.
3. Metal
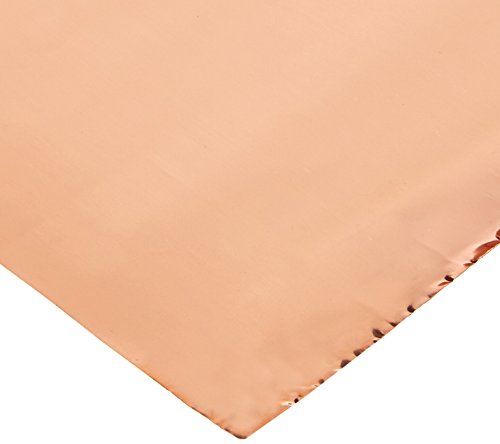
You can also cut some thin metal with the cutting machine. You could cut and score 40 gauge thin copper to make a lovely metal flower box.
To work with this metal, you will need to use the LightGrip Mat (which comes with the Maker Machine in the box) together with the Fine Point Blade (also included in the machine purchase).
I'm not a big fan of working with 40 gauge thin copper as it is a bit delicate and fiddly and you have to be really careful about removing it from the mat, so work slow – don't rush it.
You can grab some 40 gauge thin copper sheets from Amazon here.
4. Burlap

So burlap is a great product to work with as it adds such a lovely texture to your projects.
To cut the burlap, you will need to use your rotary blade (which comes with the machine) with a cut pressure of 3163.
If you don't want your image to fray it will be important to stiffen the burlap with a mixture of glue first.
I love using my stiffened burlap for layered flowers. But Burlap buntings are a great idea too.
Click here to grab some Burlap from Amazon.
5. Crepe Paper

Thanks to the rotary blades' ability to work with thin fabric, you can also get away with cutting lovely thin crepe paper.
You will need to use the LightGrip mat, together with the Rotary Blade. Also, keep in mind that crepe paper is delicate so lift it up slowly and gently from the mat.
I love the softness of crepe paper flowers, but it definitely does require patience.
I love the Lia Griffith range of Crepe Papers. Grab them online here.
6. Leather

Back to using the new Cricut Knife Blade, did you know that you can also cut leather? You can use a variety of thick leather as well.
Think about cutting some leather pieces for flowers, some leather luggage tags, leather journals, leather baby shoes, or maybe some leather earrings – and so much more!
You can find some of our tutorials to help you with leather here:
- Can you Apply HTV on Leather? Click Here to Find Out
- 5 Absolutely Stunning Cricut Leather Projects to Make
- Cutting Leather with the Cricut Maker [Step-by-Step Instructions]
7. Stencil Film

You can even make your own stencils with the Maker Cricut Machine.
Stencils are fun to work with, you can pair them up with paint or spray paint and they work brilliantly on things such as wood for custom signs.
Tip: Use the LightGrip mat with your Stencil Material so that it lifts up easier after cutting.
Click here to grab some great stencil material from Amazon.
8. Craft Foam

Craft foam is great because it is so cheap. Again, if you wish to cut craft foam, you will need to use the Cricut Knife Blade.
You can use craft foam to create die-cuts (great for teachers of young kids for craft time). I also really love working with thin craft foam to make some gorgeous flowers as well.
Here is a great multi-color craft foam pack for super cheap from Amazon.
9. Magnetic Sheets

Next is magnetic sheets. These are great if you wish to turn anything into a magnet.
You could die cut some cardstock alphabet letters and cut the same size letters out of the magnets and with a bit of glue, you have an alphabet set that your child can play with on the fridge whilst you cook.
Ideas are endless.
Why not try out these Silhouette Magnetic Sheets and get started?
10. Shrinky Dinks

And lastly, when last did you hear the word shrinky dinks? What an old-fashioned product, but hey, such a super fun one to play with.
If you don't know what shrinky dinks are, essentially you buy Shrinky film and print out some design onto it. Next, you take a heat source and basically shrink the film down to a small size.
So as an example, let's say you wanted to make a unique brooch. It is easier to create the design on a large scale and then shrink it down (it shrinks about 50%), rather than trying to create something tiny.
So to do this, you will need to get some printable shrinky dink film. Use the print-then-cut feature of the Cricut Maker.
Grab some printable shrinky film online here.
And there you have some material that you might not have thought about cutting with your Cricut Maker.
Now if you are still deciding whether you wish to invest in the machine, I highly recommend that you read through our Cricut Maker review post here. You can also hop over to grab LOADS more info, tutorials, reviews, and guides on all things Cricut.