Wondering how to create personalized Cricut Serving trays with vinyl? These trays are fabulous to theme up your house for special occasions (such as Christmas, Thanksgiving, Easter etc.), but they also make incredible gifts.
I found these gorgeous wooden octagonal-shaped serving boards on Amazon, which just adds to the unique look. And then we went a step further and created an ombre look with the vinyl as well.
Here is the full step by step tutorial.
DIY Personalized Cricut Serving Tray with Vinyl

Find below the steps to follow in order to create this gorgeous ombre winter Cricut Serving Tray. Perfect for Hot Cocoa or S'Mores.
Supply List:
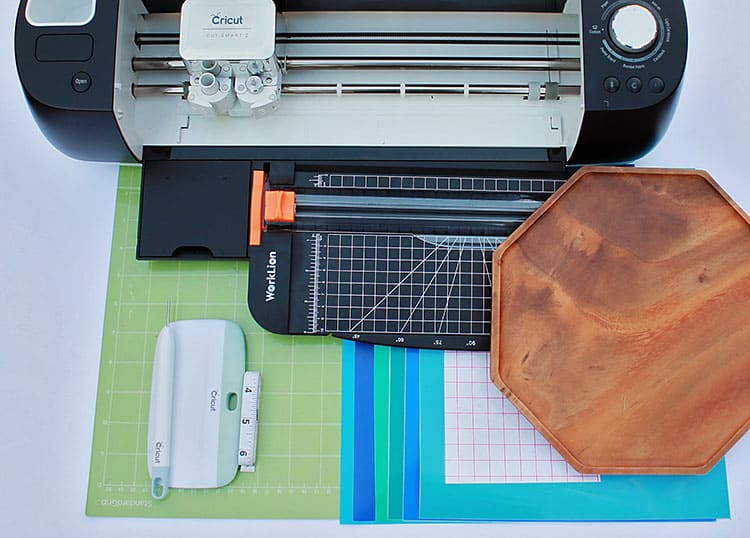
- Cricut Cutting Machine (I used the Explore Air 2)
- StandardGrip Cutting Mat
- An Assortment of Adhesive Vinyl(I used six different shades of blue and green)
- Transfer Tape (I love the YRYM)
- Wooden Tray
- Paper Cutter
- Measuring Tape
- Cricut Weeding Tool
- Cricut Scraper
Step 1: Download and Upload your SVG/JPG to Cricut Design Space
Find below the step-by-step instructions on how to prepare your winter tray JPG for cutting.
Ours will be winter-themed, but you can find whichever SVG/JPG you would like to use. Such as snowflakes or stars!
- Download the winter tray image or any SVG file. If you wish to use our image you can simply right click and save it to your desktop.

- Upload your file to the Cricut space. If you use the FREE JPG file that we are providing as part of this tutorial, then you will first need to upload and remove the background in Cricut Design Space
- Begin by selecting the “Upload” icon, then “Upload Image”
- Next select “Browse” and search for the downloaded file
- Once the file is loaded, select “‘Complex”
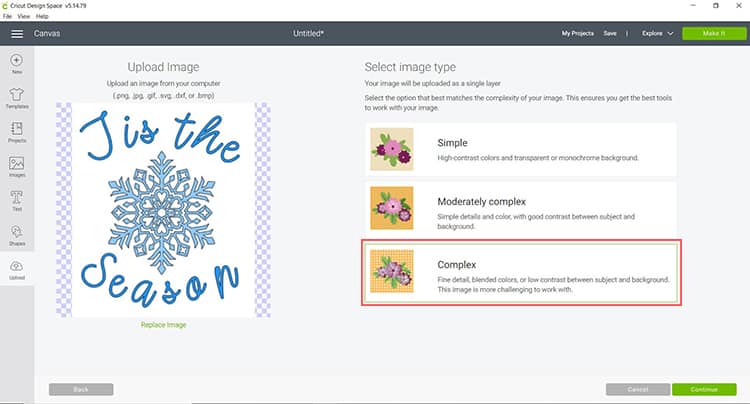
- From there stay on the “Select & Erase” tab and begin removing the white background
- You want your background to look similar to the one below

Tip: You can use the “Preview” button to see how your cut image will appear
- Once complete, select “Continue”
- Before selecting the “Save” icon, you want to make sure you have selected the “Save as a Cut Image,” from there you can name the file
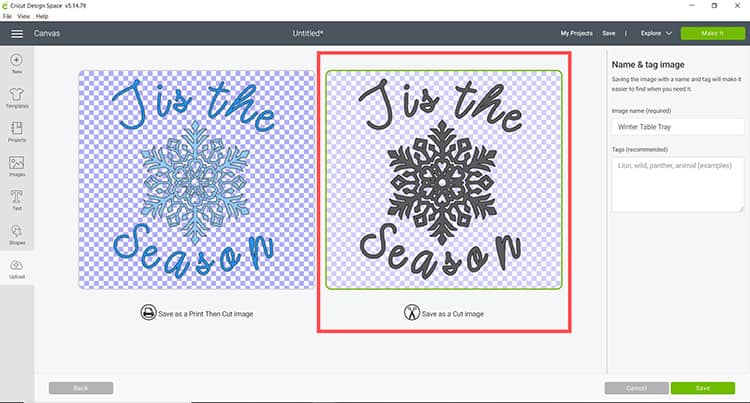
- Finally, select the “Save” icon, and there you have your new cut image
Step 2: Size your SVG and Prepare your Cutting Mat
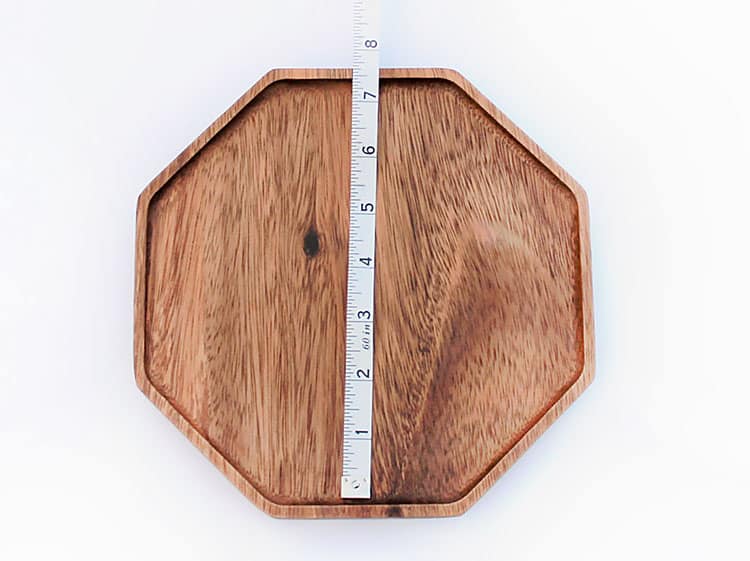
Next, it is time to size your design, remember you want to consider the edges of the tray.
Tip: You will want to give 1-2 inches of wiggle room both in length and width. If your tray measures 10 inches in length, you will want to resize your design to 8 inches and if your width measures 6 inches you may want to resize as 5 inches.
For this particular project, we will be creating an ombre look by utilizing the six different shades of blue vinyl.
- You will want to gather anywhere between 6-8 different shades of blue
- Depending on the size of your SVG, you will want to cut about an inch wide of each color.
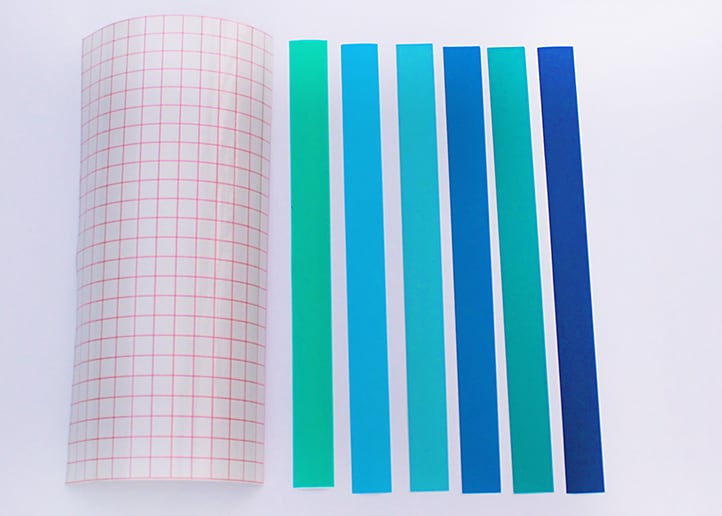
Tip: You will want to use a paper cutter to ensure straight cuts
- Once you have all your colors cut, you will want to place them on your mat. Place your vinyl with the shiny side face up on your standard grip cutting mat.
- Begin by placing the first color, followed by the other colors close together
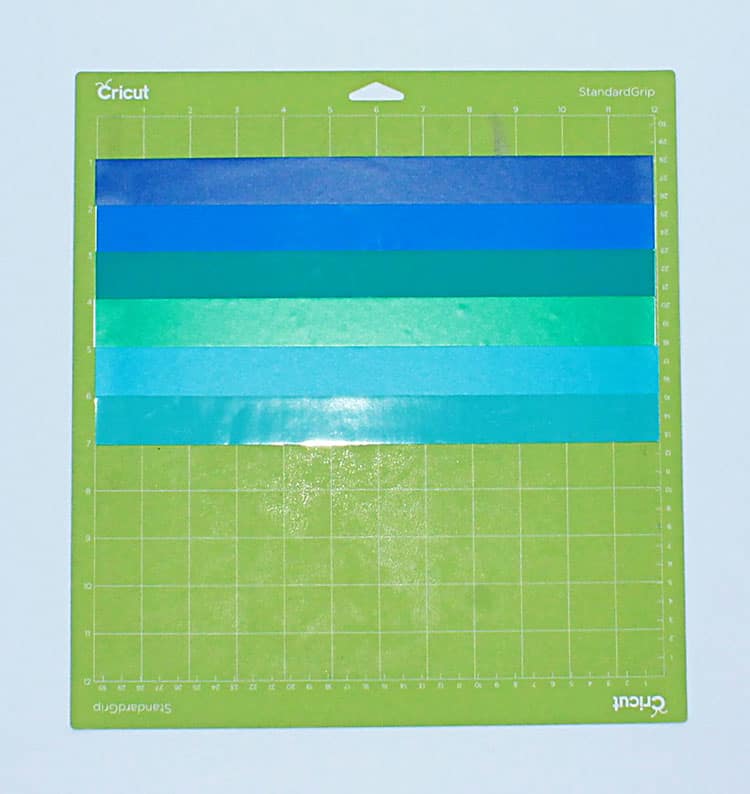
Tip: In order to obtain the ombre look, you will want to make sure there are no gaps/space in between the colors
- When you are happy click on “Make It”. You will now be able to pick your material and cut settings.
- Select “Vinyl” as the material to cut – if you are using proper stencil vinyl, make sure to select that instead.
- Load the mat into your cutting machine and cut the vinyl.
Step 3: Weed your Design
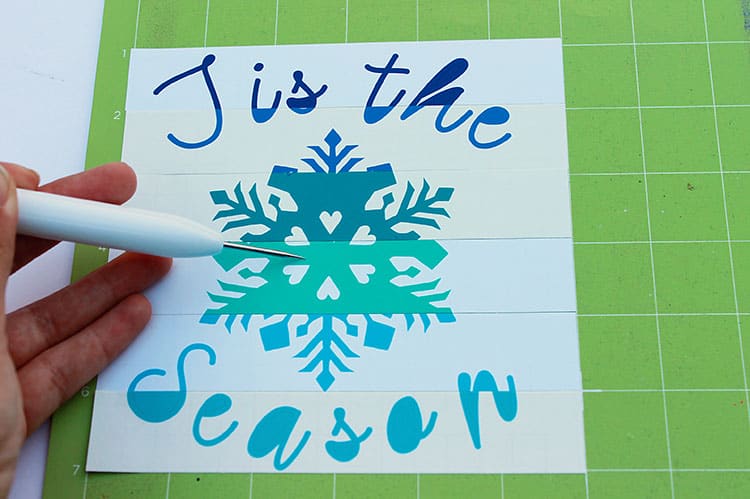
Next, use your weeding tool to help you lift up the unneeded pieces of your design. Go slowly around the letters and fine details. Don’t forget to weed out the inside pieces.
Step 4: How to Transfer Vinyl to the Wooden Tray
Once you have weeded out the winter tray design you will need to place the vinyl on the wooden tray.
- Before we apply the vinyl to the wood, please ensure that your tray is really clean and dry.
- It is much easier to use transfer tape/paper to move your design over to the wooden tray. Cut your transfer vinyl so that it is the same size or slightly larger than your design vinyl.
- Place the transfer tape on top of the vinyl and be sure not to have any bubbles or bumps.
- Find our buyers guide on: What is the best transfer tape for vinyl?
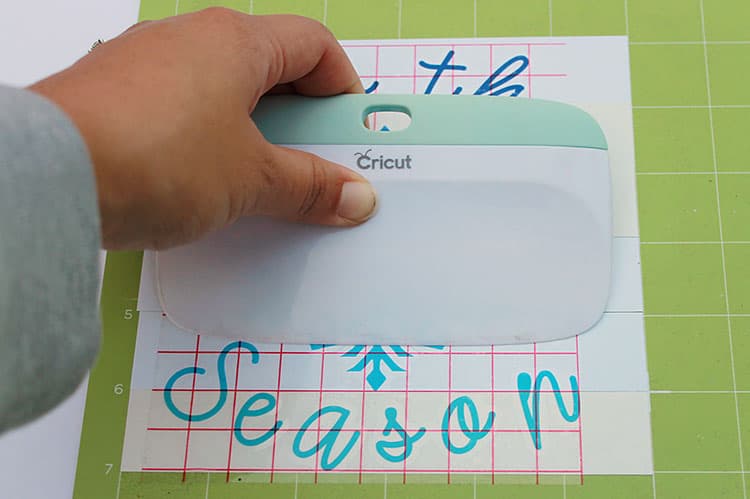
Tip: Use the scraper to get rid of any bubbles or imperfections
- Use your scraper to rub over both the front and the back of the design. We want the image to stick to the sticky transfer tape, so that it will lift up off the vinyl backing sheet.
- Slowly peel up the transfer tape and design from the top left-hand corner. Move slowly and try to work in a semi diagonal angle. If your stencil is not lifting up with the tape, place it back down and give it another good rub with the scraper.
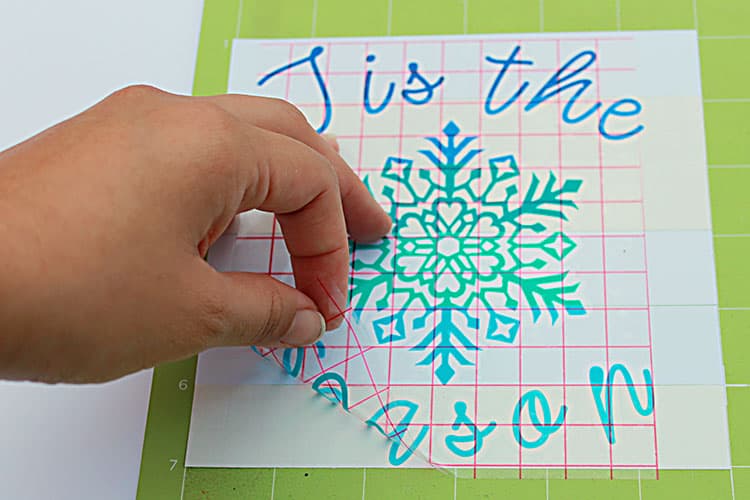
- Place the image on the wooden tray, making sure there were no bubbles or bumps. Try to make sure that it is in the centre and that it is straight.
- Once again, use the scraper to rub over the design. This time we want it to stick to the wood and to release from the transfer tape.
- Slowly peel back the transfer tape. Once again if your design lifts up, simply place the tape back down and rub over the problem area again. Place your transfer tape back on the backing paper (you can reuse transfer tape so don't throw it away).
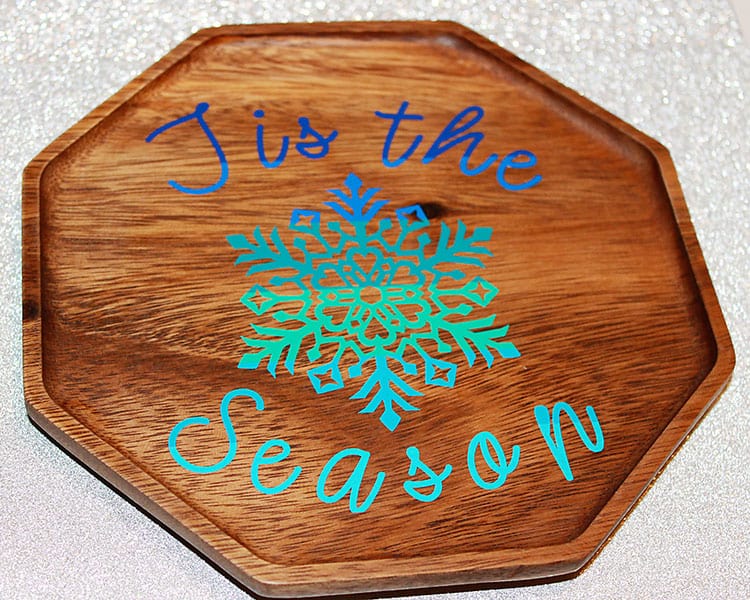
Presto!
Your wooden tray is finished!
I hope you enjoyed creating your very own ombre winter tray. You can see how easy it is to customize this design so that you can make an ombre design.
I think that this tray would make a beautiful Christmas gift, don't you!? Find a list of other gorgeous Christmas gifts made with a Cricut here.
Got the bug to make more festive season crafts with your Cricut? See a full list of Cricut Christmas craft ideas here on our blog.
Would you like to turn your Cricut hobby into a side hustle and would like further reading on this? Read our post that is full of Christmas Cricut craft ideas to sell for ideas and inspiration.