Want to know how to use transfer tape for vinyl projects?
Vinyl is such a fantastic and super fun material to craft with. Typically you would use transfer paper when you work with adhesive vinyl rather than iron-on-vinyl. Adhesive vinyl is used to create stickers/decals for items such as glasses, vases, mirrors, signs, tiles, containers, jars and so much more!
While transferring vinyl to your project material by hand is an option, not all of us are blessed with remarkably steady hands – that’s where transfer tape comes into the picture!
If you have not used it before and are wondering how to use vinyl transfer tape, let us tell you that it is reasonably straightforward.
With some practice, transfer tape can be a significant blessing for even the most complicated vinyl endeavors.
How To Use Transfer Tape With Adhesive Vinyl
Creating designs and patterns with vinyl requires steady hands, patience, and the right tools.
We have described the entire process by breaking it down into simple steps, followed by a summary of the answers to some of the most frequently asked questions about using transfer tape.
1. Choosing the Right Vinyl
Vinyl can be primarily classified as heat transfer vinyl or adhesive craft vinyl. Each vinyl uses adhesion, be it heat transfer or adhesive craft.
The only difference is that adhesive craft vinyl comes with a backing paper to preserve the adhesive whereas heat transfer vinyl comes with exposed adhesive (making one side of the vinyl duller).
Transfer paper is used with adhesive craft vinyl, which comes in many varieties like:
- Oracal 651 and Oracal 631
- EV Series 51 and EV Series 31
- Glitter and Transparent Glitter
- Glow in the dark
- InkJet Printable and Patterned
- Reflective and Metalized
- Fluorescent and Etched
Your project material and the design you are trying to create are the two essential factors that need to be considered when choosing vinyl.
Find the easier adhesive vinyl to cut, weed and transfer in our best adhesive vinyl buyers guide here.
2. Best Transfer Tape for Vinyl
There is a wide variety of transfer tapes available in the market. Transfer tape will be of help only if you choose the right kind based on your type of vinyl that you will be working with.
Transfer tape can be broadly classified into:
- Opaque tapes – You should use opaque tapes when you do not have to line the backing paper of your vinyl with it. When you are trying to transfer an abstract and symmetrical pattern (like a circular design that looks the same from any angle), opaque tapes get the job done.
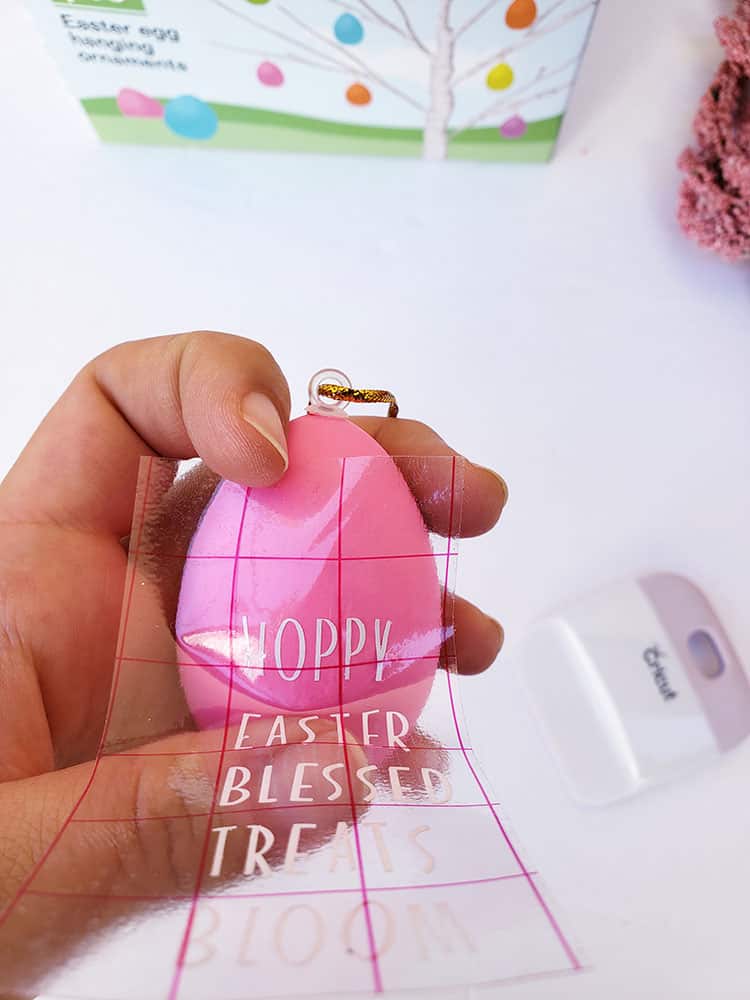
- Transparent tapes – You should use transparent tapes if your pattern needs to be lined with the vinyl’s backing paper, for instance, to transfer font.
- Paper tapes – You can go for a paper tape if you want a single-use transfer tape because it cannot be reused. It is ideal for transferring vinyl to curved objects like vases or glasses.
- Regular tapes – This is the most frequently used transfer tape. You can use it with almost all projects and surfaces. We prefer using Oracal MT80P.
- Strong-grip tapes – You will find the need for a super-strong or sticky transfer tape only when you are using glitter vinyl. Other transfer tapes do not provide optimal results in glitter vinyl projects.
Apart from paper tapes, all other types of transfer tape can be used multiple times as long as the adhesive lasts. After each use, you have to put the backing paper on before you store it to ensure that the adhesive lasts as long as it should.
Here is an incredibly helpful post to help you purchase the best transfer tape for vinyl.
3. Cutting & Weeding Vinyl

First you will need to use a cutting machine to cut your design on the vinyl sheet. Next you will need to use a weeding tool to remove all the excess vinyl from your design.
Many machines are available for cutting vinyl, the most commonly used of which are:
Whether you use Cricut or Silhouette to cut vinyl, it only gives you an outline of your design which is far from complete.
If you are using a font or an intricate pattern, you will have bits and pieces of excess vinyl that needs to be weeded out (for example, the empty spaces in the alphabets ‘d,’ ‘g,’ ‘e,’ ‘a,’ and so on).
A cutting machine is not equipped to weed out redundant pieces of vinyl. An efficient weeding tool is a must-have for creating vinyl designs. It is like a pen with a sharp point that helps remove the excess vinyl. You will be able to easily remove the smallest and thinnest pieces of vinyl with a weeding tool.
Once you are done with cutting and weeding the vinyl, it is time to bring out the transfer tape.
4. How to Apply Transfer Tape to Vinyl?
First of all, you must cut the transfer tape slightly larger than your vinyl size to ensure that you have a margin of safety when peeling off the tape in case there are any wrinkles or bubbles.
Line your transfer tape with your vinyl design and place it sticky side down. Your vinyl should be stuck on the backing paper when you apply the transfer tape.
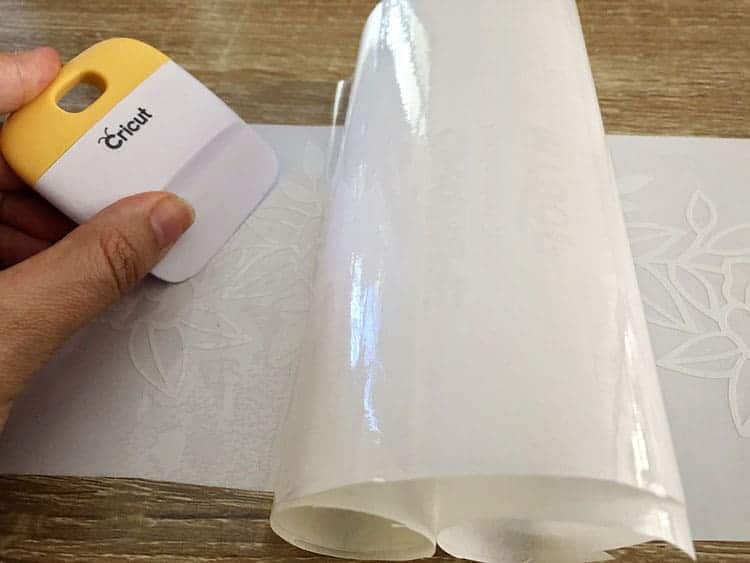
Applying the transfer tape can be a bit tricky, and you want to avoid bubbles. It is preferable that you start from one side and gradually press towards the other end.
You can use a roller or a credit card to apply pressure on the tape. We have found that using your fingers is equally effective once you understand how to put pressure on the tape.
The vinyl should leave the backing paper and get stuck on the transfer tape at this time. When you feel that you have accomplished that, it is time to turn the vinyl over and gently remove the transfer tape.
You need to ensure that any small pieces also get stuck on the tape.
Take it slow and pay attention to ensure that the entire vinyl comes off with the tape. If needed, you may use a card to stick small pieces to the tape that may still be stuck to the vinyl’s backing paper.
5. Applying the Vinyl to your Project
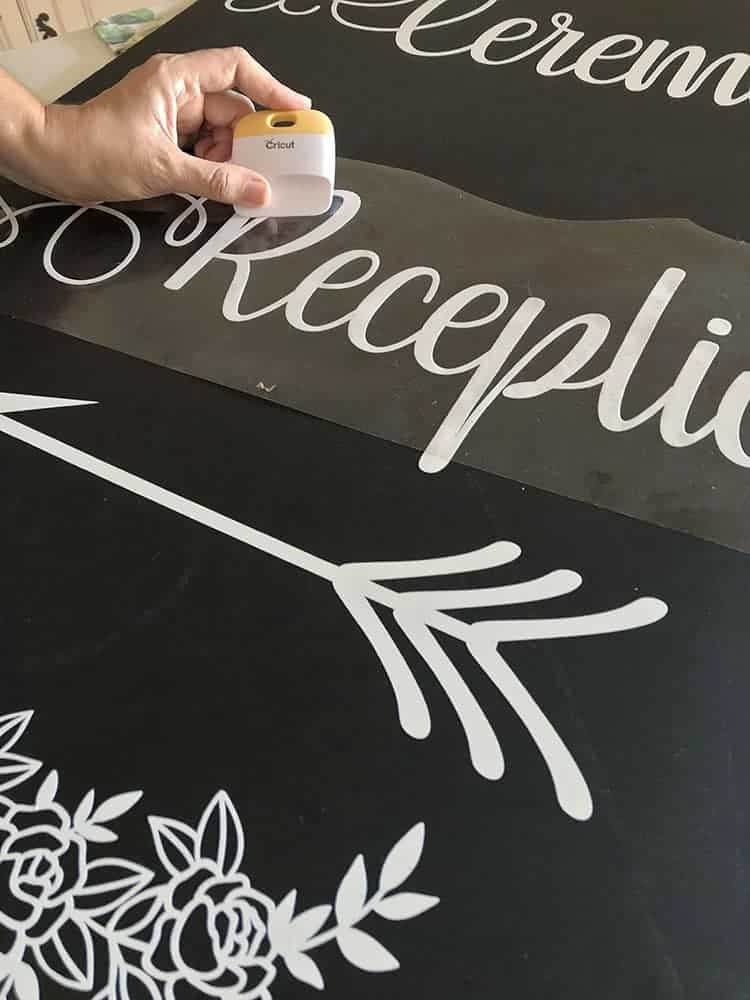
The final step in the process is applying the tape and the attached vinyl to your project surface. Make sure you line the tape if needed.
Stick the tape to the project surface gradually from one side to the other. You may use a credit card to apply pressure. Again, it is vital that you remove any bubbles and do not let the vinyl wrinkle up.
When you stick the tape to your project surface, you need to ensure that the vinyl gets transferred from the tape to the surface (just like it got transferred from its backing paper to the tape).
Irrespective of whether you are transferring the vinyl to wood, metal, glass, or fabric, if you apply the right amount of evenly distributed pressure, the tape will get the job done.
When you feel that the vinyl is securely stuck to the project surface, you need to slowly peel off the transfer tape from one end to the other.
While peeling off the tape, check that any small piece is not stuck to the tape still. If that happens, stick the tape back and rub the area with your fingers.
Frequently Asked Questions
1. Do you need transfer paper for vinyl?
You may use transfer paper only with adhesive craft vinyl. Heat transfer vinyl does not require the use of a transfer paper or tape.
Transfer paper makes the vinyl application process relatively straightforward, thereby reducing the margin of error.
2. What is transfer tape?
Transfer tape or transfer paper is a medium used to transfer vinyl to your project surface. Most transfer tapes can be used multiple times. It comes in various styles to cater to different types of vinyl and project surfaces.
3. What is Cricut transfer tape?
Cricut is a brand that is mostly known for its craft cutting machine. It is made by ProvoCraft and can cut various materials like fabric, paper, and vinyl.
Cricut also offers different types of transfer tapes. Regular tapes and StrongGrip tapes from Cricut are widely used for vinyl projects.
4. What is Silhouette transfer paper?
Silhouette, like Cricut, is a craft cutter brand that offers the Cameo, Curio, and Portrait machines. Silhouette machines are incredibly user-friendly.
The brand also provides various transfer tapes that can be used for a majority of vinyl projects.
5. What are the benefits of using transfer paper?
- Using transfer tape allows for seamless application of vinyl. The majority of vinyl types tend to be very thin and can be challenging to transfer by hand.
- Using transparent tape enables you to line the vinyl backing paper and project surface perfectly, preventing skewed or distorted designs.
- Transfer tape facilitates better accuracy and productivity in vinyl projects, owing to its simple yet efficient use.
Final Thoughts
If you are a beginner, it can be tricky figuring out how to use transfer paper with vinyl. There is a definite learning curve with using transfer tapes, and you will get much better after some practice. The process of using transfer tape for vinyl projects requires attention to detail.
Sticking vinyl to some surfaces can be tricky, and you may have to try a couple of times before you get it right. If you take it slow and follow the steps we have explained, you should be able to stick vinyl to all kinds of projects.
Till next time, happy crafting!