Would you like to learn more about how to use heat transfer vinyl for your next craft project?
Heat transfer vinyl is a brilliant product. My favorite way to use HTV is to create customized t-shirts for my children, but you can also use it on canvas bags, shopping bags, canvas shoes, hats, caps and so much more.
It is fairly easy to work with heat transfer vinyl, but you do need a really clear tutorial to follow when you try to use HTV for the first time because if you do get a few steps wrong, it will totally ruin your design.
Today we share our ultimate beginner's guide to customizing t-shirts using heat transfer vinyl.
So, get ready to manifest your graphics and witty tees!
What is Heat Transfer Vinyl?
Before we start, let's first take a look at what heat transfer vinyl is.
Heat transfer vinyl, which is also known as ‘HTV’, is a special type of vinyl (or material) that can be used on certain fabrics and materials to create unique designs. This type of vinyl comes with an adhesive backing that melts with the application of heat.
Just in case you're wondering, this method is not only for creating customized t-shirts with designs. It can be done on bags, notebooks, dresses, caps, and other possible surfaces you can imagine.

It’s perfect if you want your clothes to reflect your personality and your tastes, or if you wish to created themed clothes for special events, such as birthdays or Easter.
So, what are we waiting for? Let’s read along for more HTV instructions!
Supply List
- Heat Transfer Vinyl (any type)
- Your Design File (Check compatibility with your software)
- Iron/Cricut EasyPress/Heat Press
- Vinyl Cutting Machine
- Silhouette Studio Software/Cricut Design Space/Other Cutting Software
- Cutting mat (Preferable sizes 12″ x 12″ and 12″ x 24″)
- Weeding Tools
How To Use Heat Transfer Vinyl Cricut Tutorial

There are 3 main steps involved in using HTV vinyl. Firstly you will need to learn how to cut heat transfer vinyl, next you will learn how to weed and prepare your design and lastly, you will learn how to apply the design to your product.
1. How to Cut HTV
Wondering how to use HTV vinyl with your vinyl cutter? Here are some basics steps to follow. Please note that the steps will be slightly different depending on which brand vinyl cutter you use.
Step 1: Get your Design Ready
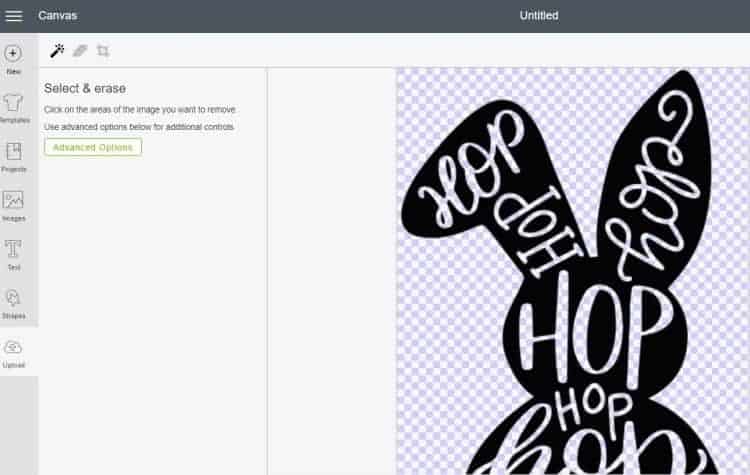
For this first step, you need to prepare your design using design software (we recommend using Silhouette Studio or Cricut Design Space for beginners because it is easy to use).
There is a range of files available for designs. For instance, SVG files are mostly graphic designs while .jpg files are photo-quality files.
Some files are more compatible and work better with designing software and cutting machines, while some don’t, so do check compatibility with your chosen software.
Side Note: How to Get a Design File?
- Basically, you download free ones if you're just starting out and practicing. You can find a list of free SVG File Websites here.
- If you're planning to sell your creations, make sure you get royalty-free designs in the initial stage to be on the safe side.
- You can also get your design customized by a designer online. There are sites selling good-quality cut-files, starting from $2 and above. It mostly depends where you get it from.
When the design is prepared, you now need to measure the area (on the shirt/product) where the design will be.
Then, open the software and check for a cut-file option. Adjust the size of the image as measured on the shirt by using the pointers on each of the four corners.
After you have finished measuring, make sure you select mirror image (on the software). This is because the cutting side is done from the back of the design (the area where you apply the design on the surface).
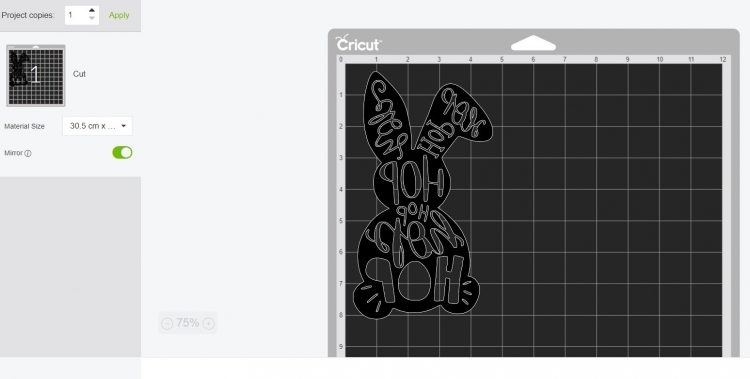
You can do this by clicking on the “Flip” option in Silhouette Studio and selecting “Flip Horizontally”. Or if you are using Cricut Design Space, simply select “Mirror-Image”
Step 2: Cutting Heat Transfer Vinyl
In this section, we’ll show you how to cut the heat transfer vinyl. Cutting HTV is not very complicated, but you really will need a good quality vinyl cutting machine in order to do a good job.

Note: Should you Have the HTV Shiny Side Up or Down?
First, place your vinyl upside down (shiny side down) on the cutting mat and adjust the size before you start.
Before kicking off with the cutting process, remember that there are different cutting adjustments for different types of vinyl you use, as well as different settings for each type of cutting machine.
Load up the mat in your cutter and next select the current type of vinyl from your options. This step will differ depending on the machine you use, some machines have a dial that you need to turn and adjust, others have settings to choose from in the software itself.
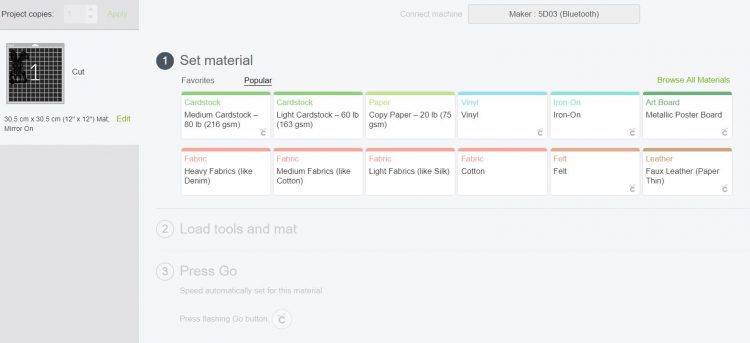
Also make sure you have selected the right blade for the job.
You will often find a handy sheet that comes with your vinyl that can help you out with the right settings, or you could do a simple google search as many brands list the settings for both Silhouette and Cricut machines on their websites.

You are now ready for cutting! So step aside and let your machine work its magic.
2. How to Weed and Prepare HTV Vinyl
Following you will find the heat transfer vinyl instructions on how to weed and prepare your design prior to the heat application stage.
Step 1: Peel off the Extra Vinyl
After cutting, you are required to peel off the excess vinyl so you can finally get to the design you want.
If you’re working on a small design, chances are, there will still be enough space on the vinyl for another project.
It would be a waste if the whole sheet is to be discarded. What you can do is cut off the rest of the usable vinyl before weeding the excess.
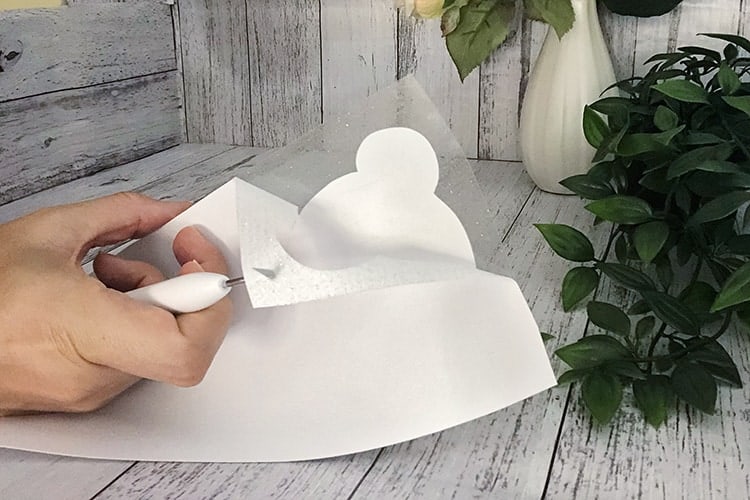
Step 2: Weeding
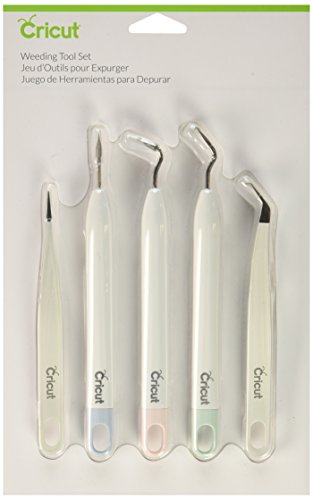
Also, for weeding, you will require a sharp/pointed pick. This will ensure that the design won’t get damaged. There are hooks you can check out that are made specifically for weeding. I love the Cricut Weeding Tool Set.
You can the sharp points of these tools to pick out all the remaining vinyl, such as in the “o” of a letter.
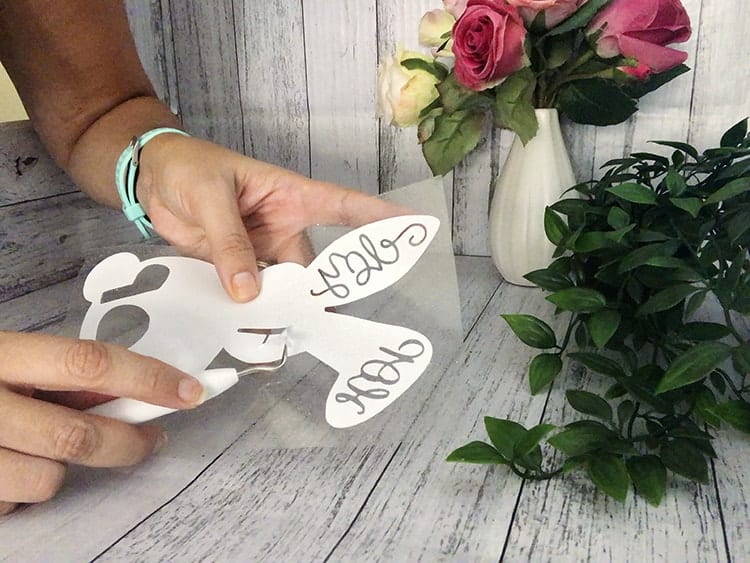
Remember not to remove the design – you are removing all the vinyl that you don't want. The design should stay on with the plastic carrier cover (which is meant to keep the design intact) and it will be used for the ironing process later.
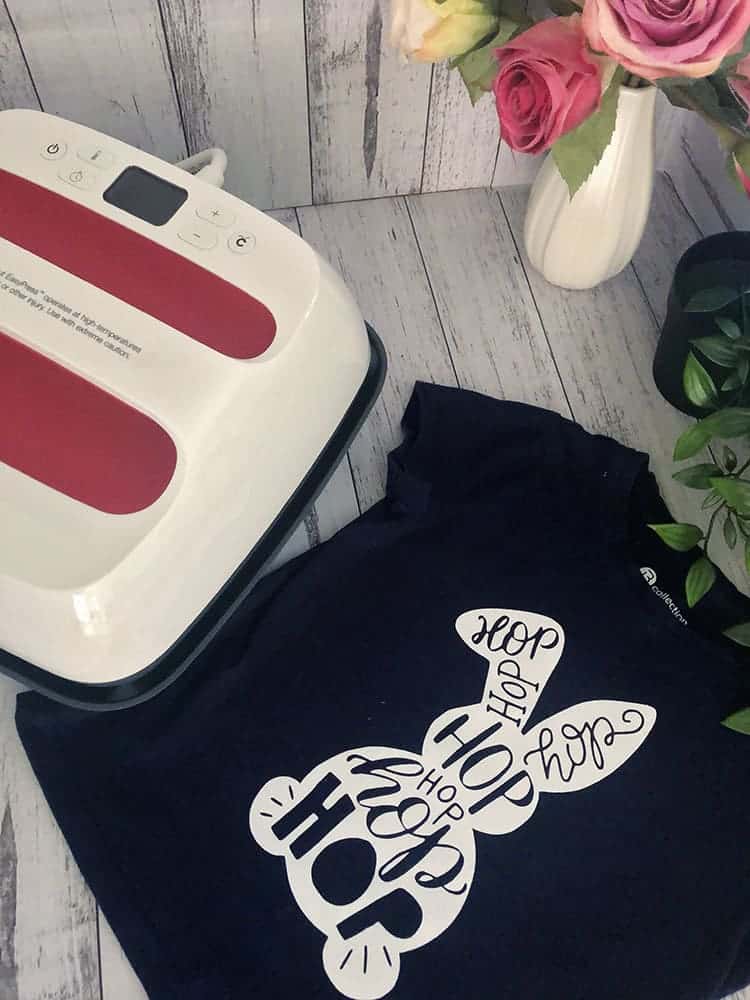
3. How to Apply Heat Transfer Vinyl with Heat
In order to get the design to stick to your material, you will need to apply heat and pressure.
The heat melts the frozen adhesive, allowing it to stick firmly on to the t-shirt.
In order to do this, you can use an iron (not really recommended), or a heat transfer vinyl press (preferred).
Step 1: Prepare your Work Surface
Before pressing the design, prepare your workspace, you need a sturdy surface (not an iron-board) and you will also need a towel or a heat press pillow that you will use to protect your work surface.
Next, I also highly recommend that you give the shirt a quick 10-sec pre-press to remove wrinkles and moisture.
Set the temperature and timing on your press (the HTV vinyl will come with instructions and info on these settings).
Step 2: Press the Design onto the Shirt
Once your press is hot enough, place your design onto your shirt face-up and simply press the design (set at the correct temperature, with the correct time setting and whilst applying pressure).
If the design surface is large and you are using an iron or a small heat press, you might have to repeat the process to all areas in order to ensure that every area gets equal heat and pressure distribution.
Next, flip over the shirt and apply a little heat on the reverse side of the shirt.
Check your HTV vinyl and read the instructions to see if your type and brand of vinyl is a “cold-peel” or a “hot peel”. This just refers to whether you should peel the plastic when it is cold or hot.
Slowly and carefully lift up the corner of the plastic sheet. Check if the vinyl stays or peels along with the sheet. If it stays, that means it’s working great.
If it sticks with the sheet, you will have to lay it back down gently and apply more pressure. You can read more about how to prevent your HTV from peeling here.
Peel away your plastic. And wha-la look what you just created!

Note: If you use smooth vinyl, the final result will also appear very smooth. On the other hand, if you use flocked vinyl, you will notice that it gives out fuzzy effects when you’re done.
One last thing, let the t-shirt rest for a day before you decide to wash it. And always wash your t-shirts inside out. Steer clear of tumble dryers.
And well, that’s everything! We have finished the last step. Your t-shirt is now ready to hit the snazzy streets!
We sure hope that our tutorial on how to make heat press transfers was beneficial to you.
If anything does happen to go wrong on your first try, do remember that it is easy to clean a heat press. You can also easily remove your HTV and residue so you can use the same blank.