After investing so much money in purchasing a decent heat press it only makes good sense to take the time to look after it. And to do so, you will find that you need to clean the heat press when things get stuck to the platens.
At some point or another, you will most likely see a build-up of dirt, residue, adhesive, HTV vinyl, and/or excess ink on your platens.
It is important to keep them residue-free in order to ensure that you get a clean heat press transfer whilst working on your next product.
It is also important to act quickly when you do notice the build-up of residue on your platens, as ongoing exposure to high temperature will cause the mess to ‘cook' onto the heat press, making it more difficult to remove in the future.
Below you will find some great simple and easy-to-follow steps on how to clean your heat press machine. I will also share my favorite heat press cleaner with you as well.
How to Clean YourMaterials Required: Heat Press Machine
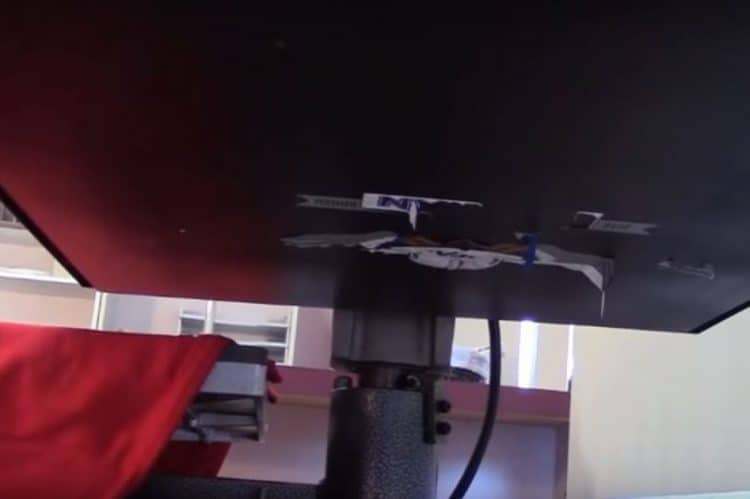
You will know when your machine needs a clean after an incident such as an ink blowout or when you accidentally pop the image the wrong side up (which will cause the ink to stick to the upper platen).
It is also important to keep an eye on the residue and adhesive build-up as well.
Fortunately cleaning a heat press is easy and doesn't take a lot of time! Find below a list of materials you will need as well as the steps that are required to give your machine a quick refresh.
Materials Required:
- Thick, Large Lint-Free Cloth
- Cleaner for cold platen cleans (Suggestions: Acetone, Clorox Wipes, or Liquid Clorox)
- Old T-Shirt
- Optional: Teflon
- Optional: EZ Off Hot Iron Cleaner – for last resort hot platen cleans
Cleaning a Heat Press – Step-by-Step Tutorial:
1. In most instances, you want to turn your machine off and let it cool down before attempting to clean it. Lowering the temperature typically makes a heat press easier to clean.
2. Grab your large clean lint-free cloth and cover it with a decent amount of cleaner (suggestions in the materials list above).
3. Gently rub the cloth over the platens to remove any of the mess.
4. Heat up the machine.
5. Fold your cloth nice and thick so that it will protect your hand from the hot plates (or wear some heat-proof gloves).
6. Pop a decent amount of EZ Off Hot Iron Paste onto your cloth and give the plates another wipe down. This should remove any residue that remains after the first clean.
7. Use an old shirt and simply do a clean heat press onto this shirt.
This step will help to get rid of any impurities and residue that you might have missed whilst cleaning. It will also get rid of any excess cleaning paste or residue that might have remained on the platens.
Tip: If you find that your heat press still has some mess cooked onto its platens even after following the above steps, we highly recommend that you purchase some protective paper and use this to protect your garments from the upper platen mess.
Not only will the protective paper protect your garment but it will also help the mess to ‘cook out' over time.
The easiest way to prevent your machine from getting dirty is to protect the platens from a potential mess.
We always heat press with a Teflon sheet to protect both our platen from potential ‘mess' as well as to protect our garment from picking up unnecessary residue during the heat press process.
We hope you now have all the tools and steps required to clean that heat press machine.
Do let us know in the comments below if you have any questions.