When you buy your first EasyPress, it can be slightly intimidating to get started. I know I was scared to use it, thinking that I will probably ruin my supplies.
Fortunately, Cricut has included some materials to get started (and that way you don't have to risk your own supplies).
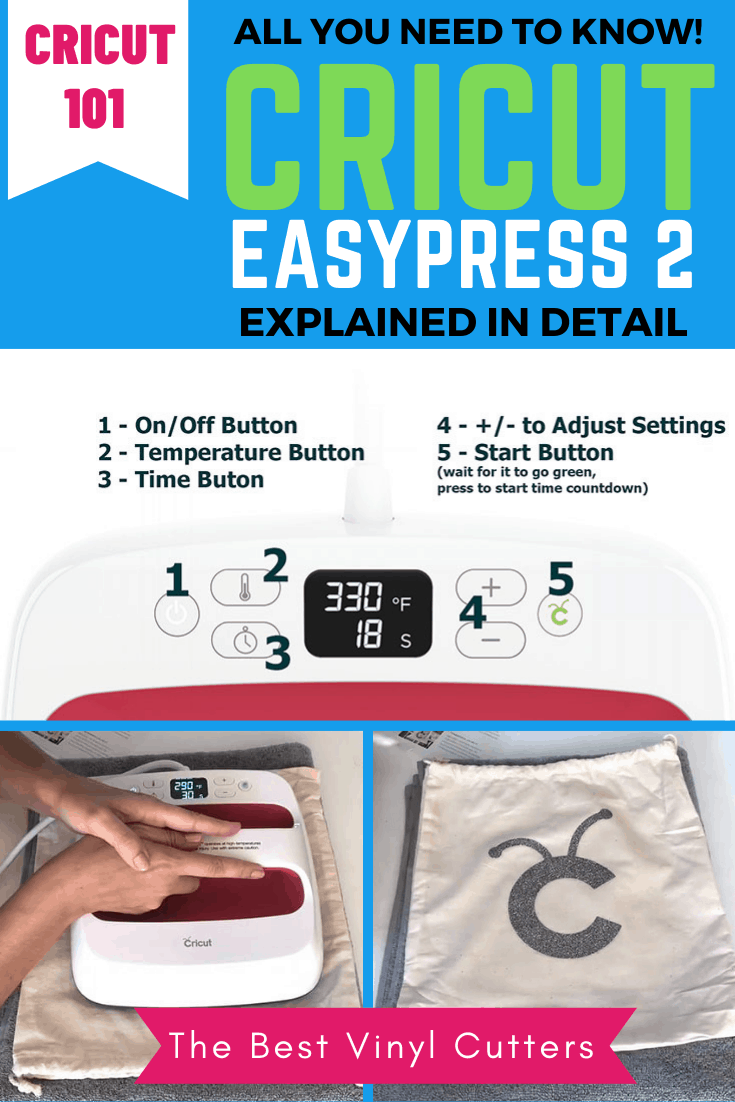
Here is a simple tutorial on how to use a Cricut EasyPress 2 effortlessly so you can get started with those iron-on projects.
Quick Guide on How to Use a Cricut EasyPress 2
Find below the steps to follow to set up your EasyPress 2 and kick off those iron-on projects you want to make.
This project is pre-cut but you can also design your own on Cricut Design Space and cut with your Cricut Machine.
Supply List
- Cricut EasyPress 2
- Cricut Logo Glitter Iron-on Vinyl Decal (included in the EasyPress 2 box)
- Cricut EasyPress 2 Canvas dustbag (included in the EasyPress 2 box)
- Cricut EasyPress Mat (recommended but not required) or a Folded Bath Towel
- Cricut Weeding Tool Kit
- HTV or Iron-On Vinyl
Iron-on Vinyl Quick Basics
Before we get started it is important to understand a few iron-on vinyl basics.
- Not all iron-on vinyl works the same way. It is important to know what brand vinyl (Cricut, Siser, etc) you are using, as well as what type (metallic, glitter, flock, etc) it is. When you know what type of vinyl you will be working with, you will need to look up the correct temperature and time that will be required to correctly press the vinyl.
- Next, you will need to lookup whether the iron-on vinyl is a cold or hot peel vinyl.
- Cold peel means after pressing, let the vinyl cool down before peeling the plastic backing off.
- Hot peel means you can peel the plastic backing off right after pressing. Since it is hot, you need some tools like tweezers or weeders to help you peel off the plastic backing.
How to Get Started with Your EasyPress 2
Find below the steps that you will need to work with the Cricut EasyPress 2. Please note that there are three Cricut EasyPress sizes currently out.
The tutorial below is not for the Cricut EasyPress Mini but will work perfectly for the 9 x9″ Press and the 10 x 12″ Press.
Let's start by turning on the machine and learning how to set the temperature and time.
- Unbox your press and grab the quick startup guide.
- You will need a sturdy work surface, I use my craft table – I highly recommend you use something sturdier than an ironing board.
- Plugin your EasyPress 2. And press the button on the left (1) to switch on the press so that it can start heating up.
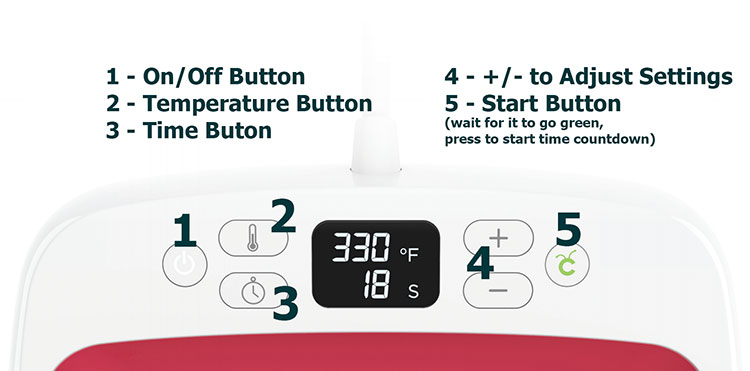
Your press comes with a base, make sure to pop the press on the base so that we don't accidentally burn our tables.
- We are using Cricut Glitter vinyl today. The correct settings for the glitter iron-on vinyl are 290°F temperature (or 145°C) and 30 seconds time.
- To set the temperature, press the Thermometer button (2). Using the up and down buttons (4), set the temperature then press the Thermometer button (2) to set it.
- To set the timer, press the Clock button (3). Using the up and down buttons (4), set the timer then press again the Clock button (3) to set the time.
- Next, you can pop it to the side whilst the machine heats up to the correct temperature (the C button will be orange at this point). We know it will be ready once the Cricut button beeps and turns green.
Step 1: Prepare your Supplies
- To protect your surface, you need either a folded bath towel or an EasyPress mat underneath your material. If you are using a towel, simply fold it up and make sure any decorative edges on your towel are facing down.
- Place your canvas on top of your towel or EasyPress mat.
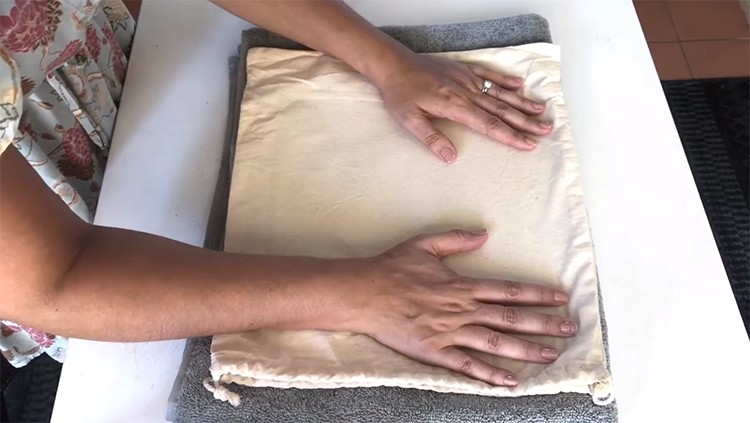
- Don't worry about the wrinkles because we will use the EasyPress like an iron to remove them in the next step.
Step 2: Do a Pre-Press to Remove Wrinkles
- Do a 5-second pre-press to your canvas before adhering your design to it. I don't worry too much about the temperature at this point but obviously, if you are using a delicate fabric, you will need to make sure that your EasyPress is not too hot.
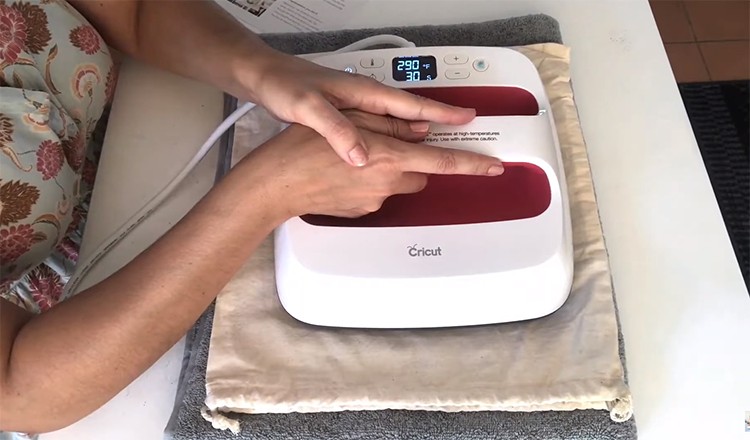
Tip: Always do a 5 second pre-press on your material before pressing your design. It does 2 things, first, this will remove wrinkles so we have a smooth surface for our vinyl to adhere too. Second, it will remove the moisture and make your material dry for your vinyl to adhere.
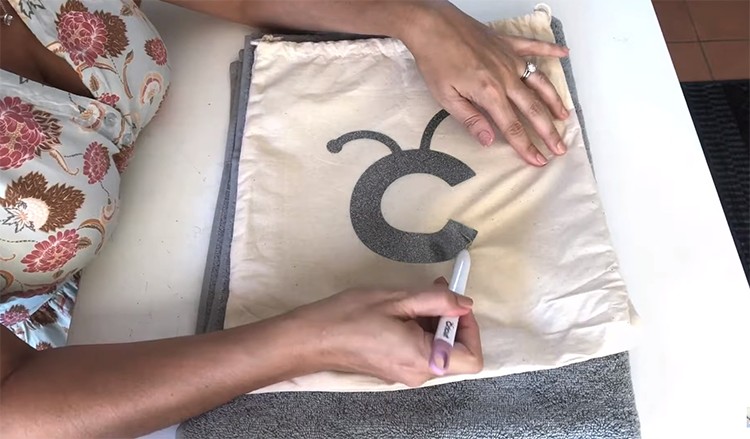
Step 3: Press your Design onto your Canvas
- Place your design on top of the canvas (place it wherever you think it will look good). If you don't know how to cut a design, you might find our post on how to use a Cricut machine helpful.
- Make sure that the plastic side of the vinyl is facing up as you will remove this after pressing.
- Once the C button on the press goes green, you can pick it up and carefully place the EasyPress on top of the iron-on vinyl. Press the Cricut logo button to start the countdown. You don't need to put a lot of pressure on it, just a little pressure will do.
- Do a 30-second press on both the front and back of the canvas. You will hear the beep sound once the 30 seconds are up.
- The Cricut iron-on vinyl is hot peel so we need to peel off the vinyl after pressing. Use the tweezers or weeder to help lift up the plastic backing of the vinyl.
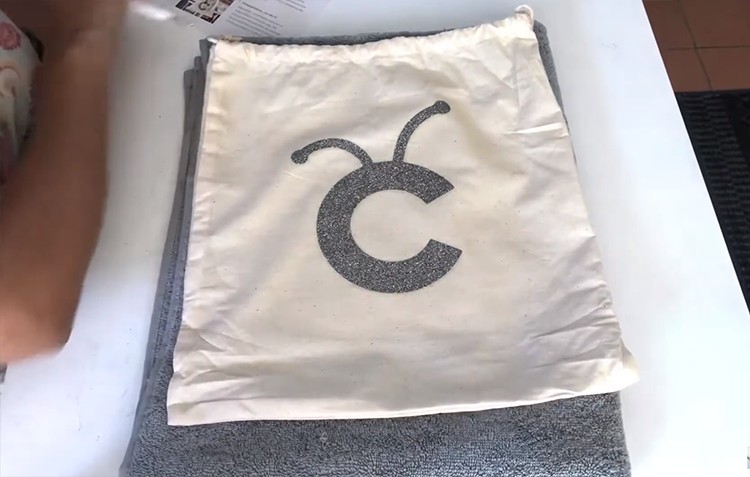
Tip: You can give another quick press if the iron-on does not adhere properly to the material.
Congratulations you have done your first iron-on project using your EasyPress 2! Super easy isn't it? You can now start making all those iron-on projects that you have seen online.
Some Helpful Resources to Help you with your Cricut Crafting Journey
Now to help you to keep moving forwards and gaining some confidence and momentum with your new Cricut hobby, I have some fabulous resources for you.
1. The Mega Cricut Cheat Sheet Book

Join thousands of students who are crafting with confidence thanks to our Cricut Cheat Sheets. Buy 80 printable Cricut cheat sheets with answers and walk-throughs to all the questions you’ve got about working with a Cricut Maker, Cricut Explore Air 2, or Cricut Joy.
The book is currently on sale and worth every single dollar. Click here to read more about The Mega Cricut Cheat Sheets.
2. The Complete Guide to Cricut Design Space

Our newest book is a step-by-step guide to confidently mastering ALL Design Space Functions on Desktop, iOS, and Android Devices. The book contains easy one-page bitesize tutorials to help you do anything and everything in Cricut Design Space. It is such a great help and I always have my book next to my laptop ready to be used.
Click here to read more about this book.
3. A Blog Post Full of EasyPress 2 Projects Ideas
Not sure what to make next with your EasyPress? Here is our blog post full of EasyPress 2 Project Ideas. There are over 12 projects that are perfect for beginners. Check it out.
4. Our Cricut Resource Blog
We have a section of our blog for Cricut fans that is full of tutorials, reviews, and helpful articles. If you are new to the world of Cricut, this free resource will be invaluable to you. Click here to hop over to our Cricut Crafts section of the blog.
Share with us what projects you have done or you want to create with your EasyPress 2.