Looking for some great DIY Valentine shirts ideas for girls?
You can't always find cute Valentine shirts for kids in the shops, so what better way to share the love in the family by making your very own girl's valentine shirt/s.
So if you are looking for Valentine shirts for toddler girls (or for any other aged daughters), we have a super sweet DIY custom Valentine HTV t-shirt tutorial to share with you all.
You will need a vinyl cutting machine (either Cricut, Silhouette, or similar) in order to follow along with the steps of this tutorial. You will also need an iron, EasyPress or heat press as well.
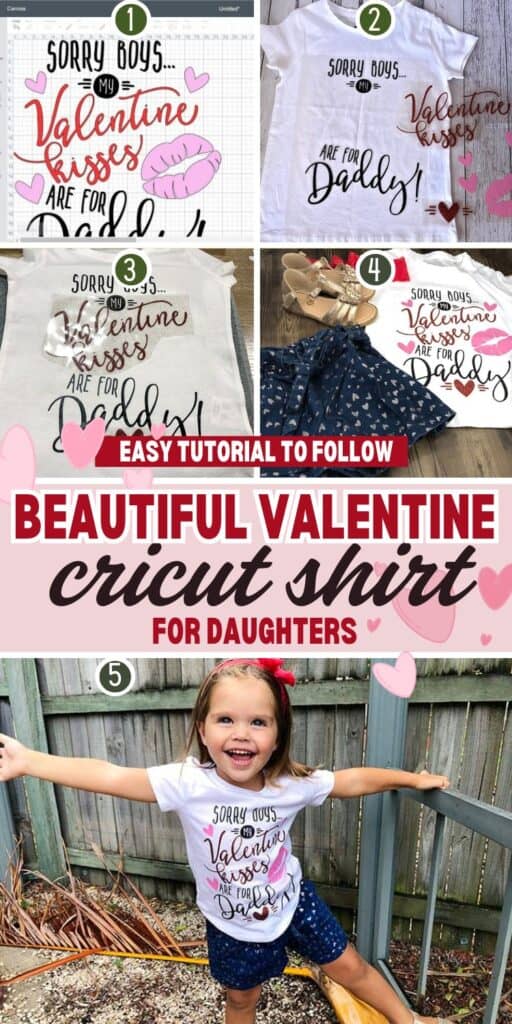
DIY Valentines Vinyl Shirt for Girls
Find below the steps to follow in order to create this adorable Valentine Tee Shirt.
Supply List:
- 1 x Blank Toddler T-Shirt (click here to find more ideas of where to source blank t-shirts for kids)
- 1 x EasyWeed Glitter HTV Vinyl(or similar HTV Vinyl)
- 1 x Weeding Tool
- 1 x EasyPress Heat Press (or your choice of vinyl heat press machine)
- 1 x Vinyl Cutting Machine (I use the Cricut Maker Machine)
- 1 x Valentine Quote SVG
Preparing Your Cut File for Cutting
Find below the step-by-step instructions on how to prepare your Valentines SVG or JPG for cutting.
1. Prepping your Cut File
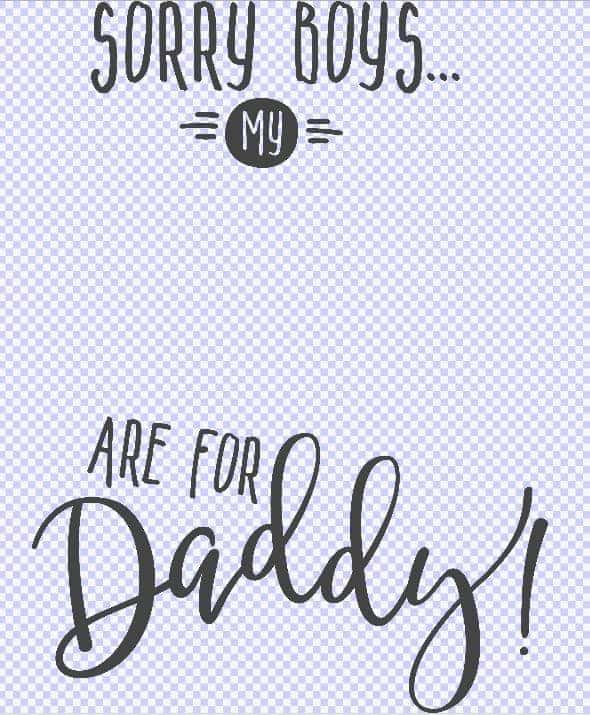
Step 1: Download your Valentine Quote SVG .
Tip: The SVG file is one single layer which is perfect if you want to use one color vinyl. I will show you how to create layers of this file in order to use 3 different colors for your t-shirt design.
As I'm using a Cricut Maker, I will show how to do this on Cricut Design Space.
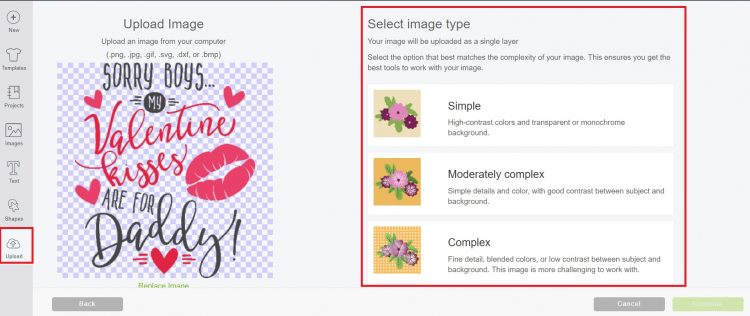
Step 2: Upload your file to Cricut Design Space. Select moderately complex for the design, and click on “Continue“.
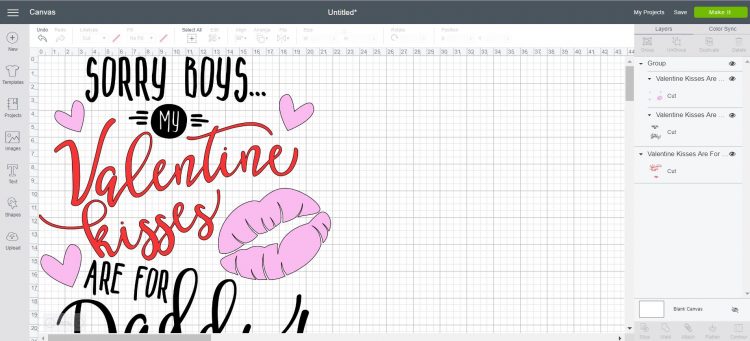
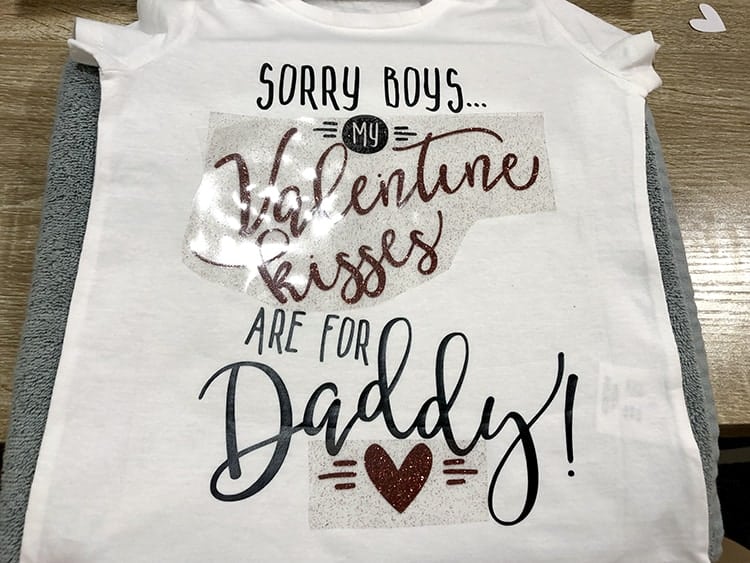
Step 3: Next, we want to create a layer that has only a single color on it. So if you want to follow the image, you would use the “Select & Erase” wand and erase all the red/pink parts of the image, so that only the black remains.
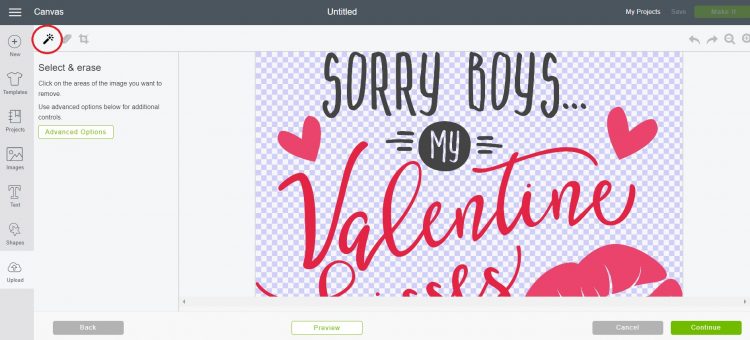
So, your black layer will look like this (see image below).
Next click on “Continue” and “Save as cut file“. Then select the image and click on “Insert image“.
Step 4: Next, click on “Upload image” on the left bottom of your screen and repeat the first 3 steps but focus on your red layer.
You will need to upload your SVG file as if it is new, and this time erase all the black and pink to leave the red behind.

Step 5: Again, click on “Upload image” on the left bottom of your screen and repeat the first 3 steps but focus on your pink layer.

Step 6: You should now have three layers on your online Cricut mat.
Tip: In order to tell Cricut that you want to cut different color vinyl, you simply need to color your vinyl and group the parts of the image that you wish to cut from the same color.
Step 7: Select the red layer of your image and simply change the color to red. Select the pink layer of the image and simply change to pink.
Step 8: Next measure the size of your shirt and resize your design to suit the shirt size. When you are happy click on “Make It“.
Step 9: Select “Mirror“.
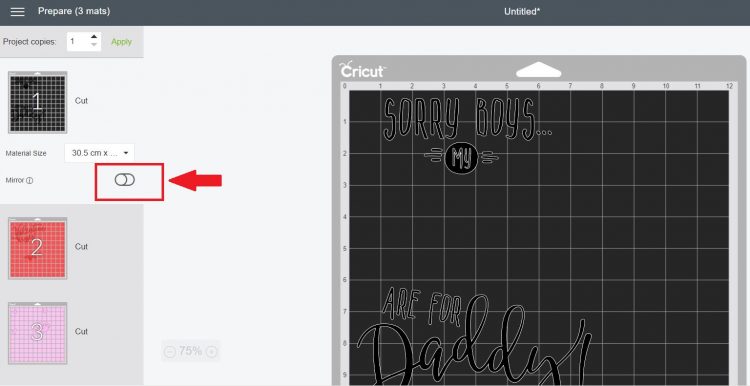
Step 10: Choose the right material from the list.
I cut my black on smooth black Easyweed HTV, so simply selected “Iron-On” for my material. For the red, I used glitter Easyweed HTV and selected “Glitter Iron-On” and also increase the level of pressure to “more”.
Step 11: Place your HTV vinyl with the shiny side face down on your green cutting mat, load the mat and cut away.
Weeding your Iron-On Vinyl
Step 1: Next use your weeding tool to grab the excess vinyl from your design. Peel away the excess vinyl.
Tip: You can learn more about how to weed vinyl here.
Step 2: Use the weeding tools and carefully weed away the words. You should now have your layers ready to press.
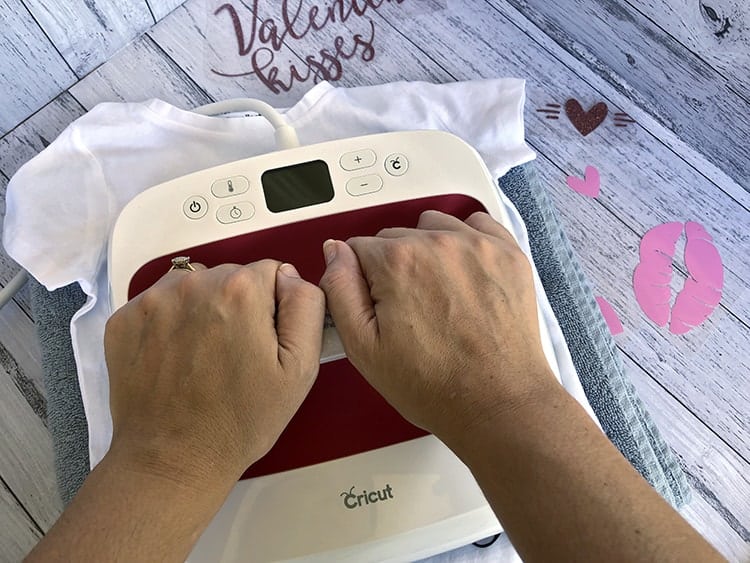
How to Press the Vinyl Layers on to the Shirt
Step 1: Black Smooth Vinyl Layer: Heat up your heat press machine to 305°F/150°C and your set your timer to 10 sec.
Step 2: Quickly give your shirt a pre-press for around 5 sec. This will remove wrinkles and moisture.
Step 3: Apply your black layer to your shirt. I recommend you only press for 10 sec as you will be applying more heat to this layer in the next few steps.
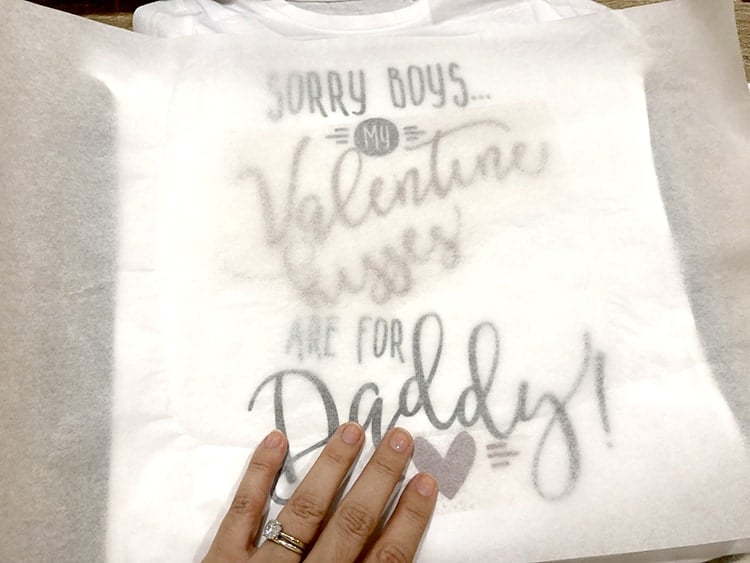
Step 4: Peel away the carrier whilst it is still hot.
Step 5: Red Glitter Layer: Heat up your heat press machine to 320°F/160°C and your set your timer to 15 sec.
Step 6: Carefully place your red glitter vinyl pieces where you want them. Next, place a sheet of teflon or parchment paper over the whole design. This will protect your black vinyl from the next hit of heat. Peel your carrier sheets whilst hot.
Step 8: Pink Smooth Vinyl Layer: Heat up your heat press machine to 305°F/150°C and your set your timer to 10 sec. And repeat your previous steps to press.
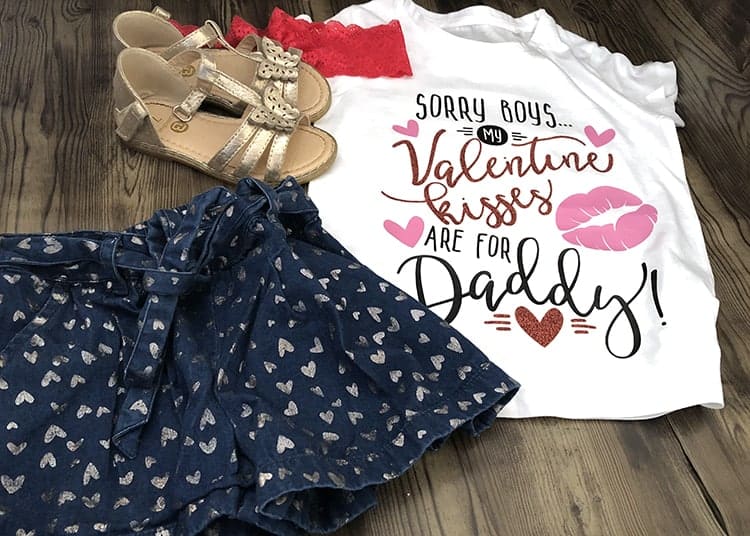
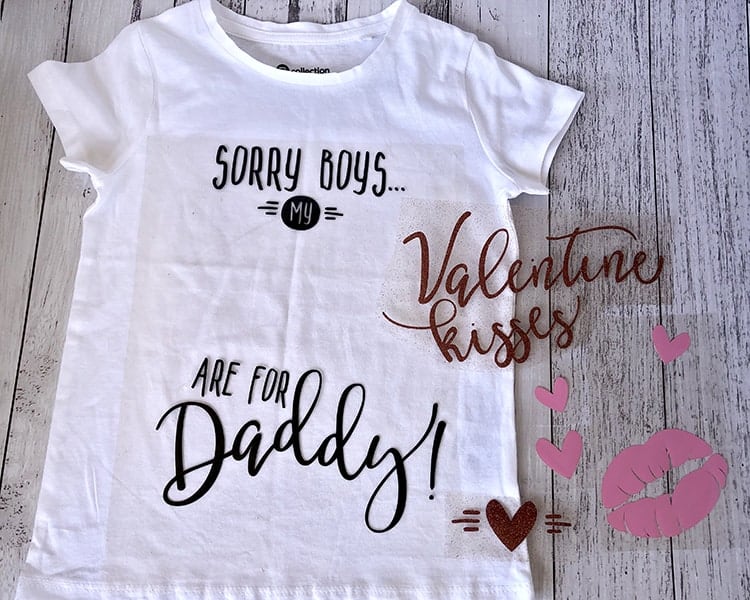
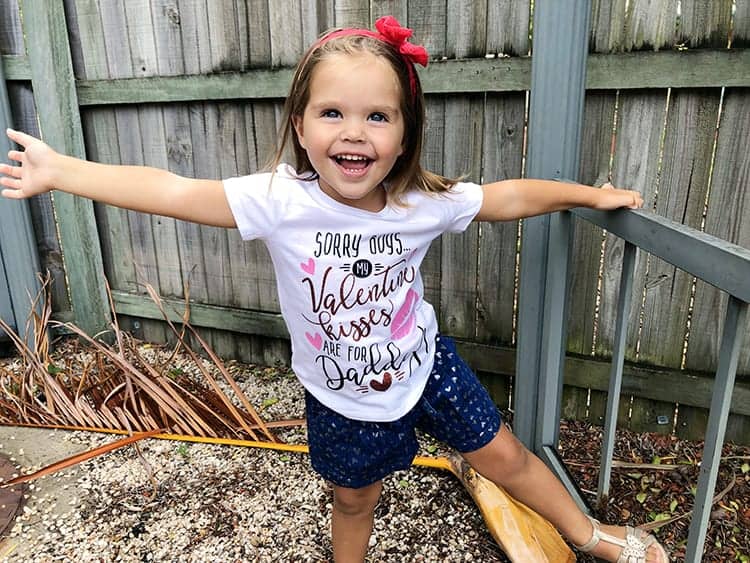
And there you have your own sweet Valentines Vinyl T-Shirt for your daughter.

We hope you enjoyed our little DIY vinyl valentines shirt tutorial. They are so much fun to whip up and what sweeter gift to your loved one, that sharing the love through your child. I think my daughter looks SUPER cute, don't you!?
If you are after more ideas of what to create for Valentines Day, why check out our Cricut Valentine ideas here.
Happy Valentines to you all.
Love this idea and want some more HTV or infusible ink tshirt ideas? Check out our blog post for some more cute Cricut shirt ideas!