Cute DIY Cricut Easter Eggs with Gold Leaf & Vinyl Sayings
After cute Easter egg designs that don't involve dyeing?
We all know you can dye eggs with shaving cream, food coloring, and more. But how about some Easter eggs ideas that involve different techniques?
Our super sweet and pretty DIY Rae Dunn-inspired Cricut Easter eggs tutorial involves a bit of paint, some metal leaf highlights, and some vinyl sayings (but you could handwrite these as well).

Our vinyl Easter eggs tutorial is really easy to follow, but I would recommend it for adults. If you are after an easy Easter kids craft activity, then check out our sweet Easter Lollipop craft tutorial instead.
They are perfect for decoration, pop them in sweet egg holders or hand them from a wood stick tree. Ideas are endless.
DIY Cricut Easter Eggs Tutorial

Find below the steps to show you how easy it is to whip up these sweet Easter eggs.
Supply List:
- Blank White Easter Eggs
- Pastel Acrylic Paints
- Paintbrush
- Liquid Tacky Fast-Drying Glue
- Glue Gun
- Twine
- Gold Metal Leaf
- Silhouette or Cricut Vinyl Cutter (I use a Cricut Maker)
- Black Permanent Adhesive Vinyl
- Transfer tape for Vinyl
- Weeding Tools
- Scoring Stylus
- The Skinny Font (download from DaFont.com)
Instructions for the DIY Cricut Easter Egg Designs
Find below the step-by-step instructions on how to whip up these sweet DIY Easter Vinyl Eggs.
1. Apply Paint and Gold Leaf
Step 1: Using pastel paints, paint your blank eggs and set them aside to dry (or use a hairdryer to speed up the process).
Step 2: Apply some tacky liquid glue with a paintbrush to the bottom 1/4 of the egg. When the glue is tacky to the touch, apply your metal gold leaf and leave it to dry.
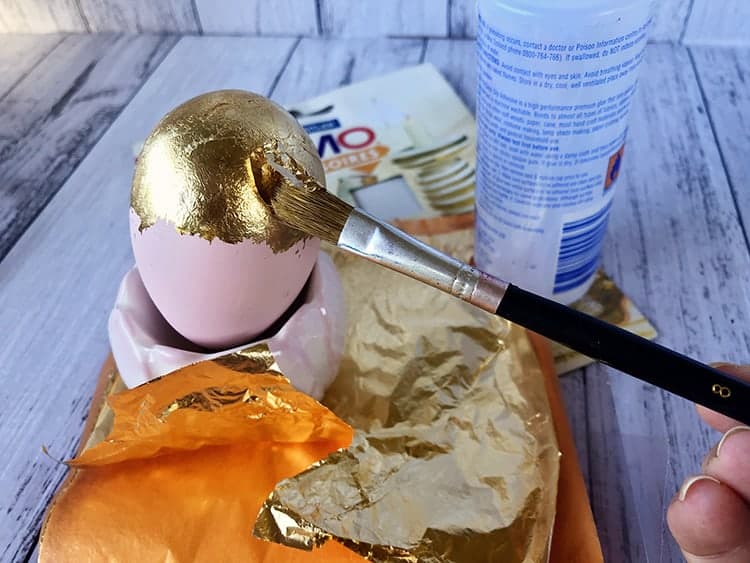
Step 3: Once the gold leaf has dried, use a paintbrush to gently brush off the excess foil.
2. Design your Vinyl Egg Sayings
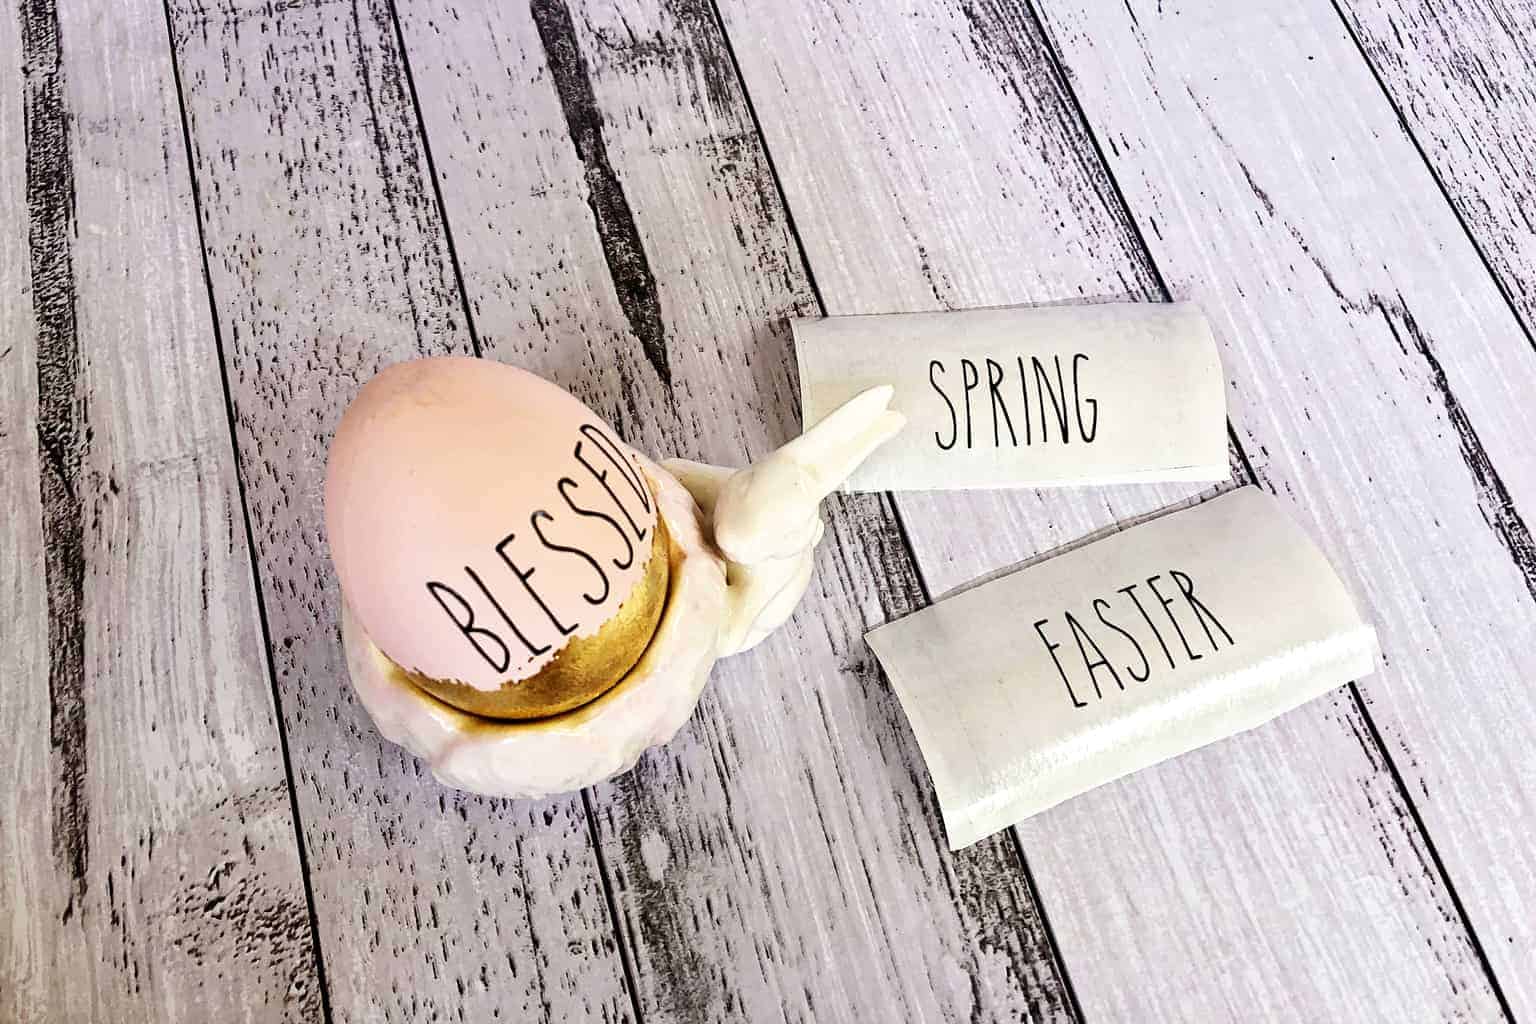
Now it is time to create our egg sayings. I like to just use words describing Easter but you could easily add names to these eggs as well. I would suggest choosing words that are short though.
Here are some ideas of egg sayings for Easter that you could use (I have a mix of religious and non-religious words):
- Easter
- Blessed
- Spring
- Faith
- Glory
- Peace
- Hope
- Joy
- Love
- Risen
- Cross
- Savior
- Bunny
- Chicks
- Peeps
- Hunt
- Hip Hop
- Hop
- Flower
- Bloom
- Chirp
Step 4: Next download and install the Skinny font from DaFont. You can also choose to purchase this font from Cricut Design Space.
Step 5: Next simply create your vinyl sayings on your vinyl cutter software. I have a Cricut Maker, so the following instructions are for Cricut Design Space, but you can follow a similar process in Silhouette Studio too.
Open Cricut Design Space and type out your words, select the “Skinny” font and change the font size so that they are around 3.5 cm in length.
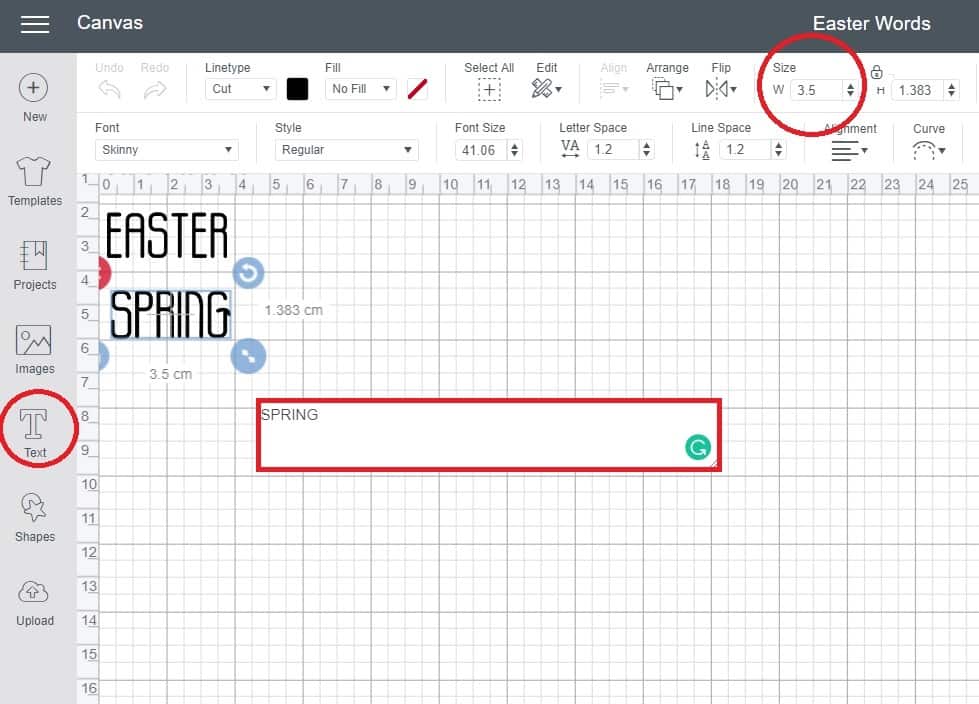
Step 6: Load your black vinyl into your vinyl cutting machine. Be sure your settings reflect the correct material – select “Vinyl” from the options and cut out your letters.
3. Applying your Vinyl Sayings
Now it is time to actually get to apply the egg sayings and ummm this step can be slightly tricky due to the fact that the letters are so thin.
Step 7: Next, trim down each word and keep the excess vinyl.
Step 8: Use the weeding tool to remove any excess vinyl. Next, apply your transfer tape. I love using my Cricut XL scraper to make sure that the transfer tape is stuck on properly.
Step 9: Next pull off the vinyl backing sheet to expose the sticky side and carefully apply your letters to your eggs.
I found that my Scoring Stylus did an excellent job of rubbing my letters onto my eggs (because the eggs curve, I could just trace over each letter – applying a bit of pressure to get the letters to stick).
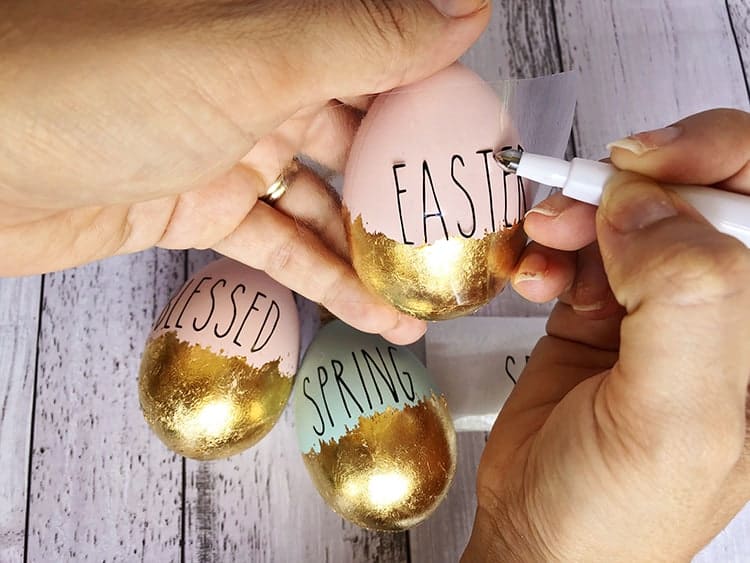
Step 10: Carefully peel off the transfer tape. I did find that some of the letters weren't stuck properly but I could use my Scoring Stylus to just press them down.
Tip: I also ran the Stylus over each letter after I removed the transfer tape to just make double sure that they were stuck properly.
What To Do If You Don't Have a Vinyl Cutter:
Now of course if you don't have a vinyl cutter, you could alternatively buy rub-on alphabet sheets and do it that way, or simply handwrite it with a fine-tipped permanent pen.
4. Adding Twine
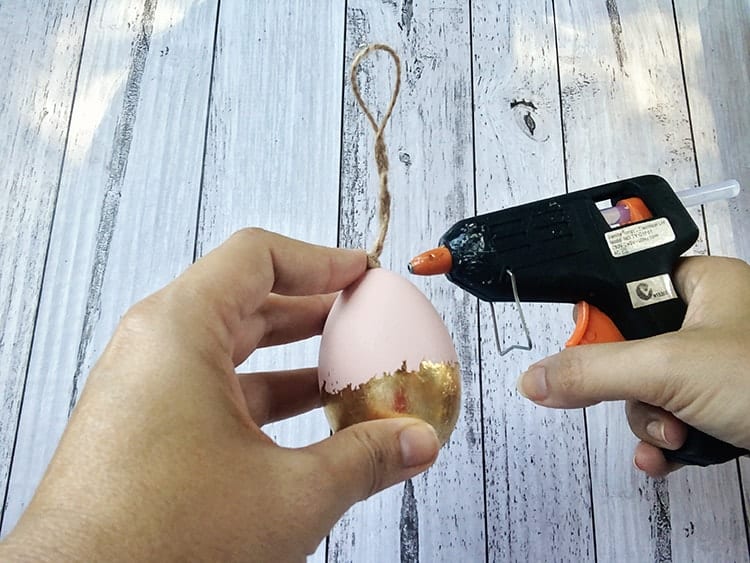
Step 11. Lastly, cut your twine at 20 cm lengths. Loop it up and tie a knot in the loose ends. Simply use your hot glue gun to adhere the twine to the top of the egg.
And there you have some super sweet Easter Eggs to decorate your house for Easter celebrations.
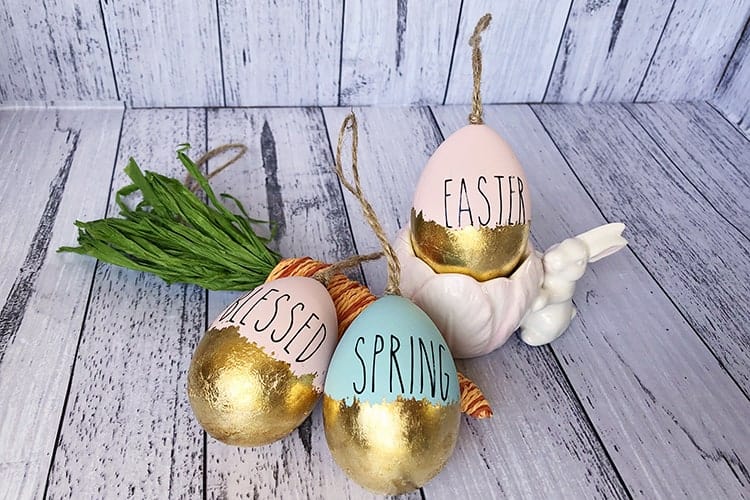
As mentioned in the introduction, you could hand these from a decor tree, create a handing Easter egg bunting, or pop them in some cute Easter Egg holders.
Do you have any other Easter eggs design ideas that you could share with us? After more Easter crafts? Here is our post full of gorgeous Cricut Easter Projects and here is a great tutorial on how to whip up a kids Cricut Easter shirt.
I hope you enjoyed our tutorial today.