Do you love the outdoors? Well, who doesn't? Nature, outdoor games, long walks, picnics, camping, stargaze, bonfire, etc.
The only thing I hate about being outdoor is there is no dishwasher! But who needs a dishwasher if you can be the dishwasher, lol.
Here is another fun and easy project to whip up with your Cricut that is handwash safe (perfect for outdoor adventures)!

Join me as I help you to whip up your very own steel Cricut mug – perfect for camping trips!
An Easy-Peasy Cricut Mug Tutorial
Find below the steps to follow in order to create a camp-themed decal for this steel coffee mug. I used adhesive vinyl since it is better for handwash and ideal for the outdoors.
Supply List
- Cricut Cutting Machine (I used a Cricut Maker in this tutorial)
- Cricut StandardGrip Cutting Mat
- Cricut Scraper and Weeder
- Cricut Stylus (recommended but not required)
- Cricut Brayer (recommended but not required)
- Oracal 651 Adhesive Vinyl
- Transfer Tape (Here is our post on the best vinyl transfer tape to use)
- Sublimation Camping Mug
- Camp Life SVG File from Etsy
Step 1: Prepare your SVG on Cricut Design Space
This is a fun project even for beginners but make sure that you use a simple and easy SVG file to work with. (The one I used is stunning but was a bit tricky to work with).
- To start a new project, click ‘New'.
- Click ‘Upload' on the Design Panel on the left to upload your chosen SVG. (You can buy the SVG I used from Etsy: Camp Life SVG)
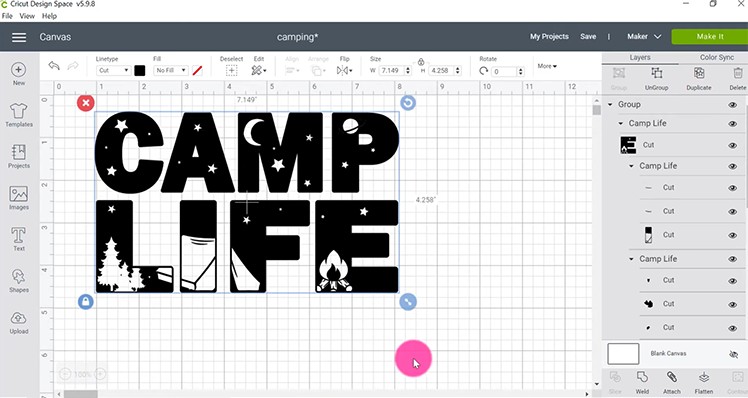
- Resize the image, make it big enough but not as big as your mug since you will struggle with the curves of your mug when you apply the decal. Make sure that it's not going all the way to the top and bottom of the mug.
- Check your SVG, if you are using multiple elements on your design make sure that your SVG is “Attached”. That way your elements will keep their positioning.
Tip: To create your own text similar to ‘Camp Life', simply choose a thick letter, position some shapes and images onto your letter then slice the shapes out of the letter.
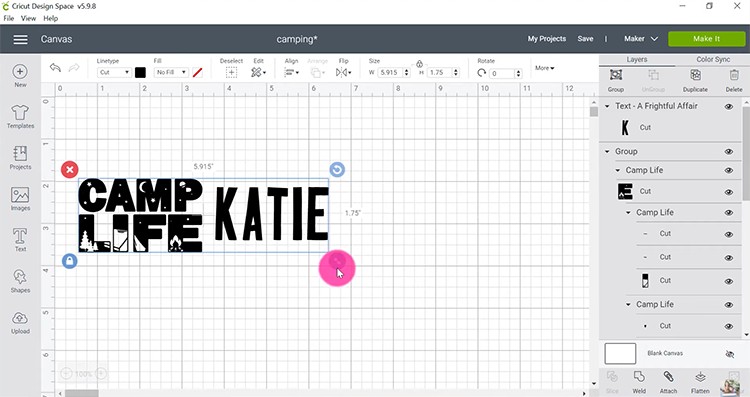
Step 2: Add a Name for the Other Side of the Cup
To make it more personalized, add the name of your child on their mug!
- Click on the ‘Textbox' on the Design Panel on the left to create your text.
- Type the name that you want to put on the mug. Choose a thick font. A thick font is much easier to work with, it is easier to weed and much easier to transfer (due to the larger surface area).
Tip: You can use a font that you want (if you don't have Cricut access). Simply download a font and install it on your computer. All installed fonts on your computer will automatically be included in your Cricut Design Space fonts. In downloading fonts, choose OTF (Open Type Font) since it is the newer/better version than the TTF (True Type Font).
- Double Check to make sure that you have enough space on your mug to fit both the SVG and the name of your child. (In this tutorial, the size of both SVG file and name together is approximately 6 inches in width to fit on the mug).
Tip: To measure how big the area of the mug is, get a string and put it around the mug then measure the string using a ruler.
- Put a space between your SVG and Text so it will be easier to snip apart after cutting. Click Make It.
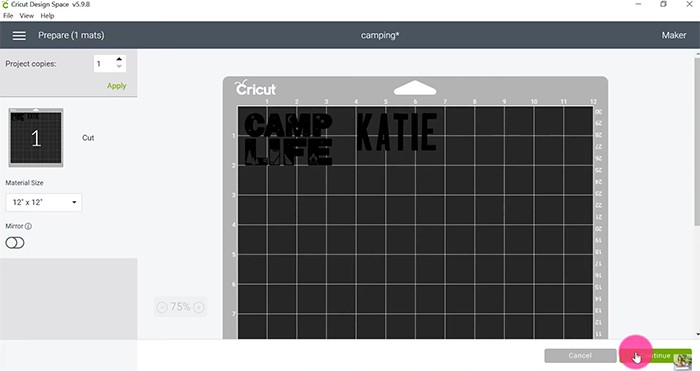
- Have a quick look over your mat to ensure that everything looks perfect. If you are happy simply click Continue.
Step 3: Choose your Settings and Start Cutting the Vinyl
- Make sure to select adhesive vinyl for your material.
Tip: Make sure that you are using permanent adhesive vinyl. Temporary vinyl will come up super quickly in the water when you wash the cup. You could also use HTV, however, I find that adhesive vinyl works better on steel mugs.
- Place your adhesive vinyl on the StandardGrip Cutting Mat (green cutting mat). The shiny side or colored side should be facing up on the mat.
- Use your hand or Cricut brayer to smooth out any wrinkles and bubbles.
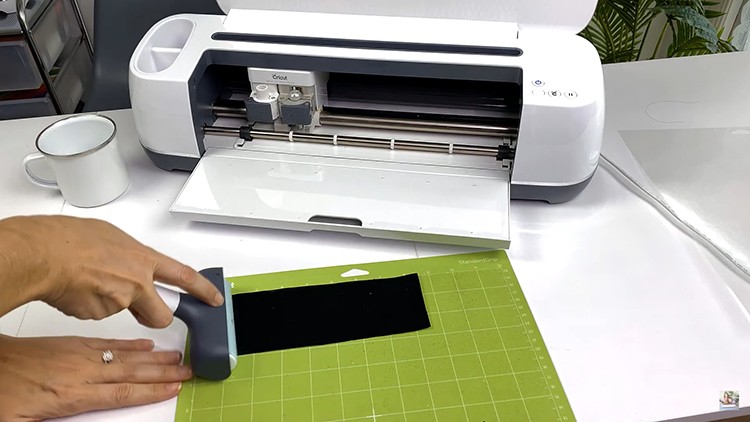
- Load the mat in your machine and press C to start cutting. Wait for it to finish.
- Unload the mat once done.
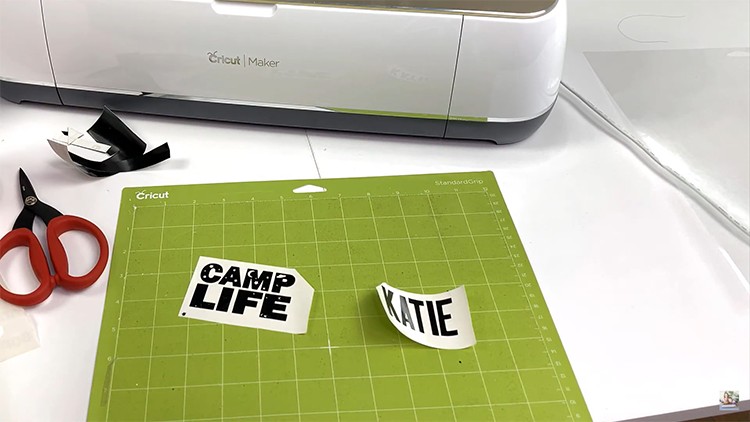
Step 4: Weed and Transfer your SVG to your Mug
- Weed out the excess vinyl around the name and the SVG using your weeder, leaving only the letters for your mug. (Learn more about how to weed vinyl here).
- Get your transfer tape, remove it from the backing and place it on top of your decal (I want my transfer tape slightly bigger than my design so it will cover all the design).
- Use a scraper to rub the letters to stick them to your transfer tape.
- Peel away the sticky sheet from its backing carefully. If your letters don't lift up easily, you can give them an extra rub with the scraper or help them to lift up using your fingernails.
Tip: You can also use a ruler, or simply use your fingers to rub your vinyl to stick it to the transfer tape as a subsitute if you don't have scraper.
- Grab your mug and stick your SVG and name to each side of the mug. Use the scraper or a stylus to rub over the letters in order to release them from the transfer tape.
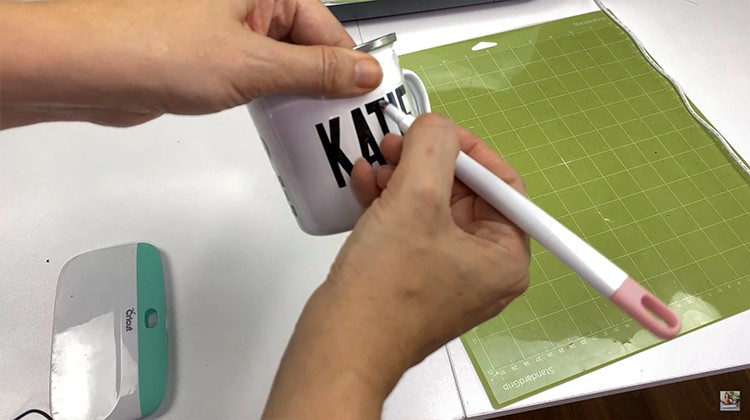
Tip: You can also use the stylus to stick on those little pieces of adhesive vinyl. This is most helpful when working with small or thin letters and designs.
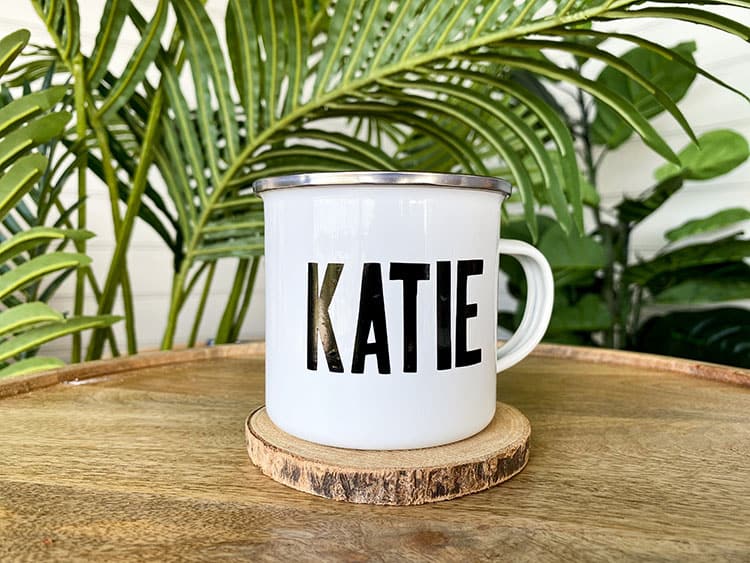
- Peel off your transfer tape and you now have your design and name on each side of the camping mug! Isn't it lovely?
Your mug is complete. It is important to keep in mind that vinyl does not love water. Adhesive vinyl can handle water pretty well but eventually, the decal will start peeling off. This mug is currently perfect for a quick handwash (don't let it soak), but it won't like a dishwasher as much.
If you wish to make your mug dishwasher-proof I suggest you seal it with something like Mod Podge or a waterproof sealer spray.
I'm sure your kids will love using this steel camping mug with their names on it. Don't forget to make one for each of them and pack on your next outdoor or camping adventure!
Looking for more Cricut Coffee Mug Ideas? Click here to check out our list of beautiful Cricut Cup Ideas that you can try next.