A mother is sometimes called mommy, mom, mama, mummy, mum, momma, ma, madre.
Whatever your kids call you, you are still that one person wearing a lot of hats and doing a lot of roles.
For your kids, you are their world's best chef (even you just cooked pancakes and hotdogs for them), caring nurse, patient teacher, uncomplaining housekeeper and chauffeur, event planner (they love how you throw parties for them), health care provider (your hugs and kisses are the best medicine), counselor, stylist, photographer, manager, and director (how can they forget the song and dance you taught them on talent day?), superhero, best friend, and their number 1 fan.
Whatever hat you are wearing, you are still amazing! Salute to all mothers around the world! Happy Mother's Day!
Here is a tutorial for a DIY Cricut Mother's Day gift you can make this year.
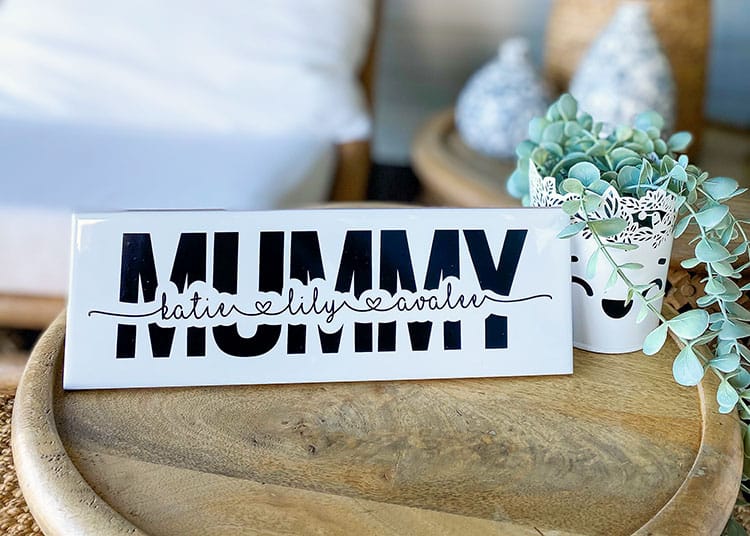
It is fun and easy, you can get a little help from your kiddos and bond with them while you make it. Doesn't it look so elegant? Definitely looks store-bought to me!
DIY Mum Subway Tile With a Cricut
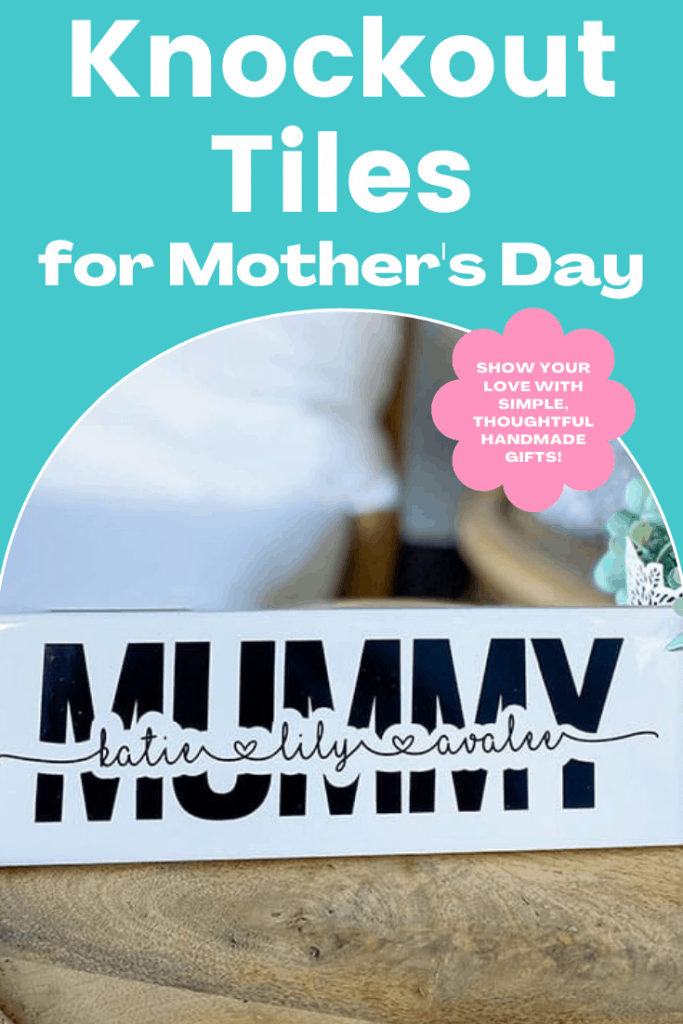
Find below the steps to follow in order to create these adorable Knockout tiles perfect as a Mother's Day gift for your loving and selfless moms.
It is an easy project that everyone can do, even for a newbie.
I chose to do the tile with the word ‘Mummy' and then add my kids' names, however, you could also pop Mother's Day quotes on these tiles too!
Supply List
- Cricut Cutting Machine (I used a Cricut Maker in this tutorial)
- Cricut StandardGrip Cutting Mat
- Cricut Scraper and Weeder
- Cricut Stylus (recommended but not required)
- Cricut Brayer (recommended but not required)
- Cricut Self Healing Mat (recommended but not required)
- Cricut Rotary Cutter (recommended but not required)
- Metal Ruler (recommended but not required)
- Oracal 651 Adhesive Vinyl
- Transfer Tape (Find the best transfer tape to buy in our post here)
- Baking Paper (Any brand)
- Rubbing Alcohol (Any brand)
- Glossy White Subway Tile (Around 12 x 4″ in size): (3 x 12″) or (4 x 16″)
Step 1: Download & Install the Font
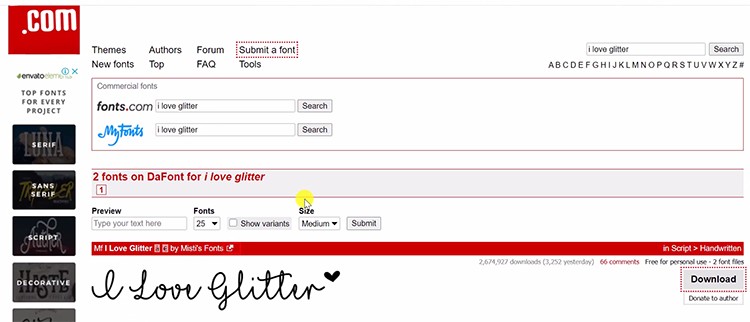
You can use fonts already available on your device but you can also download a new font for this project. I used a font named “I Love Glitter” downloaded via Dafont.com and another font called Oswald Semibold from Cricut Design Space.
- Go to Google and type Dafont.com on the address bar. Click on the site when it pops up.
- Type “I Love Glitter” (or anything flowy font) on the search bar.
- Click download on the font that you want to download.
Tip: I used the font “I Love Glitter” because it is a beautiful flowy font with fancy glyphs which is perfect for Knockout text effect for this project.
- Search for the downloaded font on your downloads folder and click to open.
- Choose the font type that you want to install and click Install.
Tip: In installing fonts, choose OTF (Open Type Font) since it is the newer/better version than the TTF (True Type Font).
- Open your Cricut Design Space or if your Cricut Design Space is already open, click on View then Reload (this is to refresh your Design Space to include the font that you have recently downloaded and installed).
- Here is a more detailed tutorial on how to upload fonts to Cricut Design Space (for those that need more detailed instructions).
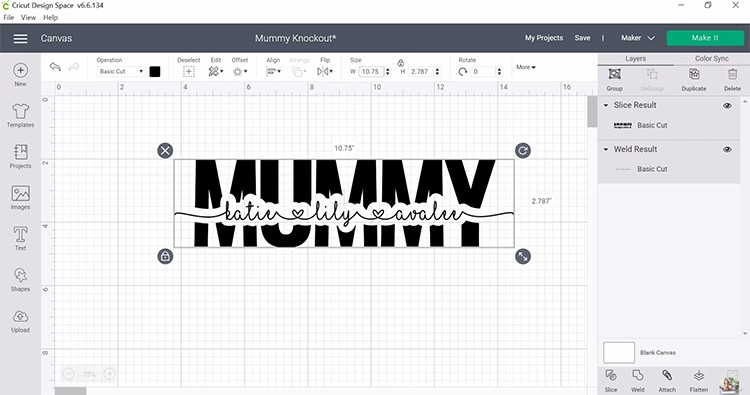
Step 2: Create Text 1 (MUMMY) in Cricut Design Space
This is the main text to be cut for your tile. Choose a bigger and thicker font so it will be visible even from afar.
- Click ‘New' to start a new project.
- On the Design Panel on the left, click on the ‘Text box' to create your text.
- Type the word that you want to put on your tile. Here I used the word “Mummy”.
- Click the dropdown on the ‘Font' and choose the font Oswald Semibold.
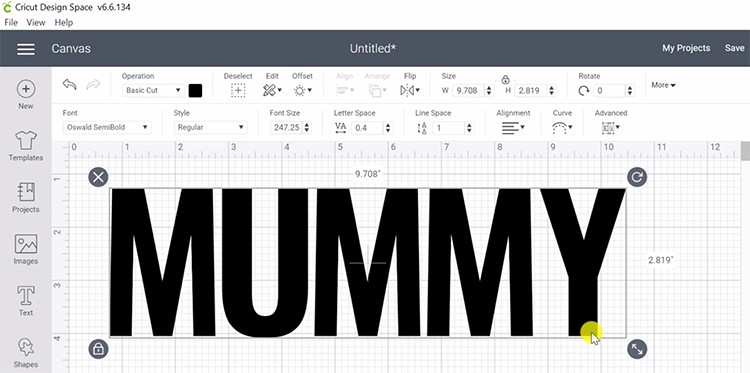
- Move the letters of the word slightly closer together until you are satisfied with the spacing.
Tip: You can move the letters of the word in two ways:
First by using the ‘Letter Space' on the Edit panel. Click the arrow down to move the letters closer or move the arrow up to make the spaces bigger.
Second, by using ‘Ungroup' on the Layers panel. By ungrouping the word, you can manually move the letters.
You can also click on the ‘Align' on the Design Panel to check if your letters are aligned with one another.
- If you are already happy with the spacing and the size of your word, click ‘Weld' to make it one word. The tile I used is 3×12 inches so I make sure that the word is slightly smaller so it will fit into the tile.
Step 3: Create the Text 2 (KIDS NAMES)
You can now use the beautiful flowy font here like the ‘I Love Glitter' one which we have downloaded from Dafont.com in step 1.
- Click the ‘Text box' again to create a new text.
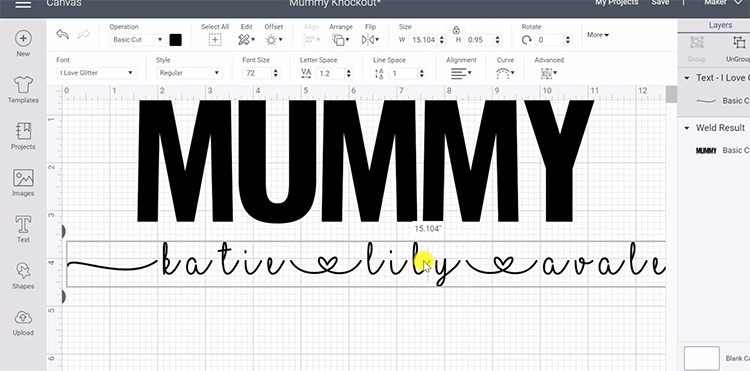
- This time we will type the names of the kids. To do the nice flourish or swash to the letters you can type the following [katie_lily_avalee]. It's up to you if you want the first letter of the name to be a small or capital letter, but I prefer a small letter.
- Then on the Font, choose the I Love Glitter font.
Tip: The square bracket will be changed to a wavy swash while the underscore will be changed to heart once you changed the font to I Love Glitter.
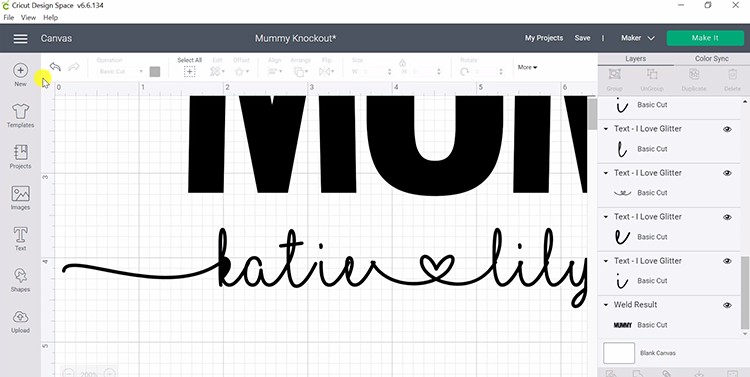
- Move the letters closer to have that beautiful cursive look by using the ‘Letter Space' or manually moving the letters by ungrouping.
- Work your way into connecting all those letters. Once you are happy with how the names look, drag a box around the names to highlight and include everything then click ‘Weld' on the Layers Panel to have one single layer for those letters.
Tip: Move the letters closer but not too close since it will make the closed part of the letter all black once you weld it (look at the small letter k on the example below). It helps to make the letters REALLY big so you can see what you are doing.
If the inside of letters go black when you weld, just click undo and move the letters a little farther.
Step 4: How to Create an Offset Around the Letters
The white space around that highlights the letters of the word is called an Offset. This will help in the knockout text effect for this project.
- Click the word that you want to apply the offset to (in this case it will be the kids' names).
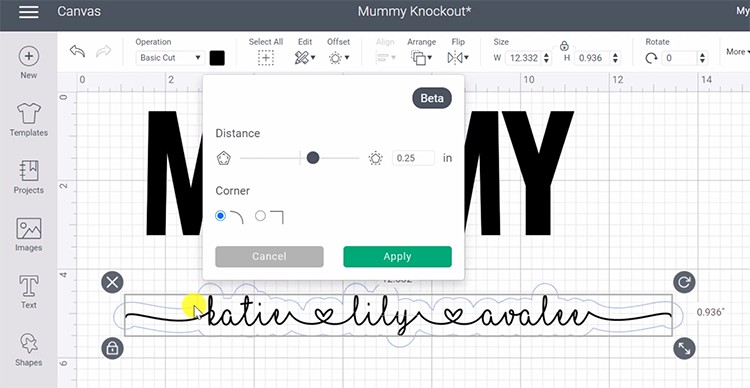
- Click ‘Offset' on the Design Panel to create an offset around the letters.
- On the inches, put how big you want your offset to be. In this project, I used 0.25-0.30.
- You can also choose if you want a rounded corner or squared corner. I used a rounded one because the round end looks cute with this project.
- The blue line around the letters is the offset, adjust as needed then Click Apply.
- Grab your text and offset together and put them on top of your main text to size up. Decide how big you want your second text against the main text. Adjust the text size and position as necessary.
Tip: If you want to check if your second text is in the center of the main text, grab both text and click Align then go to Center Align. It will automatically align everything.
- Next, remove the second text (but leave the offset where it is).
- Highlight both the main text and the offset then click ‘Slice' on the Layers Panel so we can cut the cloud-looking offset right out of the word Mummy.
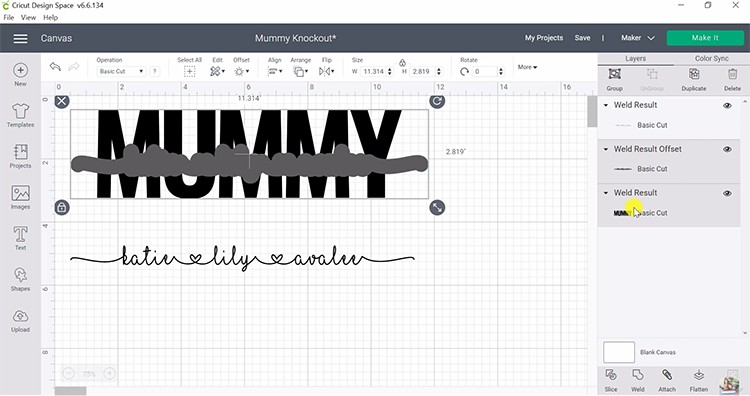
- Delete the extra sliced layers that you don't need, leaving only the main text Mummy and the second text which is the kids names.
- Measure the height and width of the text, it should not be bigger than the tile. Mine is 10.75″ in widths and 2.78″ in height.
Step 5: Cut and Weed your Design
- Click Make It then Set base material to ‘Vinyl' and Pressure to ‘More'.
Tip: I always like to set Pressure to ‘More' because it makes weeding a lot easier.
- Place your permanent vinyl on the StandardGrip cutting mat, make sure that the shiny side is facing up the mat.
- Use your hand or Cricut brayer to smooth out the vinyl on the mat.
- Press the arrow button to load the mat in your machine and press C to start cutting. Wait for it to finish.
- Unload the mat once done.
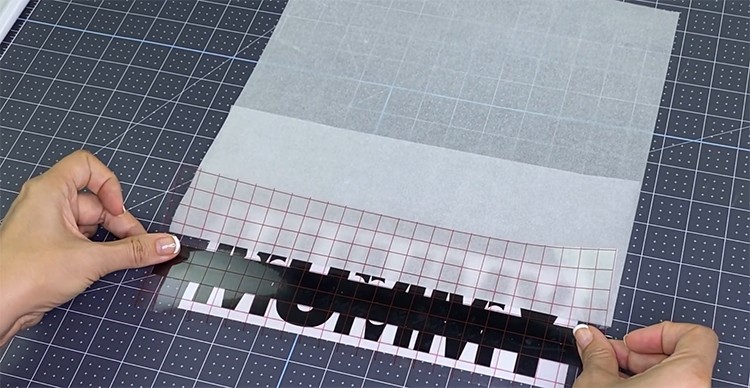
- Flip the mat upside down to remove the vinyl from the mat.
- Trim your vinyl then weed to remove the excess vinyl around your larger design. Here is a great article on how to weed vinyl (for beginners).
- It is easy to weed out excess vinyl from the main text (because it is big and bold text) but it is a lot harder on the second text since we have tiny letters and flourishes on it so I highly recommend you reverse weed the second text. That means that you should NOT remove any excess vinyl yet.
Tip: Reverse weeding is a technique that works well when you have tiny letters, flourishes or fancy letters on your design.
- Cut transfer tape big enough to fit both your main text and the second text.
- Position your second word on top of your main word where you sliced the offset. Use baking paper to prevent the transfer tape from picking up the vinyl for your main word.
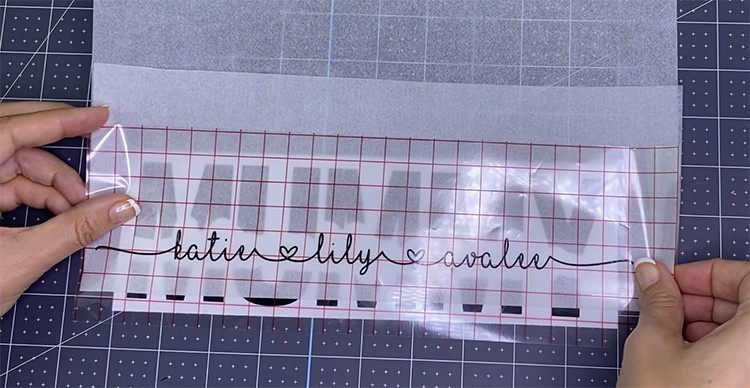
- Pick the second word only to do the reverse weeding. Get your scraper and rub the front and back of your vinyl to stick the fine letters up the transfer tape.
- Peel off the vinyl backing, leaving the block of vinyl on the transfer tape.
- Carefully peel off the excess vinyl around the letters and inside the letters. This is the reverse weeding technique.
If this is confusing to you I highly recommend you watch the video on this page to see it in action.

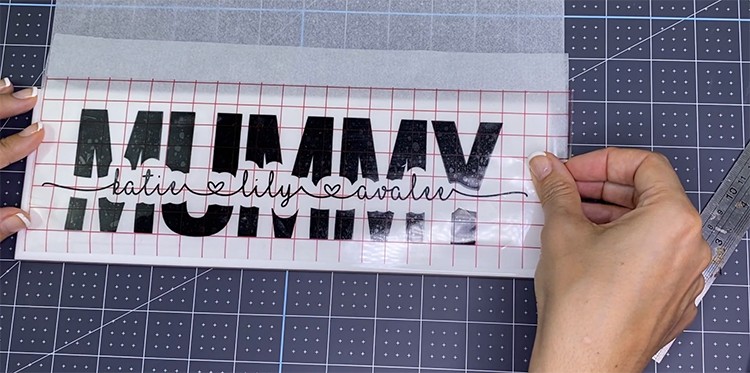
- Now, layer the main text with your second text on the transfer tape. This is where the cutting mat comes in handy, use the grid lines of your cutting mat to keep everything as straight as possible.
- Grab again your baking paper, put it on top of your main text. This will help you move your second text around to find its position without sticking the transfer tape to the main word.
Tip: Baking paper allows you to find perfect positioning before commiting to sticking down your adhesive vinyl. It makes life so much easier! Give it a go.
- Once you're satisfied with the position of your layered text, stick the edge of your transfer tape down on the mat to keep your second text in place before removing the baking paper.
- Pull out your baking paper.
- Gently press down your transfer tape.
- Use a scraper to apply pressure to your letters in order to get them to adhere properly.
- Carefully peel away the sticky sheet from its backing. If your letters don't lift up easily, give them an extra rub with the scraper or lift them up using your fingernails.
Step 6: Prepare your Tile and Transfer your Decal
- Clean your tile with rubbing alcohol, this is to remove the oil and dirt on your tile.
- Set the tile aside to let it dry.
- Pop your baking sheet with the decal on top of your tile. This will help you position your design on the tile.
- Leave a little sticky side over the edge of the baking paper to stick to the tile once you're happy with the position.
- Position your design at the center of the tile. Using a ruler, make sure that there is even space at the end of each flourish.
- Once you're happy with the placement, again stick down the bottom of the transfer tape to the tile to keep your design in place then remove the baking paper.
- Use your scraper again to stick down your design to the tile.
There you have that lovely and easy-to-make knockout tile that you can give as a present!
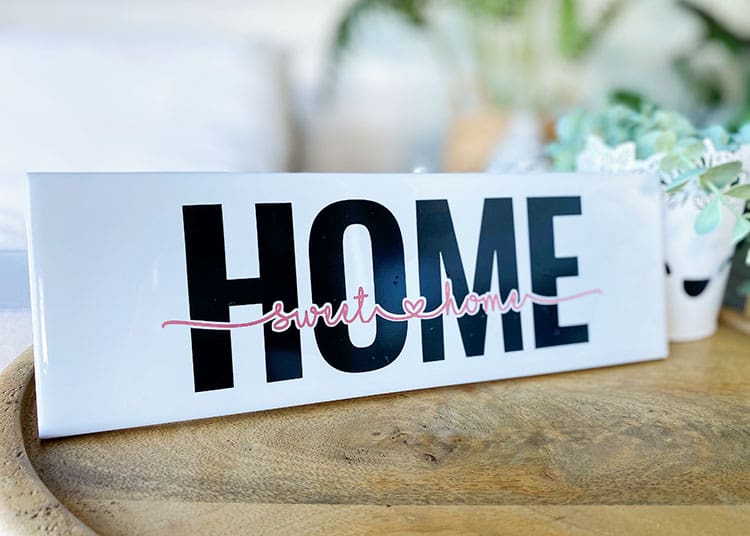
You can try different designs and colors, like the one with pink Sweet Home below for your homes. You can also grab a cheap plate stand to put these tiles up on display!
Enjoy playing with those tiles! Share with us what design you come up with and where you plan to put it.