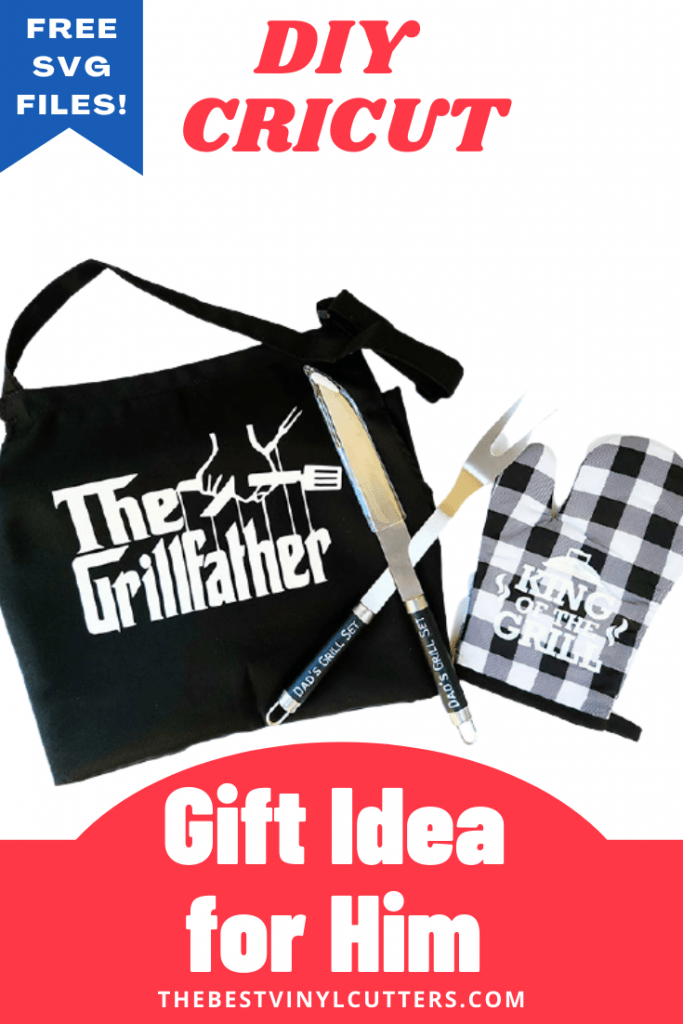
Want to create the ultimate Cricut gift set for a special man in your life? Then scroll on down as today we will be decorating various items that when placed together can create a wonderful grill set.
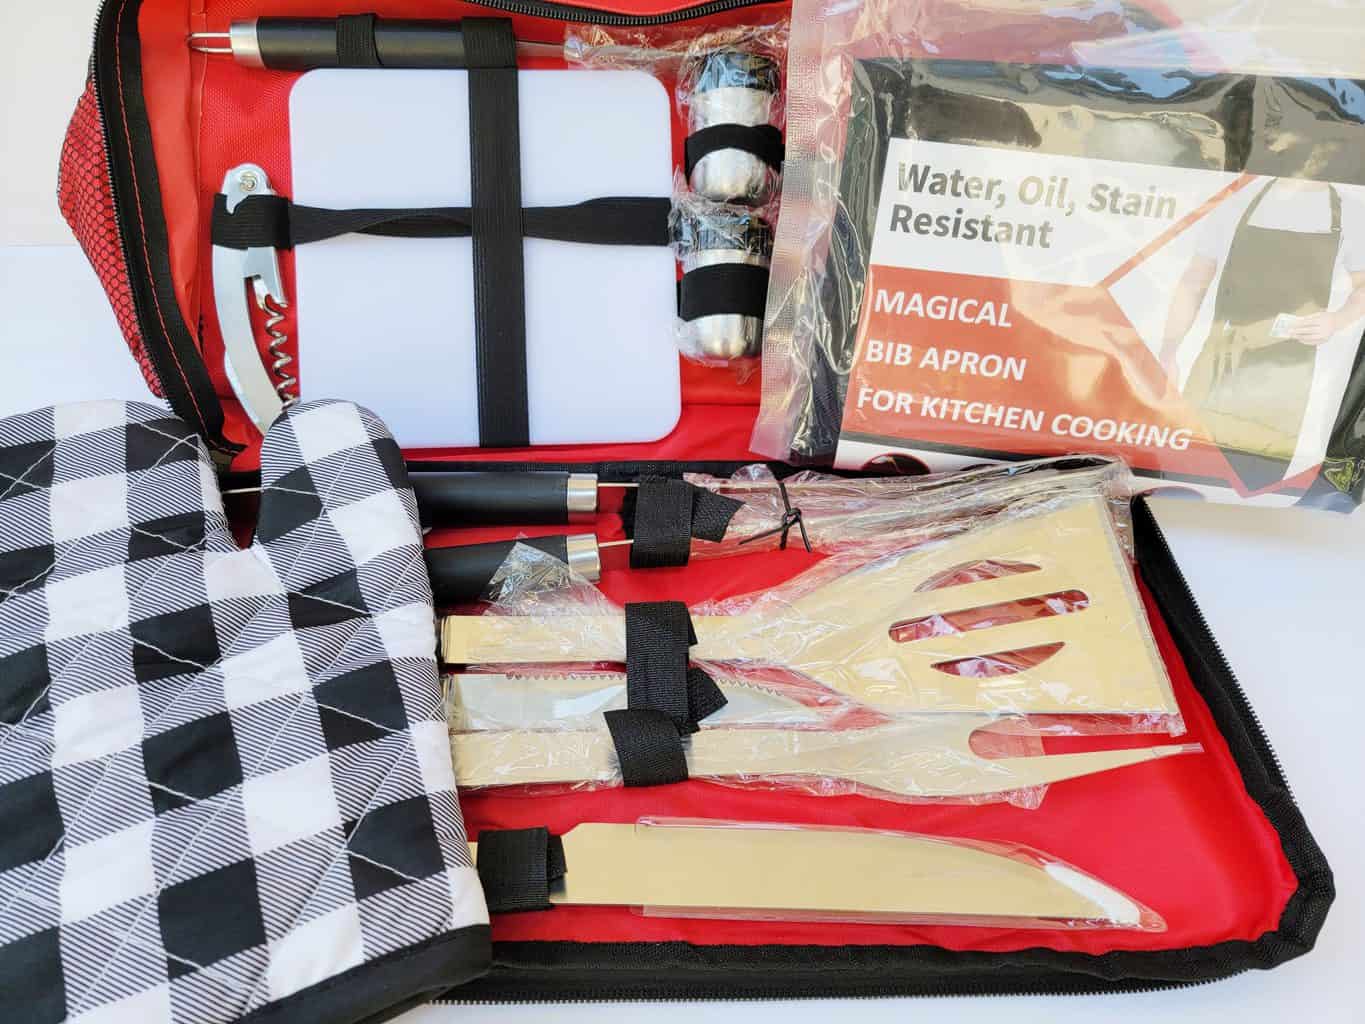
All that is missing are the meat cuts and drinks to be stored in the portable cooler.
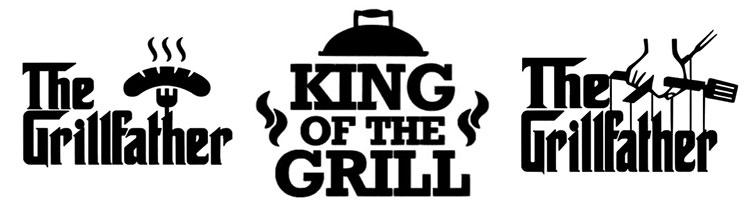
The best part of all, this project comes with three SVG designs for you to choose from. You can choose to make the project with the same design or shake it up a bit and use all three.
These Cricut gifts for him, are perfect for Father’s Day, for birthdays, and even for Valentine's Day. If the man loves to BBQ, he will feel so spoiled with this gorgeous handmade gift set.
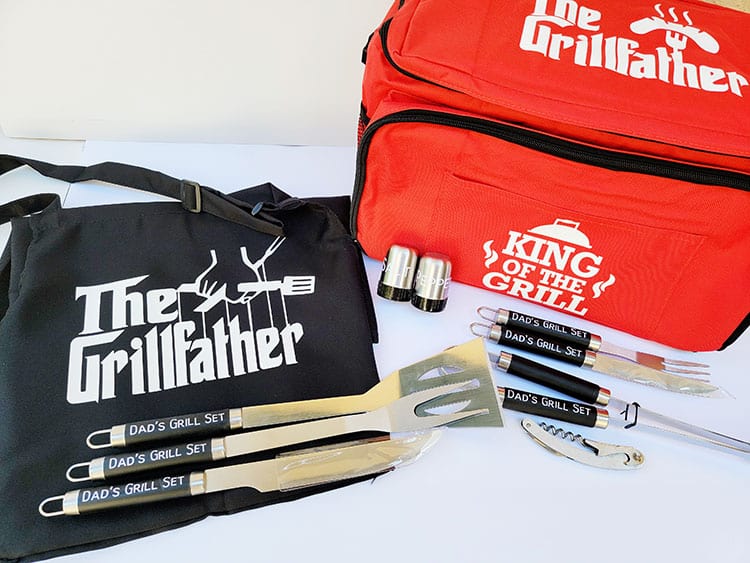
Cricut Gifts for Him: Personalised Grill Utensils, Apron, Grill Bag with Cooler Bag
If you have a man in your life that just loves to grill then this Cricut Gifts for Him idea is the ultimate Cricut gift idea!
This is sure to be a winner and make your grillmaster smile. It is also a great gift for Father's Day, but if this is not exactly what you had in mind, you can find more Cricut Father's Day ideas here.
Gifts Purchased from Amazon to Personalise:
Cricut Supplies Needed:
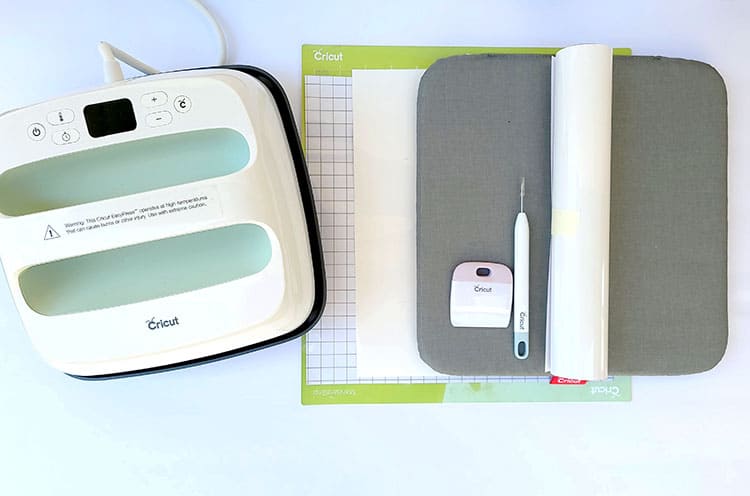
- Cricut Cutting Machine (I used an Explore Air 2)
- Cricut StandardGrip Cutting Mat
- Cricut EasyPress 2
- Cricut EasyPress Mat
- Transfer tape (Here is our post on the best transfer paper for vinyl)
- White Iron-on Vinyl
- White Permanent Vinyl
- Scraper
- Weeder
Step 1: Download and Upload your SVG to Cricut Design Space
Find below the step-by-step instructions on how to prepare your Father’s day SVG for cutting.
- Download your 3 Grill Master SVG Files – They are FREE!
- Next, open Cricut Design Space and start a New Project.
- Select “Upload,” then “Upload Image,” and “Browse”.
- Upload the free SVG files you just downloaded in step 1.
- Once all files are uploaded, select all three and select “‘Insert Images”.
- Now all you need to do is decide which design you will use where. We used ‘The Grillfather’ on the Apron, ‘King of the Grill’ on the Grill Mit, and both ‘The Grillfather (with the sausage)’ and ‘King of the Grill’ on the cooler. If you are doing it the same as us, you will need to duplicate the ‘King of the Grill’ SVG.
- After, you will need to resize each image file to your desired size.
- For the grill designs, we will be working with HTV (or iron-on).
- For the personalized labels for the tools and salt-pepper, we will need adhesive vinyl.
- For the personalized labels create text that will be used on the grill utensils. To add the text make sure to select the Text icon and use the following font: Arial Narrow. Type out the words “Dad’s Grill Set” and “Salt”’ and “Pepper”.
- Change the color of the text from black to gray. That way the black grill graphics will be cut out from one mat so that we can use HTV, whilst the text will cut out on a separate mat so we can use adhesive vinyl.
- Duplicate the “Dad’s Grill Set” text an additional six times for a total of seven decals for each individual tool (or for as many tools as you will be creating labels for).
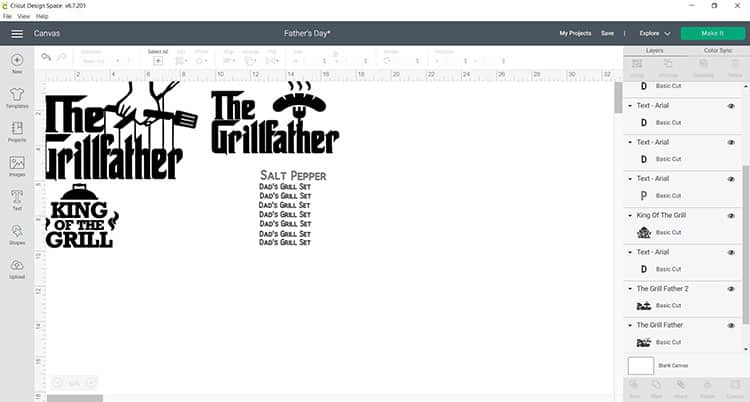
- Resize the words so that they will fit on the utensils.
- Once you are satisfied with the design you can now move on to the next step of cutting the design.
Step 2: Prepare your Cutting Mat
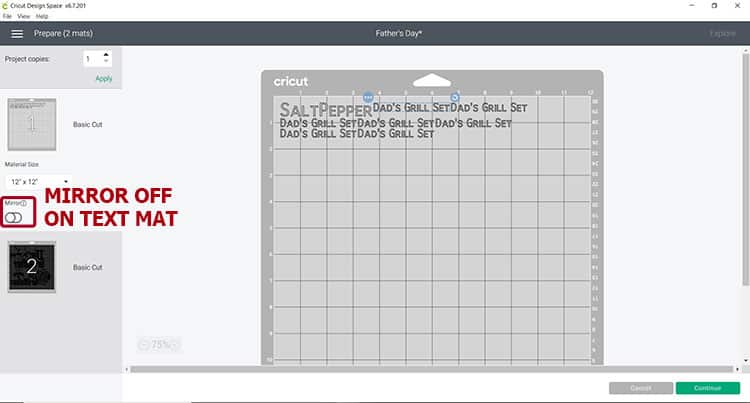
Next, it is time to cut your design. This project will have you load the project into two different mats. One mat will be for the iron-on vinyl while the other will be for the permanent vinyl.
- When you are happy with the size and color of your design click on “Make It”.
- Make sure to select “Mirror” on the Iron on decals which include the “King of the Grill” and “Grill Father” designs.
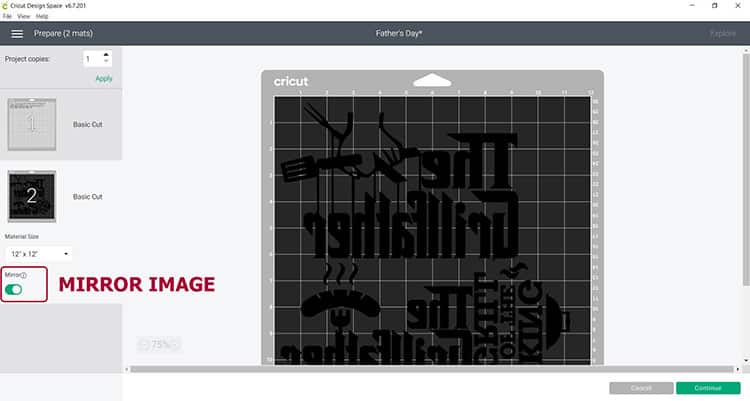
Note: You will want to make sure the “Dad’s Grill Set” text DOES NOT have the “Mirror” option as we will cut the text with adhesive vinyl.
- Select continue and connect your Cricut machine.
- You will now be able to pick your material and cut settings.
- If you have an Explore Air 2 – Select “Iron-on” on your material dial for the HTV and “Vinyl” for the permanent vinyl.
- Place the HTV with the shiny side down and the permanent vinyl with the shiny side up on the Green StandardGrip mat.
- Load the mat into your cutting machine and follow the instructions to cut the transfer sheets.
Step 3: Weed your Design
Now that your design has been cut you will need to weed the cut vinyl before moving on to the next steps.
- Unload the mat and carefully peel or roll the mat away from the vinyl.
- Trim down the vinyl if needed. Then start peeling away the excess vinyl from the top left corner. Go slowly around the letters and fine details. Don’t forget to weed out the inside pieces.

Tip: You should be able to do your weeding with your fingers, but use a weeding tool for smaller detail if required.
Step 4: Press the HTV Designs onto the Apron, Cooler, and Mitten
Now that you have completed weeding all your cut vinyl pieces, it is time to heat press the iron-on vinyl to the mitten, cooler, and apron to create your Cricut gift for him.
- Start by warming up your EasyPress. I am using the EasyPress 2 and setting it to 300°F for 15 seconds.
- Iron the apron to make sure there are no wrinkles and make sure there is no lint by using a lint roller if available.
- Next place the design on the apron.

- Apply heat to your design for 15 seconds at 300°F. If you are using the EasyPress 2 (highly recommended) you need to apply light pressure.
- Wait for the Transfer Sheet to cool down before you remove it.
Tip: Be sure to check to see if your iron-on vinyl is a cool peel or hot peel. If it is a hot peel you will remove the transfer sheet before the design cools down. For cool peel the transfer sheet can only be removed when it has cooled.
- From there you will want to repeat steps 2 through 5 to apply each design to the cooler and mitten.
Step 5: How to Transfer Adhesive Vinyl to Grill Set
Once you have weeded out the grill set text design you will need to place the vinyl on the grill tools.
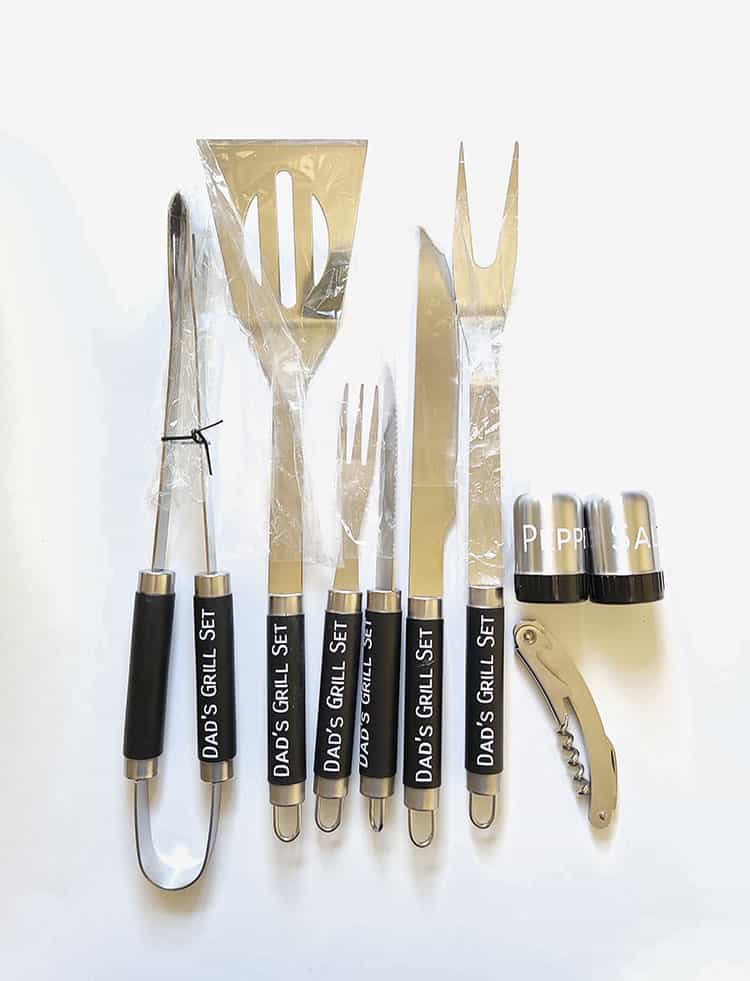
- Before we apply the vinyl to the tools, please ensure that your tools are really clean and dry.
Tip: It is much easier to use transfer tape/paper to move your design over to the tools.
- Cut your transfer vinyl so that it is the same size or slightly larger than your design vinyl.
- Place the transfer tape on top of the vinyl and be sure not to have any bubbles or bumps.
Tip: Use the scraper to get rid of any bubbles or imperfections
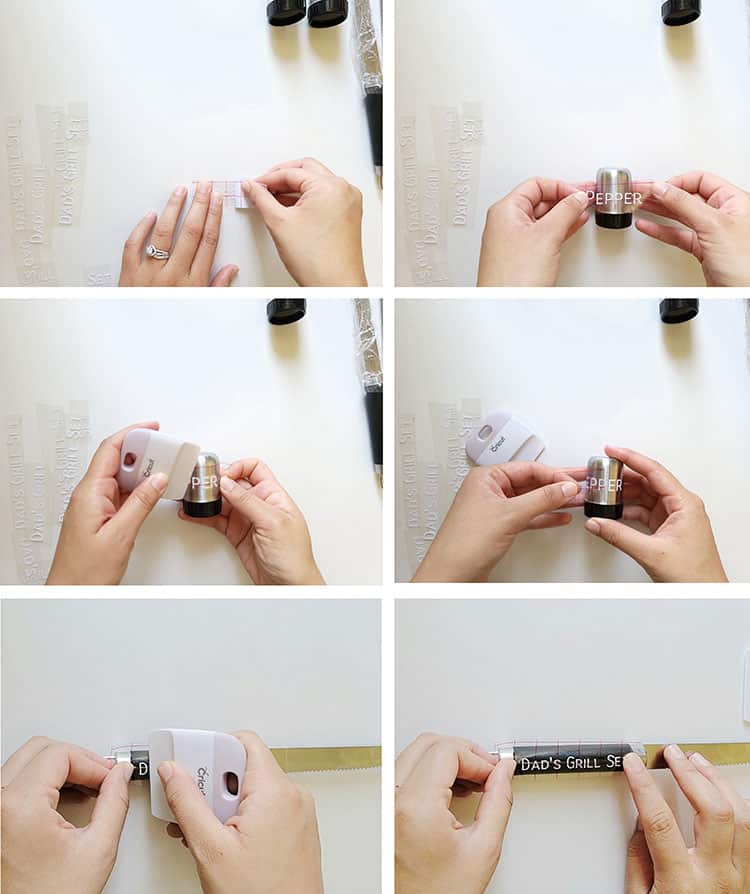
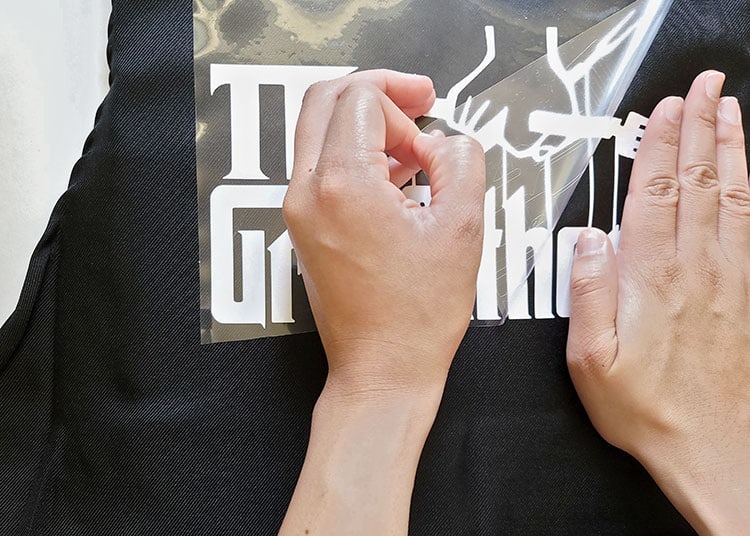
- Use your scraper to rub over both the front and the back of the design. We want the image to stick to the sticky transfer tape so that it will lift up off the vinyl backing sheet.
- Slowly peel up the transfer tape and design from the top left-hand corner. Move slowly and try to work at a semi diagonal angle. If your stencil is not lifting up with the tape, place it back down and give it another good rub with the scraper.
- Place the image on the tool, making sure there were no bubbles or bumps. Try to make sure that it is in the center and that it is straight.
- Once again, use the scraper to rub over the design. This time we want it to stick to the wood and to release from the transfer tape.
- Slowly peel back the transfer tape. Once again if your design lifts up, simply place the tape back down and rub over the problem area again. Place your transfer tape back on the backing paper (you can reuse transfer tape so don't throw it away).
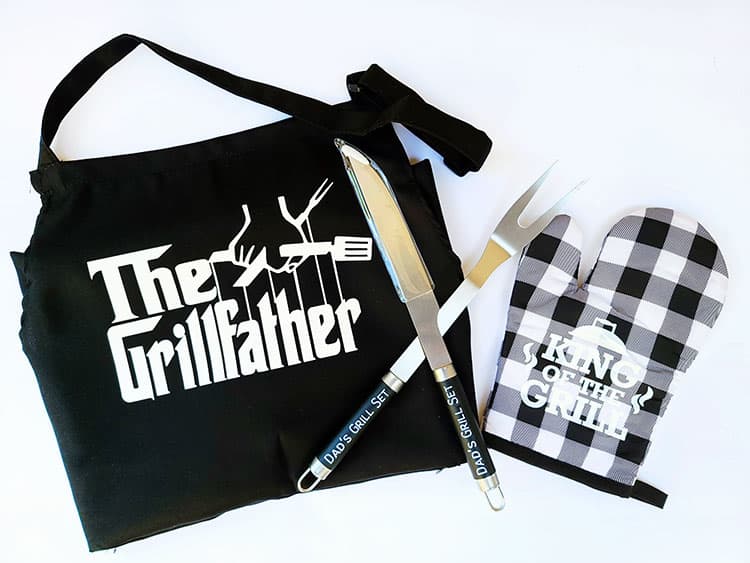
And just like that, you have created your very own Father’s day gift set which includes grill tools, cooler, and apron.
The beautiful thing about this is you can make it for anyone who loves to grill as a birthday set, anniversary gift, or more!
Want more ideas? Check out our post with more easy beginner Cricut Gift Ideas for Him! Or this Father's Day Cricut Mug with Infusible Ink – perfect for dad!