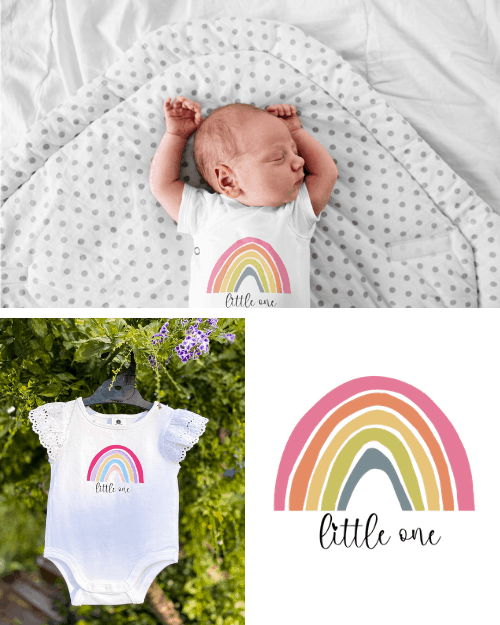
Looking for a perfect gift for the adorable new bundle of joy? Why not create something with your personal touch on it?
Here is one project I'm so excited to teach you, how I created this cute multicolored vinyl decal for a baby onesie.
What's so awesome about this tutorial is that I will teach a trick on how you can cut every bit and piece of different colored vinyl using a single mat only!
How cool is that? Saves time and effort loading and unloading your mat, simple and easy!
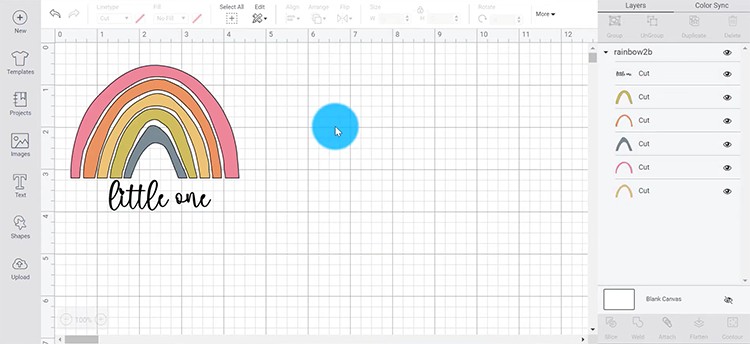
Plus, this fun SVG file is handpainted digitally, and if you want this Rainbow SVG you can download it here for free.
DIY Cricut Baby Onesie with an HTV Rainbow Decal
Find below the steps to follow in order to create this cute colorful rainbow decal onesie perfect for your adorable little one.
You can use any blank baby clothes for this tutorial, it doesn't matter whether it is a cotton short-sleeve onesie, some blank bamboo pajamas for a baby, or a cute little blank romper that you have on hand.
Supply List
- Cricut Cutting Machine (I am using a Maker)
- Cricut StandardGrip Cutting Mat
- Cricut EasyPress (or iron)
- Cricut EasyPress Mat (or towel)
- An Assortment of Pastel HTV (I used Siser EasyWeed HTV in this tutorial)
- Blank Baby Onesie (preferably white if you are working with different color pieces of vinyl)
- Cricut Scraper and Weeder
- Baking Paper
Step 1: Upload your SVG to Cricut Design Space
In this tutorial, we will be using this digitally handpainted Rainbow SVG that you can download for free.
- Upload your Rainbow SVG to the Cricut Design Space.
- Insert the uploaded image onto your canvas.
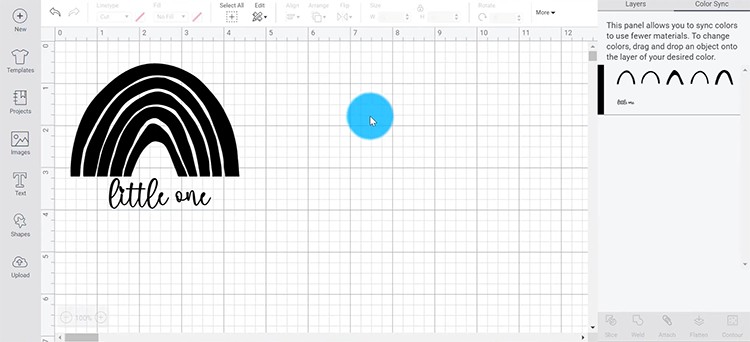
- Since the Rainbow SVG has different colors, once you click “Make It“, you will have different colored mats for each color.
Tip: You can cut multiple colors on one single mat. To do it duplicate your rainbow (so you have a color one for reference), then click the Color Sync on the Layers Panel and simply drag and drop the different colored layers to the black layer so that all your layers are the same color.
- Click “Make It“.
Step 2: Prepare the SVG on the Cutting Mat
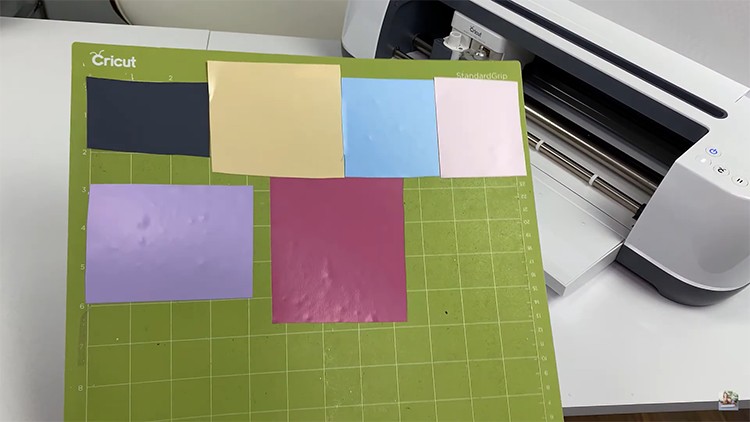
It is time to cut your design. I'll show you how to cut multiple colors on one mat.
- Switch on the Mirror toggle (on the left of the screen under the mat).
- In order to cut multiple colors on one mat, we need to make sure that the pieces are spread apart. Click on the pieces and rearrange them to create enough separation so that it is easier to lay down different color vinyl.
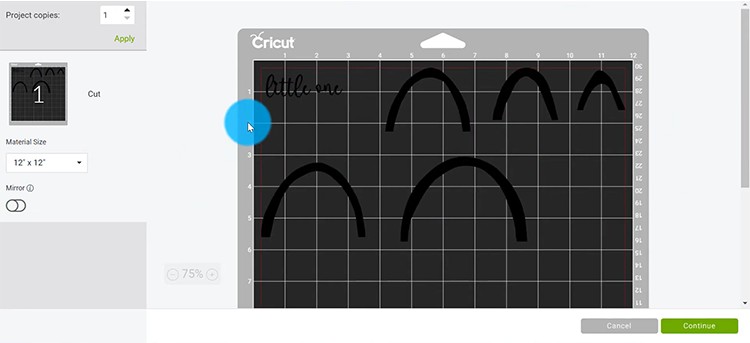
- Now, take note of the position and size of the SVG layers. Use the mat on your screen to find the correct placement of each piece. If I look at the screen above my ‘little one' is just under 3″ in length and about 1.5″ in height. I love to cut my vinyl pieces slightly bigger than needed so I'll cut my black vinyl to 3.5″ x 2″. Next, have a look at where you should be placing your vinyl, this one is in the top left of the mat.
- Place the different colored vinyl blocks upside down (shiny side down) on your green StandardGrip Mat.
- Click “Continue“.
- Select your material from the material list. I am cutting everyday iron-on so I'll select that.
Tip: I love to change my pressure setting from default to ‘more'. I find weeding is easier when you have a deeper cut. This is something you can experiment with yourself.
- Load the mat and press “C” to start cutting.
Step 3: Transfer your Rainbow Design on the Onesie
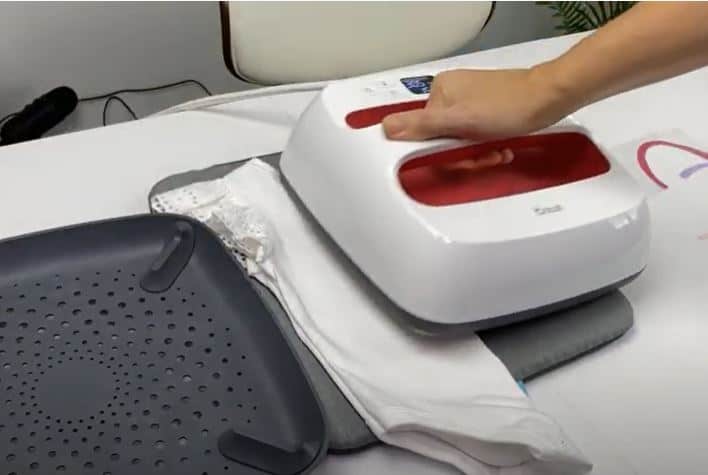
Once it's finished cutting, you can use an iron, Cricut EasyPress or Heat Press to press the Rainbow layers to a baby onesie.
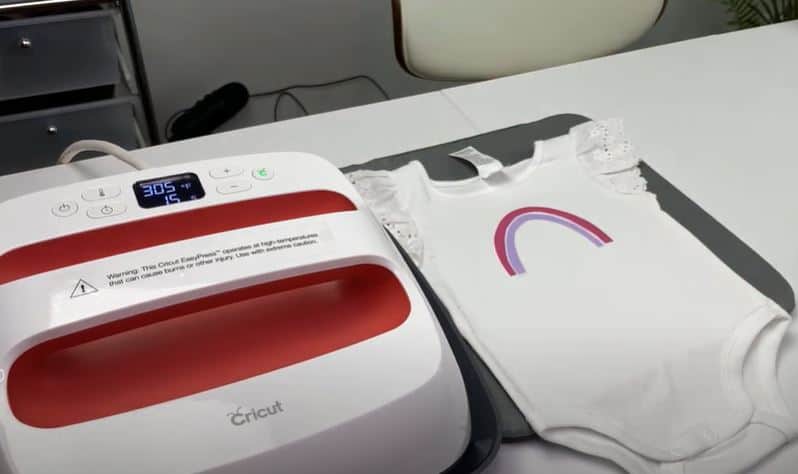
- Set the temperature and time on your EasyPress so that it can start heating up. If you are not sure which temperature to set it to, you can either google or check out the correct settings in our Cricut Cheat Sheet Book.
- Weed out the excess vinyl on your rainbow design. Here is a great post with info on how to weed vinyl – if you need it.
- Prepare the onesie by laying it on top of the EasyPress mat (or a folded towel). Use the EasyPress to remove any wrinkles. Find the middle of the onesie by folding it in half and give it a press to mark the centre.
- Take the top strip of your rainbow, fold it in half to get the middle part then match the centre line of the rainbow with the centre link of the onesie. You might want to loosely lay out all your layers to make sure that you are happy with the positioning of your rainbow.
- Now take your top strip and press it on your onesie.
- Check to see if you should hot or cold peel (depending on your brand and type of vinyl). Peel off the backing.
- Next, fold the next strip of the rainbow in half and place it over the centre of the onesie. Take some baking paper and place it over the strips (to protect the previous layer that doesn't have a backing o it anymore). And press.
- Do the same to the next colors until all the rainbow layers are pressed on your onesie.
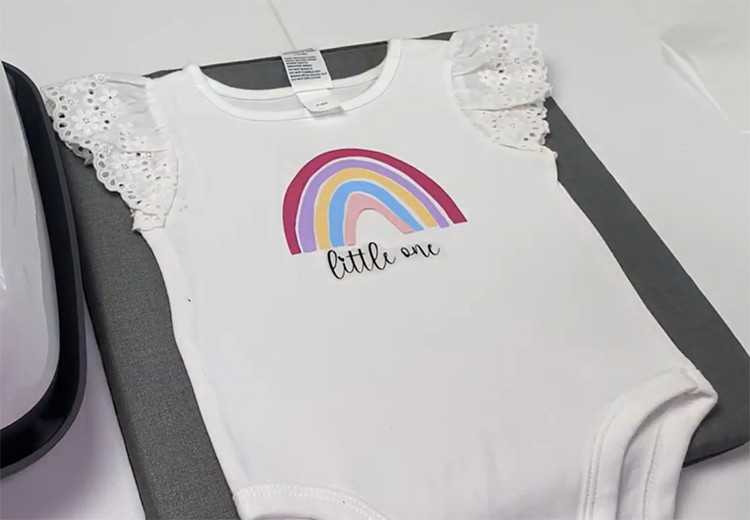
- Lastly, place the word “Little One” below the rainbow then give a press.
- Lastly, flip the baby onesie upside down and do a quick 10-sec press on the back (not necessary if you are working with a heat press).
And voila! How super duper cute is your new baby onesie. This would be perfect for your own little bub or as a baby welcoming present.
Ready to hop into your next craft project? Head on over to our tutorial and see how to make these adorable DIY Cricut Baby Milestones Acrylic tiles or you can find more Cricut tutorials by clicking here.