If you are looking to purchase the Cricut Maker 3 or have just bought one, you are probably wondering just how to use the Cricut Maker 3 cutting machine.
The machine does come with a bit of a learning curve and it can often leave new crafters feeling overwhelmed and stressed out.
So instead of freaking out when you first unbox your machine, I wanted to provide a guide to walk you through all the steps so you can use your Cricut Maker 3 for the first time without the anxiety.
I will share with you just how to use your Maker 3 as well as some tips and tricks to make crafting with your new Maker 3 fun and easy.
Before we continue make sure you grab the downloadable and printable version of this post so you can have it next to you whilst you set up your new machine.
What is the Cricut Maker 3
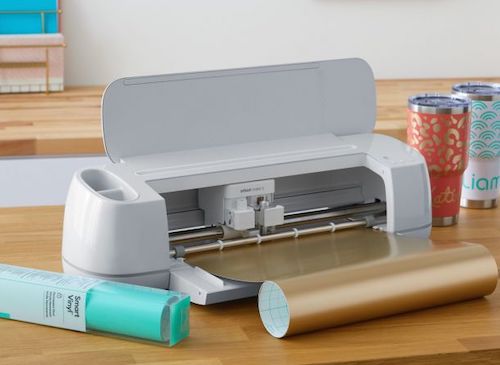
The Cricut Maker 3 is the ultimate smart cutting machine. It has the ability to use advanced tools enabling it to cut hundreds of materials quickly and accurately.
The first machine of the Maker family is the Cricut Maker that was released in 2018. The Cricut Maker 3 is the latest machine in the Maker family and was released in June 2021.
NOTE: There is no Cricut Maker 2, Cricut made the same and substantial changes to the Maker and Explore Air 2. As the Explore 3 and Maker 3 were released together Cricut used the same name to communicate these similarities.
The Cricut Maker 3 is an electronic cutting machine that can be used on over 300 materials just like its predecessor.
The Adaptive Tool System automatically controls blade direction and cutting pressure whilst enabling you to switch out the 13 different tools to cut, draw, score, deboss, engrave, and foil.
It doesn't matter whether you chose to purchase a machine-only or if you opted for one of the popular Cricut Maker 3 bundles, the set up will be the same for both options.
How to Set Up Your Cricut Maker 3
Now that you have your Maker 3, it is important to get it set up properly so you can get crafting.
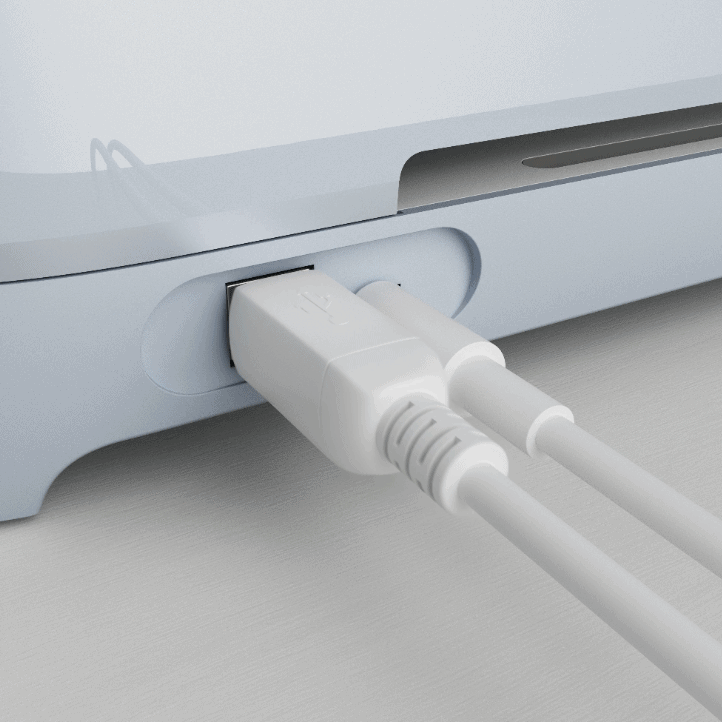
1. Plug the machine in
- Using the round end of the power cable supplied in the box, plug it into the back of the Cricut Maker 3 machine. Plug the other end into a power source.
- Power on your Cricut Maker 3.
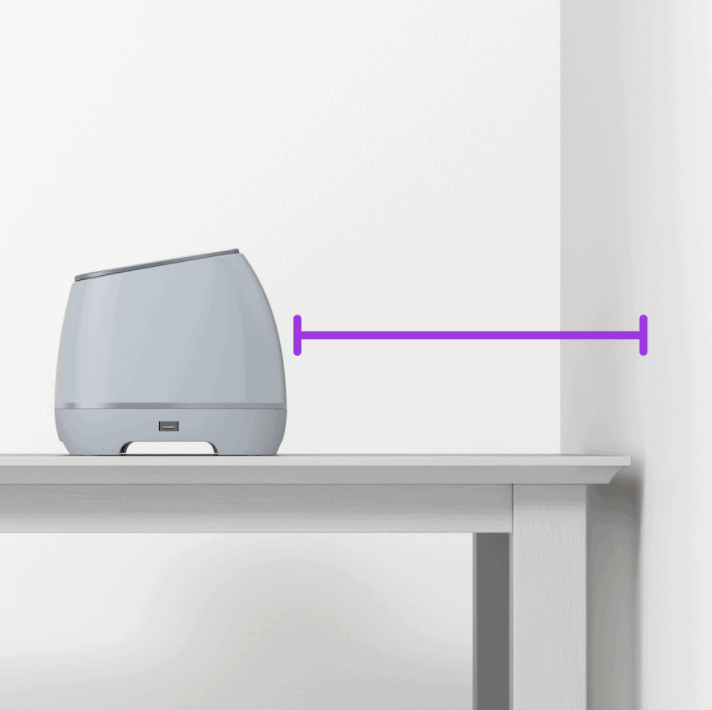
NOTE: Ensure that there is 10″ clear space at the back of the machine so that mats and materials can move freely from the front, through the machine, and out of the back (back and forth).
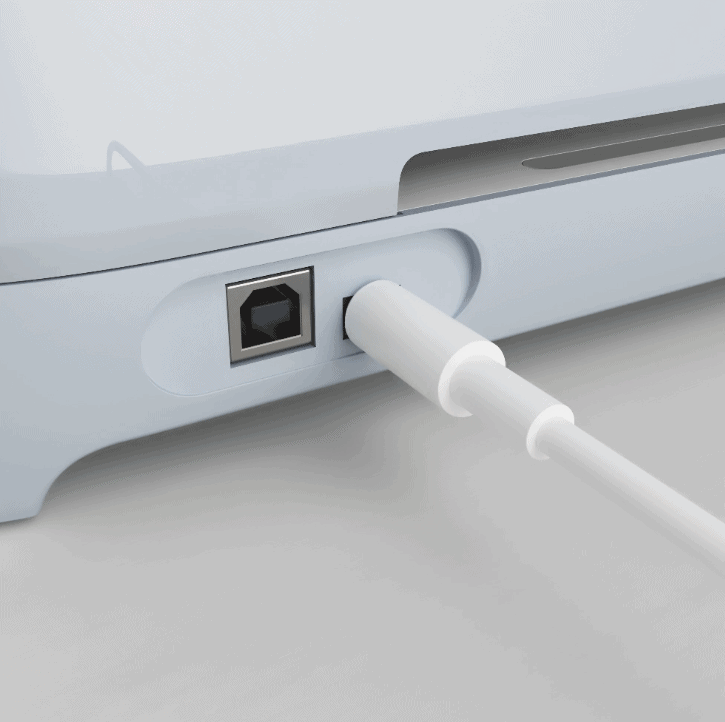
2. Connect Your Maker 3 to Your Computer
The Cricut Maker 3 can be connected to your computer by using the USB cable provided in the box and plugging it into the back of the machine and into your computer or you can also connect via Bluetooth.
To connect via Bluetooth, follow the steps below:
- Ensure your Cricut Maker 3 is switched ON and plugged into the laptop.
- Make sure your device has Bluetooth enabled and is ON.
- Open “Bluetooth” on your device which will allow your device to search for other Bluetooth devices nearby.
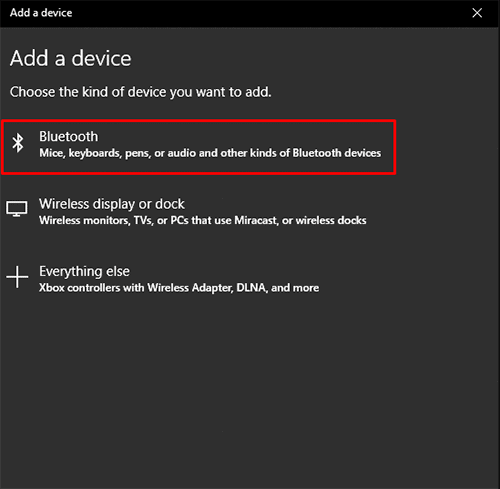
- Select the Cricut Maker 3 device from the list of discovered devices (If you're prompted to enter a PIN, type 0000).
- Select Connect.
Set Up Cricut Design Space
Now that you have your Maker 3 connected to your device, the next part of the process is to set up Cricut Design Space.
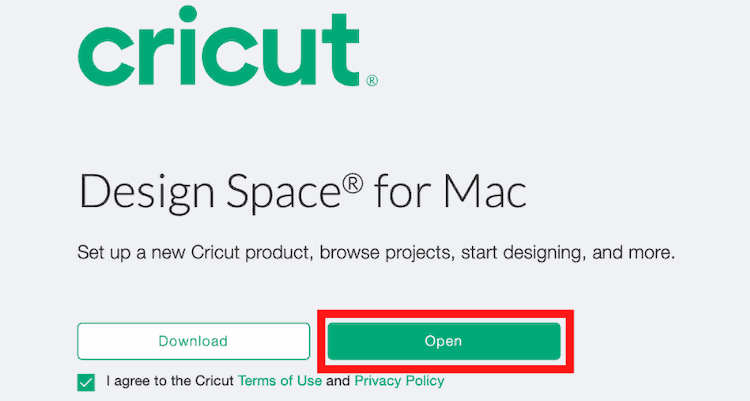
If you have not done so already, you will need to download the Cricut Design Space app or software program at design.cricut.com/setup.
The Design Space program is where you will design and create your projects before cutting or sending them to your Cricut Maker 3 to be created. You can use this software on a laptop, iPad or Phone (via an app).
1. Downloading the Software
- Click on this link to start the download.
- Tick the box to agree to Cricut's Terms & Conditions, then click on “Download”
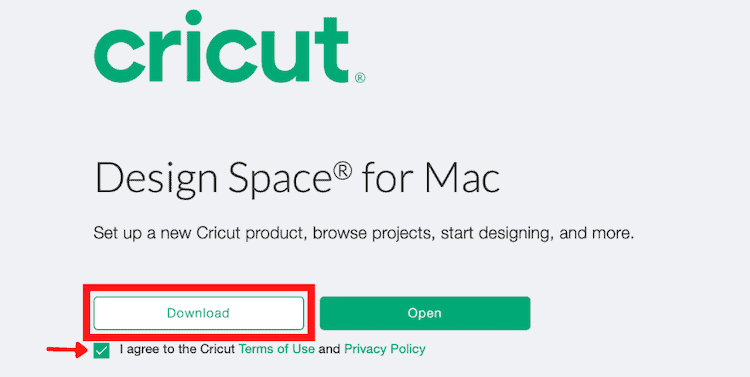
- Open your downloaded file. The setup wizard will automatically install the software for you.
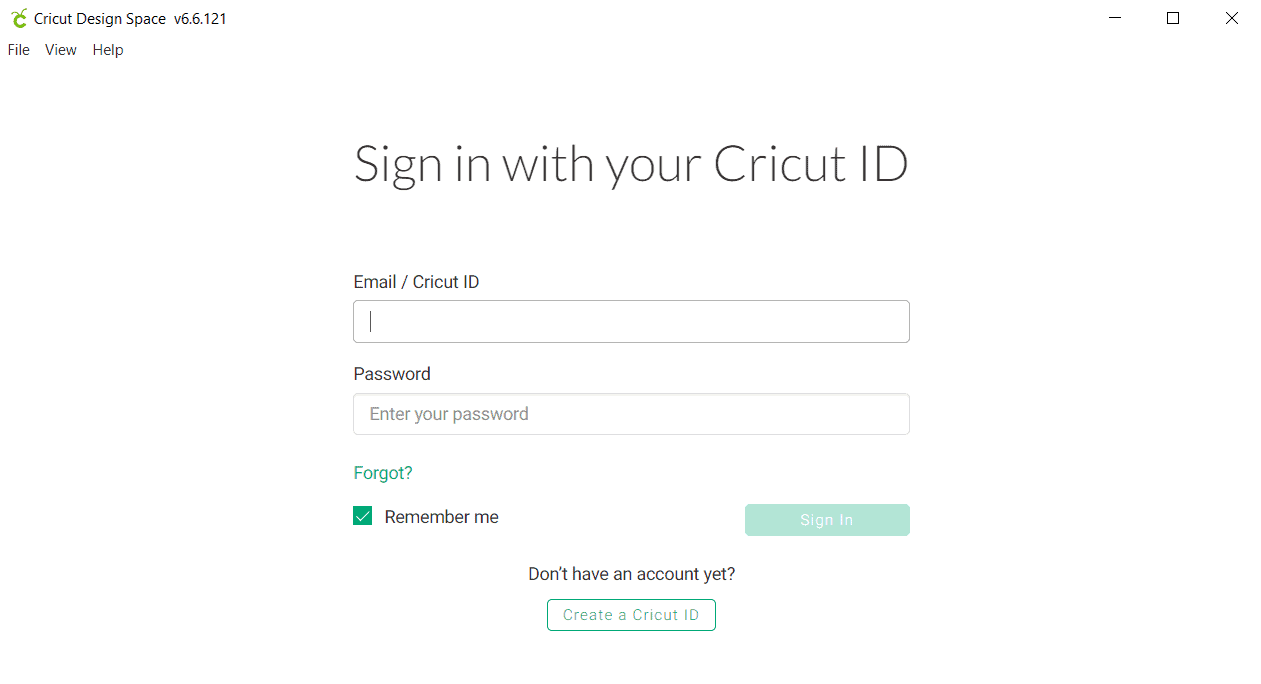
2. Sign In to Cricut Design Space
- The next step will be to create your profile and log-in information. If you already have a Cricut ID you can simply log in.
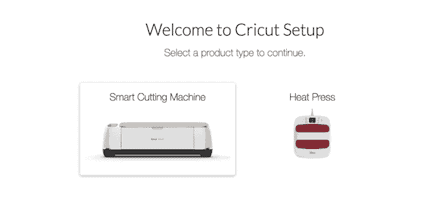
- As you will be setting up a new product, click on “New Product Set-Up”
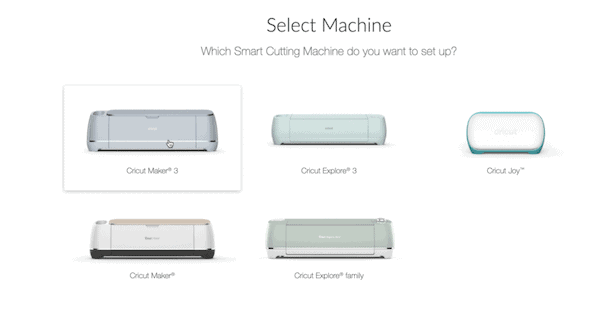
- Select the Smart Cutting Machine Option.
- Then select “Cricut Maker 3”
- Follow the instructions on the screen in order to connect your Cricut Maker 3 with Cricut Design Space.
Note: Your cutter HAS TO BE TURNED ON in order for the software to be able to connect to it.
- Click on “Update” if there are any new updates that need to be installed. After the updates are installed, you will get to the Success Page!
- Click on “Continue”. The Software will automatically register your cutter on your behalf.
- Click on “Next”.
You will now be able to make your first Test Cut by following the instructions or you can skip this step and make your first project with your Cricut Maker 3. If you need some project ideas, you can check our blog post for Cricut Maker 3 projects for beginners.
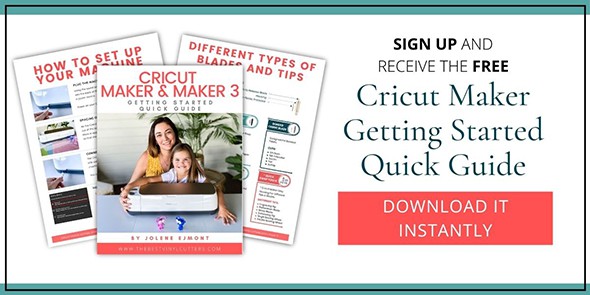
DOWNLOAD Your FREE Getting Starter Guide
We have a FREE Getting Started Guide for your Maker 3 that covers how to change mats, tools, and even how to weed.
You can grab your FREE copy by clicking here.
How to Use Cricut Maker 3: Your First Project
Congratulations! Now that your Maker 3 is connected to your device and you have downloaded Design Space, you can create your first project!

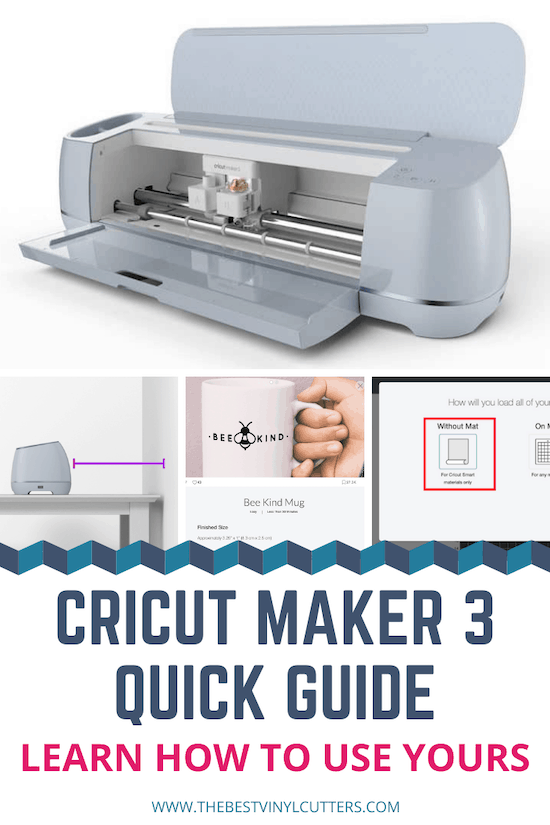
For this project, you will use your Cricut Maker 3 without a cutting mat. We are using a project from the Design Space Library called the “Be Kind Mug” Vinyl sticker.
By creating this project you will gain experience using the Cut function without a cutting mat as well as working with Cricut Smart Adhesive Vinyl.
As this is the first project, we will not customize the design and will simply create the project as is in Cricut Design Space.
Supplies Required for This Project:
- Cricut Maker 3
- A Blank White Mug (any mug from a local store will work)
- Black Cricut Smart Vinyl
- Weeding Tools (this is a really handy starter kit)
- Smart Vinyl Transfer Tape
1. Create the Project in Design Space
- Click on this link to open the project in Cricut Design Space.
- Once the screen loads up simply click on “Open”.
- You will get another pop-up here, select “Open the Cricut Design Space Application.”
- Wait for Design Space to open up. You might have to click on the application to see it once it has loaded.
- The Bee Kind Vinyl Sticker will be on the screen, the tutorial will provide information on:
- the materials you will require;
- the time it will take;
- and the steps to create the project.
- Click on the “Make It”.

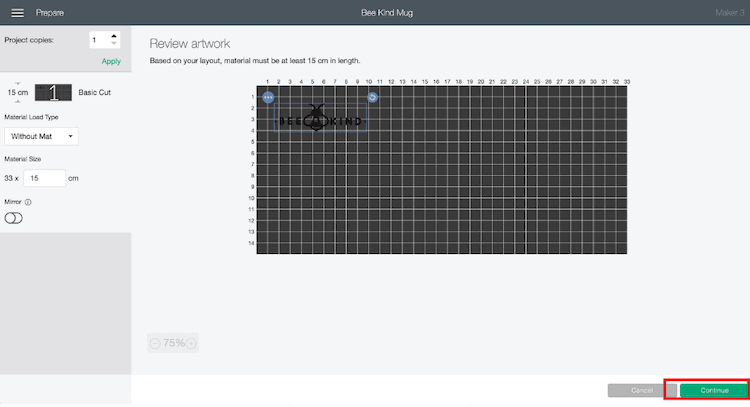
2. Preparing Material & Project for Cutting
- The project will open on a project canvas in Design Space.
- Choose the option to cut without a cutting mat.
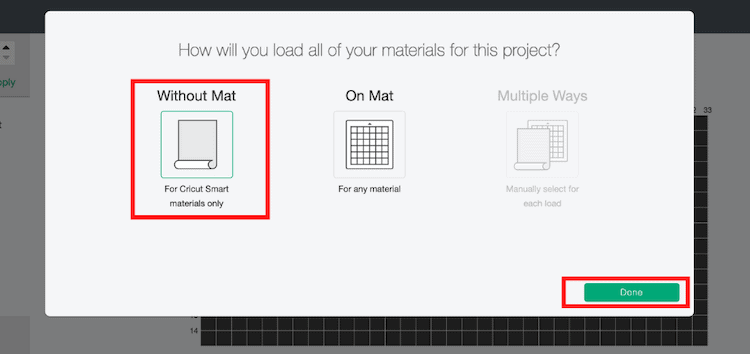
- Click on ‘Done'.
- Insert your Smart Vinyl into the machine under the guides up to the rollers.
- Click on “Continue”.
3. Send Your Project to Cut
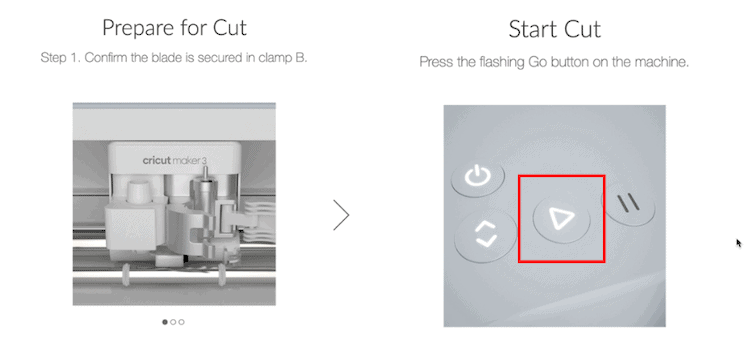
- Make sure that you have the fine point blade installed in the Cricut Maker 3 in Clamp B.
- Press “GO” by pressing the blinking start button to begin cutting (the flashing Arrow/Triangle icon button).
- Sit back, relax and wait for the machine to cut out your bits.
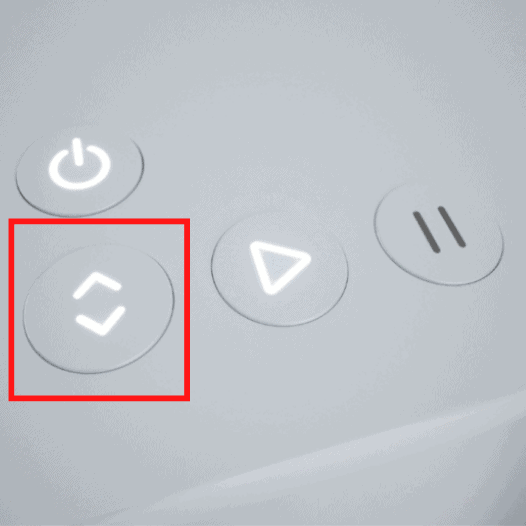
- Unload the Smart Vinyl when the machine is finished cutting by simply pressing the button that has two arrowheads.
- Weed out the unwanted pieces of vinyl.
- Now add your sticker to the item of your choosing by using transfer tape to transfer the design. Place transfer tape sticky side down on your vinyl to remove from backing sheet.
- Place the vinyl sticky side down onto your item and rub it with the scraper.
- Peel away your transfer tape slowly.
- So easy right!!
There you have your first project using your Cricut Maker 3.
Using your Maker 3 to create projects with a mat is super easy. Remember that you can only cut projects without a mat when using Cricut Smart Materials.
Let me know if you made this for your first project with your Cricut Maker 3! Not sure what to make? Here is a list of some perfect Cricut Projects for beginners.