Ever wanted to create your own Cricut Easter wreath?
Today our team will be creating a customized wreath filled with an assortment of eggs and gnome characters representing the family members of the household.
To make things more bright and vibrant this holiday season, we will be adding a dash of battery-powered lights. However, the best part will be the ability to select your own holiday font and upload it to the Cricut Design Space, so let's get started!
Below is the list of items you will need to replicate our wreath.
How to Make an Easter Wreath with Eggs and Adorable Gnomes
Find below the steps to follow in order to create this adorable Easter Wreath Craft perfect for decorating the home for Easter.
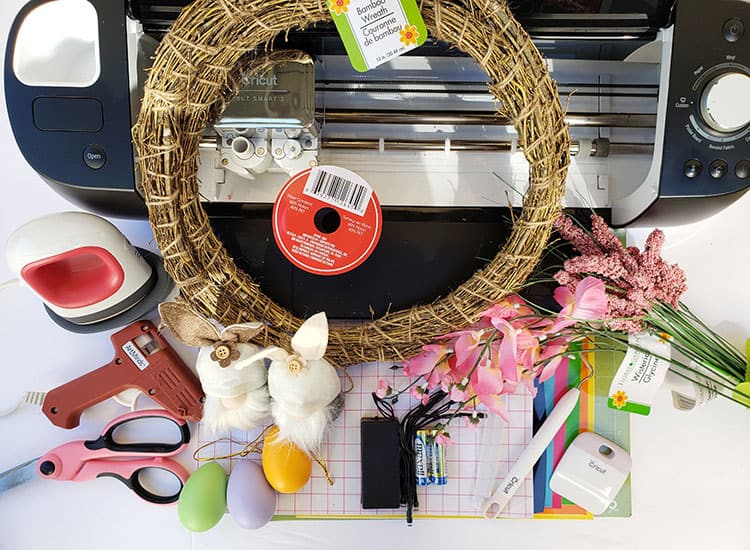
Easter Wreath Supplies Needed
- Cricut Cutting Machine (I am using the Cricut Explore Air 2)
- StandardGrip Cutting Mat
- Iron-On Vinyl (or HTV)
- Adhesive Vinyl
- Cricut Weeding Tool
- Gnomes
- Easter Eggs
- 12” Branch Wreath
- Assortment of Flowers
- Glue Gun
- Ribbon
- Battery Powered String Lights (Fairy Lights)
- Batteries
- Cricut EasyPress Mini
- Transfer Tape
- Cricut Scraper
Step 1: Download Font File
Find below the step-by-step instructions on how to upload a new font file to Cricut Design Space.
- Visit https://www.fontspace.com/ and look for a font you love. For this project, we downloaded Holiday Pleasure by Dumadistyle.
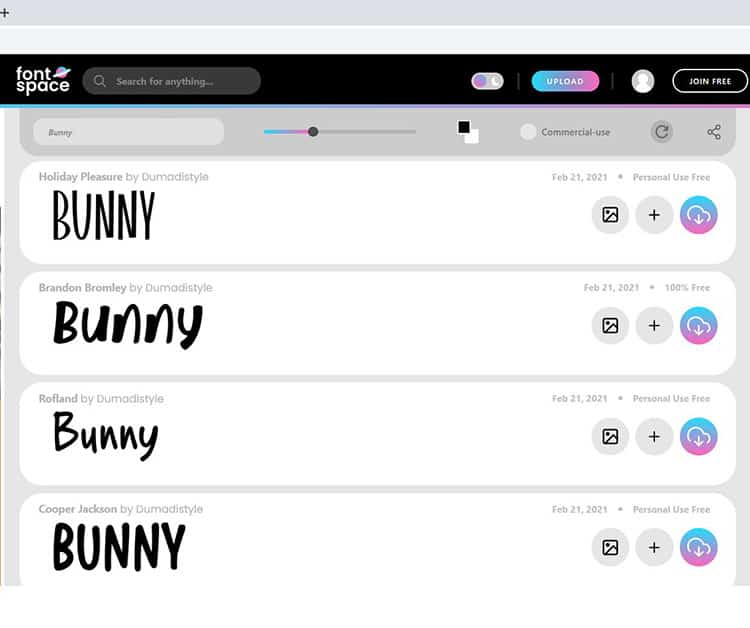
- Once you find a font you love, click on the download icon.
- After the font is downloaded, navigate to the folder location.
- Open up the folder and select the “TrueType Font File”.
- From the pop up select “Install”.
Note: If you have Cricut Design Space open before the install, you will need to close the application and open it again. In addition, the font file will only be able to be used on the device it was installed on.
Step 2: Creating Text or Words in Design Space
It is time to create the text or words in Cricut Design Space in preparation for cutting.

- Open up Cricut Design Space and start a new project.
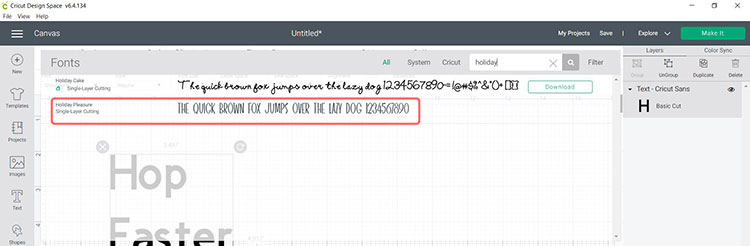
- Once your blank canvas opens up, click on the “Text” icon.
- Once the text box appears type in your words. Below is the list of words we used. You may choose to create a text box for each word or use a single text box with all the words.
- Hoppy
- Easter
- Happy
- Blessed
- Bloom
- From there you will need to change the text font by looking for the recently uploaded font.
- Now you will need to adjust the size of the text based on Easter Egg size.
- Now repeat to add the family names that will be used for the Easter Gnomes.
- Select the Easter Egg words and change the color to the same as the color vinyl you will be using. We used white for the Easter Eggs.
- Now select the family names and change the color to the same as the color vinyl you will be using. We used blue for the Easter Gnomes.
Step 3: Cut Your Iron-On Vinyl for the Gnomes
Now it is time to cut your design. We will be cutting both adhesive vinyl and Iron-On (HTV), but for this step, we will focus on the Iron-On first.
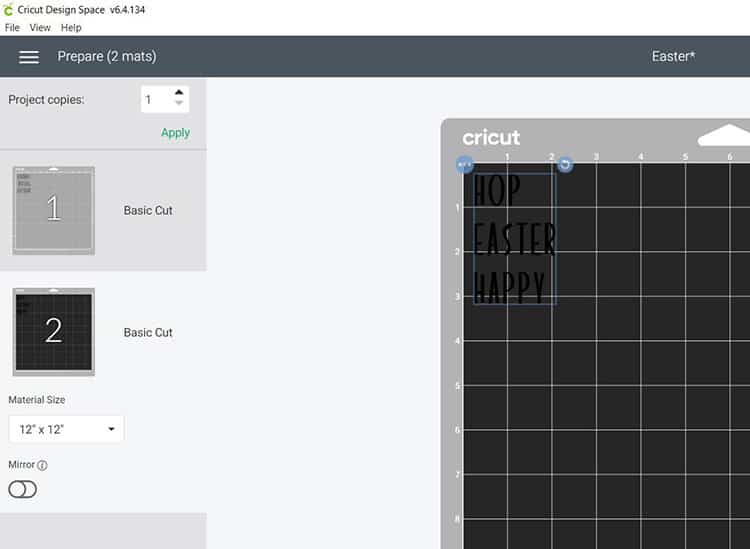
- When you are happy with the size and color of your design click on “Make It”.
- Identify the mat that has the family names on it. Click on that mat to highlight it.
- Select “Mirror” for that mat (we only want the “Mirror” to be switched on for the iron-on mat, not for the adhesive vinyl mat).

- Select “Continue” and connect your Cricut machine.
- On the material settings, make sure you select the iron-on vinyl that matches the type of vinyl you will be using. We are using a standard iron-on vinyl so we will select that.
- Place the iron-on vinyl on your StandardGrip mat with the shiny side down.
- Load the mat into your cutting machine and cut.
Tip: By color coordinating the design prior to cutting, Cricut design space will instruct you on which color mat to load next.
Step 4: Cut Your Adhesive Vinyl for the Eggs
Now we will cut out the words or text using the adhesive vinyl which we will use on the Easter Eggs.
- We will have mat 2 highlighted now in order to cut the adhesive vinyl words.
- Change your cutting machine material to “Vinyl”.
- Place the vinyl on the Green StandardGrip mat with the shiny side up.
- Load the mat into your cutting machine and cut out your words.
Step 4: Weeding Your Designs
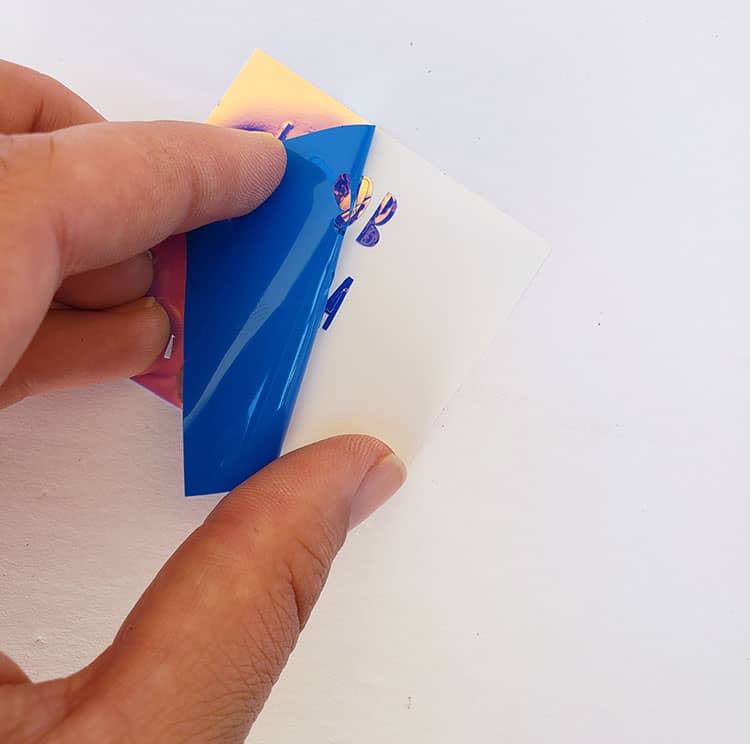
- Using your weeding tool to help lift up the pieces of vinyl that will not be used. Go slowly around the letters and fine details. Don’t forget to weed out the smaller inside pieces of the letters.
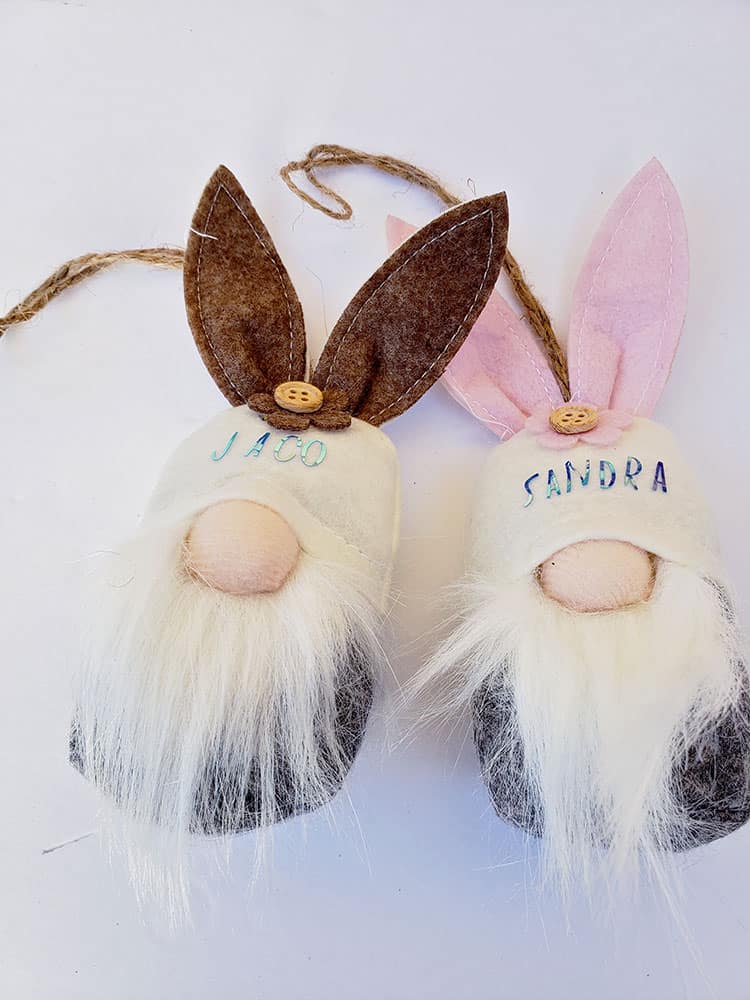
Step 5: Press the Iron-on Vinyl to the Gnomes
Now that you have weeded the designs and are left with the words that you will be used to create the Easter Wreath, we will add the family names to the Gnomes using the Iron-On (HTV).
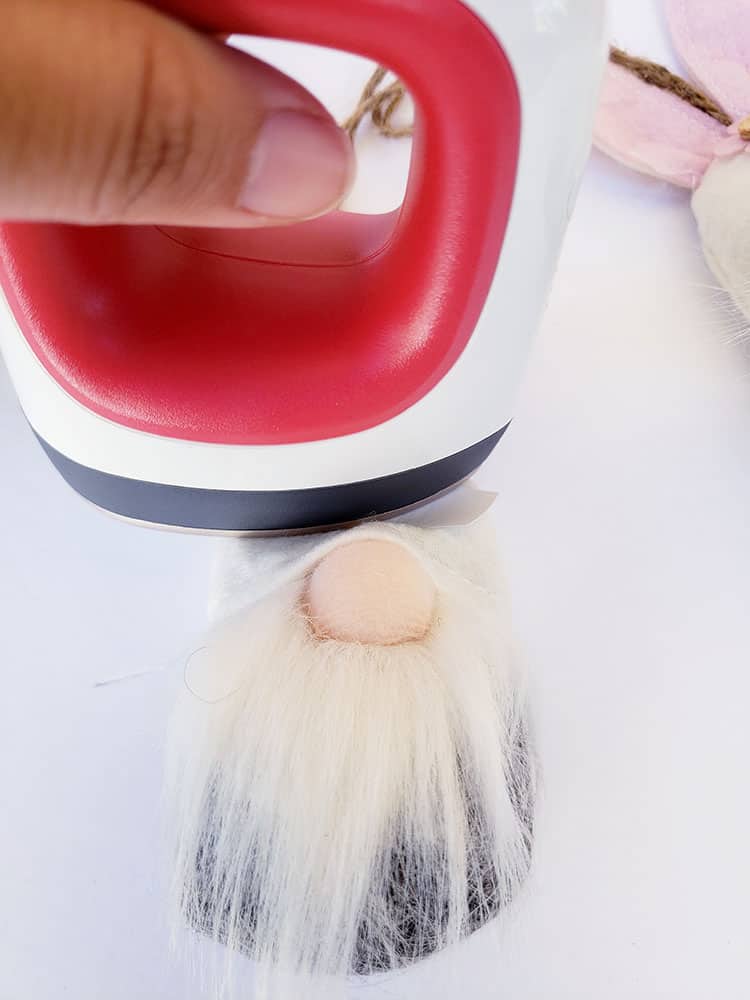
- Start by warming up your iron or EasyPress Mini (we used the low setting for this project). We love using the EasyPress Mini for these types of designs as the size of the EasyPress Mini is perfect for these little Gnomes and the area the Iron-on will be applied.
- Next, place your names on the Gnome hats.
- Apply pressure and move the EasyPress Mini around for around 30 seconds.
- Wait for the carrier sheet to cool down and then slowly peel away (we used a cool peel Iron-On but if you are using a hot peel make sure to remove the carrier sheet before it cools).
- If some of the Iron-on vinyl is not applied properly, place the carrier sheet back down and apply more heat and pressure to that area.
- Continue with the project by slowly pressing each name on each of the gnomes.
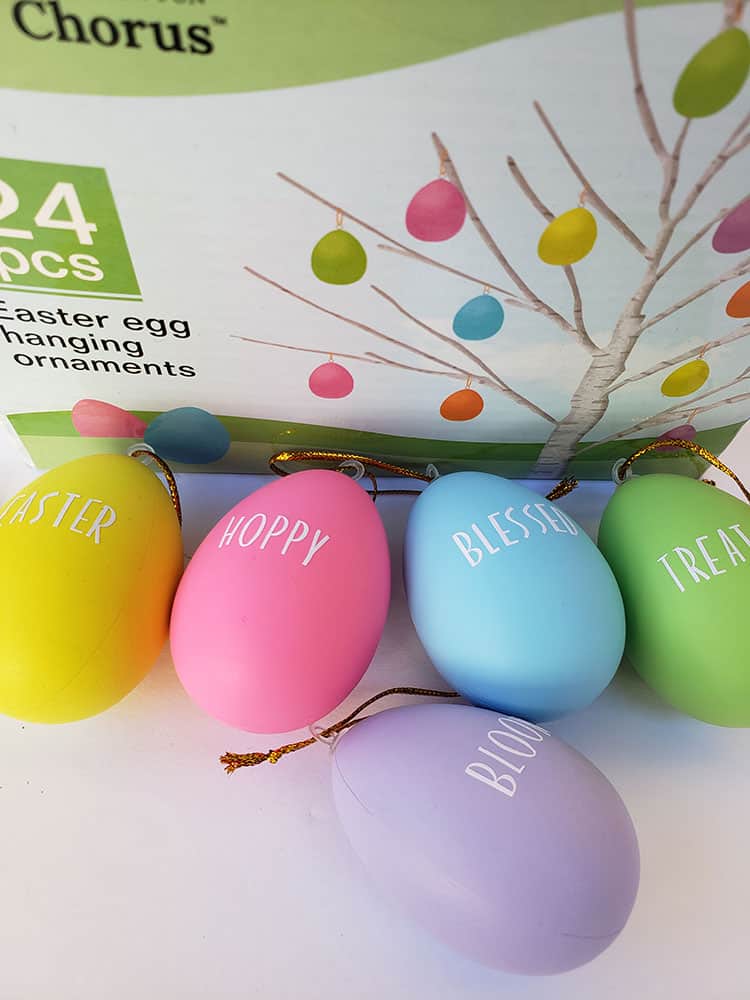
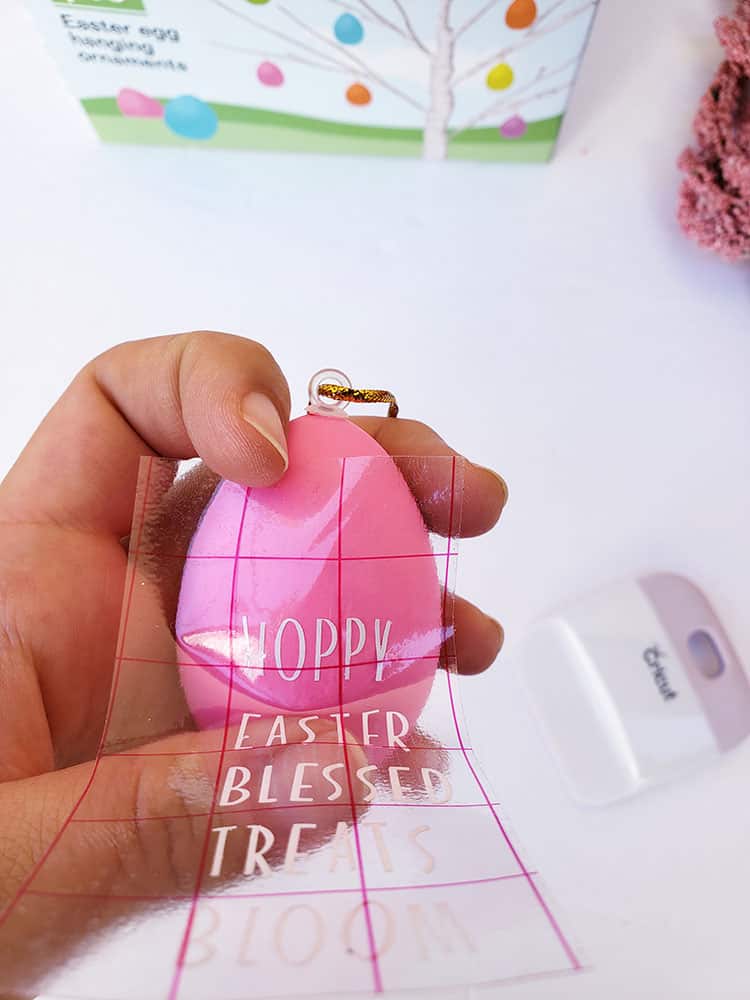
Step 6: Add Vinyl Easter Words to Easter Eggs
Once you have weeded out the Easter words you will need to place the adhesive vinyl on the eggs.
- Before applying the adhesive vinyl to the eggs, make sure the eggs are really clean and dry.
- Cut each word so that each word is as a separate piece (I kept my words all as one strip but it might be easier for transferring and placing on the Easter Eggs to cut each word as a separate piece).
- Cut your transfer tape so that it is the same size or slightly larger than your design or word. (Click to find our full guide on transfer tape for vinyl).
- Place the transfer tape on top of one of the adhesive vinyl pieces and be sure not to have any bubbles or bumps.
- Use your scraper to rub over both the front and the back of the design. We want the words to stick to the sticky transfer tape so that it will lift up off the adhesive vinyl backing sheet.
Tip: Use the scraper to get rid of any bubbles or imperfections.

- Slowly peel up the transfer tape and design from the top left-hand corner. Move slowly and try to work at a semi-diagonal angle. If your design is not lifting up with the tape, place it back down and give it another good rub with the scraper.
- Using the transfer tape move your design over to the egg.
- Place the adhesive vinyl word on the egg, making sure there are no bubbles or bumps. Try to make sure that it is in the center and that it is straight.
- Once again, use the scraper to rub over the design. This time we want it to stick to the egg and to release from the transfer tape.
- Slowly peel back the transfer tape. Once again if your design lifts up, simply place the transfer tape back down and rub over the problem area again. Place your transfer tape back on the backing paper (you can reuse transfer tape so don't throw it away).
Step 7: Assemble the Wreath
Now for the fun part, assembling the Easter Wreath. For this step, we will put the branch wreath, assortment of flowers, eggs, gnomes, lights, and ribbon together to create the Easter Wreath.
- Separate out the assortment of flowers and place them into bunches.
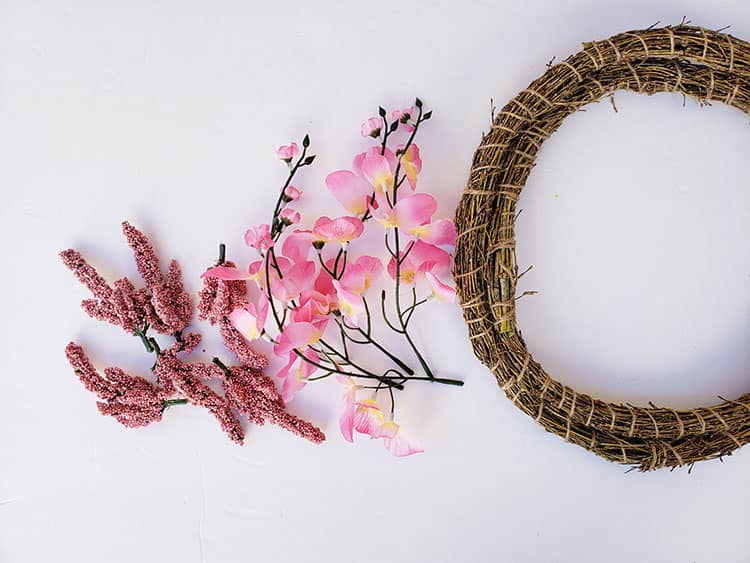
Tip: By separating the assortment of flowers, it will be easier for you to sort which flowers you want to use from those you do not.
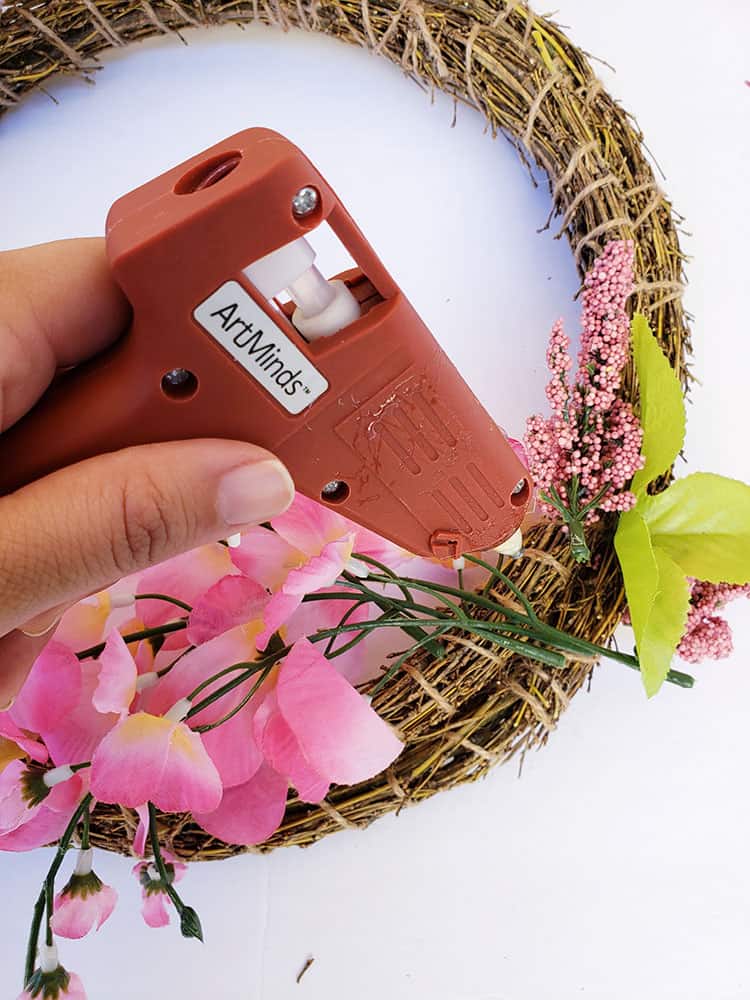
- Once separated, begin to place the flowers on the wreath in the design you would like. As some of the flowers had very long stems, I have removed the stems by simply cutting them shorter.

- When you are happy with where you will be placing the flowers, begin to hot glue gun the flowers pieces on your wreath. Make sure to gently press the flowers directly on to glue and wreath to ensure that they stick.
- Next is to start adding the personalized Easter Eggs and Gnomes.
- Now you will want to add the lights. Wrap them around the wreath and make sure to place the battery box in the back. I used hot glue to glue the box to the back.

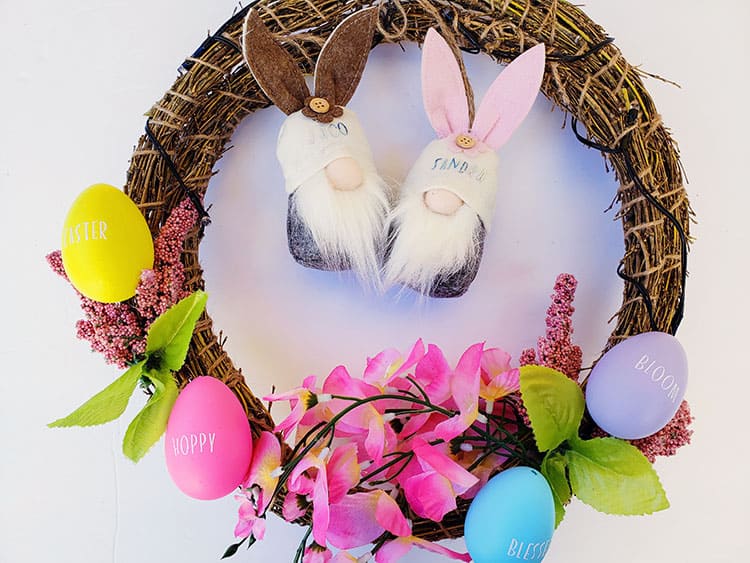
All that is left is to find somewhere to hang your wreath. You can add a bow with your ribbon to the top to help you hang your wreath. Pop on the lights and ta-da! So cute right!?

This is such a cute and adorable way to create an Easter decoration for the home.
Use these steps to create this Easter Wreath Craft with decorations of your choice or even create a wreath for a different occasion! In the mood to create more Easter-themed things? Why not whip up some Easter vinyl shirts?
What decorations will you use to create your wreath? Let me know!