With fall now in full action and Halloween and Thanksgiving right around the corner, you may be looking for ways to decorate your home to welcome your guests and trick-or-treaters.

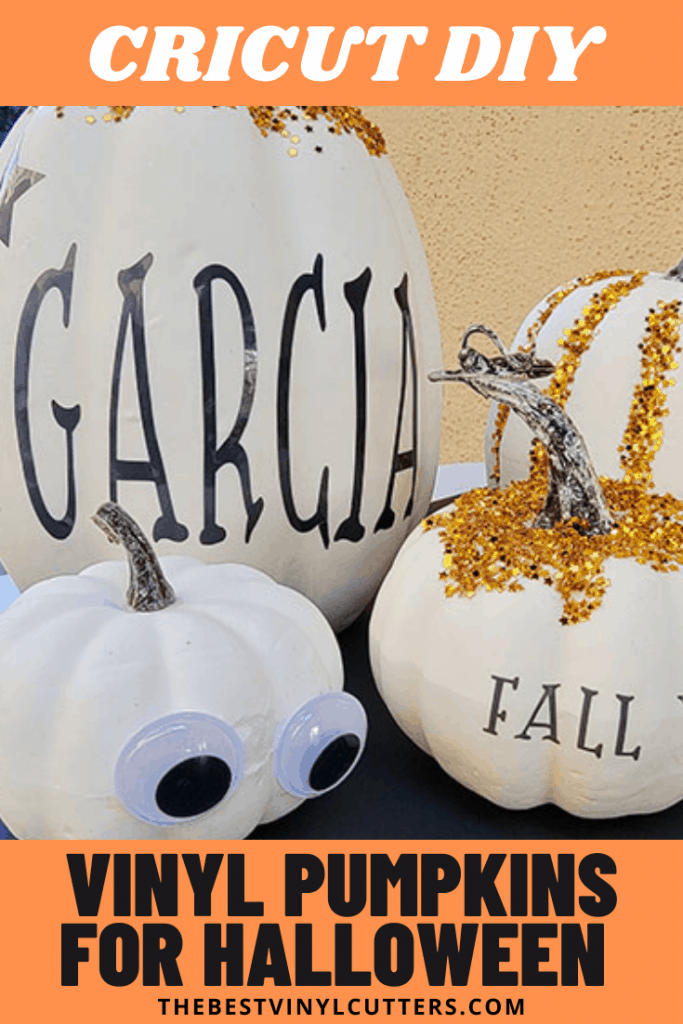
Instead of purchasing pumpkins that can rot quickly and last a few days when carved, why not join the trend and customize your pumpkins with glitter, text, and even animation, such as googly eyes?
Best of all, you can choose your text, color, and words to show your personality and who you are!
Tutorial: DIY Cricut Halloween Pumpkins
Follow our step-by-step tutorial to create your DIY Cricut Pumpkin designs. Such a great way to welcome guests or trick-or-treaters to your home on this spooky day!
Here is our pumpkin decorating with a Cricut machine tutorial.
Supply List:
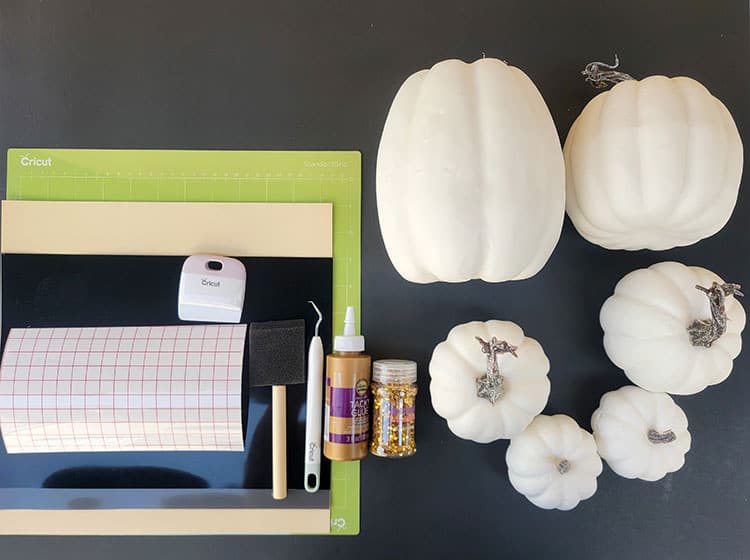
- Blank Pumpkins (We used this set from Amazon)
- Cricut StandardGrip Cutting Mat
- Cardstock Paper
- Black Adhesive Vinyl (you can also use Grey)
- Transfer Paper/Tape
- Tacky Glue
- Glitter (We chose gold glitter that was shaped like stars)
- Foam Paint Brush
- Cricut Scraper
- Cricut Weeding Tool
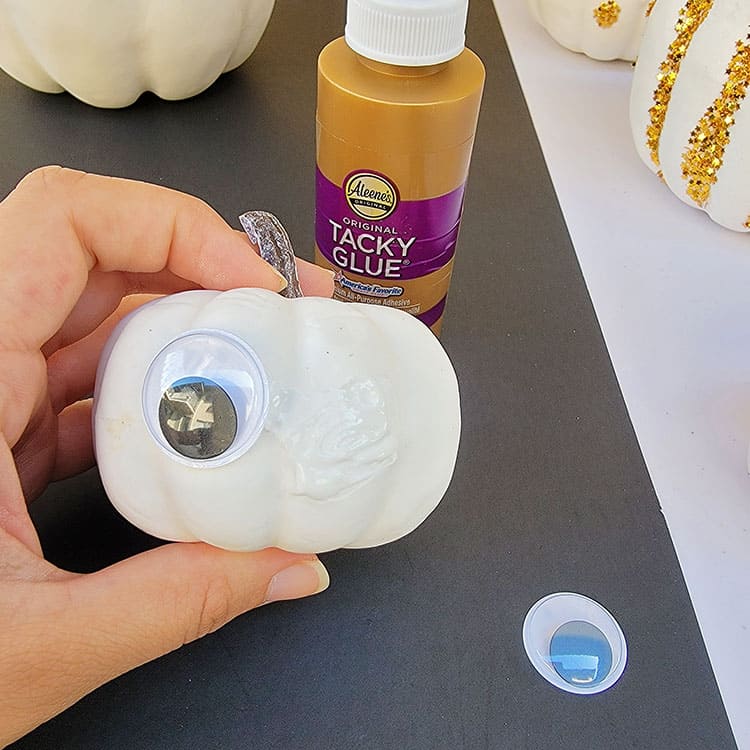
- Google Eyes (Optional)
Step 1: Decorate Blank Pumpkins
The first step in creating your customized pumpkins for this fall season is to decorate them with glitter or paint.
Supplies required for this step: cardstock paper, tacky glue, star glitter, a foam paint brush, and the blank pumpkins.
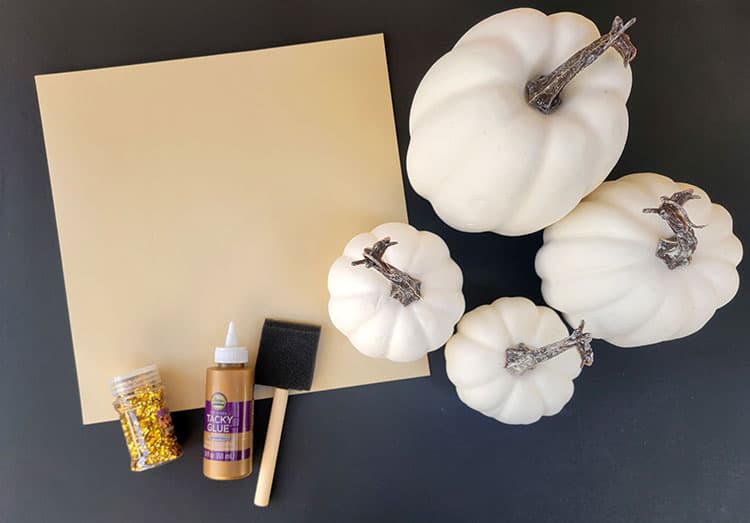
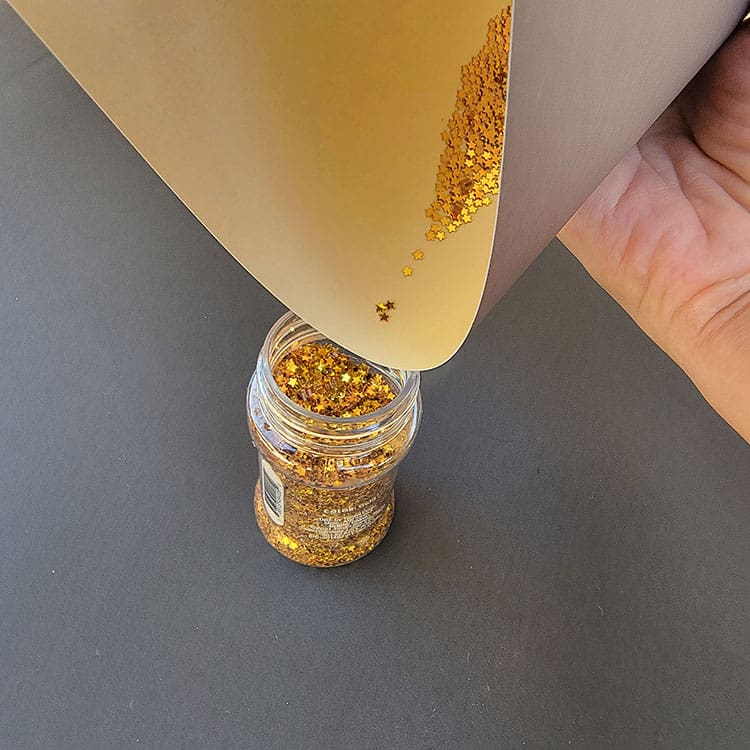
- Place the cardstock down on your table. This will protect your work surface and make it easier to pop the excess glitter back into its jar.
- Grab a blank pumpkin and tacky glue. Before applying the glue, think about what you would like as your result, or you can follow the designs we created on our pumpkins.
- With the foam paint brush, begin brushing the glue around the area where you want the glitter to be applied.
- Slowly begin sprinkling the glitter around the glue areas, ensuring every portion is sprinkled with glitter.
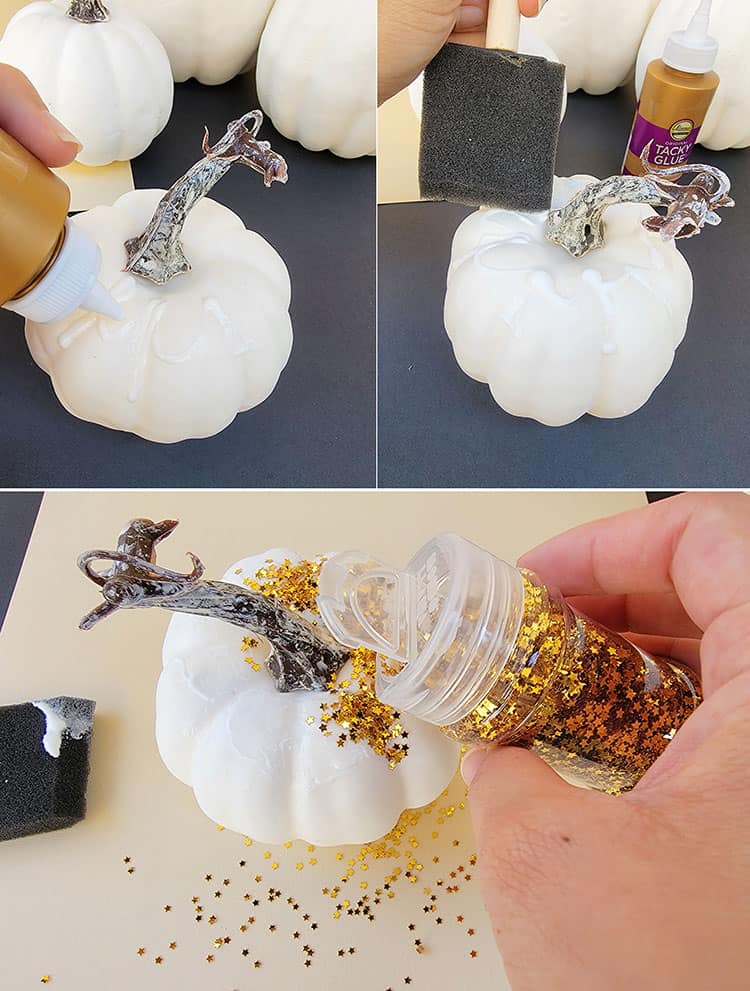
- To place the excess glitter back in your container, lift your pieces of card stock and pour the glitter back into your glitter container.
- Now repeat steps 1- 4 for the other three remaining blank pumpkins.
- At this point, you can cover your pumpkins in glitter all around or place a little bit here and there the way we did with our design.
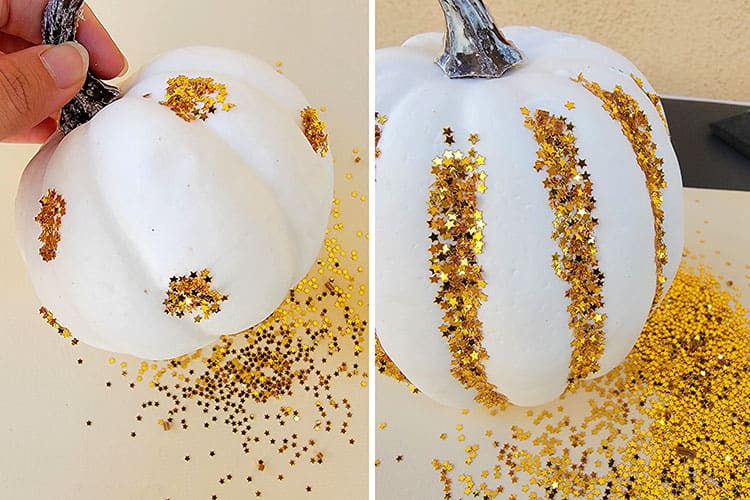
- We did not place glitter for two of our designs but rather a pair of googly eyes for the cute factor.
- Allow the pumpkins to dry for at least 30 minutes.
Step 2: Prepare the Pumpkin Cricut Design
After your pumpkins have dried, you will need to create the text and design that will go on your pumpkins.
- Begin by selecting the direct Cricut Design Space link.
- Select “Open” and then select “Open Cricut Design Space Application.”
- From there, select “Edit Copy”.
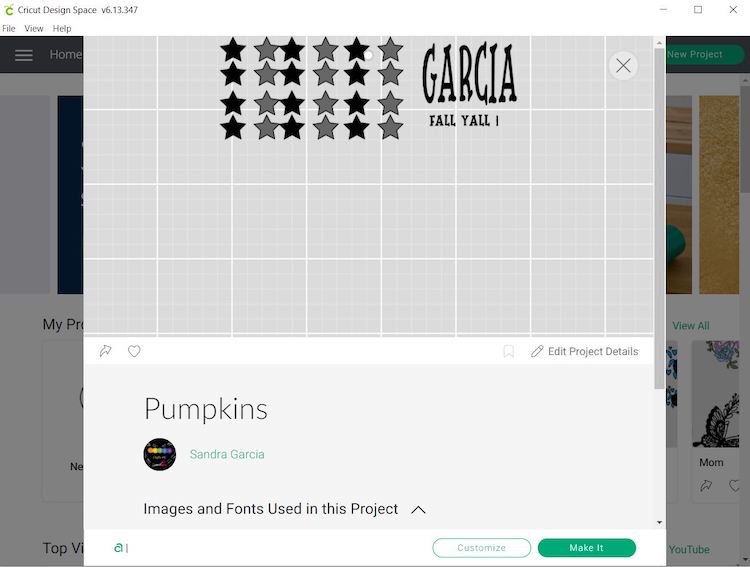
- You can change the name of the pumpkins. We decided to use our surname, but you can use any words you wish.
Note: You may need to resize the design to suit the size of your pumpkins. The design is sized for the large pumpkin and second to small pumpkin (if you are using the same set as us), you may need to resize if placing text on other pumpkin sizes.
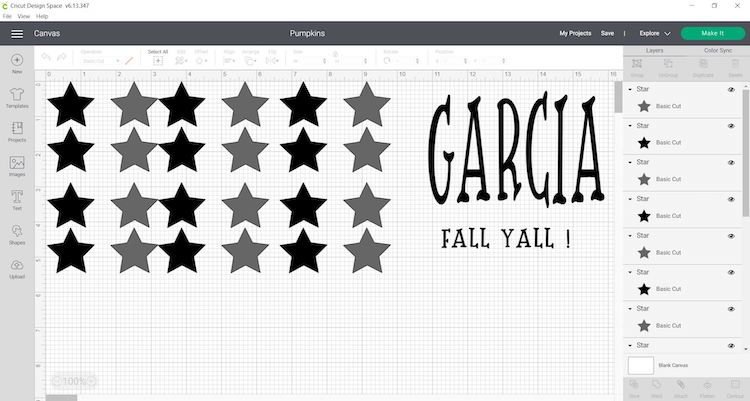
- Once satisfied with the design and size, the next step is to cut the design with your cutting machine.
Step 3: Cut & Weed Design
Now that the design has been selected, it is time to cut!
- Grab your StandradGrip mat. Place the adhesive vinyl, shiny side up, on your green StandardGrip mat. Use your scraper to remove any bubbles and/or wrinkles.
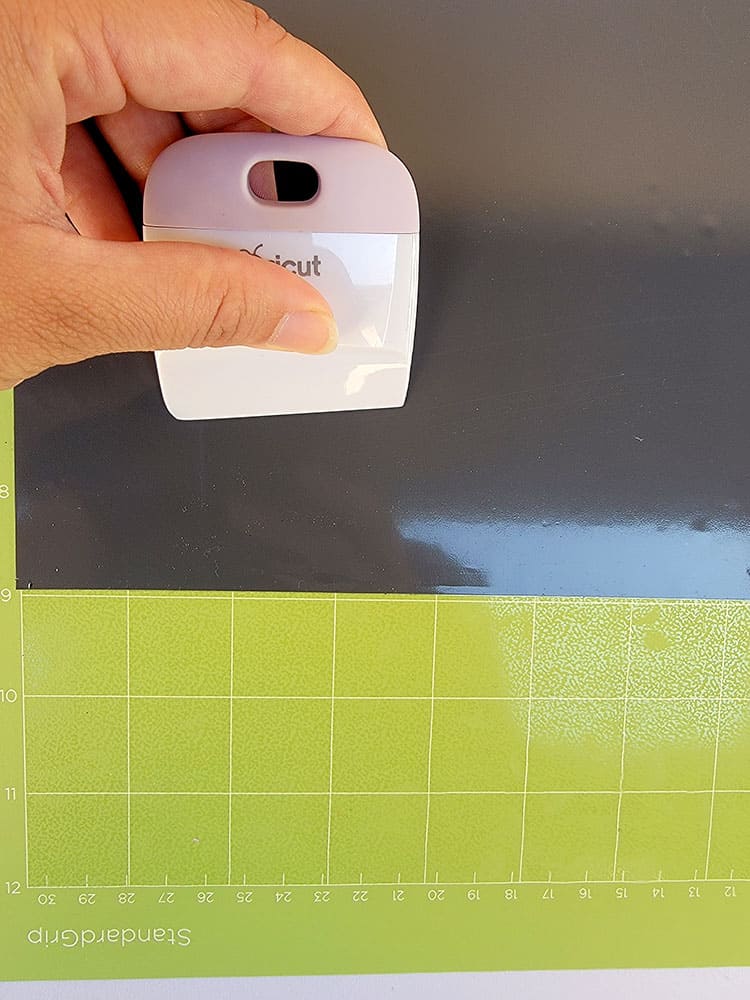
- In Cricut Design Space, click on “Make It”.
- Select “Continue” and connect your Cricut machine. You will now be able to pick your material and cut settings.
- Load the mat into your cutting machine and follow the instructions to cut the vinyl sheet.
- Next, use your weeding tool to help you lift the unneeded pieces of your design. Go slowly around the letters and fine details. Don’t forget to weed out the inside pieces.
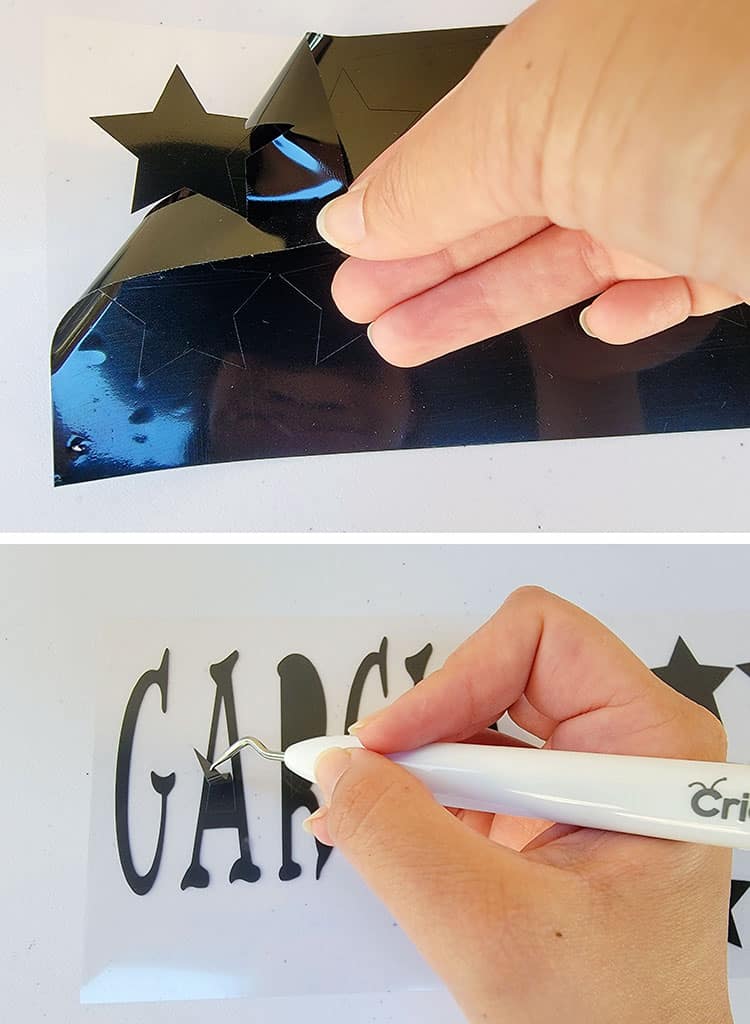
Note: You should be able to do your weeding with your fingers but use a weeding tool for smaller detail if required.
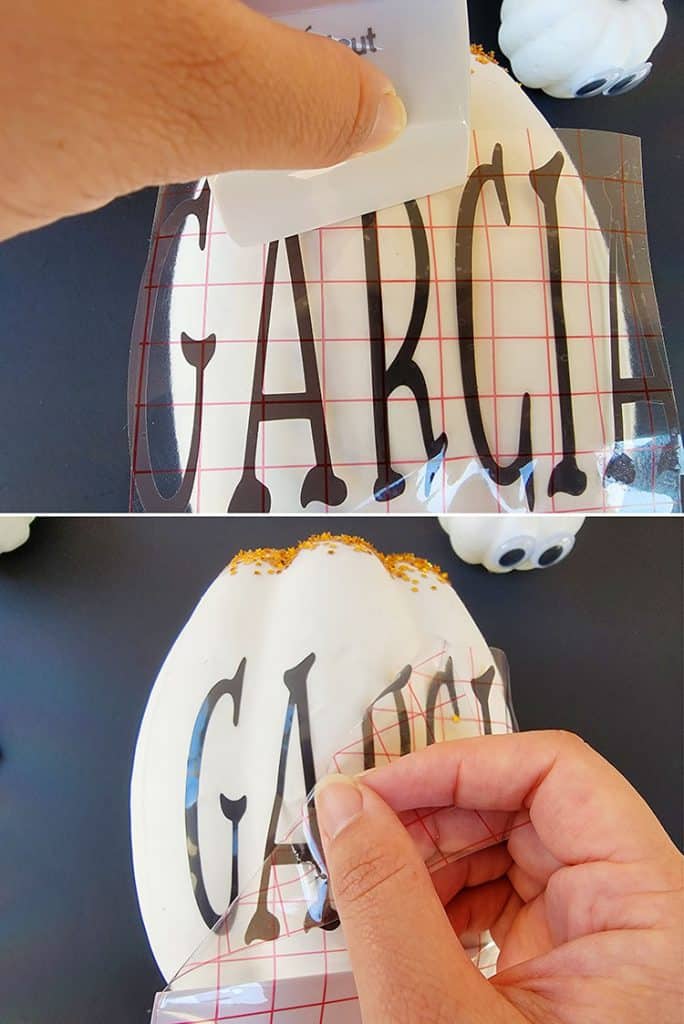
Step 4: Transfer Adhesive Vinyl to Pumpkins
Before applying the adhesive vinyl to the pumpkin, ensure the glue is dry.
- It is much easier to use transfer tape/paper to move your adhesive vinyl decal over to the pumpkin. Cut your transfer tape to the same or slightly larger size as your vinyl decal.
- Place the transfer tape on top of the vinyl and use a scraper to remove any bubbles or bumps.
- Use your scraper to rub over the design's front and back. We want the image to stick to the sticky transfer tape so that it will lift off the vinyl backing sheet.
- Slowly peel the transfer tape and design from the top left-hand corner. Move slowly and try to work at a semi-diagonal angle.
- If your decal is not lifting with the tape, place it back down and give it another good rub with the scraper

- Place the design on the pumpkin, ensuring no bubbles or bumps. Try to make sure that it is in the center and that it is straight.
- Once again, use the scraper to rub over the design. This time we want it to stick to the pumpkin and to release from the transfer tape. In some cases rubbing your finger over the design worked better than a scraper in the curved sections.
- Slowly peel back the transfer tape. Once again, if your decal lifts, simply place the tape back down and rub it over the problem area again.
- Place your transfer tape back on the backing paper (you can reuse transfer tape, so don't throw it away).
- Go ahead and complete your pumpkins this way.
- We created one small pumpkin with the words ‘fall yall!’ and a giant pumpkin with our surname on one side and the stars on the other.
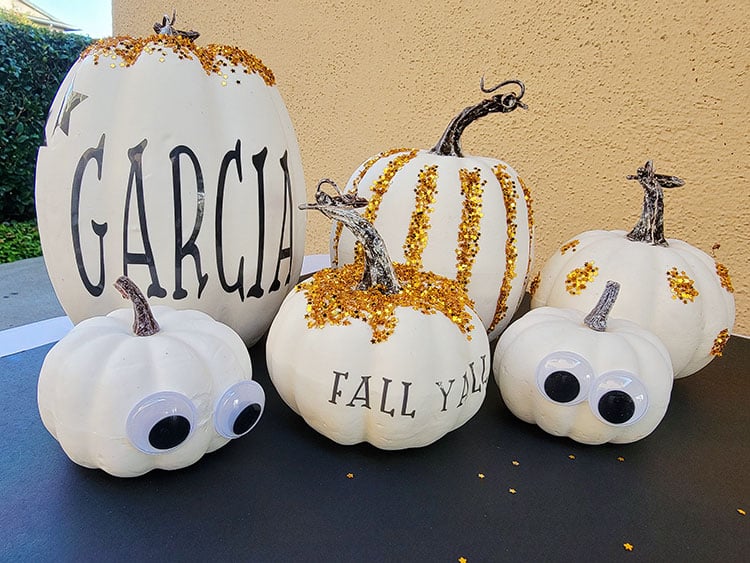
Finally, you have created your very own DIY Adorable Halloween pumpkins.
The beautiful part about this project is you can use any glitter and create any freehand design for the pumpkins.
Make your pumpkins cute and fun by adding some googly eyes as we did to our collection.
Ready to make something else? Find all our Cricut tutorials here.