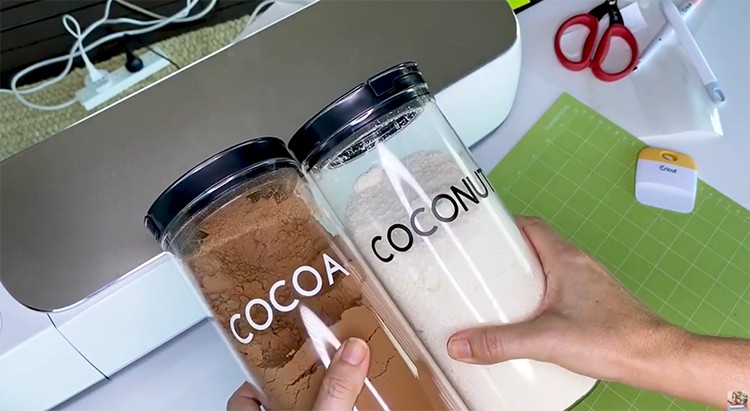
How do you organize your home? Do you want to find out how to create some easy Cricut pantry labels?
For me, I always want to customize things and put labels on boxes, canisters, jars, and any containers that I can think of. This will not only make your home look beautiful but more importantly, being organized makes your life easier.
Today I have a super quick and easy tutorial for you, to show you how to create pantry labels with Cricut. You can create labels with either a Cricut Maker, an Explore Air 2 or a Cricut Joy.
How to Create Some Super Easy Cricut Pantry Labels
Find below the steps to follow in order to create these lovely labels to organize your pantry.
Supply List
- Cricut Machine (Maker, Explore Air 2 or Cricut Joy)
- Cricut StandardGrip Mat
- Silhouette Black Adhesive Vinyl
- Cricut White Permanent Vinyl
- Cricut Transfer Tape (Find the best transfer tape for Cricut vinyl in our post here)
- Cricut Scraper and Weeder
- Pantry Jars (There are some GORGEOUS jars on Amazon which you can browse by clicking here)
Step 1: Create Text for your Labels
In this tutorial, we will use a simple yet functional font that can be read easily which is perfect for those canister labels.
- Click on the Text box on the Design Panel on the left to create your text.
- Type the word that you want for your label and resize it to your desired size.
- Choose a font for your label. I chose Cricut Sans for this tutorial.
Tip: In selecting font, choose a font that you can read easily and that is thick enough to stick to your canisters easily.
- I just created mine in a line so with enough space in between the words so that I can easily snip them apart after cutting it with the machine.
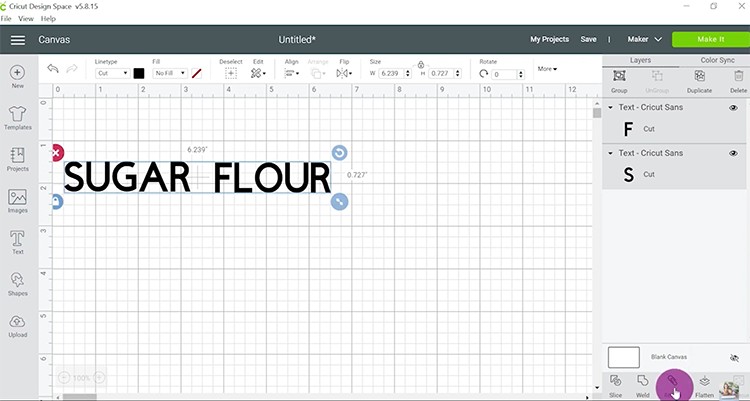
- Click Make It and Continue.
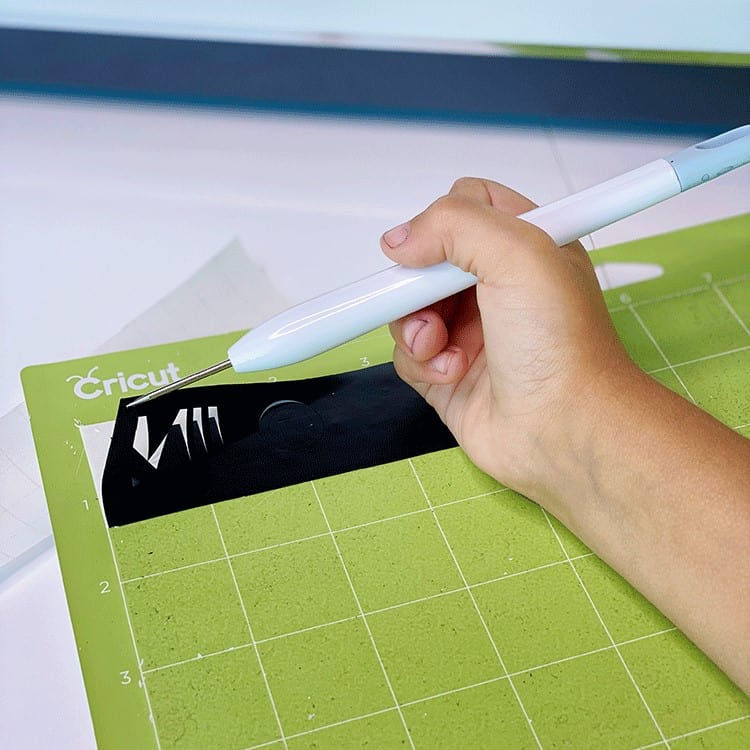
Step 2: Let's Cut and Weed!
- Stick your adhesive vinyl shiny side up (or color side up) onto your green StandardGrip Mat. Use your hand or a Cricut brayer to smooth it down and to remove any wrinkles or bubbles.
- Load your mat then press C to start cutting. Wait for it to finish.
- Unload the mat once done then weed out that excess vinyl (find an article on how to weed vinyl here), leaving only the letters for your label.
Step 3: It's time to Transfer your Design to the Canisters!
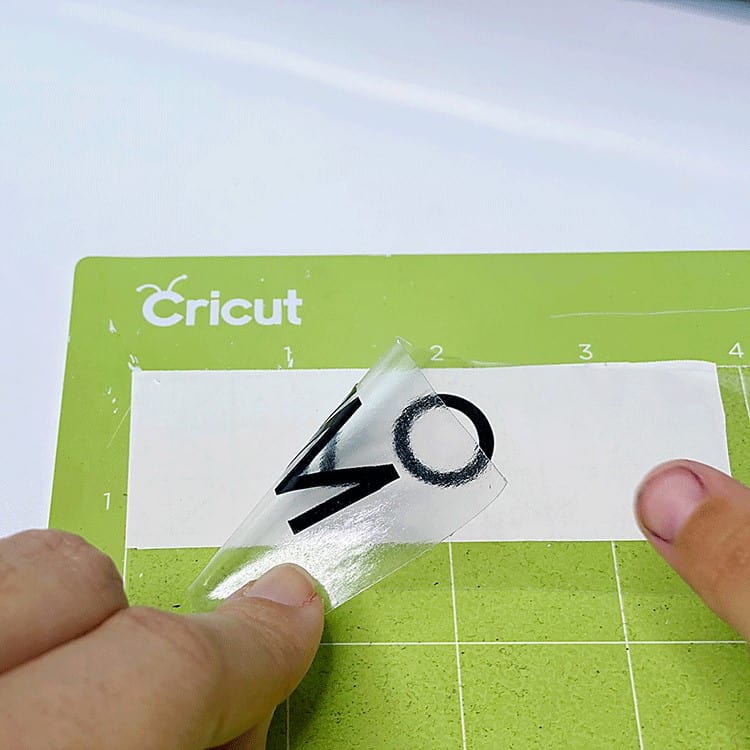
- Cut your transfer tape slightly bigger than your decal.
- Carefully peel away the sticky part of the transfer tape. Place the transfer tape on top of the vinyl and make sure not to have any bubbles or bumps. Use your scraper to rub your letters until it sticks to the transfer tape. You want to be able to lift the vinyl off its backing sheet easily. I find it helpful to rub over both the front and the back of the decal.
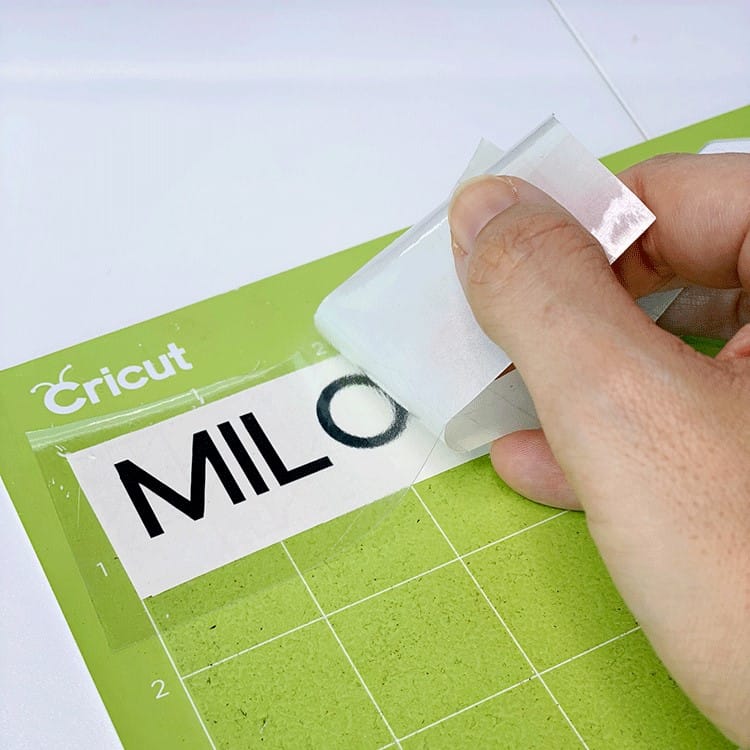
- Carefully peel away the sticky sheet from the backing sheet. If your letters don't lift up, either lay them back down and give them an extra rub with the scraper or help them to lift up with your fingernails.
- Grab your kitchen jars or canisters then stick your letters to them. Use the scraper to stick it on. (excuse the fingernails in the photo – they belong to my 3-year-old daughter)
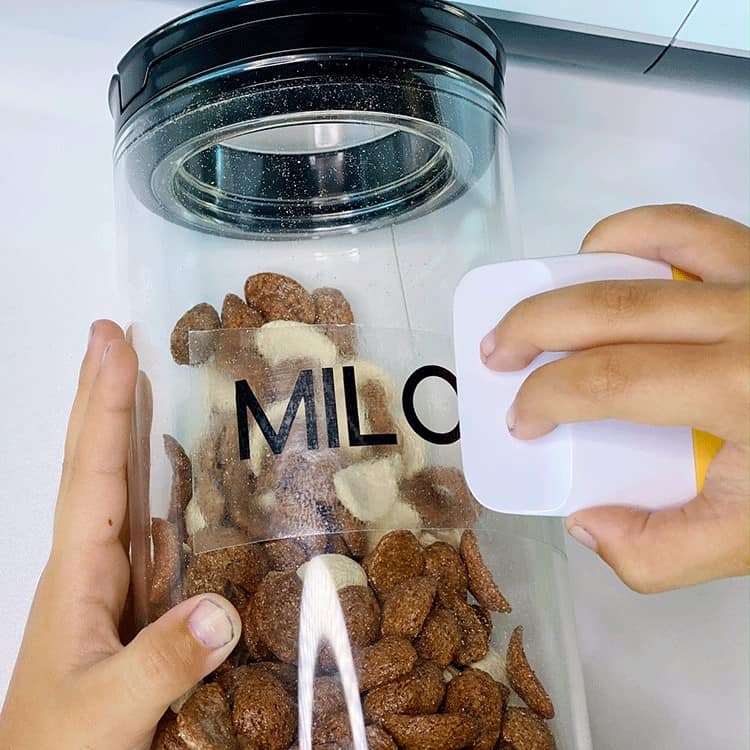
Tip: You can also use the stylus to stick on those little pieces of adhesive vinyl. I really find the stylus helpful when I'm workign with small or thin letters.
- Peel off your transfer tape and now you have your labels on your canister!
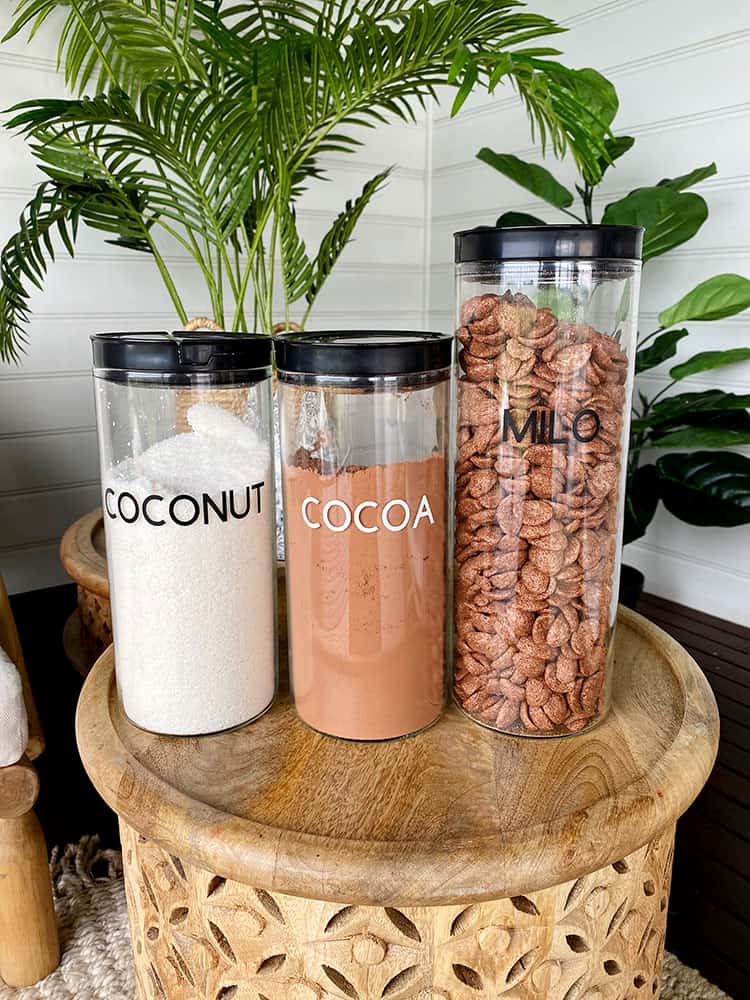
How cool is that? I'm so excited to see your final output too!
What sorts of projects do you wish to do to organize your home?