Looking for a fun and creative way to announce your baby’s arrival or even a family member's baby's arrival? This sweet Cricut birth announcement elephant is made from an elephant that we bought from Amazon. You can buy either a pink or grey elephant from Amazon but you could use any color Elephant you wish!
We personalized the elephant with important delivery details such as the baby's birthday, weight, height, and time of birth along with their full name. If you have an EasyPress mini it will be an easy tutorial for you! The mini is really helpful to get into those elephant ears properly.
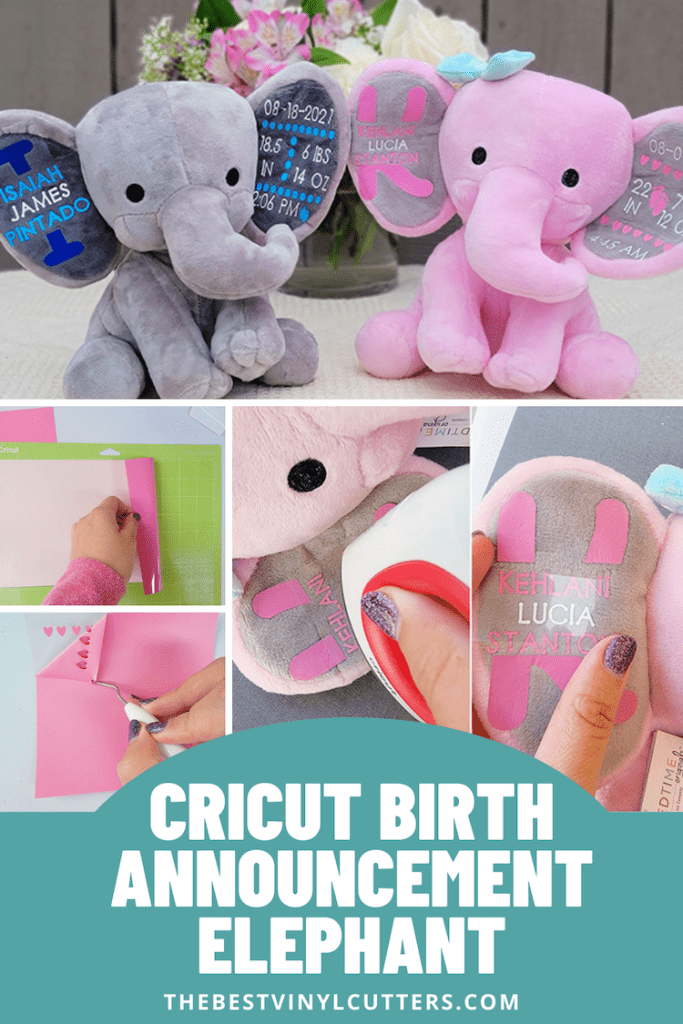
These Cricut birth stat elephants are a great gift for new parents. Best of all you can place the design with the colors of your choosing.
DIY Cricut Elephant Tutorial
Find below the steps to follow in order to create this super cute Cricut birth elephant! It makes such an awesome gift or addition to any baby nursery.
Supply List:
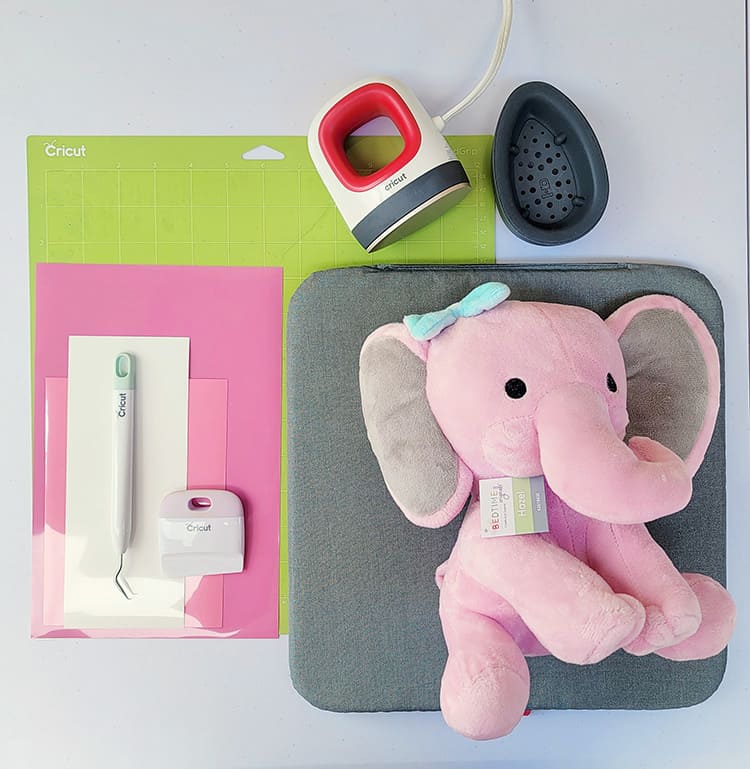
- Cricut Standard Cutting Mat
- Heat Transfer Vinyl (we use pink and white, but you can use any color you want)
- Paper Cutter/Trimmer
- Cricut Scraper Tool
- Cricut Weeding Tool
- Cricut Tweezer Tool
- Cricut EasyPress Mini
- Cricut Heat Mat
- Elephant Birth Announcement Stuffed Animal (Pink Elephant and Grey Elephant)
Step 1: Prepare Design in Cricut Design Space
The first and most important part of this project is to edit the file we created in Design Space to reflect the correct information about the newborn baby.
- Begin by selecting this design in Cricut Design Space
- Then select “Open” and then select “Open Cricut Design Space Application.” From there select “Customize/Edit Copy”.
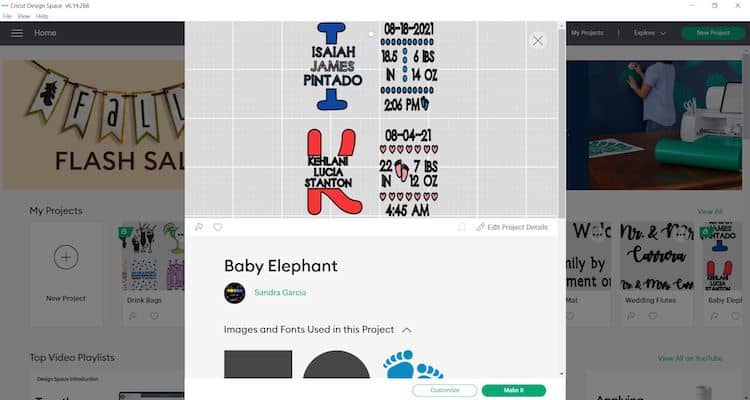
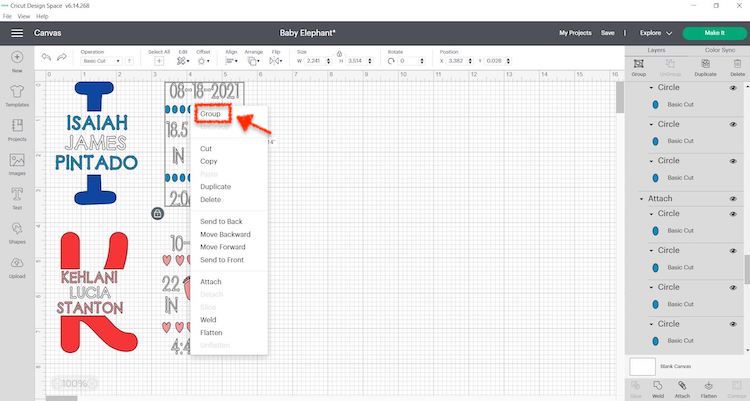
- Now you will need to edit the text with the information of your newborn baby. For editing the text selecting the text group, ungrouping any of the text and selecting the bits you want to edit.
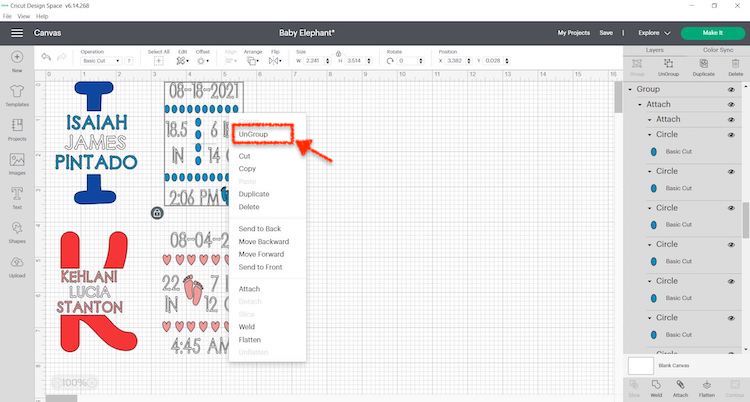
- Once you have completed all the edits, make sure to group the all the text together again. You can c do this by selecting all the text that belong in a group, right click and select Group.
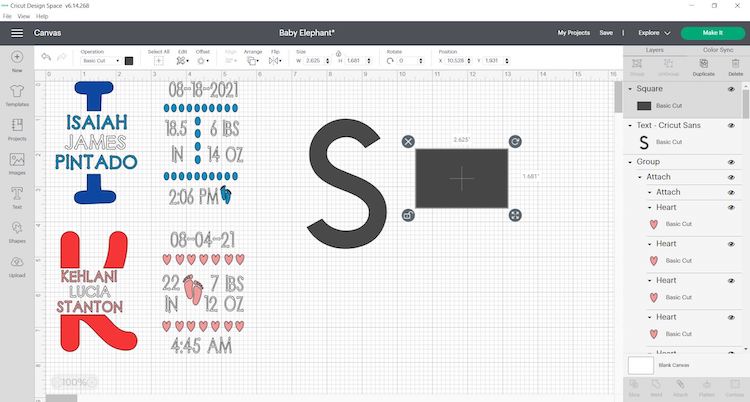
- In order to create the split monogram or big letter with the gap, you will need to insert a text box with the letter you need and then add a basic square shape.
- From there resize the letter to the wanted size and reshape the square to look more rectangle, the rectangle represents the text that will go in the middle.
- Next, place the rectangle over the letter to the desired location and highlight both items and select “Slice”.
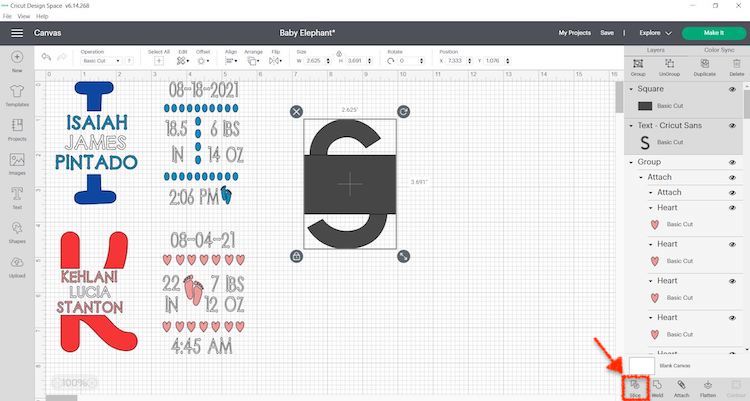
- From there you can delete all the items except the cut out of your letter which you will use as the backdrop of the name information.

- Once you are satisfied with the design you may move forward with cutting the design out on your HTV.
Step 2: Cut & Weed Design
Now that all the information is finalized you are ready to cut.
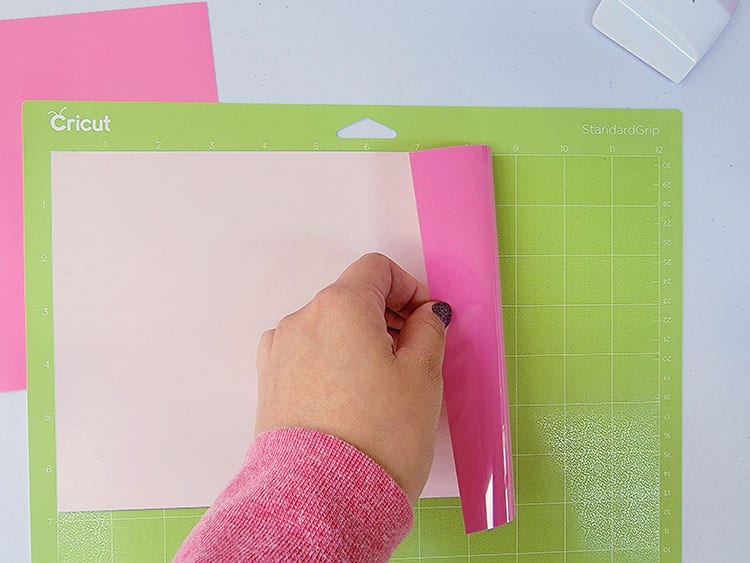
- Grab your StandardGrip mat. Place the HTV or Iron-On vinyl, shiny side down, on your green StandardGrip mat. Use your scraper to remove any bubbles and/or wrinkles.
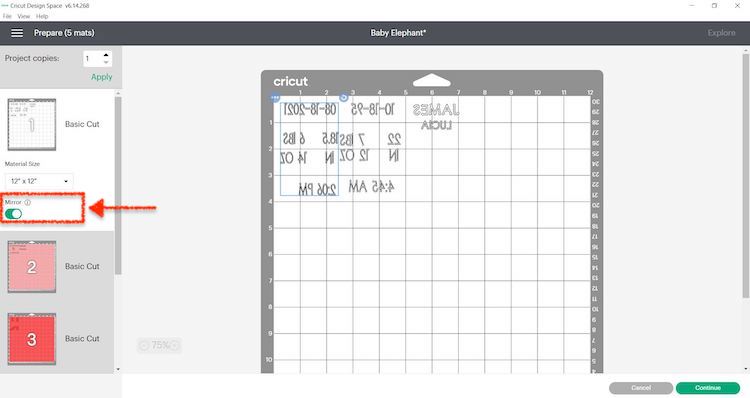
- In Cricut Design Space, click on “Make It”.
- Select continue and connect your Cricut machine. You will now be able to pick your material and cut settings.
- Load the mat into your cutting machine and select Iron on and select mirror prior to cutting.
- Next, use your weeding tool to help you lift the unneeded pieces of your design. Go slowly around the letters and fine details. Don’t forget to weed out the inside pieces.
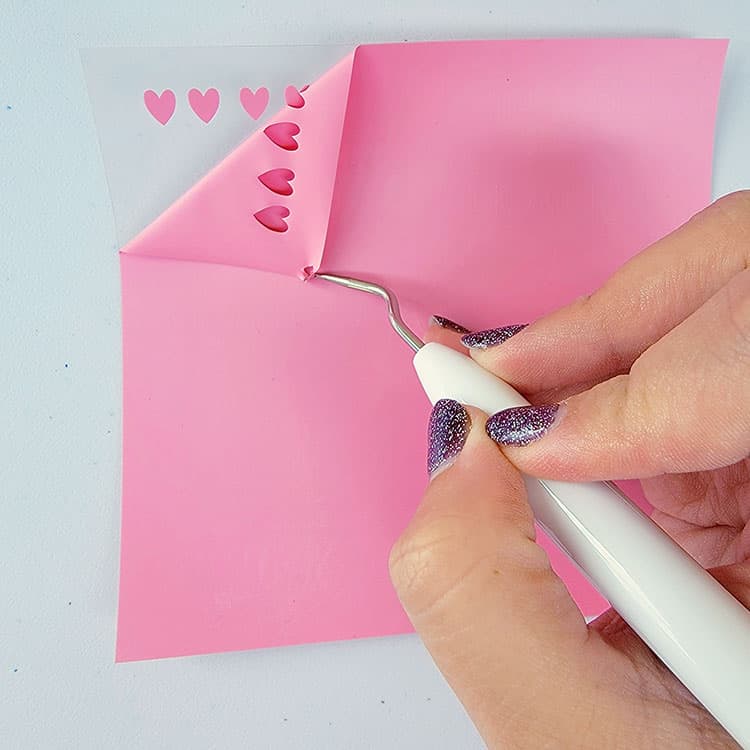
Note: You should be able to do your weeding with your fingers but use a weeding tool for smaller detail if required. I also found that in some cases the Cricut tweezer helped best for the very small pieces of vinyl.
Step 3: Transfer HTV to Elephant
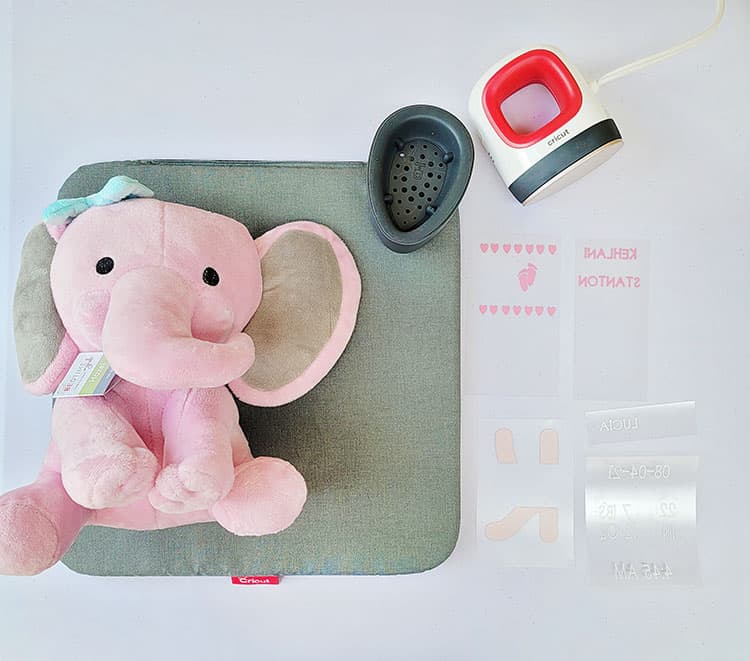
Before we apply the HTV to the elephant, make sure the elephant ears are clean and dry. You may want to use a lint roller to get rid of any lint.
It may be easier to add each part of the design to the ears by doing it section by section. You can also cut the pieces of HTV transfer sheets smaller so that you can still play around with the placing and also add each item of the design individually. For this project, we cut the HTV transfers into sections using our paper trimmer.
- Plug in your Cricut Easy Press Mini and set it to the lowest setting.
- Whilst waiting for the EasyPress to heat up you can cut your HTV transfer sheets into smaller sections using the paper cutter.
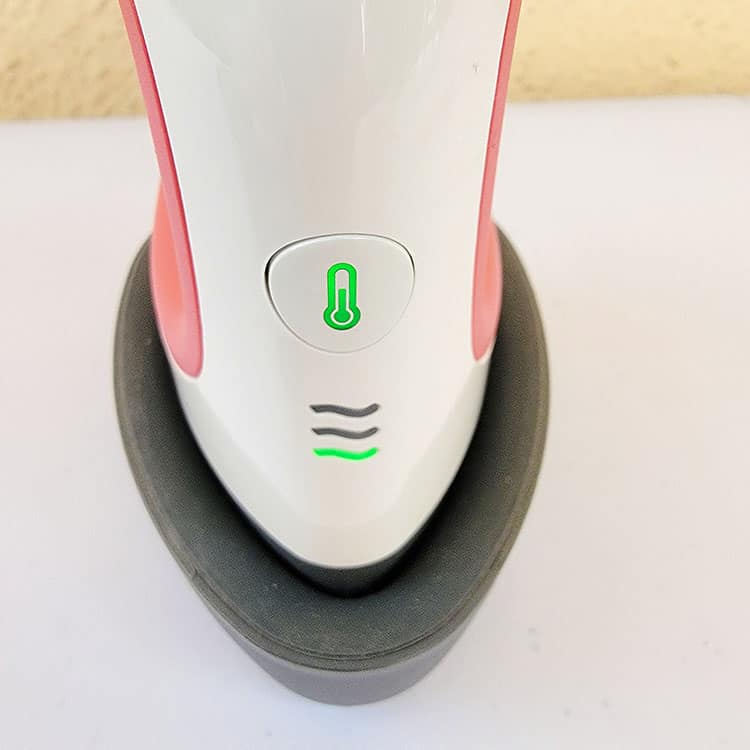
- Once your EasyPress Mini light is green you may begin to iron on each section slowly. I applied medium pressure and applied heat for around 20-25 seconds.
- Carefully peel the HTV transfer sheet backing away from the design.
TIP: Check to see if you the HTV you are using is hot or cold peel. If it is cold peel you will need to leave HTV transfer sheet to cool before peeling away from the design or HTV that you have applied.
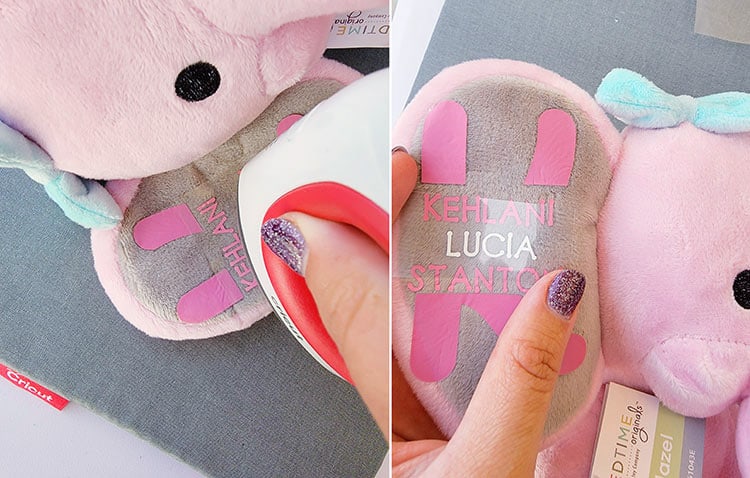
- It is best to gently iron it on and place each section one by one and go over it one last time.
- You will want to repeat this process over and over until you have all the sections placed and ironed on.
Finally, you have your very own personalized Cricut Elephant announcement stuffed animal filled with your little bundle of joys birth information. You can also easily follow the tutorial to whip up the grey elephant to welcome a baby boy.

The best part about this is that you can play with the colors and even the positioning of the text or you can stick with the traditional design.
Do you run an Etsy shop? These elephants sell really well on Etsy. You can also find a list of other Cricut crafts to sell on Etsy here.
Want to make another great baby project with your Cricut? Head on over to our tutorial and see how to make these adorable DIY Cricut Baby Milestones Acrylic tiles.