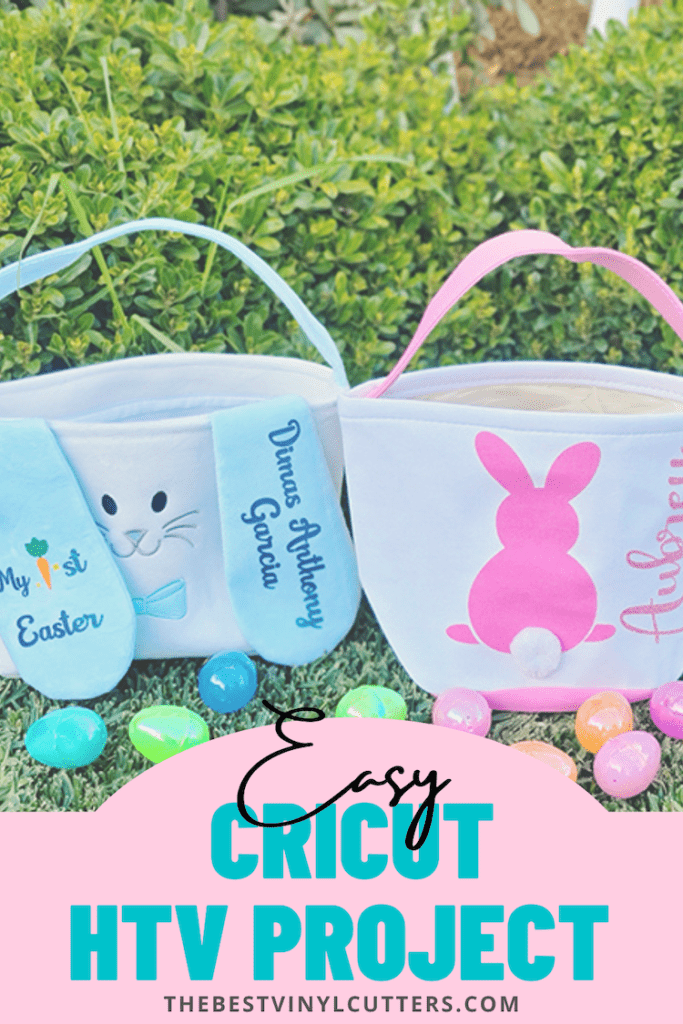
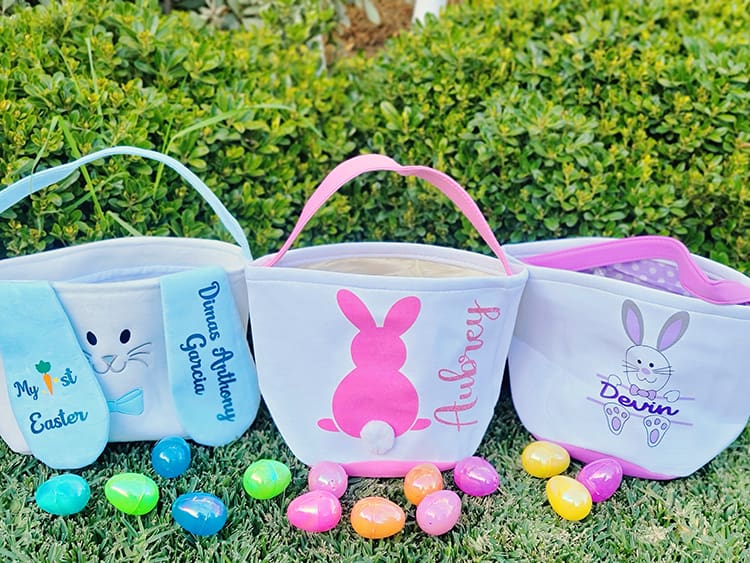
All three of our Cricut Easter Basket ideas are super easy to make! We found some adorable baskets from Amazon that are quick to personalize for Easter this year.
This tutorial will go over the three different ways you can customize your very own DIY Easter baskets.
Follow our tutorial and you will get a chance to play around with the Cricut Design text field by customizing your very own text or creating your own simple Easter design.
Cricut Easter Basket Tutorial
Follow our detailed tutorial to learn how to make these super cute Easter basket Cricut ideas.
Supplies Needed:
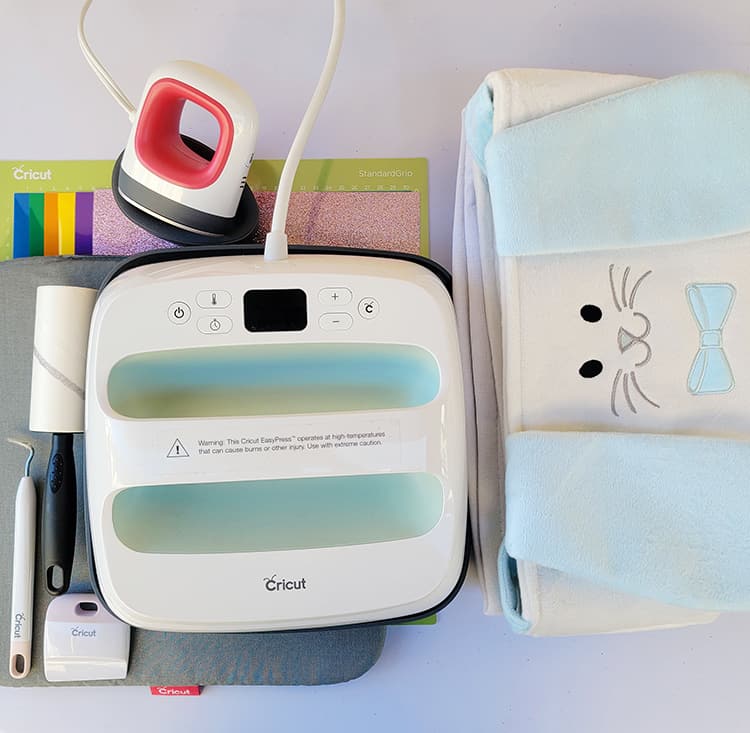
- Cricut Cutting Machine (I use a Cricut Explore Air 2)
- Cricut StandardGrip Cutting Mat
- Cricut EasyPress 2 (You can also use the Cricut EasyPress Mini)
- Cricut EasyPress Heat Mat
- Iron on Vinyl
- Cricut Scraper (can be bought in Cricut Basic Tool Set)
- Cricut Weeding Tool (can also be bought in Cricut Basic Tool Set)
- Lint Roller
- Choice of Easter Basket (Easter Basket 1, Easter Basket 2, Easter Basket 3)
Step 1: Create Text in Cricut Design Space
The first step of the project is to create the desired text in the Cricut Design Space.
- Open Cricut Design Space and start a New Project.
- Next, select “Text,” and select your desired font. We used the following three font types: Annie Leu, DTC October Daylight, and Double Whipped.
- From there you may rearrange the text to your liking.
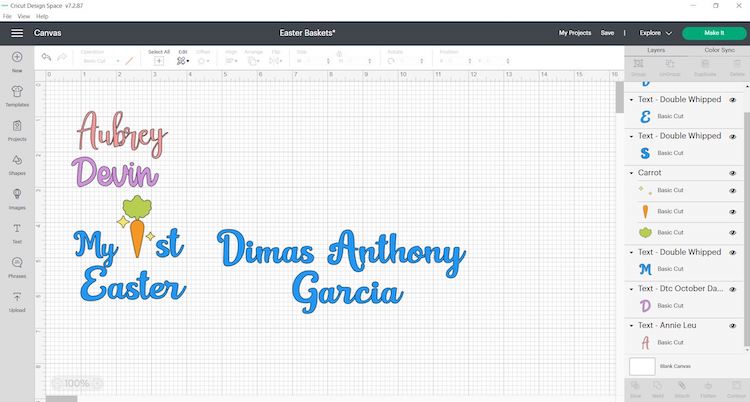
- Next make sure to Weld the text to ensure that the word is cut out as one word. This is important if you select a text that is cursive. Though if you do not mind the separate cutouts you do not need to weld.
- Now resize each text to your desired size.
- Once you are satisfied with the design you may move forward with cutting the design.
Step 2: Prepare your Cutting Mat
In this next step, the design (text or words) will be cut out by using your Cricut machine. This project will have you load the project into six different mats due to the number of colors we have chosen to use.
- When you are happy with the size and color of your design click on “Make It”.
- Make sure to select “Mirror”.
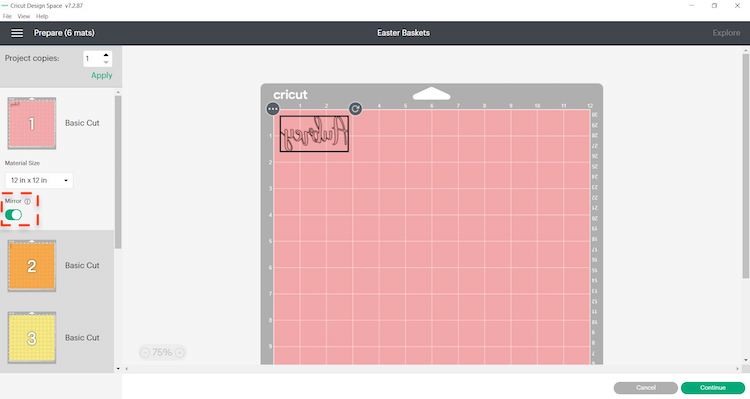
- Select continue and connect your Cricut machine.
- You will now be able to pick your material type and cut settings.
- If you have an Explore Air 2 – Select “Iron-on” on your material dial for the HTV.
- Place the HTV with the shiny side down on the Green StandardGrip mat.
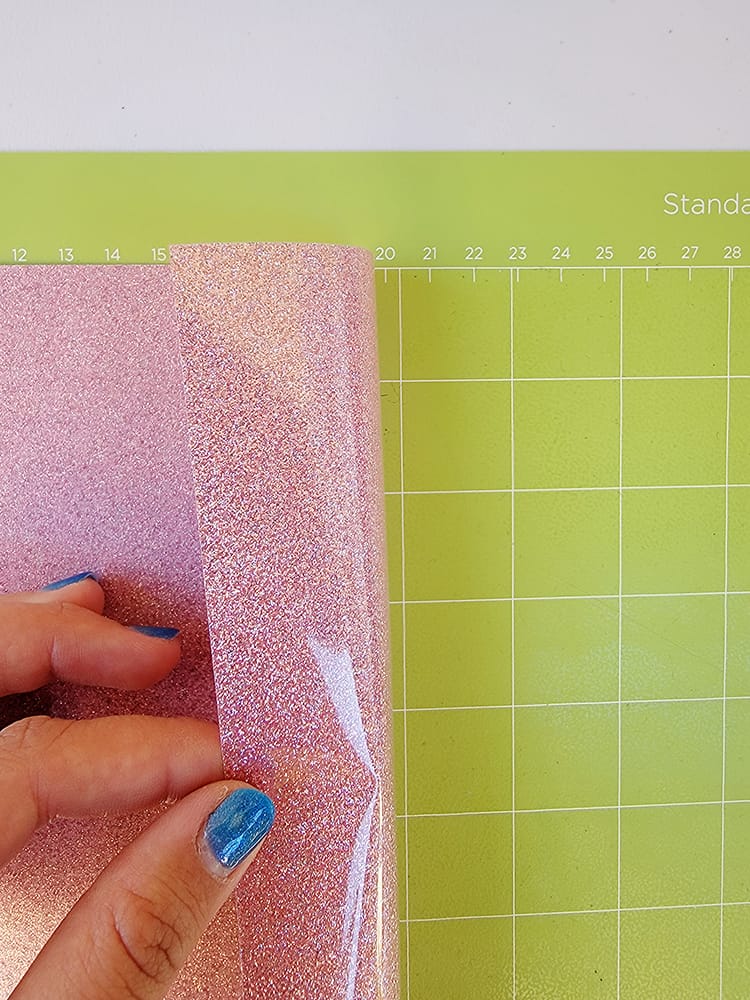
- Load the mat into your cutting machine and follow the instructions to cut the transfer sheets.
Step 3: Weed your Design
- Unload the mat and carefully peel the mat away from the vinyl.
- Trim down the vinyl if needed.
- Then start peeling away the excess vinyl from the top left corner. Go slowly around the letters and fine details.
- Don’t forget to weed out the inside pieces.
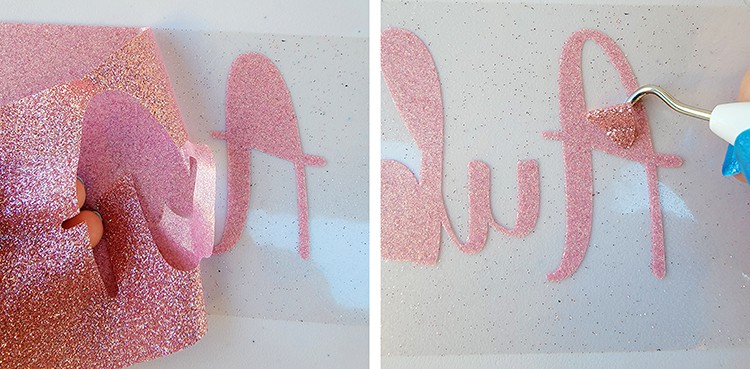
Tip: You should be able to do your weeding with your fingers, but use a weeding tool for smaller detail if required.
Step 4: Press the HTV Designs onto the Easter Baskets
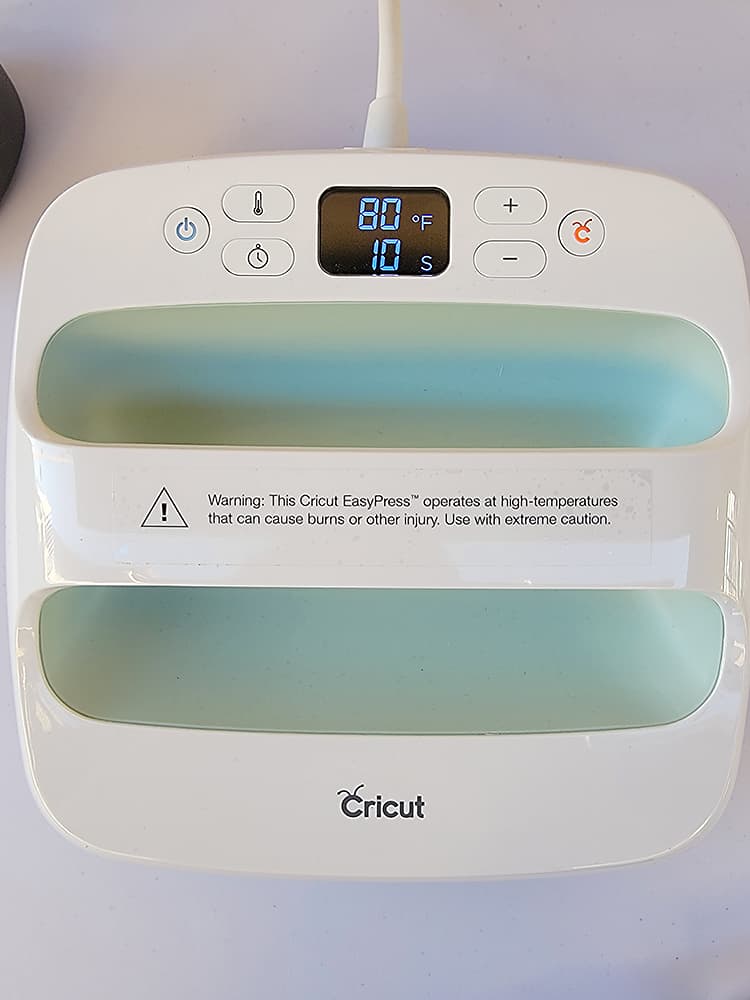
- Start by warming up your EasyPress Mini or Easy Press 2. I am using the EasyPress 2 and setting it to 300°F for 15 seconds. If you are using the Mini set it to the first setting.
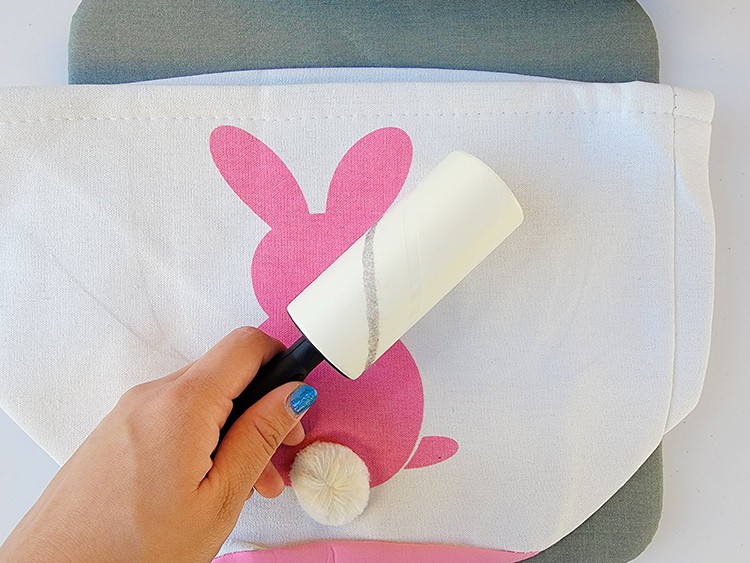
- Use a lint roller to remove random bits of fluff from the bunny tail.
- Iron or press the Easter basket with your press to make sure there are no wrinkles.
- Next place the design on the basket.

- Apply heat to your design for 15 seconds at 300°F. If you are using the EasyPress 2 (highly recommended) you need to apply light pressure.
- If you are using cool press HTV, make sure to wait for the Transfer Sheet to cool down before you remove it.
- From there you will want to repeat steps 2 through 5 to apply each design to the other baskets.
And just like that you have created your very own Easter day baskets. The beautiful thing about this is you can make it for anyone who will be Easter egg hunting this year.
Now for Easter time, you have a gorgeous little basket to fill with chocolates. Or for those who are sick of the sugar rush that chocolate brings, here is also a great post on non-candy easter basket filler ideas.
Excited to make more Easter crafts with your Cricut? Why not check out these Easter craft tutorials that you can make?
- Easy Easter Bunny HTV Shirt for kids
- DIY Easter Egg Decoration for your home
- Gorgeous Easter-themed wreath
- Cute lollipop Easter craft that kids will love
- Or check out all of these Cricut Easter Projects that you can make even if you own a Silhouette machine!
Which Cricut Easter craft will you make?