Protect your face from the sun’s harmful rays this summer season with our trendy DIY personalized beach hat with flock HTV!
What is flock HTV you may ask? Flock HTV is a special type of heat transfer vinyl that has a lovely raised soft and fuzzy texture to it.
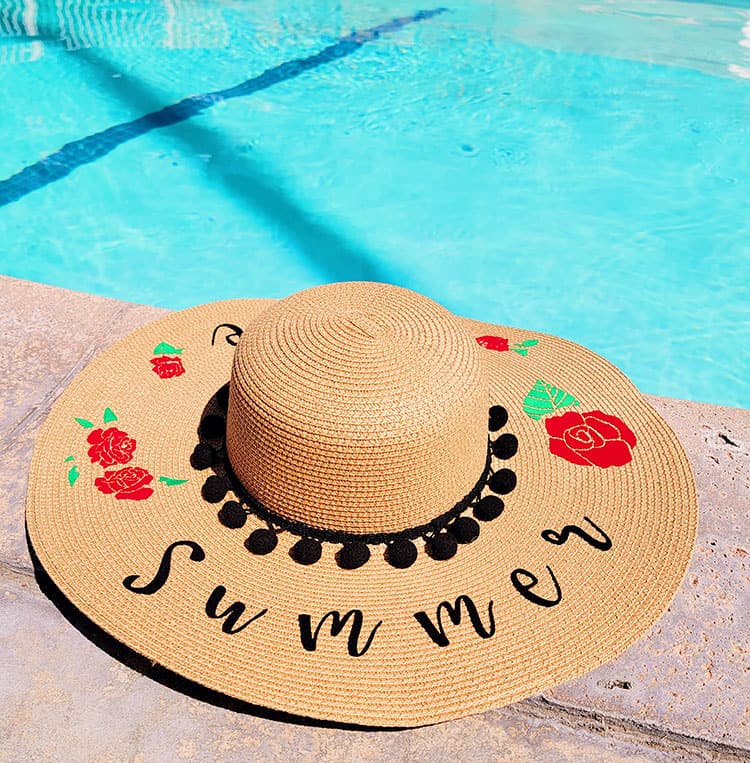
I picked up this cute little beach hat from Amazon, they had them in a couple of different shades of tan but I liked the light tan the best.
Once you have learned how to make your very own beach hat, you can create a few for your best friends or one for yourself for each day of the week this summer.

DIY Personalized Beach Hat with a Cricut Machine
Find below the steps to follow in order to create this stunning personalized sun hat. It is an easy project that everyone can do, even for a newbie.
Customized Beach Hat Supply List
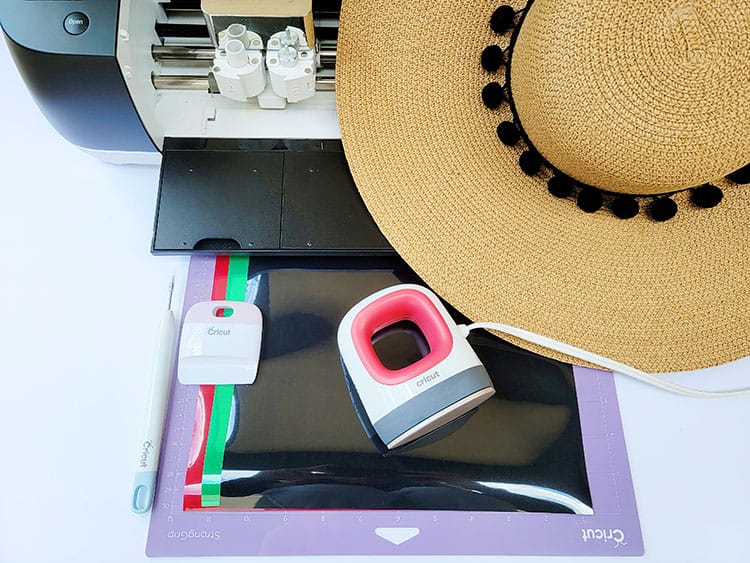
- Cricut Cutting Machine (I used an Explore Air 2)
- Cricut StrongGrip Cutting Mat
- Flock HTV (Red, Green, and Black)
- Cricut Weeding Tool
- Cricut Scrapper
- Cricut EasyPress (I use the Cricut EasyPress Mini)
- Cricut EasyPress Mat
- Floppy Summer Hat
Step 1: Download and Upload your SVG to Cricut Design Space
Find below the step-by-step instructions on how to prepare your Summer Hat SVG for cutting.
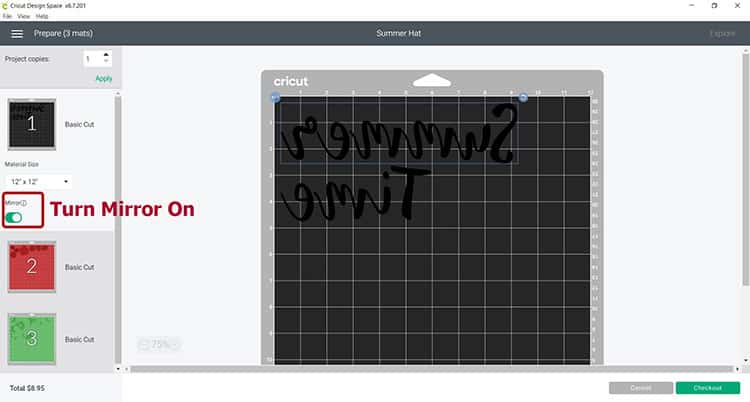
- Upload the summer hat SVG files by clicking here.
Note: The designs are obtained through the Cricut Assess profile.
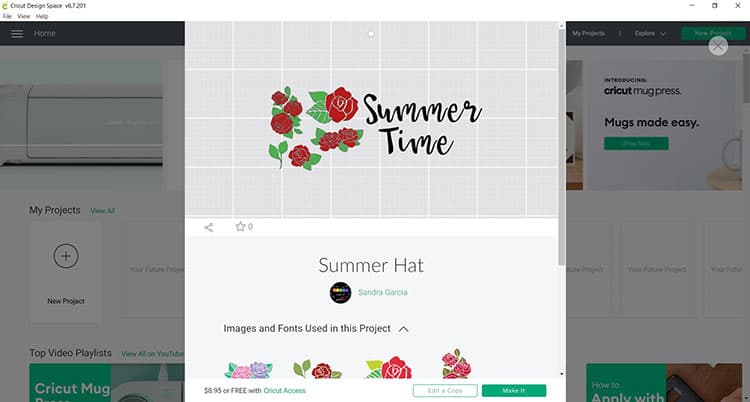
- Once you have selected the direct Cricut Design Space project from the link above, select “Open”.
- Now select “Open Cricut Design Space Application”
- From there you can select “Edit Copy” or “Make It”
Note: Only select “Edit Copy” if you want to change the color and size. If you want to keep the same size as ours and love the color selection, select “Make It”.
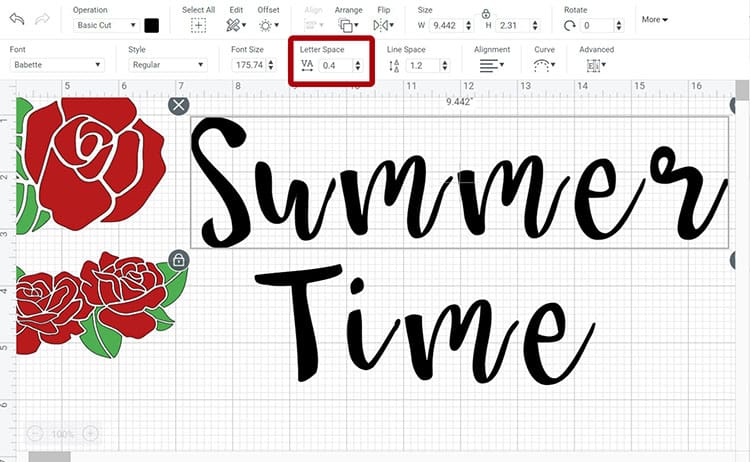
- I recommend moving the letters slightly apart. We will be cutting them out individually and then arranging them on the hat as we want. I simply moved them 0.4” apart.
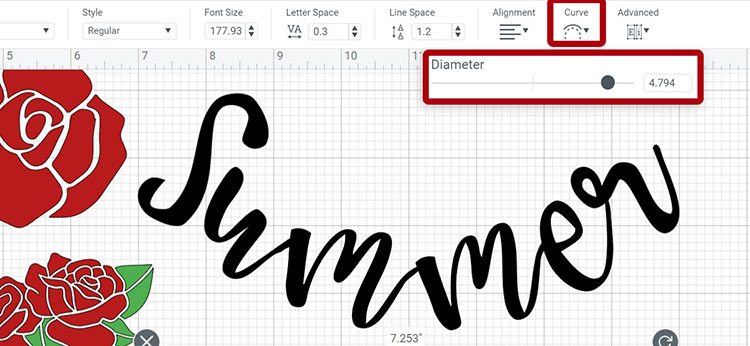
Tip: If we wanted the font to be curved, you should use the curve slider to curve your text – this might be a bit of trial and error, so maybe do a test cut on some paper to ensure you have the correct curve for the hat before cutting on vinyl.
- Once you are satisfied with the design you may move forward with cutting the design.
Step 2: Prepare your Cutting Mat
Next, it is time to cut your design. This project will have you load the project into three different mats.
- When you are happy with the size and color of your design click on “Make It”.
- Make sure to select “Mirror” on each mat.
- Select continue and connect your Cricut machine.
- You will now be able to pick your material and cut settings.
- If you have an Explore Air 2 – Select “Iron-on +” on your material dial.
- Place the flock HTV Sheet on your Strong Grip mat with the shiny color or pattern side facing down.
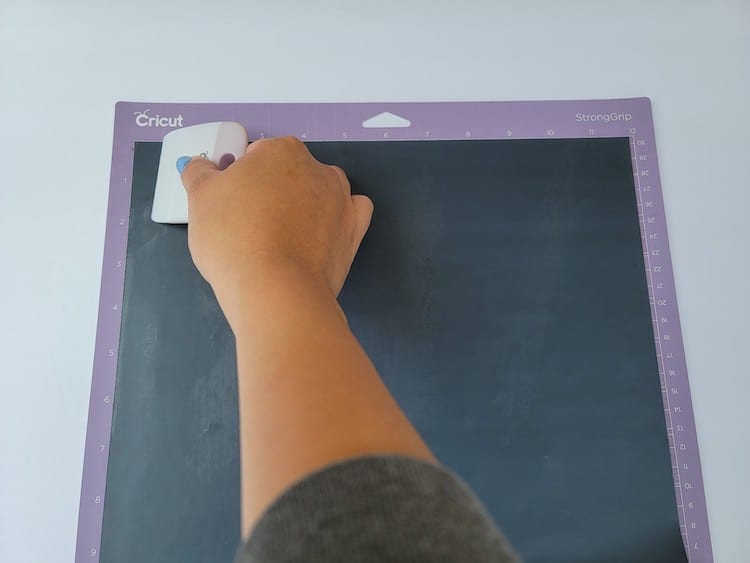
- Load the mat into your cutting machine and follow the instructions to cut the transfer sheets.
Tip: By color coordinating the design prior to cutting, Cricut Design Space will instruct you on which color mat to load next.
Step 3: Weed the Design
- Next, remove the unneeded pieces of vinyl from your design. Go slowly around the letters and fine details. Don’t forget to weed out the inside pieces. (Learn more about how to weed in this blog post here if needed).

Tip: You should be able to do your weeding with your fingers, but use a weeding tool for smaller detail if required.
Step 4: Press the Flock Layers on the Summer Hat
- Start by warming up your EasyPress. I am using the EasyPress Mini and selecting Medium for my heat setting.
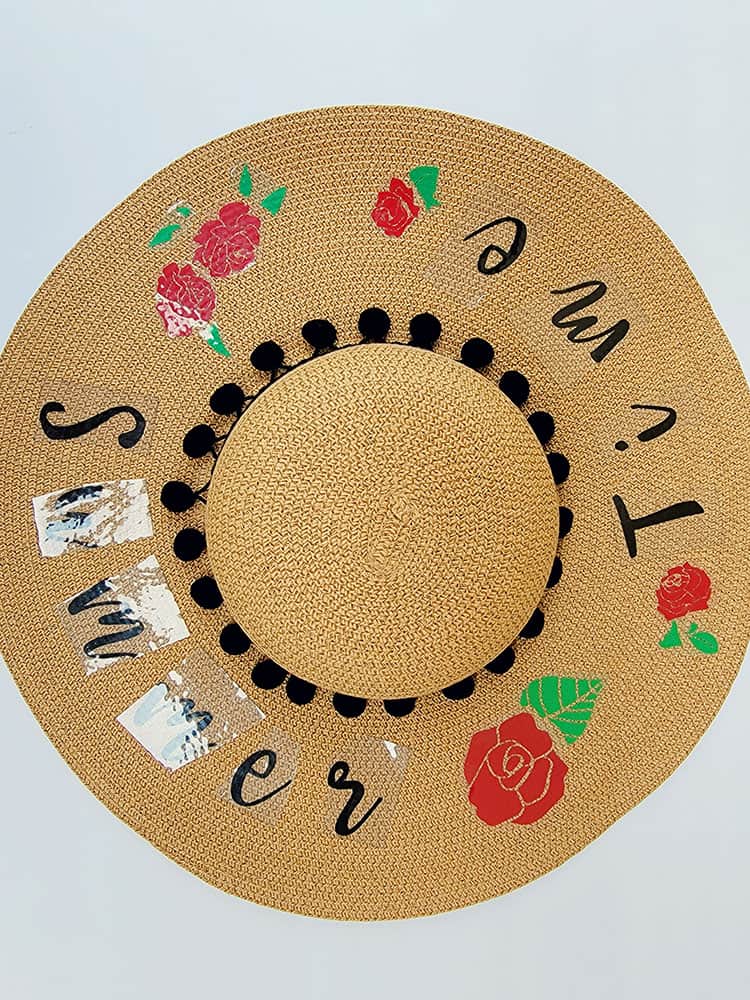
- Place the flock HTV design UPSIDE DOWN on the hat. I recommend that you lay down all your pieces to make sure the spacing is correct and that it all fits on your hat.
- Apply heat to your design for 90 seconds. Remember if you are using the Mini press you need to apply light pressure and move around constantly.
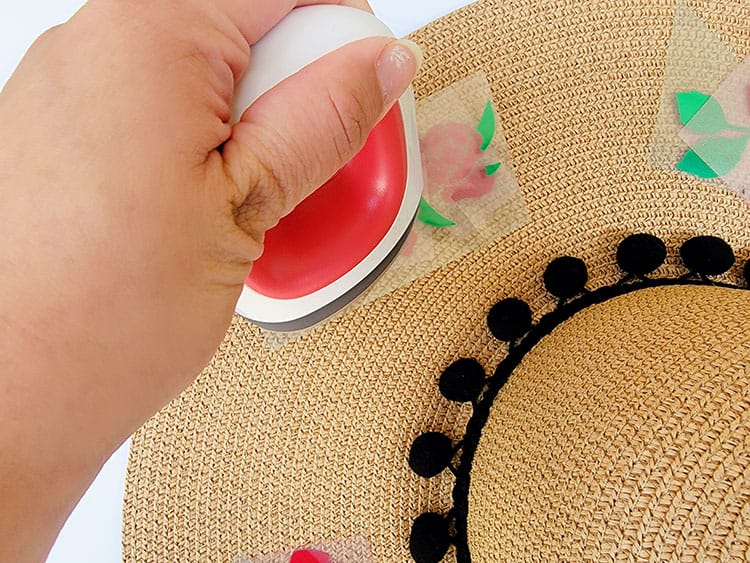
- Wait for the flock HTV Carrier Sheet to cool down before you peel it away from the HTV.
And just like that, you have created your very own personalized summer hat. The beautiful thing about this is that you can create personalized summer hats for friends and family by choosing wording that is just for them!
What would your personalized summer hat say?