If you love creating personalized items and have thought that you cannot give Infusible Ink a go because you do not have an EasyPress or Heat Press, then this post is perfect for you.
In this post, we will show you how to personalize baby clothes using Infusible Ink sheets and an iron.
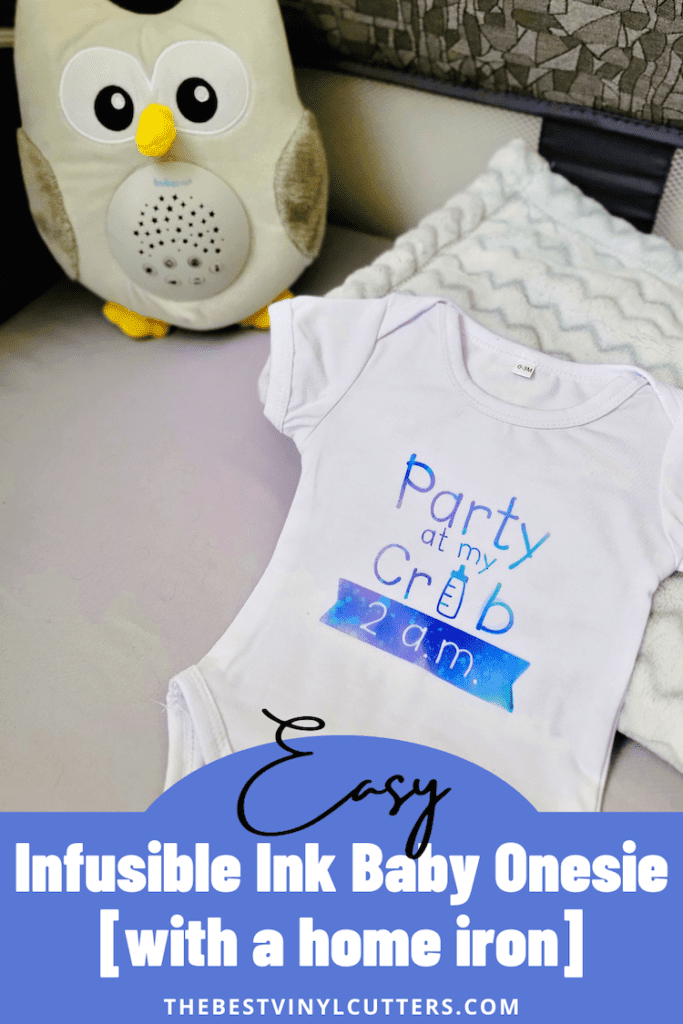
These baby bodysuits are great baby shower gifts or simply clothing items that you can create for your own bundle of joy.
With endless designs, there are so many clothes that you can make using Cricut Infusible Ink and a home iron.
The best thing about using Infusible Ink is the ability for the design to seep into the fabric rather than just being layers on top.
You also have such great color designs that are endless thanks to Cricuts' many options.
Not sure what Cricut Infusible Ink is? Read our complete guide to Cricut Infusible Ink – perfect for beginners!
Can You Use an Iron for Infusible Ink?
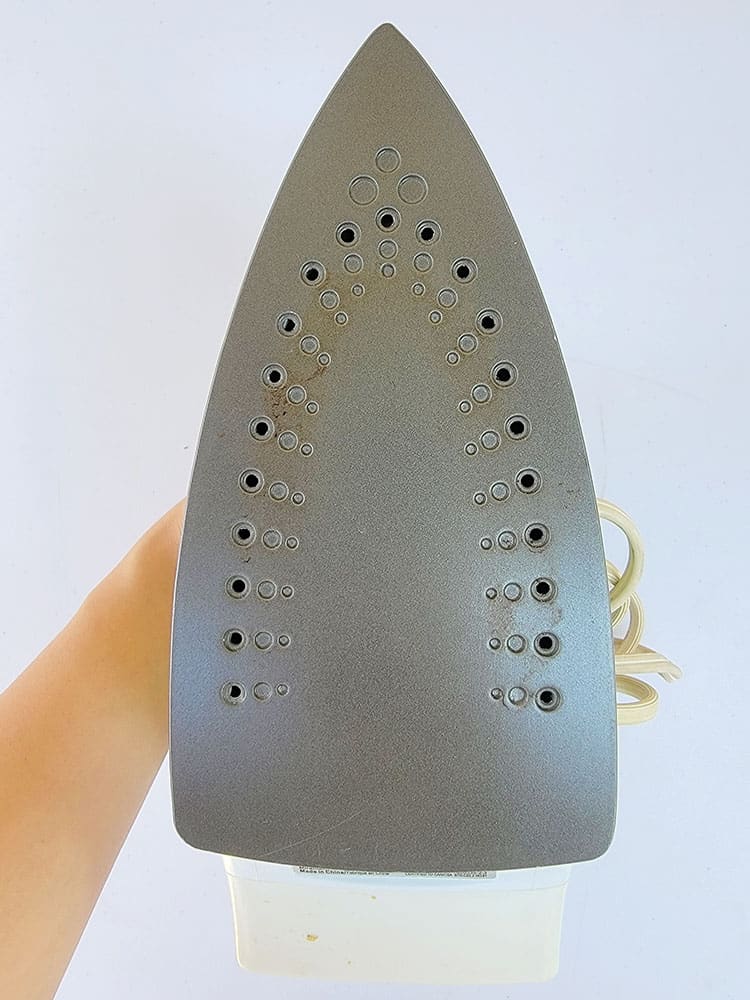
The short answer to this question is yes you can! So if you have a home iron similar to the image below you can use it to transfer Cricut Infusible Ink to blanks.
However, using a home iron with infusible ink is a little tricky and there are a few points to note before you start to get the best possible result.
So what can possibly go wrong?
A home iron has a small surface area compared to a heat press machine which means that if your design is bigger than the iron's heat plate you will need to press the design by lifting the iron and placing it down on an unpressed or heated area.
If the image moves or you do not apply the same amount of pressure or press for less or more time your image may result in the uneven color transfer or ghosting.
You can see the ghosting effect on the project we make in this tutorial as the color is slightly lighter in sections.
Other tips to note when using a home iron are:
-
- Use a dry iron and make sure the steam setting is not on as the steam will cause the ink to run.
-
- Set your iron to the highest temperature setting possible.
How to Make an Infusible Ink Baby Onesie with an Iron
Follow our steps below to see how you can create gorgeous baby onesies and clothing items using Cricut Infusible Ink and an iron.
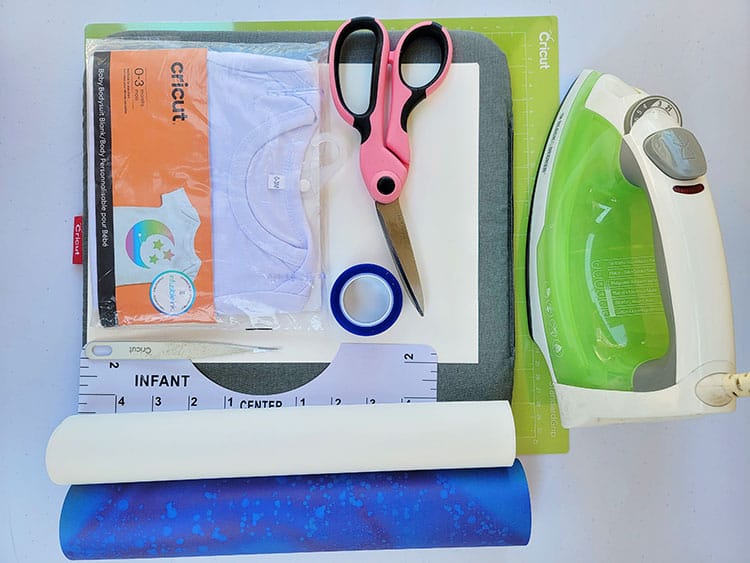
Supplies Needed:
-
- Butcher paper (supplied in the Infusible Ink transfer sheet box)
-
- Cricut blank (baby suit) or other compatible Cricut Infusible Ink clothing blanks
-
- Scissors & Tweezers (you can get all these tools in the Cricut Basic Tool Set)
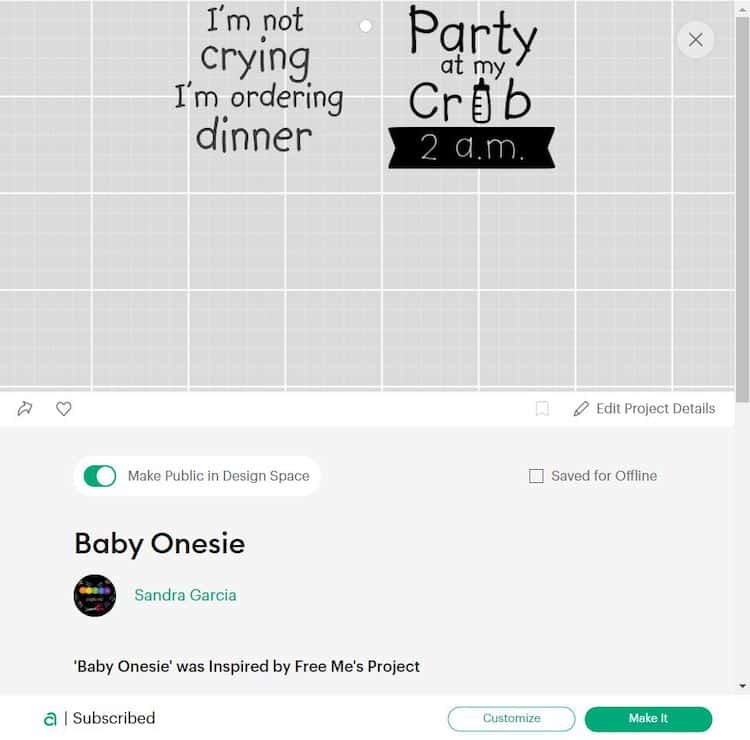
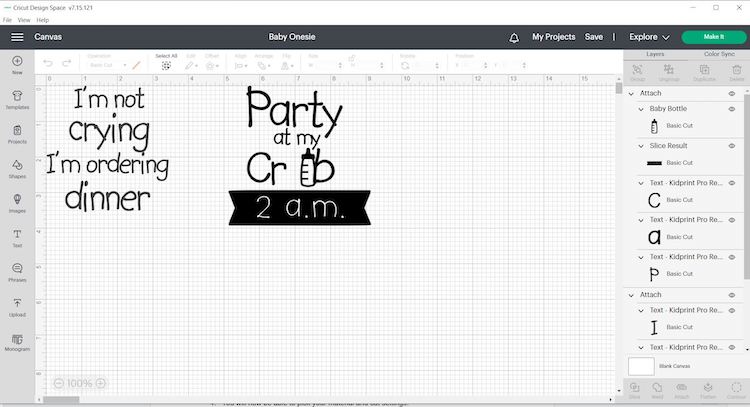
Step 1: Download Design
Follow the step-by-step instructions on how to prepare your design.
You can either follow our project instructions to create your own baby onesie, or you could choose a pre-made design from the Cricut Design Space project library so you can create something completely different such as a shirt or pillowcase.
-
- If you like to create the exact body suit as we did, you can do so by clicking on this link (it will open up the project in Cricut Design Space).
-
- Next select “Open in App” and “I agree to Cricut Terms of Use and Privacy Policy,” from there you can select “Customize” or “Make It.”
Note: Select “Customize” if you want to change the color and size. We used the sizes 3” x 3″ for a 0-3 month baby bodysuit.
-
- Once you are satisfied with the design you may move forward with cutting the design.
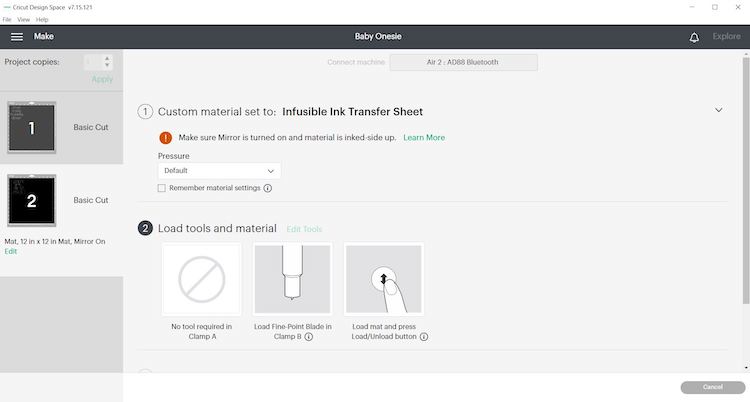
Step 2: Cut Your Infusible Ink Sheets
Next, it is time to cut your design.
Note: Before handling infusible ink materials be sure that your hands are dry and free of any oils or lotions.
-
- When you are happy with the size and color of your design click on “Make It”.
-
- Make sure to select “Mirror” in Design Space.

-
- Select Continue and connect your Cricut machine.
-
- You will now be able to pick your material and cut settings.
-
- If you have an Explore Air 2 – Select “Custom” on your material dial for the Infusible Ink.
-
- Select Infusible Ink Transfer Sheet from the list of materials in Design Space.
-
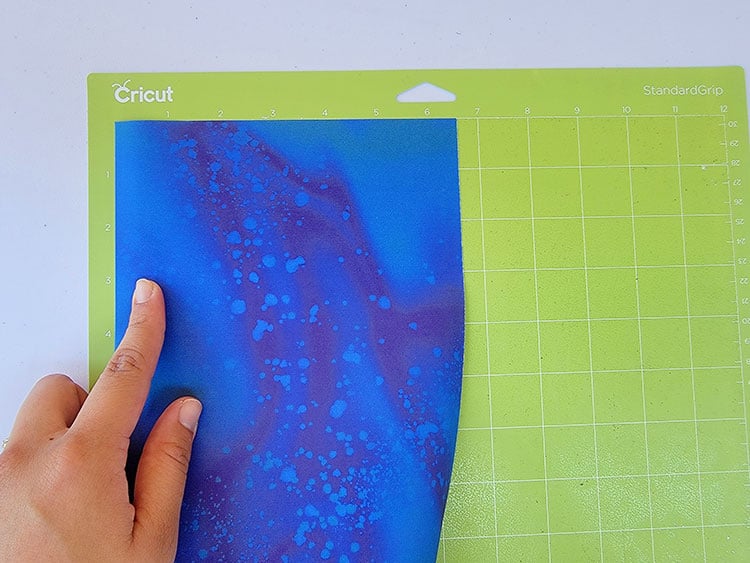
- Place Infusible Ink Transfer Sheet onto a StandardGrip mat, liner side down.
-
- Load the mat and blade into the machine, then press Go.
-
- Before removing the mat from the machine, once cut, double-check that the design has been cut in the Infusible Ink sheet. If it is not cut, press Go again to have the design cut again in the Infusible Ink sheet.
Tip: Try to touch the sheet as little as possible, I find that using a brayer or roller comes in really useful to smooth out the sheet if needed.
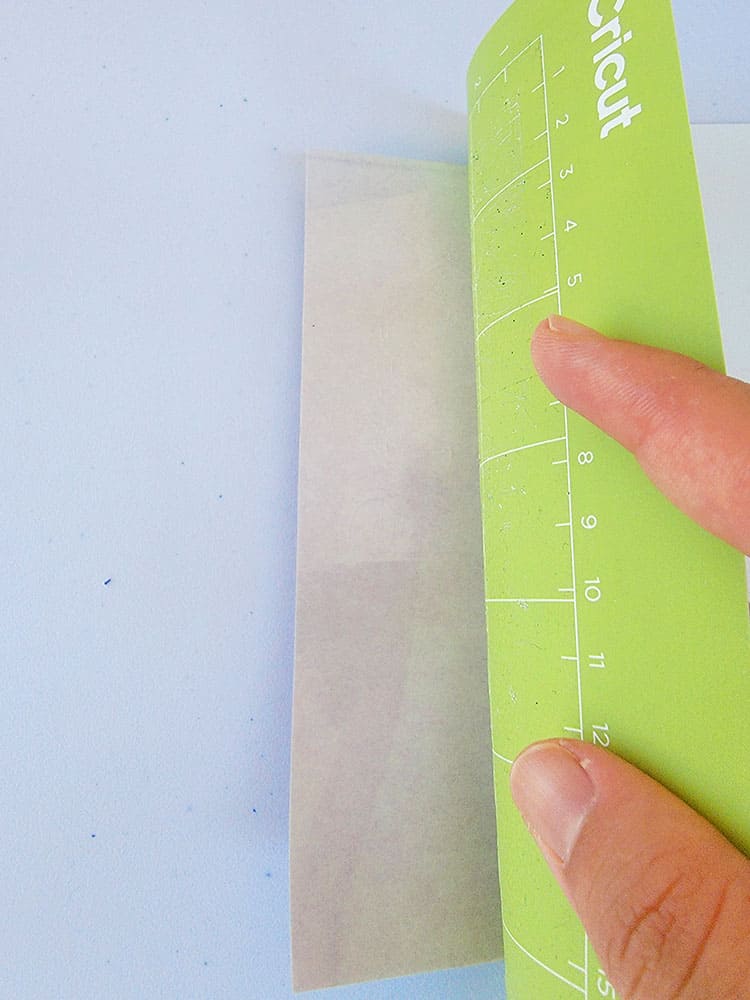
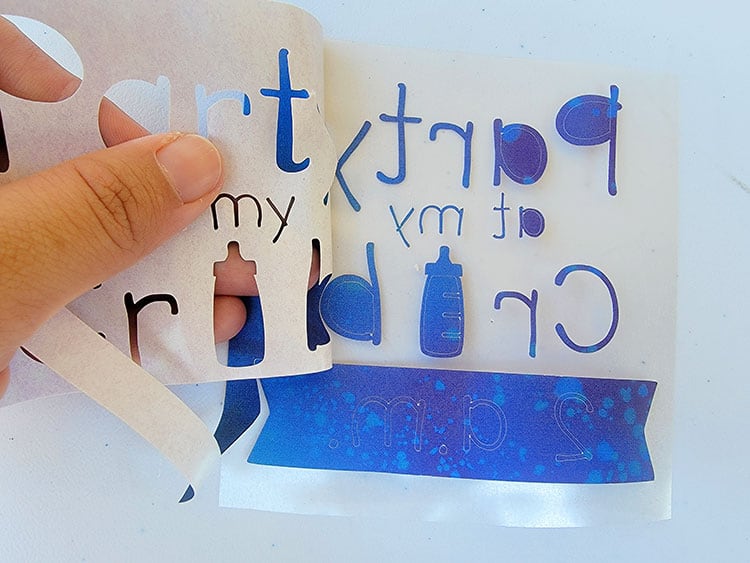
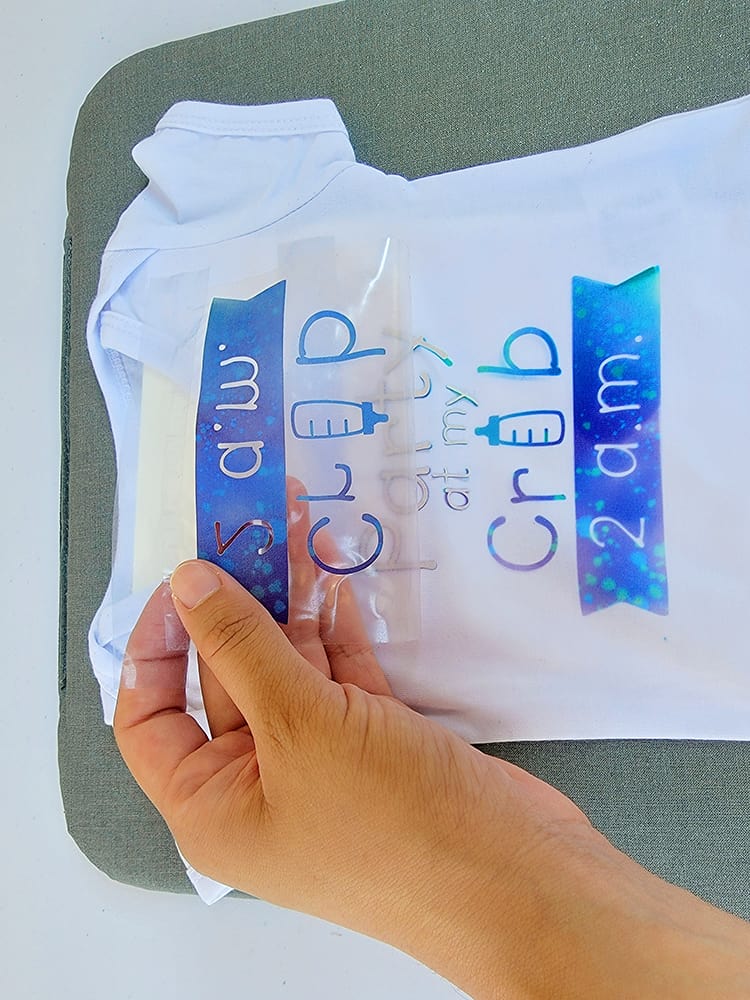
Step 3: Weed Your Design
-
- Remove the cut design from the mat (it is best to roll the mat away from the sheet, rather than pulling the sheet from the mat) and trim away unused areas of the sheet.
-
- Gently roll cut design so cut lines separate and are more visible. “Cracking” the cut this way makes it easier to remove excess paper from in and around your design.
-
- Use your fingers or tweezers to remove negative pieces in and around your design, leaving the design on the liner.
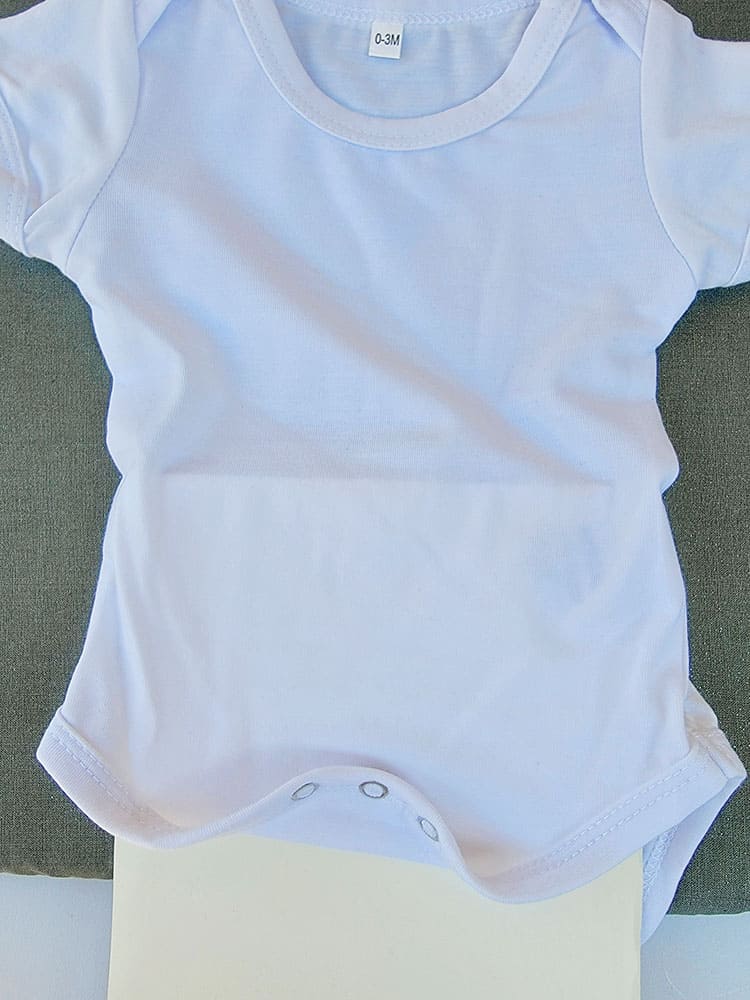
Step 4: Prepare the Blank
Now is an excellent time to prepare your Iron.
Set your iron on high for this project and turn off the steam option. If you leave the steam option on, it will create spots in your design due to the steam that is released from the holes at the bottom of the iron.
-
- Place a piece of cardstock (or printer paper) inside the baby body suit The cardstock will protect your mat and project.
-
- Do not skip this step: Use a new adhesive to lint-roll the entire surface. Even tiny debris or fibers may create imperfections in the final transfer.
-
- Cover the blank with butcher paper.
Note: Butcher paper comes in each package of Infusible Ink Transfer Sheets.
-
- Do not skip this step. Preheat the application area to remove moisture and wrinkles that result in unwanted effects.
-
- Remove butcher paper and let the baby bodysuit cool completely.
Step 5: Apply the Infusible Ink Design
Now we are ready to apply heat to the Infusbile Ink design to transfer it to the baby onesie.
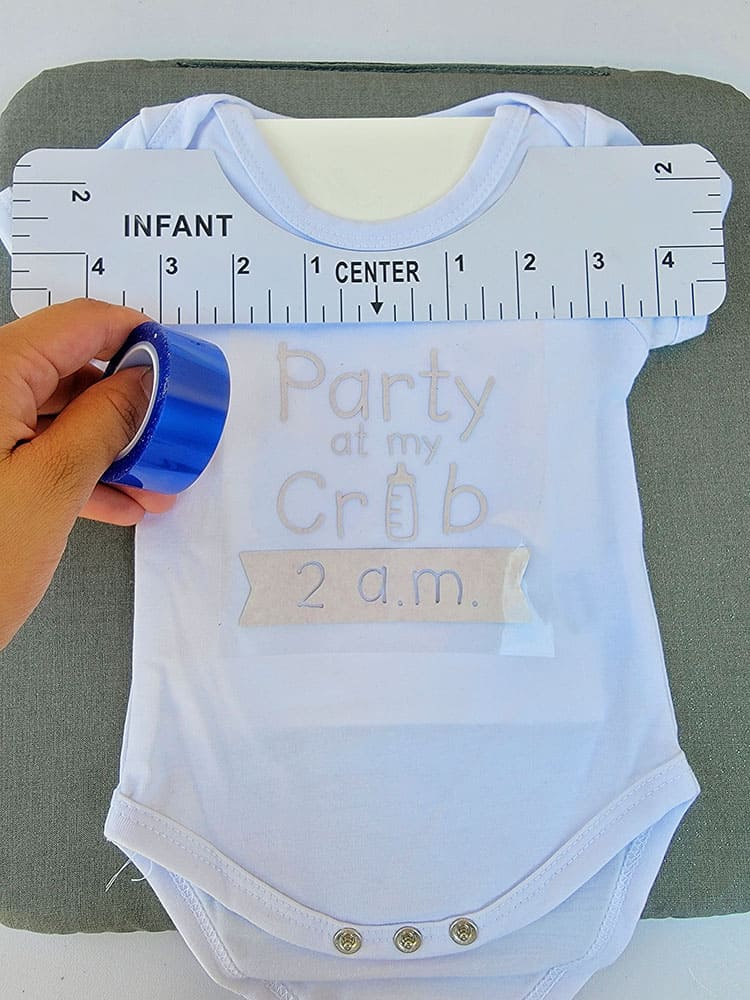
-
- Place the cut design face down on the baby bodysuit with the clear liner facing up. I recommend that you use some heat tape to keep the design in place.
-
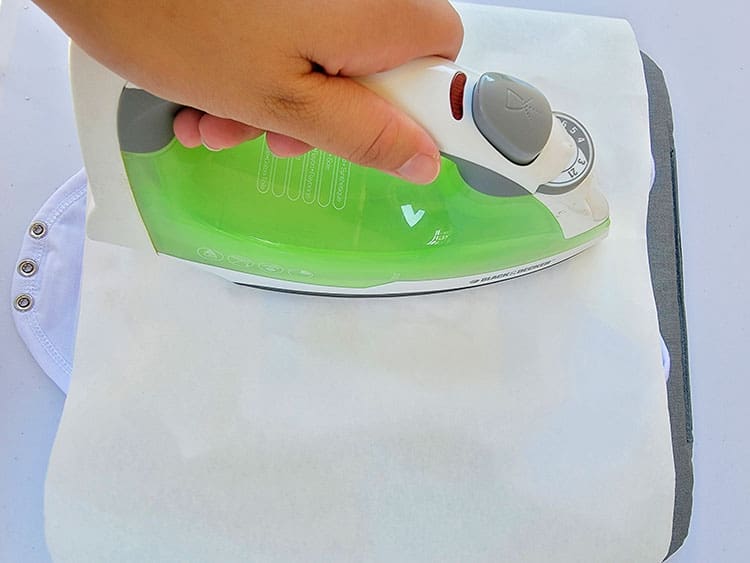
- Cover your design with butcher paper that is larger than the iron.
-
- Slowly move the iron around the design with light pressure; this may take a few minutes and a couple of rounds. Keep moving the iron, don't stop, and try to get even amounts of heat to each section of the design.
-
- Slowly lift the iron.
-
- Let the project cool completely. Then slowly remove butcher paper and liner with design.
-
- Important: If the design separates from the liner and remains on blank, remove it with tweezers. Please do not remove it using your fingers. This could cause unwanted effects, like ghosting or marbling.
Keep in mind: it is really tricky to get a perfect transfer when you use an iron. It is common to get a design with some sections slightly darker than the rest. In our case, the design could have been done with some additional heat to really bring out the color more.
But we are happy with our attempt and our design team member's little newborn will look beautiful in his new onesie!
Check out our post for some amazing design ideas!
We hope this tutorial has explained how you can use a home iron to transfer your Infusible Ink design.
Although we would recommend using a heat press when using Infusible Ink transfer sheets, we still think that if you are just giving it a go or only make a few projects with Infusible Ink, then using your home iron will work until you are ready or want to invest in a heat press.