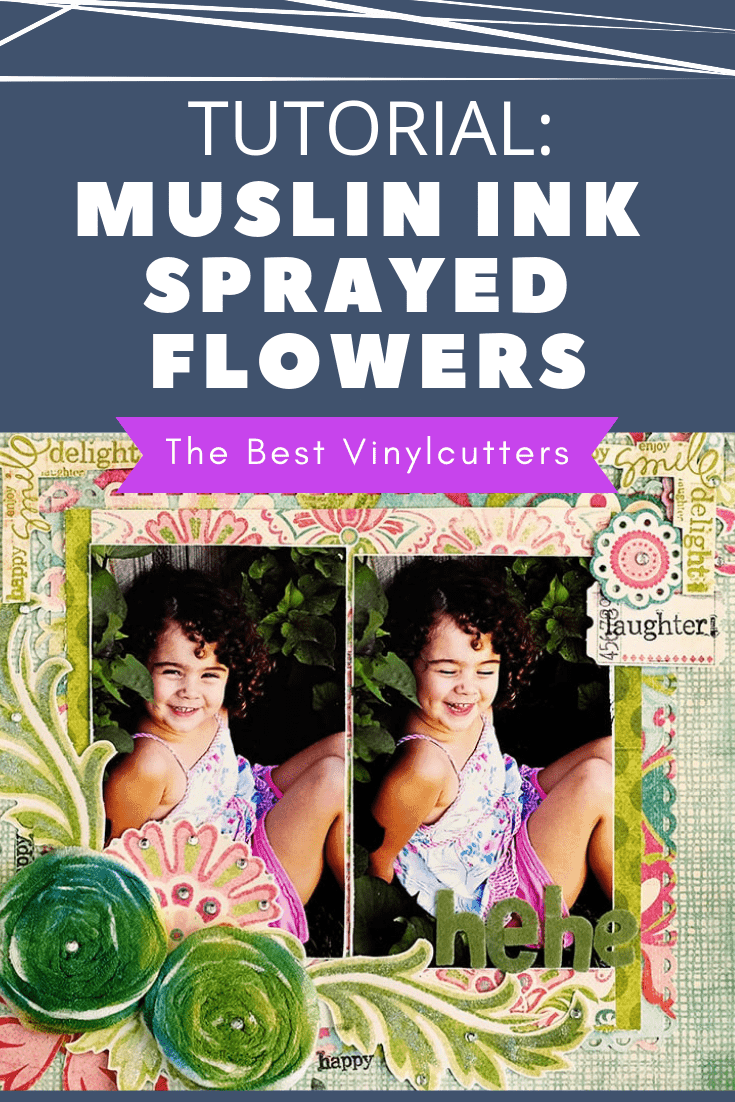
Today I wanted to share with you a quick tutorial to a scrapbook layout that I've made.
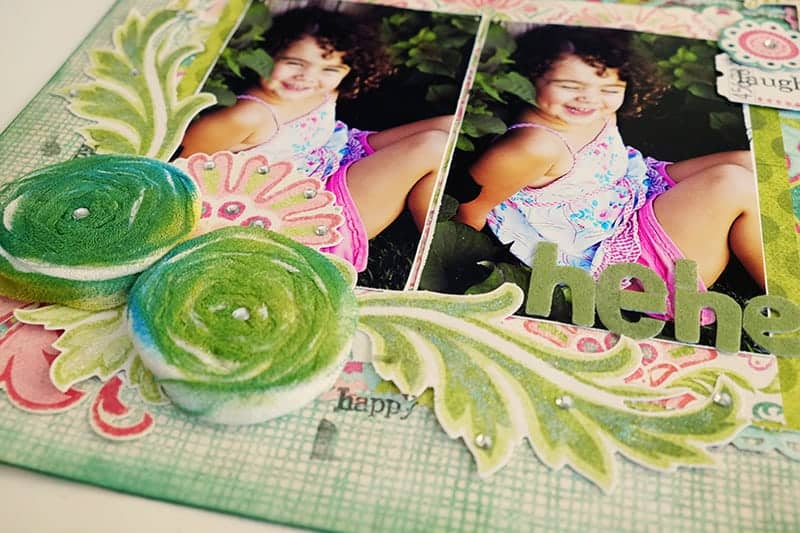
The layout features gorgeous handmade muslin flowers & it also has some beautiful decorative borders that I created with my die cut machine. (As a side note, you can check out our guide to the best die cut machine here).
Muslin is a finely woven cotton material that is available in a variety of widths and weights. It is typically white or undyed, making it perfect for adding color with ink-based sprays. The fabric is readily available from fabric stores.
Muslin can be used in a variety of ways in scrapbooking and altered projects.
Use some frayed muslin as one of your layers to add a soft, natural look to your projects. Roll it up to create some frayed muslin flowers; and twist, knot, or ink for a more interesting effect.
Keep in mind that muslin is not acid-free, so try to keep it away from direct contact with your photos.
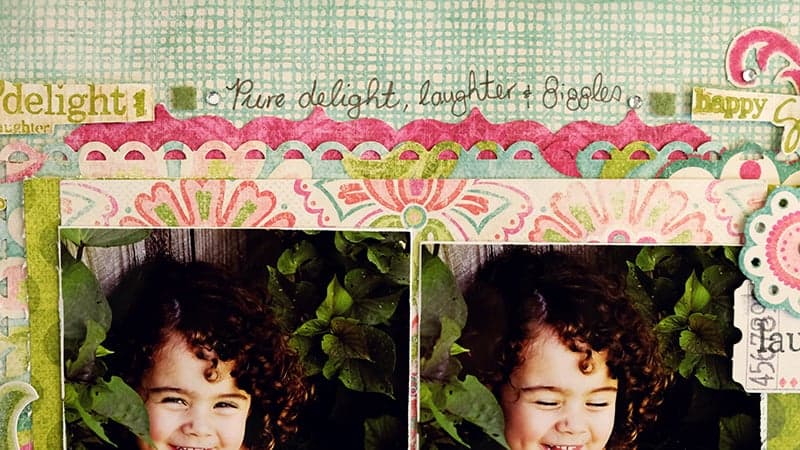
The Layout – Laughter

Tip: Dimension on a layout adds interest. When you are working with paper die-cut shapes, think about adding dimension by using foam tape, jewels, or brads.
Materials:
Here is our list of supplies needed to complete this project. If you are new to scrapbooking, you will also find our post with a beginner scrapbooking supplies list helpful.
|
|
Step-By-Step Instructions for the Flowers:
1. Make a tiny sip close to the fabric selvage at one end of your muslin and tear the end of the muslin fabric off. By ripping the fabric and not cutting it, you will be left with a beautiful softly frayed edge.
2. Measure 2″ from this edge, and make another tiny snip and rip the muslin along the width again. This should give you a strip of muslin around 2″ in width with two frayed edges.
3. Roughly fold the muslin in half lengthways and tie a knot in one end. This knot will become the center of the flower.
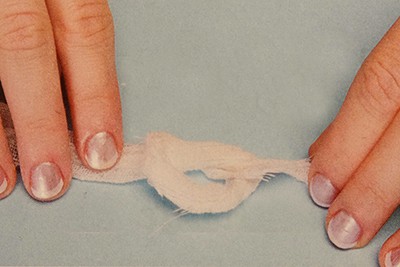

4. Start wrapping the muslin around the knot you created, add a few twists and turns as you wrap to add some dimension and interest. How loosely or how tightly you roll your muslin will depend on the type of flower you want to create. Here, I have made a loose roll. Keep wrapping, twisting, folding and wrapping.
5. Once you are happy with the look of the flower, adhere the end of the flower down. I like to adhere the end of the muslin to the bottom of the flower using some glue from my glue gun, but using a needle and thread works equally well.
6. Now it's time for the messy fun to begin! You can choose to color your muslin in any colors you wish. Use a gorgeous shimmery brown spray for a vintage-style look or bright, bold colors for a happy feel.
Here, I have used two complementary colors – a blue and a green. I find that starting with the darker color of the two works best.
First, place your muslin flower in a cardboard box. Spray the flower with the blue mist and try not to cover the whole flower. You need some uncolored muslin so that the green will pop more.
If you prefer a more subtle look, have a spray bottle of water close by and simply spray water in between each color spray.
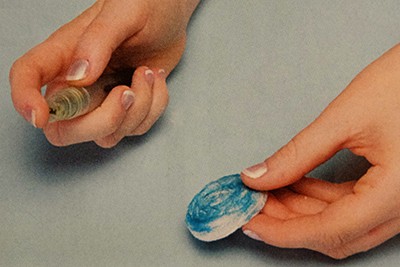
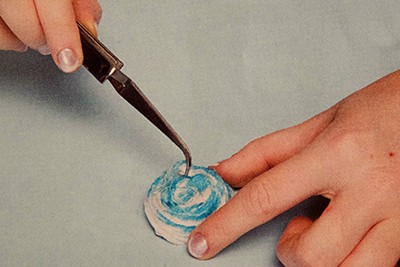
5. Pulling and tugging on your flower will expose a bit more uncolored muslin. Once a fair amount of uncolored area is exposed, simply give your flower a spray in the lighter color to make it pop.
6. Finally, set your flower aside to dry.
Step-By-Step Instructions for the Layout:
1. Lightly sand down the edges of your photos to expose the white core of the photo paper.
2. Cut one of your patterned papers to 19 x 19cm.
3. Cut a contrasting patterned paper to 21 x 19cm.
4. Your third patterned paper should be cut to 24 x 22cm. Use a digital machine to cut a decorative border right around this patterned paper (or alternatively use a border punch).
5. Cut your last patterned paper or cardstock to 17.5 x 2cm. Use a digital cutter to cut a decorative border along the top edge of this patterned paper (or alternatively use a border punch).
6. Next, adhere your layers of patterned papers and photo down in the center of your base patterned paper. (see photo for reference).
7. Either make use of some pre-made die cuts or create your own die cuts on your cutting machine and adhere these to the bottom left and top right of the photos. Think about overlapping. Use foam tape to add dimension and add detail with glitter dust and gems.
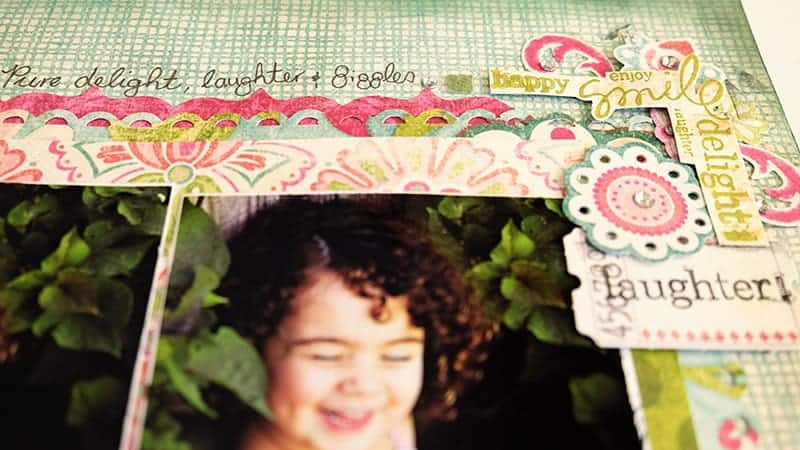
8. Create some felt letters on your cutter and adhere the title in place on the bottom right side of the photo.
9. Adhere the two muslin flowers that you made in the previous steps. Add a jewel, pearl, or brad to the centre of the flowers for decoration.
10. Add journalling around the edges if you wish.
11. Complete your design by distressing the edges of the page with some ink.
That is it for today, please leave me a comment below and let me know if you are going to try making your own muslin flowers.
After more craft ideas? Click here to find all our craft tutorials.