Wondering how to make your own personalized unique Cricut cake topper? I love cake toppers because they are so easy to create and they can take a boring cake and just make it look super elegant. Check out our multi-layer cake topper that will be sure to go hand in hand with your cake.
With this instruction guide, you can choose to stick with our color scheme or mix it up with your favorite colors.
DIY Cricut Cake Topper for New Year's Eve (or Any Occasion)
Find below the steps to follow in order to create this gorgeous Cricut cake Topper. Perfect for New Year's Eve but easy to customize for any occassion!
Supply List
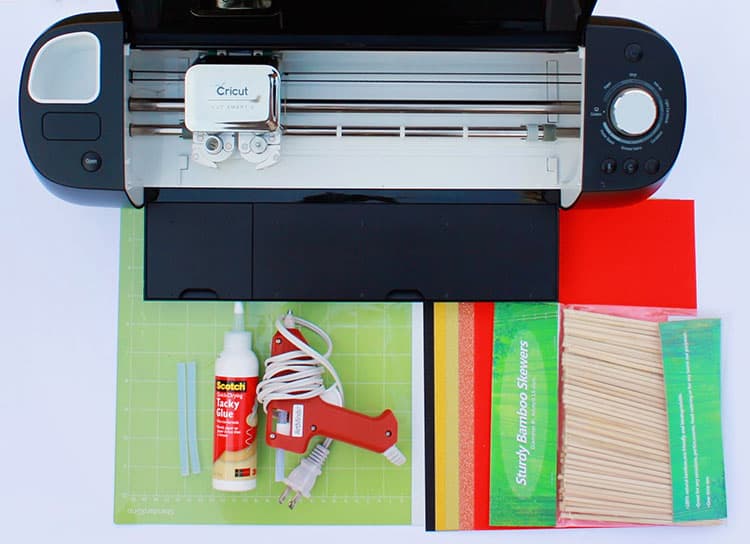
- Cricut Cutting Machine (I am using an Explore Air 2)
- StandardGrip Cutting Mat
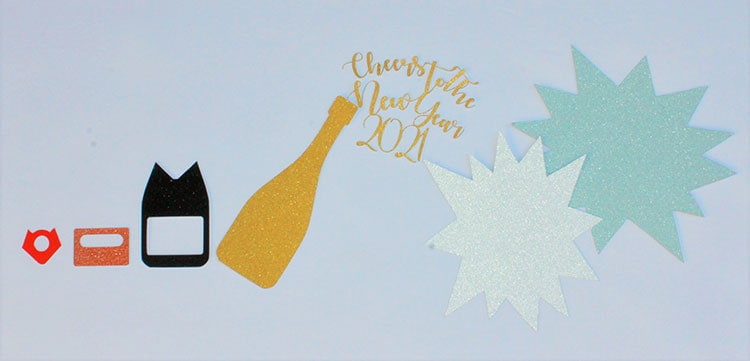
- An Assortment of Heavy-Duty Cardstock (I used red, brown, gold, yellow, silver and black)
- Wooden Sticks
- Glue Gun
- Glue Sticks
- Tacky Glue
Step 1: Download and Upload your SVG to Cricut Design Space
Find below the step-by-step instructions on how to prepare your SVG for cutting.
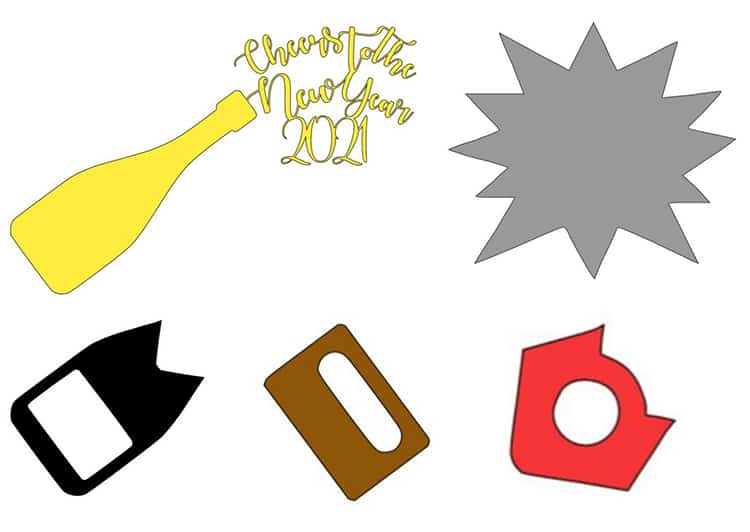
- Download the New Years SVG files or find your own SVG on Cricut Design Space or Google. You can easily customize this tutorial for a birthday cake topper, valentine cake topper and so much more!
- Upload your files to the Cricut Design Space. If you use the FREE SVG files that we are providing as part of this tutorial, then you will need to upload each file individually.
- Begin by selecting the “Upload” icon, then “Upload Image” and upload all your SVG's.
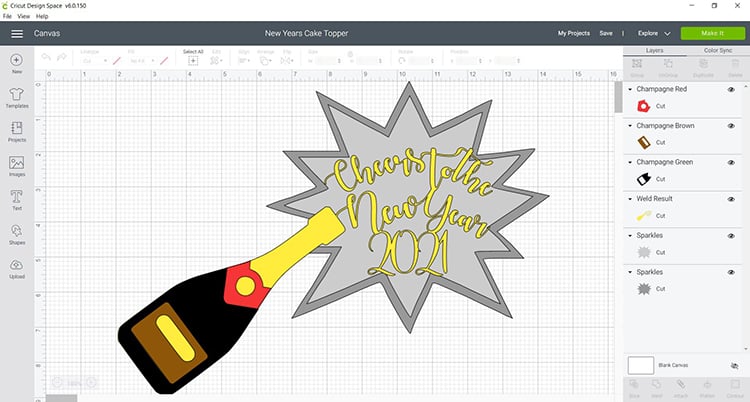
- Once all five files have been uploaded you will want to color-code each image (so change the color to each piece so that it resembles the colors of your final design), this helps you visualize the final design.
Tip: The colors will also be helpful when it comes to loading your mats, because Cricut Design Space will color their mats the same color so that you can quickly and easily see which color you should be using next.
- After, you will want to “Assemble” the design in the Cricut Design Space. This will help you see the final picture and it will also help you to make sure that you have all of your elements. As you may have noticed, there is only one sparkle file, but you need two. So insert another sparkle layer so that you can create the layered effect.
- Finally, you will want to size your design. The size will depend on the size of your cake, so it is important to have an idea of what size the cake will be.
Step 2: Prepare your Cutting Mat
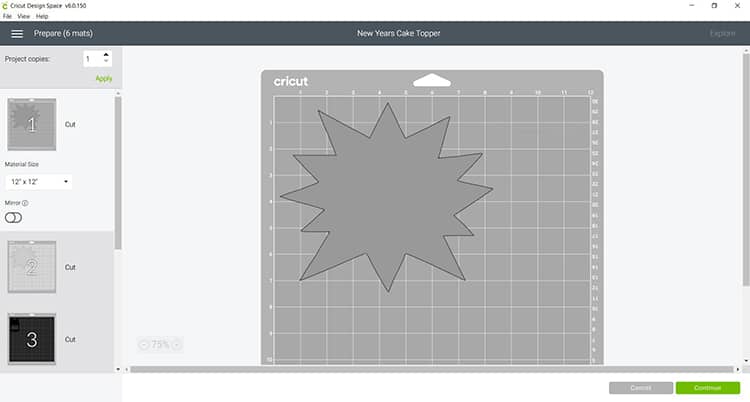
Next, it is time to cut your design. If you are following along with our SVG, you will have to load the project onto six different mats.
- When you are happy with the size of your design click on “Make It”. You will now be able to pick your material and cut settings.
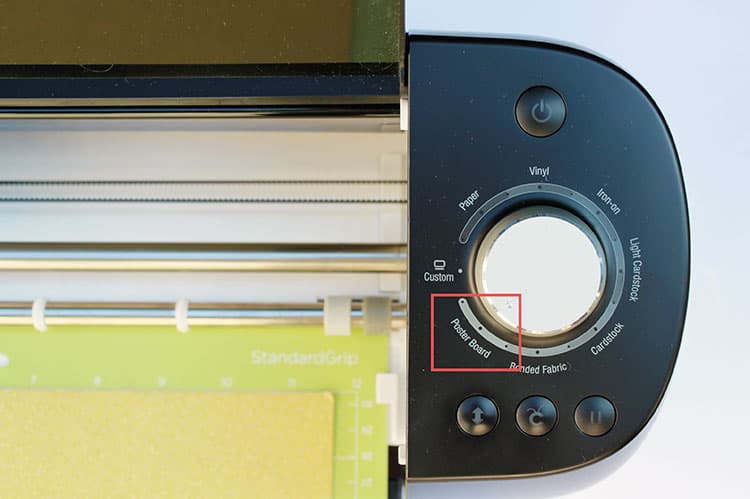
- Select the material type. I had to select “Poster Board” as the material to cut as the brand of heavy-duty cardstock I had was too thick when using “cardstock” mode with the Cricut Explore Air 2.
- Load the mat into your cutting machine and cut the cardstock, follow the instructions on the screen as you complete each step.
Tip: Make sure to pick your colors for the elements before cutting, that way Cricut Design Space can instruct you on which color cardstock to cut next.
Step 3: Remove your Design from the Mat
Next, you will want to remove each portion of the project carefully and set aside to begin the assembly process.
Tip: It is easier to turn the mat upside down and to curl the mat away from the cardstock, then it is to peel the cardstock from the mat.
Step 4: Assemble your Design

Once you have all the parts, you are ready to begin the glueing-and-assembly process.
- Start adhering your pieces together to create your design. You can either use some fast dry tacky glue or you can even use some foam tape/pop dots to add dimension as well.
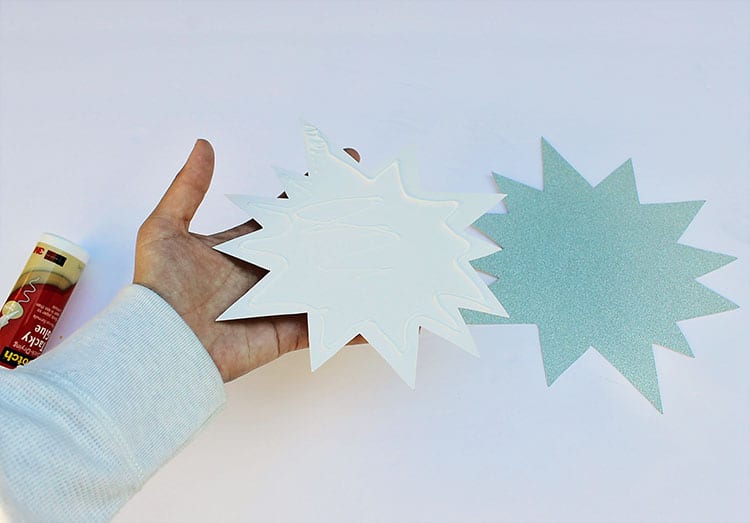
Tip: give each layer time to dry, otherwise you might find that your pieces will move around as you add the new layers.

- Finally, you will add the wooden sticks to the back of your design with a hot glue gun instead of the normal tacky glue to ensure the sticks remain secure to your topper. I added one stick to the star element and one to the champagne bottle.
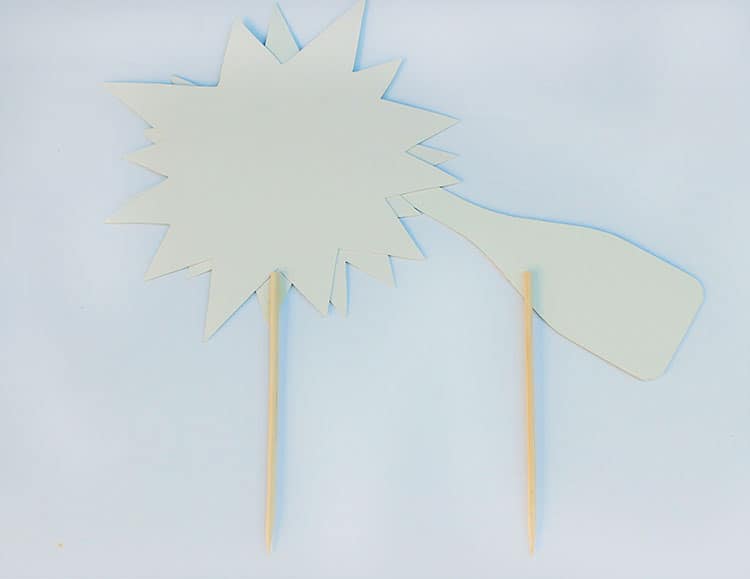
Tip: Typically you would only need one wooden stick, however due to the size and weight of the cake topper, you will want to have at least two wooden sticks for this particular SVG designed. Position each stick towards the middle of the two main elements.
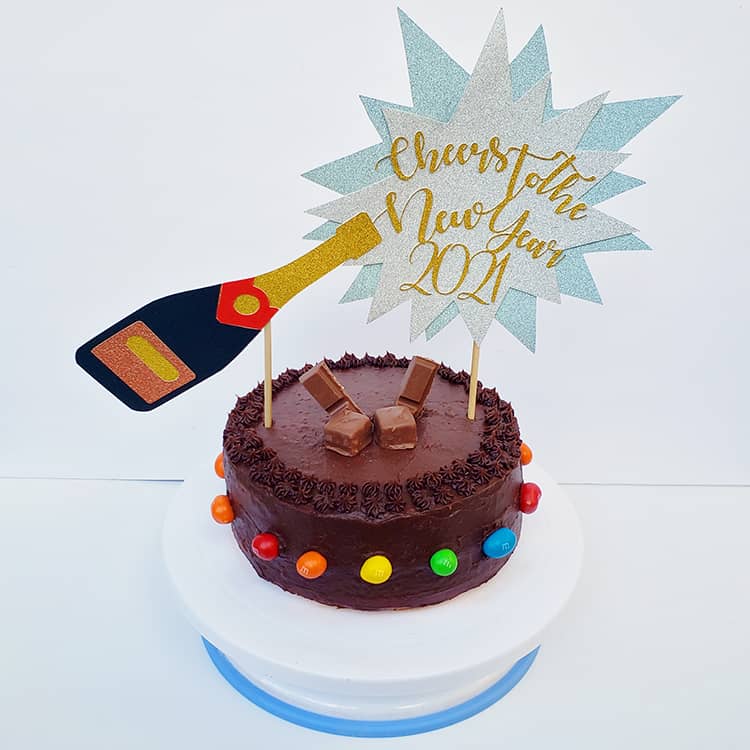
And just like that, you have your very own New Year's cake topper, all you are missing is your fabulous cake and friends to share with!
We have heaps of additional cardstock Cricut ideas for those who love to work with cardstock or paper.
Happy crafting!