Have you ever wondered how to make those awesome glitter-filled Starbucks tumblers better known as Starbucks snow globe tumblers that you’ve seen all over Pinterest and Etsy?
Well so have we and so this time around our design team learned the ins and outs to create a step-by-step tutorial of how to create your very own.
For this project, we used fine glitter and small shiny glitter, but the best part is, you can use any glitter whether chunky or small.
Creating your own glitter tumblers is so much fun that once you know how to create your very own, you will want to create these for wonderful gifts or items to sell.
Here are all the instructions (plus tips) so you can successfully make your own tumbler.
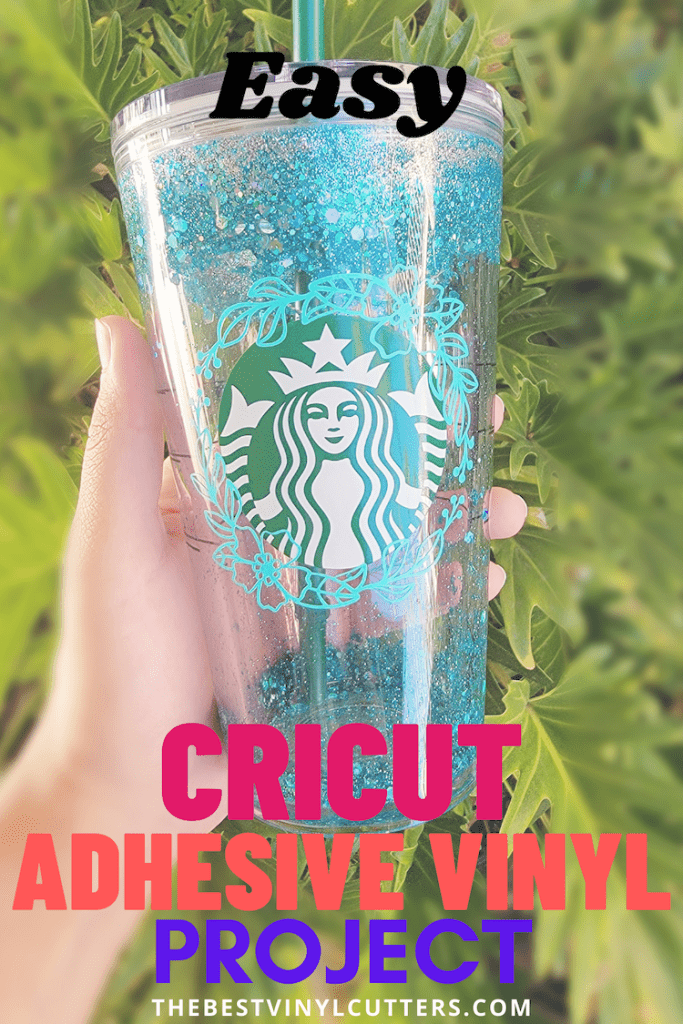
DIY Custom Starbucks Snow Globe Tumbler Tutorial
Learn how to create your own Starbucks snow globe glitter tumbler with our detailed step-by-step tutorial.
I would suggest reading through the whole tutorial before starting as there is a lot to learn along the way! Good luck and have fun!
Few Tips on the Tumbler:
You have the option of either grabbing these tumblers at Starbucks or from Amazon. I’m an Amazon shopper so I grabbed some from there and simply hung out at home till they arrived (although truth be told they are actually cheaper if you get them from Starbucks).
If you prefer a clear tumbler (so not Starbucks-themed), you can also grab some generic clear double walled tumblers from Amazon as well.
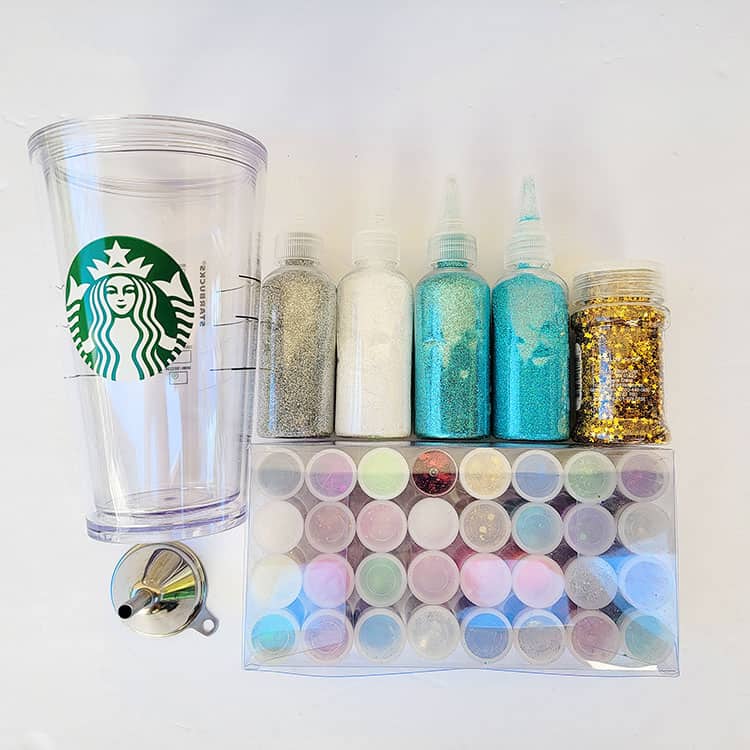
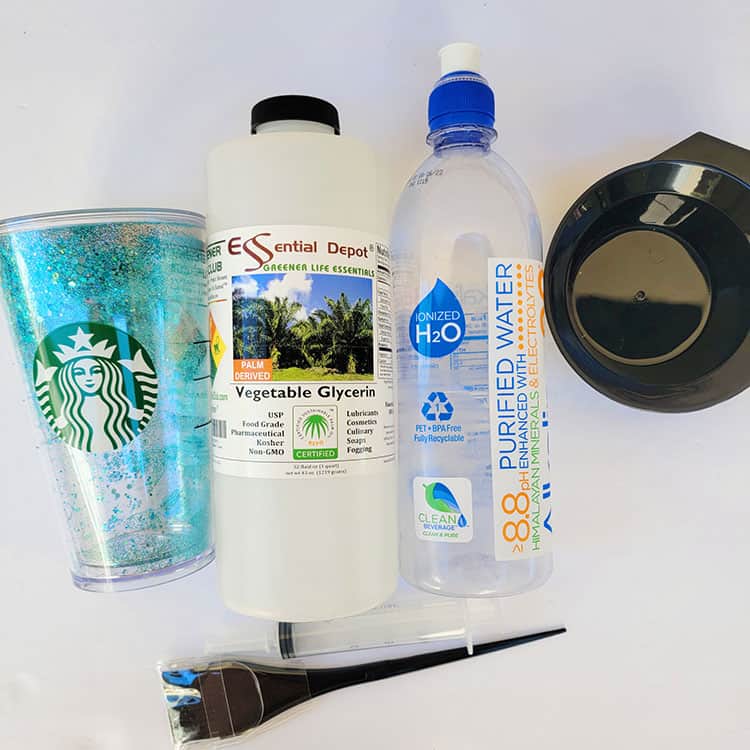
Supply List:
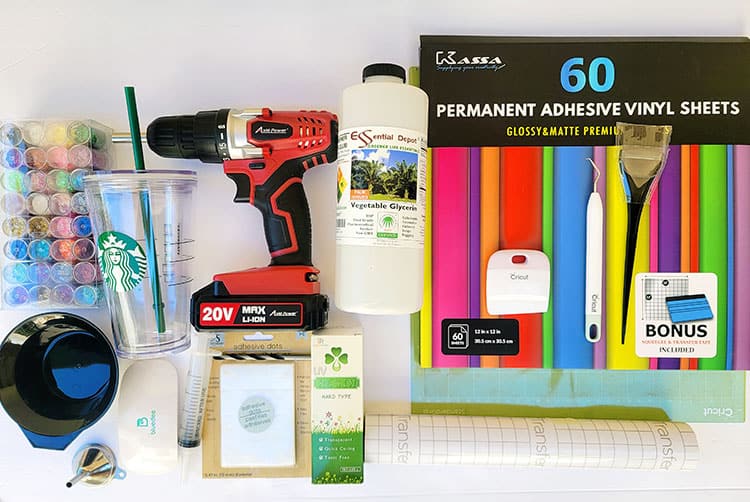
For this project, I am using my Cricut Explore Air 2 but you could use any Cricut cutting machine.
- Starbucks Tumbler
- Glitter
- Funnel
- Mixing bowl with stirring utensil
- Portable UV Light
- Adhesive dots
- UV Resin
- Vegetable Glycerin
- StandardGrip Cutting Mat
- Cricut Scraper
- Cricut Weeder
- Transfer Tape
- Syringe
- Vinyl
- Drill
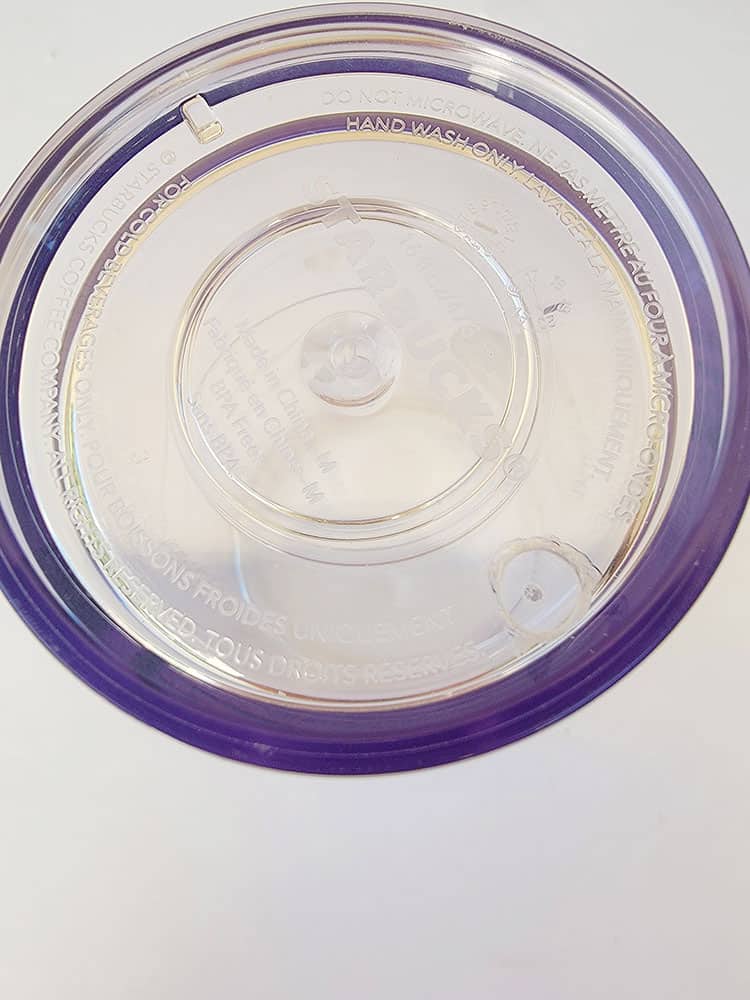
Step 1: Drill a Hole in the Tumbler
The first step in creating your own Starbucks snow globe glitter tumbler is to create the hole underneath the Starbucks tumbler so we can pour in the liquid and glitter. For this, you will need a drill and drill bit the size of your funnel or larger.
Supplies required for this step: Tumbler, Drill, and Drill Bit
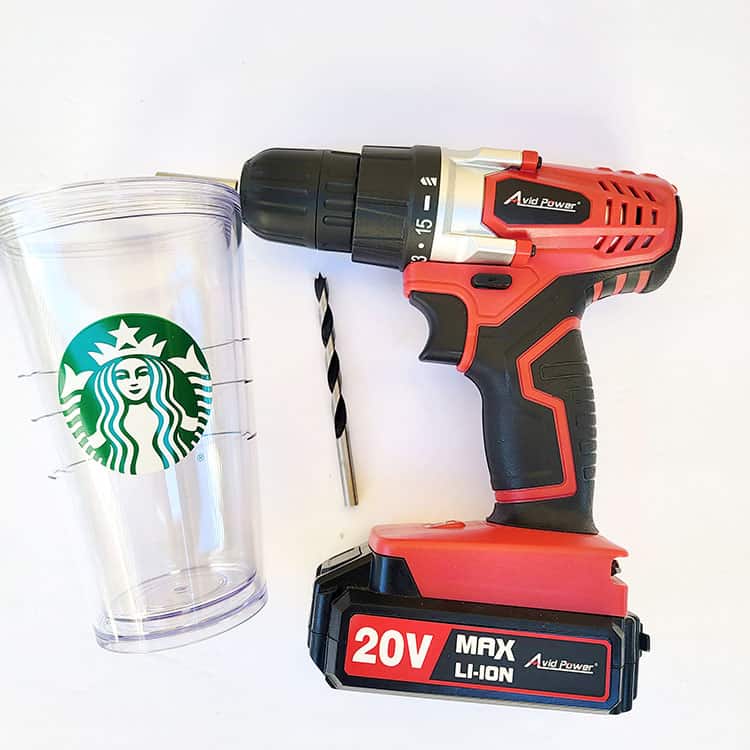
- Grab your machine and drill bit, ensure the drill bit is a little bigger than the funnel. Also make sure the drill bit it securely on the drill tool, you want to make sure it is not moving in any direction other than straight.
- Place your tumbler upside down on top of a sturdy table and place the drill bit to the edge of the tumbler as shown in the picture below. You want it at the edge (not the middle) so the glitter can fall easily in between the walls.
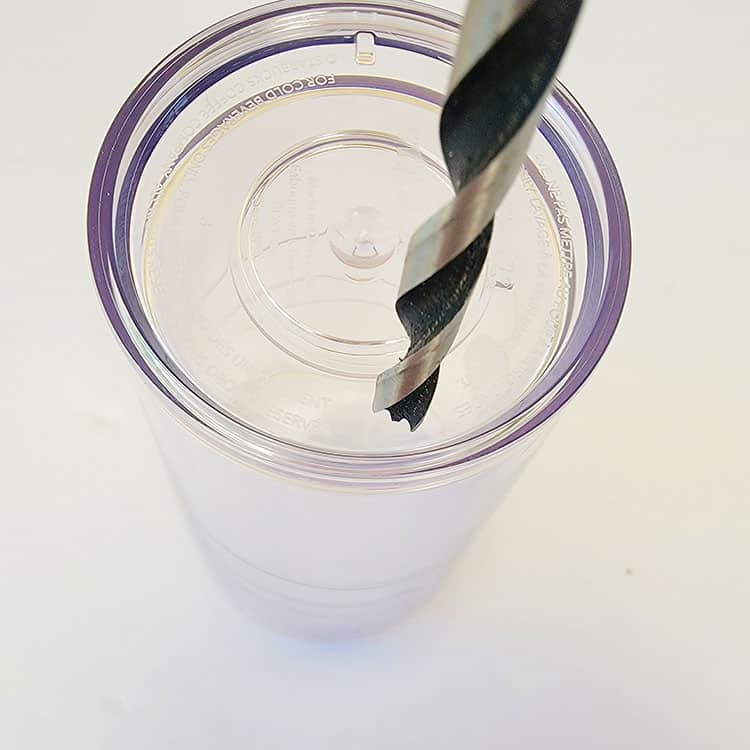
- Slowly begin to drill the hole. You want to take your time so that you do not accidentally drill into the second wall. What we did is drill in a little bit and drilled out and cleared the plastic bits as we went on. You will know you got through the first layer when you hear a small pop when the tumbler is no longer insulated.
- From there you will want to clear out any of the remaining plastic bits.
Step 2: Adding Glitter to the Tumbler
This is the fun part! You will get to add glitter to the inside of your Starbucks tumbler.
Tip: I would recommend that you do not use fine glitter by itself. Either use a chunky glitter or use a mix of different sizes. It will help so the glitter has the ‘falling’ effect. Fine glitter tends to clump and get stuck a bit more than chunky ones.
Supplies required for this step: Tumbler, funnel, glitter
- Place your funnel into the hole you created.
- Add your glitter into the tumbler through the funnel. You may want to go slowly depending on the size of your funnel hole.
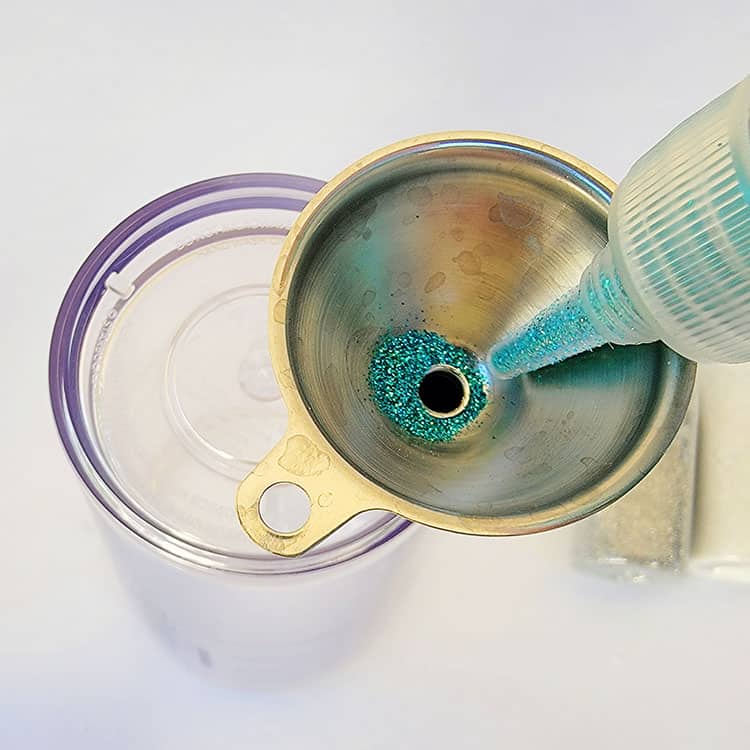
Note: If you do not have a funnel, you can also place the glitter on top of the tumbler and slowly shake it through the hole. We found this was the easiest way to get all the glitter although it was a little messy.
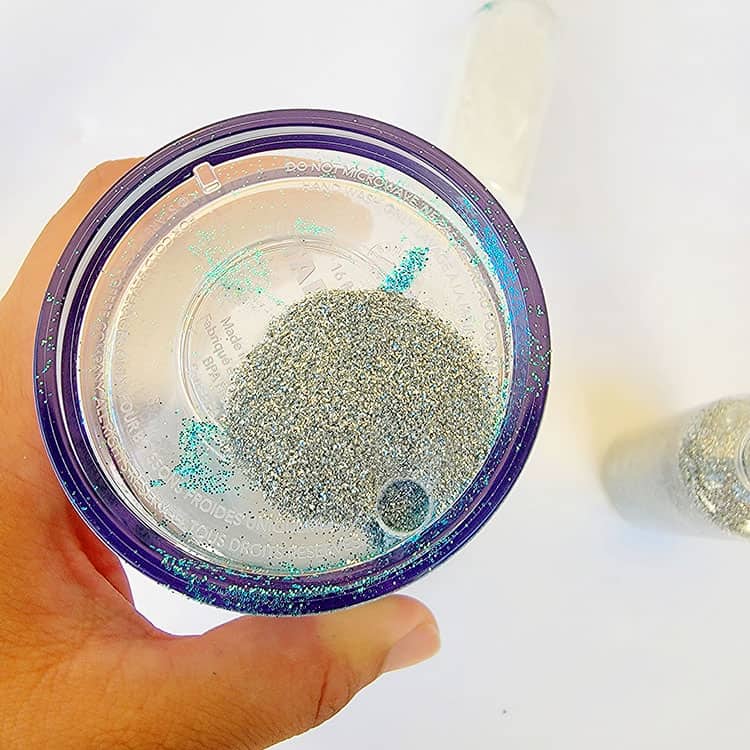
- You will want to add all your glitter one by one, taking your time, you will also want to be generous with the glitter.
- Fill it up as much as you want, we usually tend to fill it up until it reaches the first line of the tumbler.
Step 3: Adding Water/Vegetable Glycerin
For this part, you will be determining how much movement you want inside your snow globe tumbler as this will affect how much of each solution you add (water and vegetable glycerin) for the effect inside the tumbler.
Supplies need for this step: Tumbler, Glycerin, Water, Mixing Bowl, Brush, Syringe
- Determine if you want it fast (runny) or slow effect when you turn over the tumbler.
- If you want it to have a lot of movement then I suggest adding an even amount of vegetable glycerin and water in the mixing bowl and then mix it up. If you want it slow moving, put ¾ cup of vegetable glycerin and ¼ cup of water and then mix.
- Grab your syringe and slowly extract the mix from the mixing bowl.
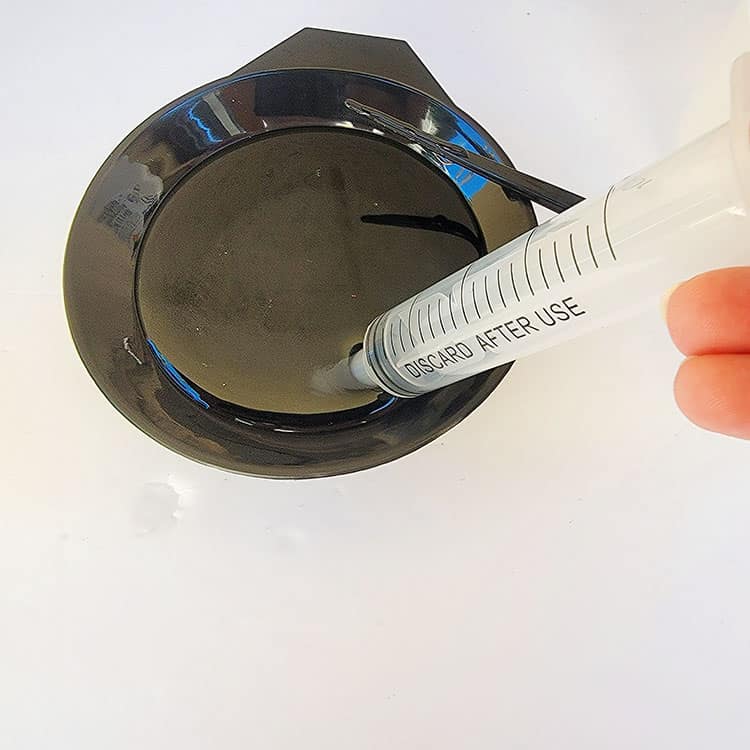
- Place the syringe in the hole you created under the tumbler and slowly pour the liquid inside. We found it is best to pour at an angle and push in slowly.
- From there repeat steps 3 and 4 until the inside of the tumbler is filled to the top rim with a small amount of wiggle room.
- Cover the hole with your finger and turn the tumbler upside down to see if it has the effect that you like, if not, now is the time to adjust it before we seal the hole up.
Step 4: Sealing your Tumbler
Now that you are happy with the amount of glitter and snow globe effect liquid, it is time to seal your creation.
Supplies needed for this step: UV resin, UV light, and adhesive dots, or clear plastic vinyl
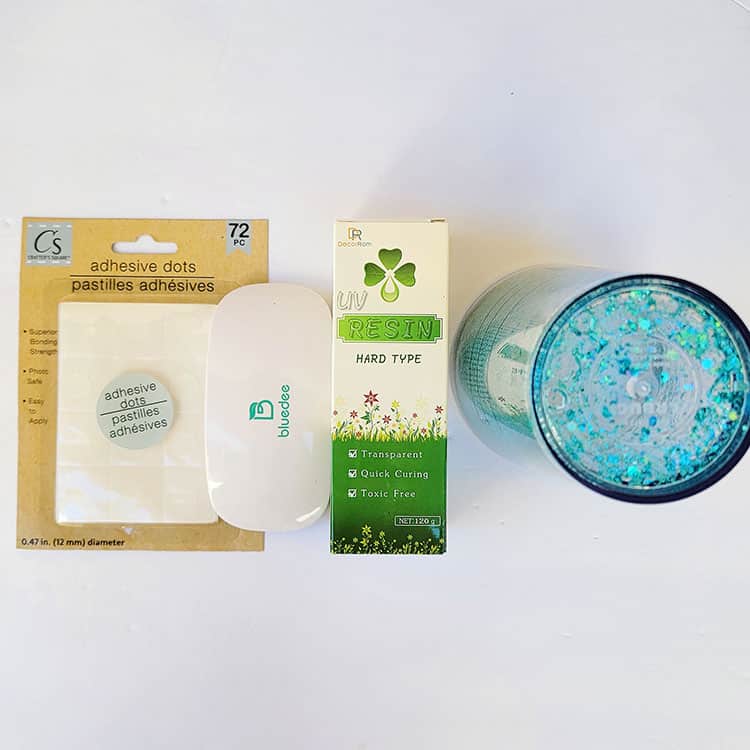
- Place the tumbler in a well-ventilated area and on a table near an electricity outlet.
- Wipe the area with a wipe or alcohol. The glycerin we used before is an oil, so it is important to make sure the surface is clean and dry to ensure that the resin sticks properly.
- Place an adhesive dot on top of the tumblers hole, you can also put a piece of vinyl over the hole as you are trying to create a small layer seal before adding the resin.
- Place a small amount of UV resin around the hole and area.
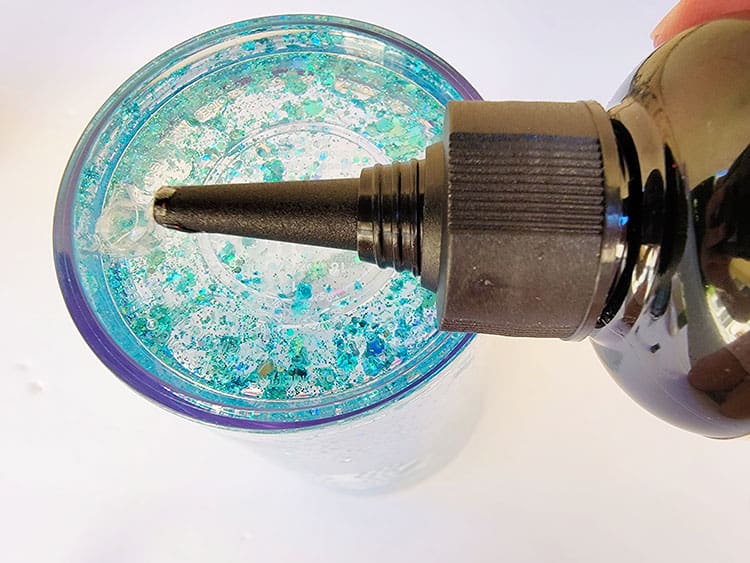
- Place the UV light on top of the area for about 3 minutes.
- Repeat steps 3 and 4 two more times for a total of 3 layers to ensure no liquid is coming out. We did this by testing the tumbler and shaking it and dabbing it with a paper towel to ensure there were no leaks.
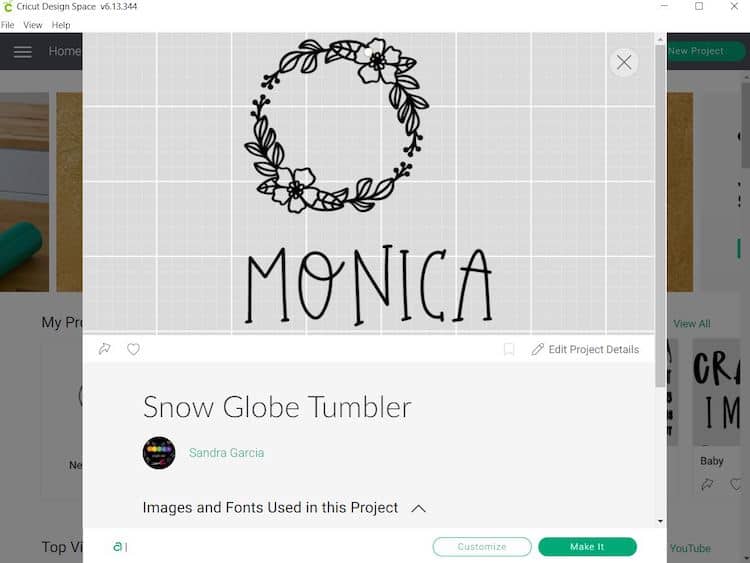
Step 5: Prepare Design in Cricut Design Space
After your tumbler has dried and hardened, you will now be able to customize your tumbler even more with some vinyl Cricut cutouts. For our tumbler, we used a floral design from the Cricut Access Library and added text with the name of a family member.
- Begin by uploading the floral design that you can find in Cricut Design Space.
- Select “Open”
- Select “Open Cricut Design Space Application”
- Now select “Edit Copy”, and change the name.
Note: You may select “Edit Copy” if you want to change the color and size. The design is sized for a normal tumbler size however, you can make the designs bigger than the 3-inch dimensions.
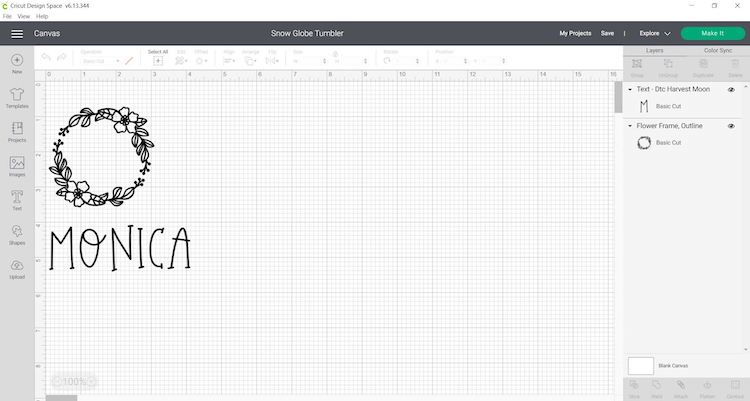
- Once you are satisfied with the design you may move forward with cutting the design.
Step 6: Cut Design with Cricut Machine
Now that the design has been selected it is time to cut!
Supplies needed: Cricut machine, Green StandardGrip Mat, Weeding Tool, Scraper
- Cut Design with your Cricut Machine. Cut the design out of vinyl and place the vinyl, shiny side up on your green StandardGrip mat.
- When you are happy with the size and color of your design click on “Make It”.
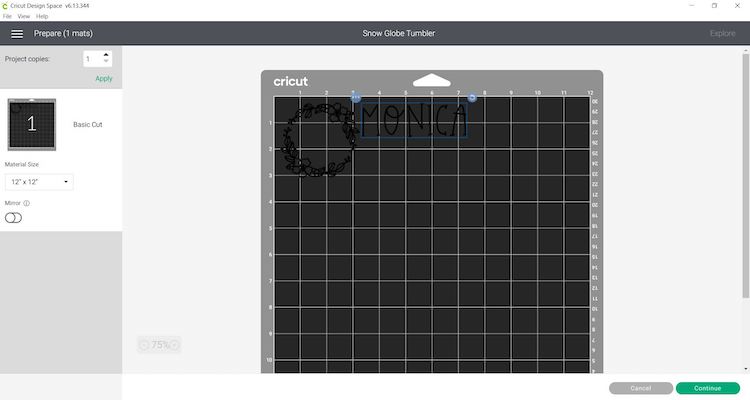
- Make sure to turn on your Cricut machine.
- Select continue and connect your Cricut machine. You will now be able to pick your material and cut settings. If you have an Explore Air 2 – Select “Vinyl” on your material dial.
- Load the mat into your cutting machine and follow the instructions to cut the vinyl sheet
- Weed your Designby using your weeding tool to help lift the unneeded pieces of your design. Go slowly around the letters and fine details. Don’t forget to weed out the inside pieces.
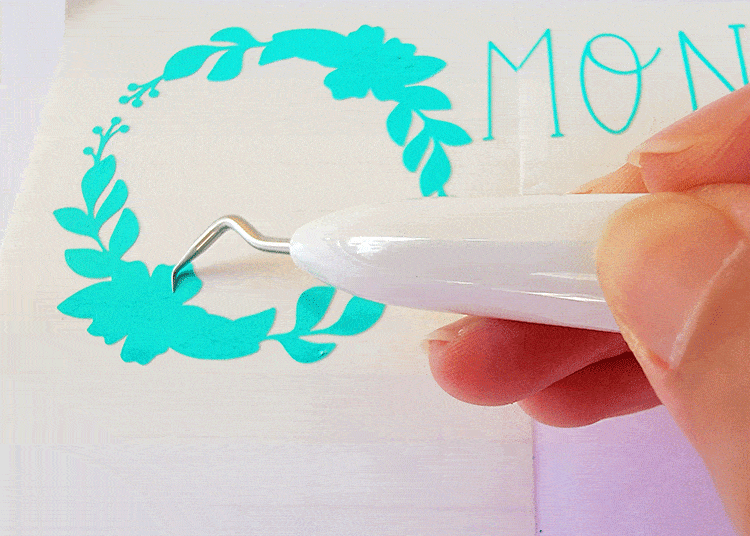
Note: You should be able to do your weeding with your fingers but use a weeding tool for smaller detail if required.
Step 7: Transfer Adhesive Vinyl to tumbler
Before we apply the adhesive vinyl to the tumbler, make sure that the tumbler is dry and clean.
- It is much easier to use transfer tape to move your design over to the tumbler. Cut your transfer vinyl so that it is the same size or slightly larger than your stencil vinyl.
- Place the transfer tape on top of the vinyl and be sure not to have any bubbles or bumps.
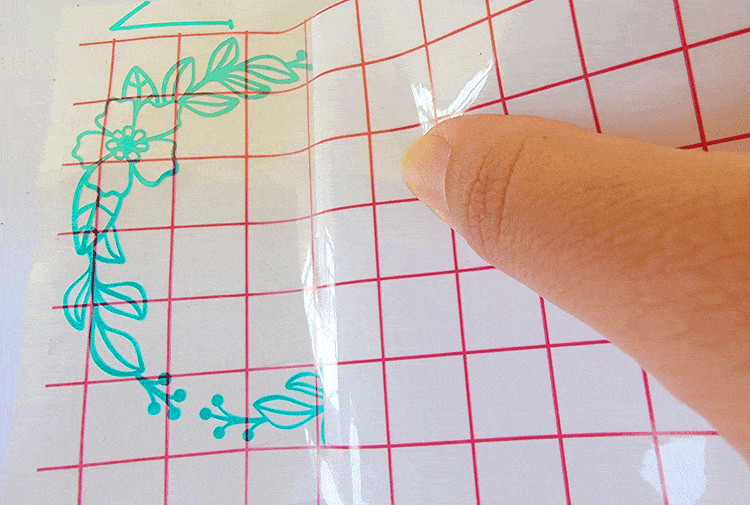
Note: Use the scraper to get rid of any bubbles or imperfections
- Use your scraper to rub over both the front and the back of the design. We want the image to stick to the sticky transfer tape, so that it will lift off the vinyl backing sheet.
- Slowly peel the transfer tape and design from the top left-hand corner. Move slowly and try to work in a semi diagonal angle. If your stencil is not lifting with the tape, place it back down and give it another good rub with the scraper.
- Place the design on the tumbler, making sure there were no bubbles or bumps. Try to make sure that it is in the center and that it is straight. For this design we cut each design individually and put them on one by one.
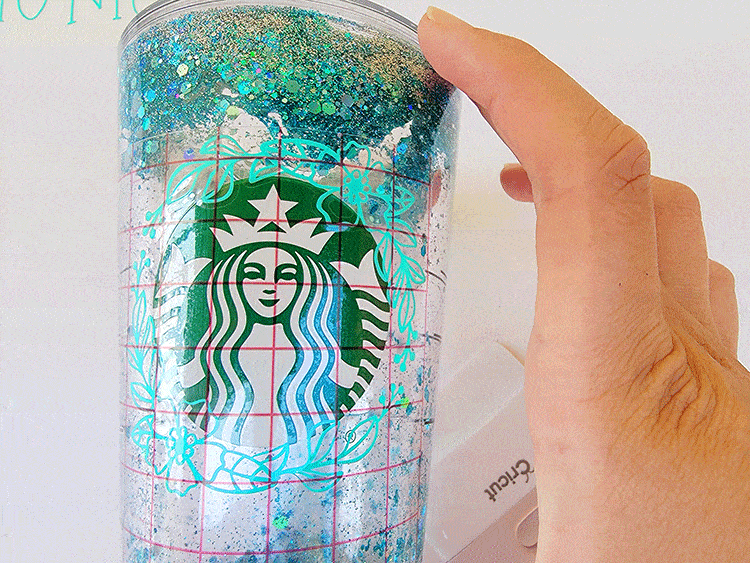
- Once again, use the scraper to rub over the design. This time we want it to stick to the tumbler and to release from the transfer tape.
- Slowly peel back the transfer tape. Once again if your stencil lifts, simply place the tape back down and rub over the problem area again. Place your transfer tape back on the backing paper (you can reuse transfer tape so don't throw it away).
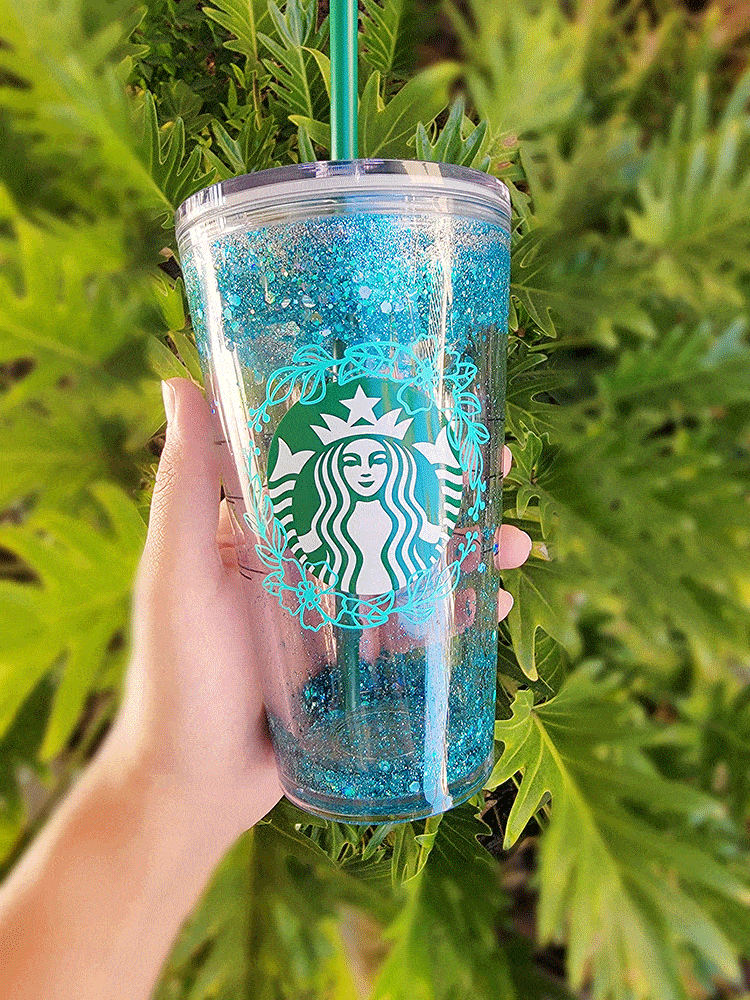
And just like that, you have created your very own snow globe tumbler! Best of all you can create these year-round. You can create a tumbler for each holiday or favorite Starbucks drink.