Have a couple of old shoes you want to revive?
Today we will bring to life a couple of old plain white shoes into a couple of cool cactus themed souls. Through this guide, you will learn how to iron on any design to any shoe you want from flats to sandals.
HTV Cactus-Themed Shoes
Find below the steps to follow in order to create some funky customized canvas shoes. You can easily follow this tutorial to whip up any type of shoe from sandals to floes to sneakers.
Supply List
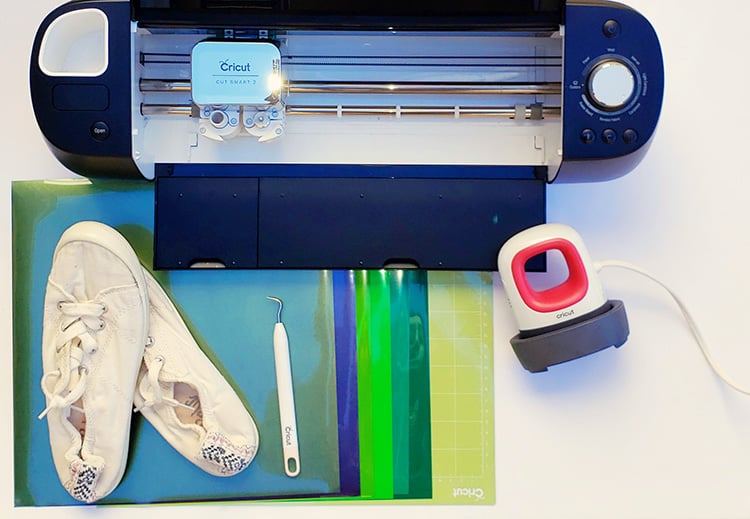
- Cricut Cutting Machine (I used the Cricut Explore Air 2 – see the review for the machine here)
- Cricut EasyPress Mini
- StandardGrip Cutting Mat
- HTV (green, black, pink)
- Weeder
- Shoes
Step 1: Prepare your Shoe
The first step to any iron-on project is finding the perfect item you want to apply the iron-on to.
- Find a pair of shoes (sandals, flats, boots, etc.).
- Iron out any wrinkles from the shoe – I find the EasyPress Mini works brilliantly for this.
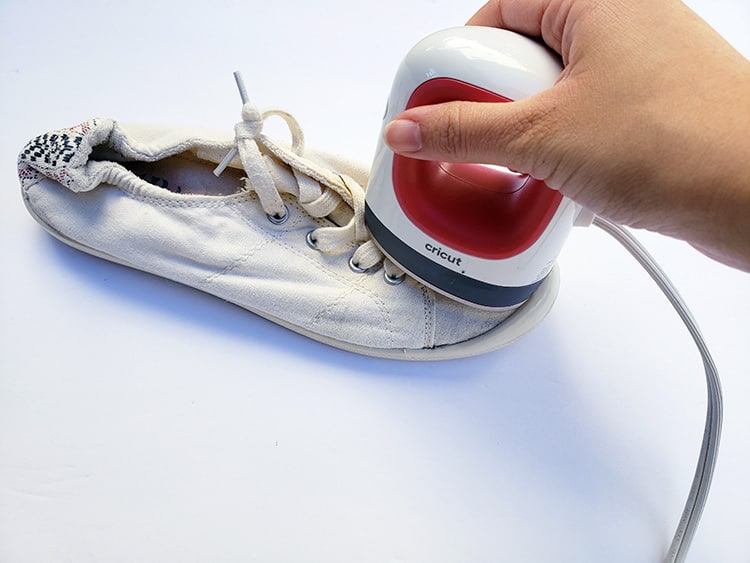
- Stuff a balled-up sock into the shoe to get a flat surface which will help to iron out any wrinkles and to apply the iron-on decal.
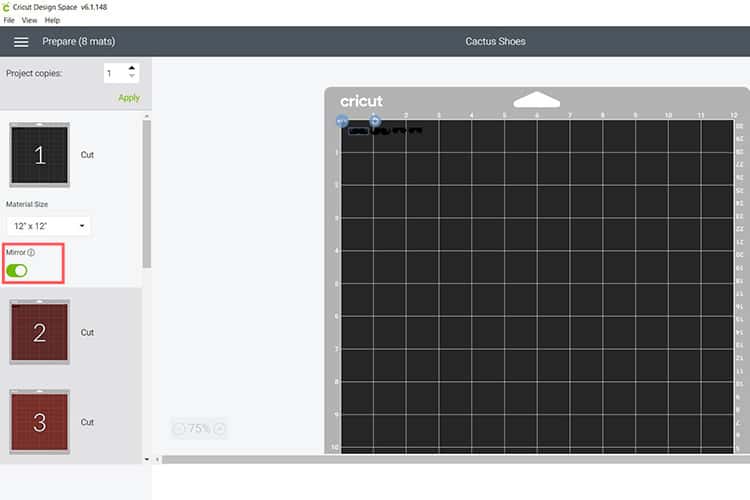
Step 2: Download and Upload your SVG to Cricut Design Space
Find below the step-by-step instructions on how to prepare your Cactus SVG for cutting.
- Download both Cactus SVG files.
- Upload the files to the Cricut Design Space.

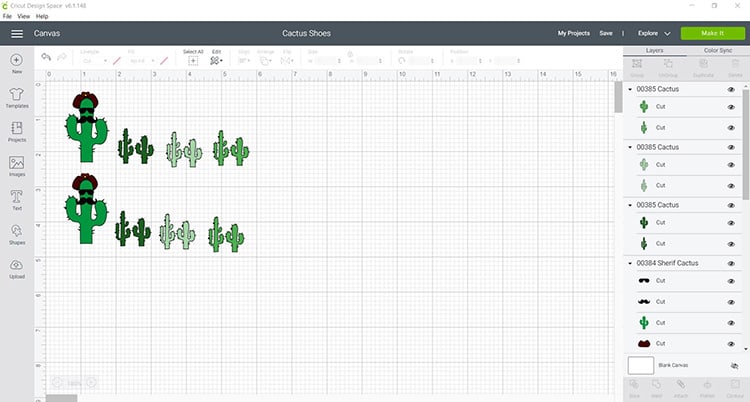
Tip: In order to tell Cricut that you want to cut different color vinyl, you simply need to color your vinyl and group the parts of the image that you wish to cut from the same color.
- Next, measure the size of your shoe and resize your design. We resized ours to 1.75 inches high.
- When you are happy click on “Make It.”
- Select “Mirror.”
- Select “Iron on” as the material to cut.
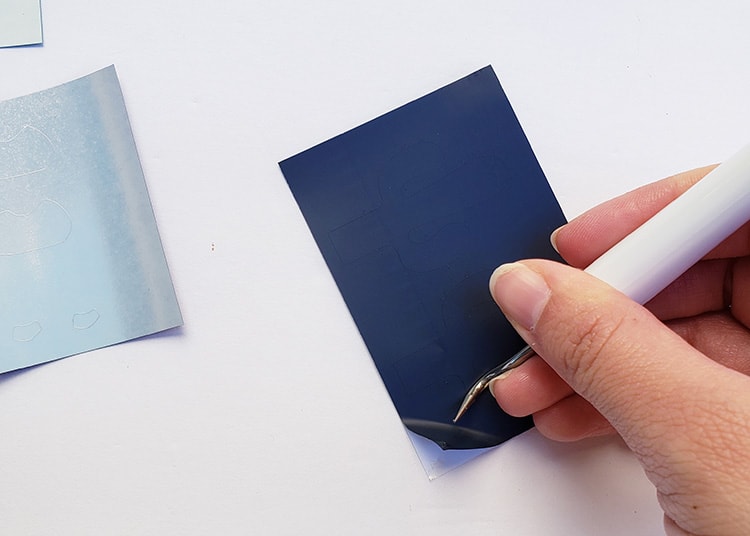
Step 3: Cut and Weed your Design
Now it is time for the fun to begin. Let's load up the vinyl so that we can cut the adorable designs.
- Place your iron-on vinyl with the shiny side face down on your green cutting mat, load the mat and cut away.
- Next, use your weeding tool and pick up the corner of the vinyl. Use your hands to peel away the excess vinyl. Go slowly around the curves. Don’t forget to weed out the inside pieces.
Step 4: Press the Vinyl Layers on to the Shoe
Now it is time to complete the design. Find your iron or EasyPress Mini to complete the project.
- Start by warming up your iron or EasyPress Mini (select the medium setting on your EasyPress). I highly recommend you use a heat source that allows you to get into corners and hard to press areas, so a larger EasyPress won't work as well.
- Place your shoe on a level table.
- Begin the project by placing the Cactus outline in a position you are satisfied with and press the first layer.
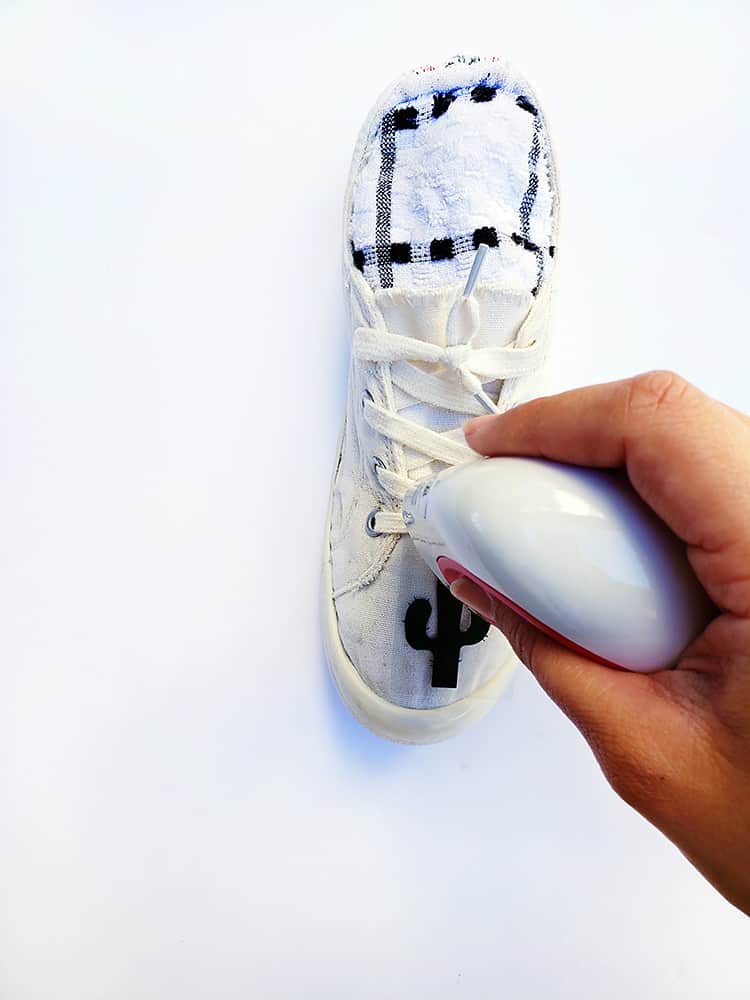
- After about 30 seconds, you may slowly remove the carrier sheet. Please follow instructions for your type of vinyl on whether you should hot/cold peel.
- Continue with the project by slowly pressing each layer design.
Viola! You now have brand new shoes, you can mix and match your favorite colors and even add the design to a variety of shoes like sandals for the summer.
I love doing this to old boring shoes and giving them a brand new life, but you can also easily do the same on brand new shoes as well.
Let me know which designs you are planning to add to your shoes.
cute! do you seal them with anything? I want to do this for kiddos, but they are very hard on their shoes. feeling like I would need to seal it. 🤔 what would you recommend?
Hi, no we didn’t seal them, if you do a good job with the heat press, the design should well and truly be fused into the fibres of the shoe 🙂