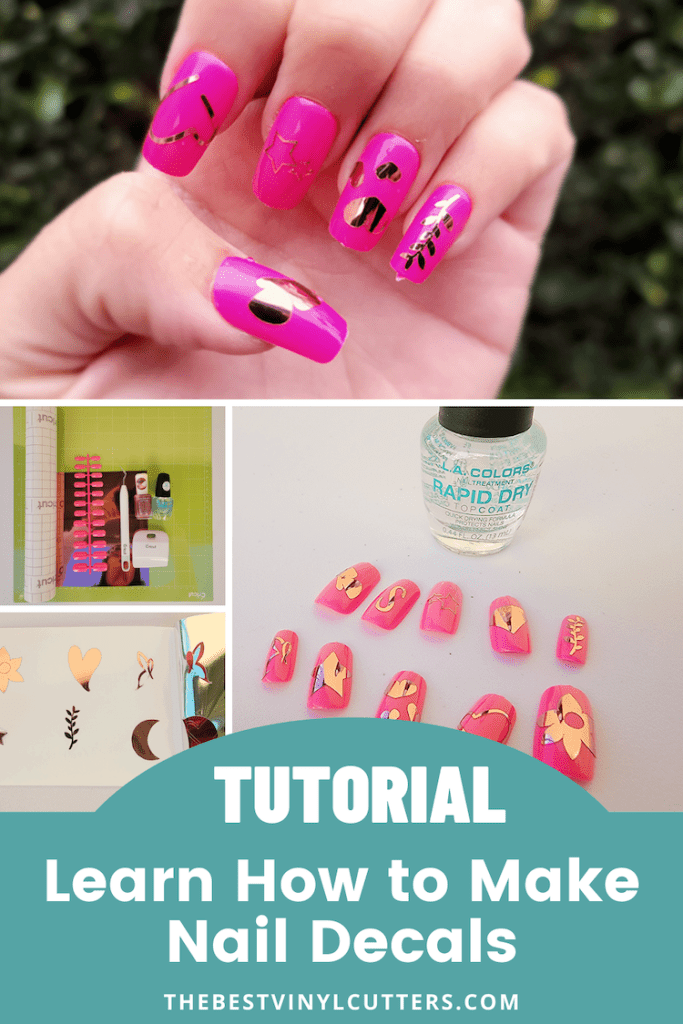
Ever go to a nail salon and see customers come out with fancy nail designs? Want to create your very own vinyl sticker art that you can use either on your own nails or press on nails?
Well today we will be showing you how to make nail decals. The best part is you can mix and match your own nail colors in addition to the vinyl designs.
The combinations are limitless and you can even create themed stickers for everyday or the holidays.
How to Make Nail Decals Tutorial
Learn how to make nail sticker art using your Cricut machine and some adhesive vinyl.
The great fun about this project is that you can create new designs whenever you fancy changing up your nail art!
They will also look great on top of some classy short nail designs.
DIY Nail Decal Supply List
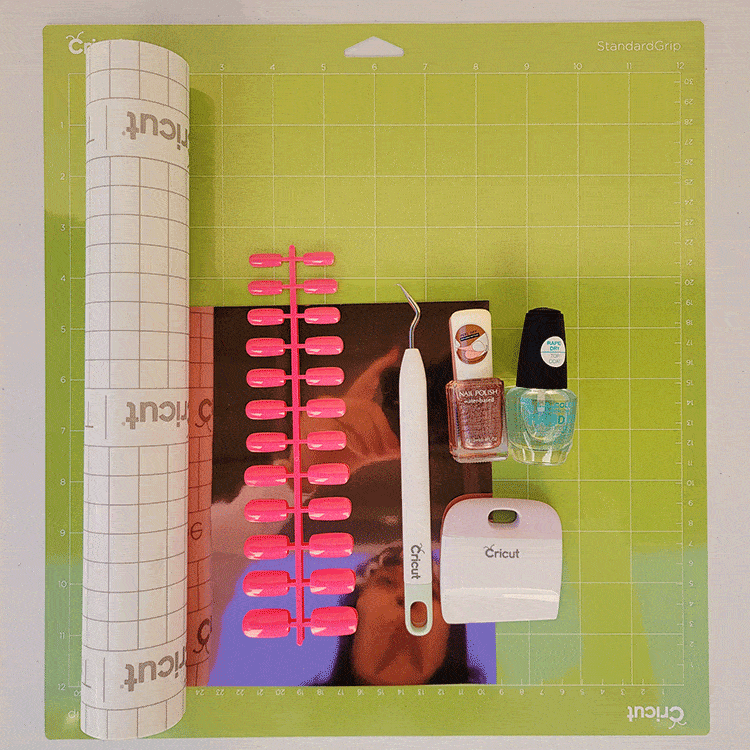
- Cutting Machine (We use a Cricut Machine)
- Cricut StandardGrip Cutting Mat
- Adhesive Vinyl
- Transfer Tape
- Cricut Scraper (can be bought in Cricut Basic Tool Set)
- Cricut Weeding Tool (can also be bought in Cricut Basic Tool Set)
- Cricut Tweezer (found in Cricut Basic Tool Set)
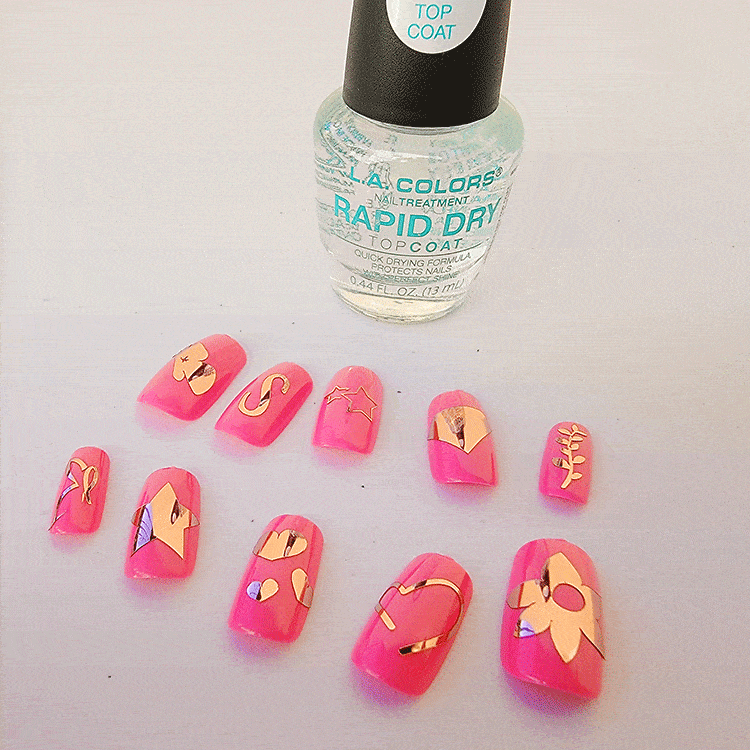
- Clear Nail Polish
- Press on Nails
Step 1: Download and Upload your SVG to Cricut Design Space
- Begin by selecting the project by clicking this link.
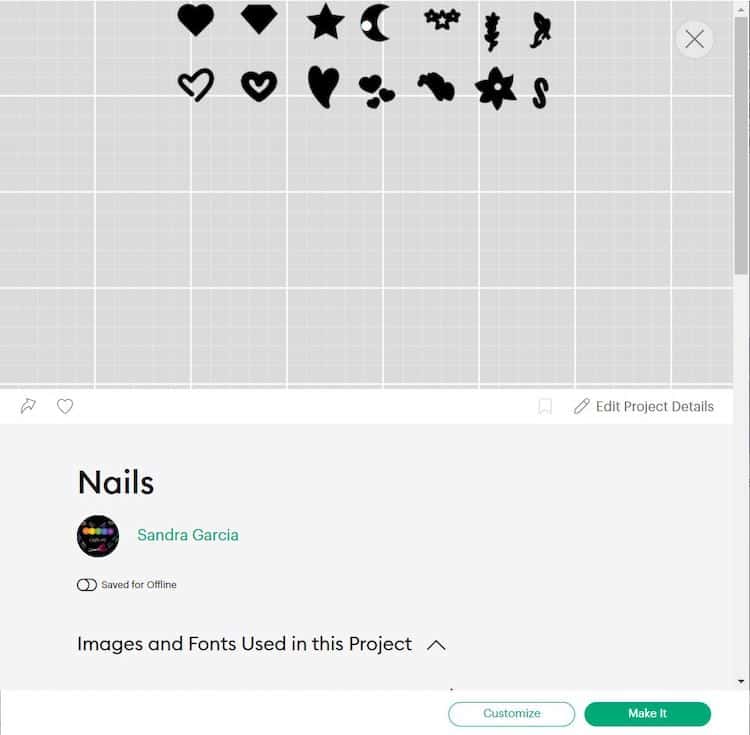
- Select “Open” and then select “Open Cricut Design Space Application.”
- Next select “Customize”.
- Now you will need to edit the dimension to best fit your nail size. For this project we customized the design to 1” x 1”.
- Once satisfied with the design the next step is to start cutting the design with your machine.
Step 2: Cut and Weed Design
Now that the size has been adjusted it is ready to cut your decals.
- Switch on your Cricut Machine.
- Grab your StandardGrip mat. Place the vinyl, shiny side up or print side up if your vinyl has a print/design on it, on your green StandardGrip mat.
- Use your scraper to remove any bubbles and/or wrinkles.

- In Cricut Design Space, click on “Make It”.
- Select continue and connect your Cricut machine. You will now be able to pick your material and cut settings. If you have an Explore Air 2 – Select “Vinyl” on your material dial.
- Load the mat into your cutting machine and follow the instructions to cut the vinyl sheets.
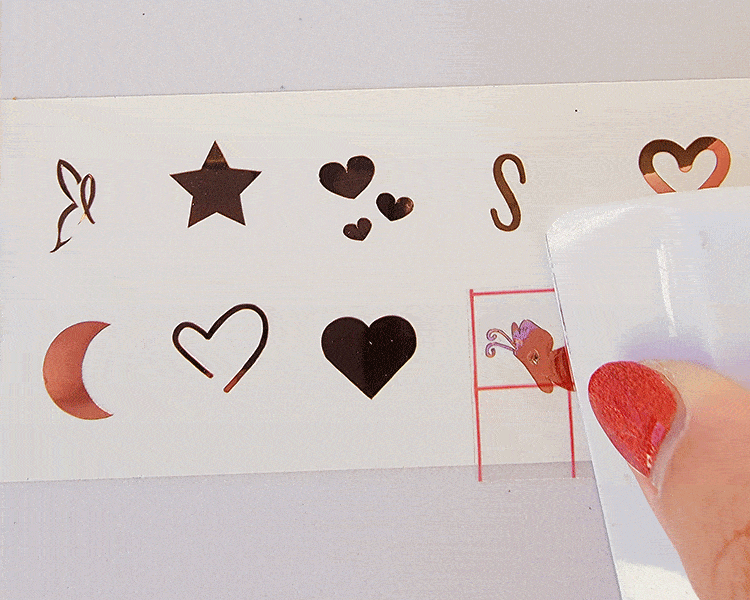
- When the design has been cut, you can unload the mat and then use your weeder tool to help you lift the unneeded pieces from your design. Go slowly around the letters and fine details. Don’t forget to weed out the inside pieces.
TIP: As the designs may be small, it can be easier to leave the adhesive vinyl sheet on your mat and weed the design. Once your weeding is complete remove the vinyl sheet from the mat.
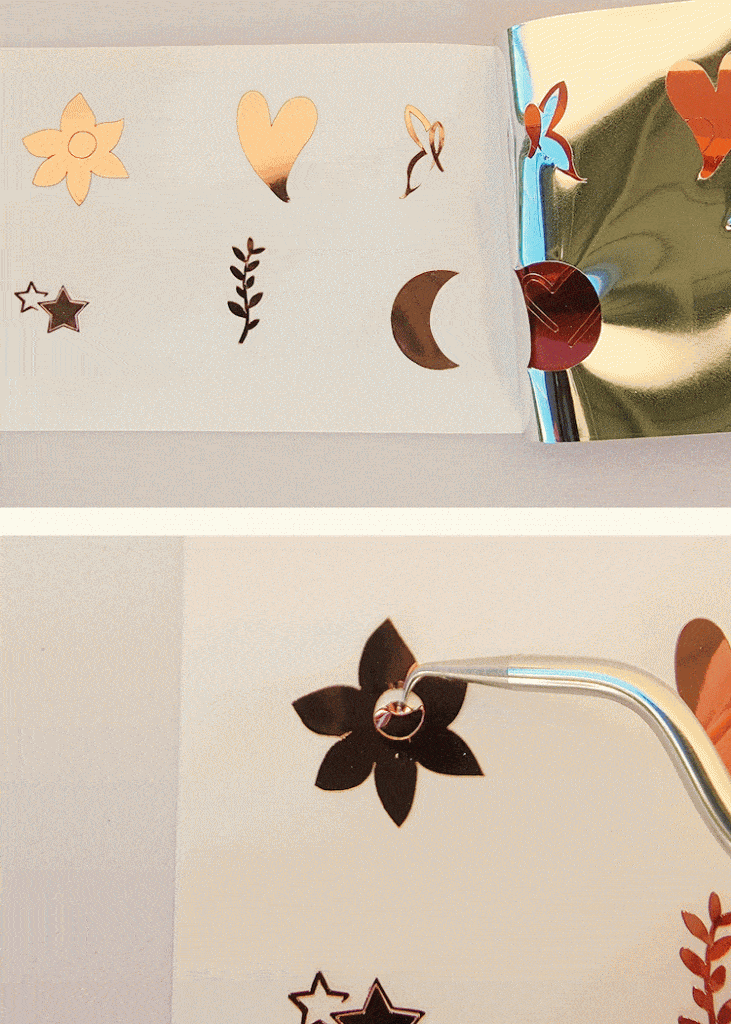
Note: You should be able to do your weeding with your fingers but use a weeding tool for smaller detail if required. I also found that in some cases the Cricut tweezer helped best for the very small items. Another note would be to cut the designs into pieces to help you weed out the items a little easier.
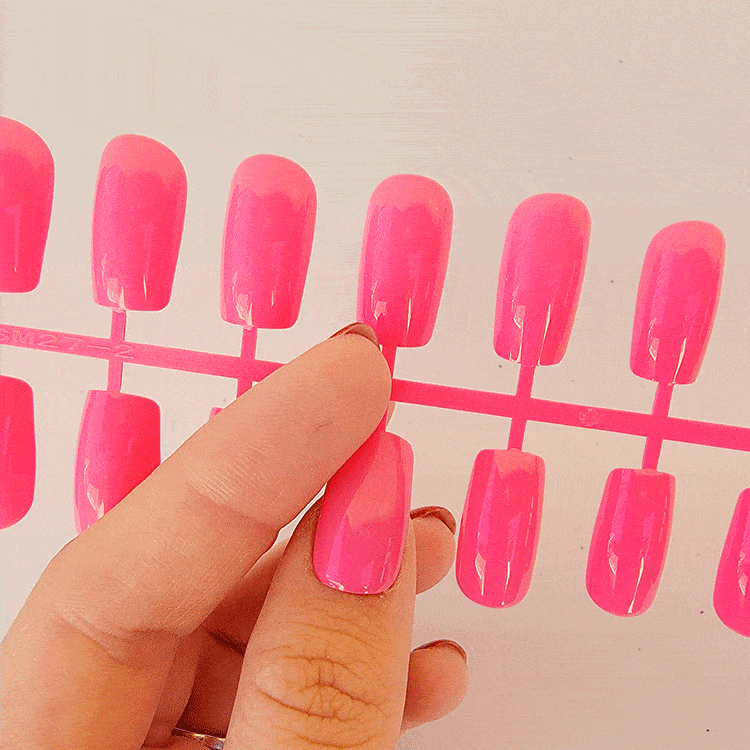
Step 3: Transfer Vinyl on the Blank Press on Nails
Before we apply the adhesive vinyl to the press on nails make sure they are dry and clean, you do not want any dust.
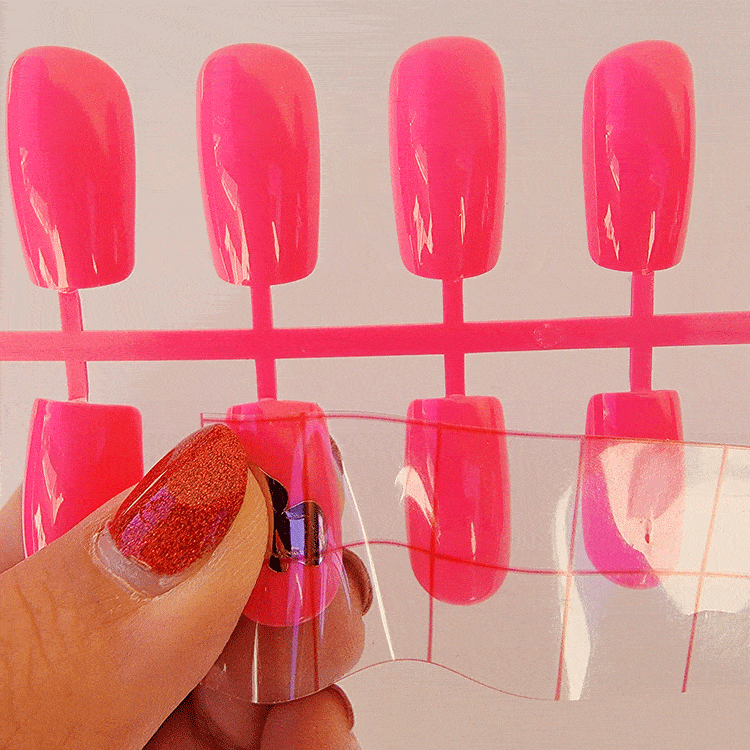
- It is much easier to use transfer tape to move your design over to the nail.
- Cut your transfer vinyl so that it is the same size or slightly larger than your vinyl decal.
- Place the transfer tape on top of the vinyl and use a scraper to remove any bubbles or bumps.
- Use your scraper to rub over both the front and the back of the design. We want the image to stick to the sticky transfer tape, so that it will lift off the vinyl backing sheet.
- Slowly peel the transfer tape and design from the top left-hand corner. Move slowly and try to work in a semi diagonal angle. If your adhesive vinyl decal or sticker is not lifting with the tape, place it back down and give it another good rub with the scraper.
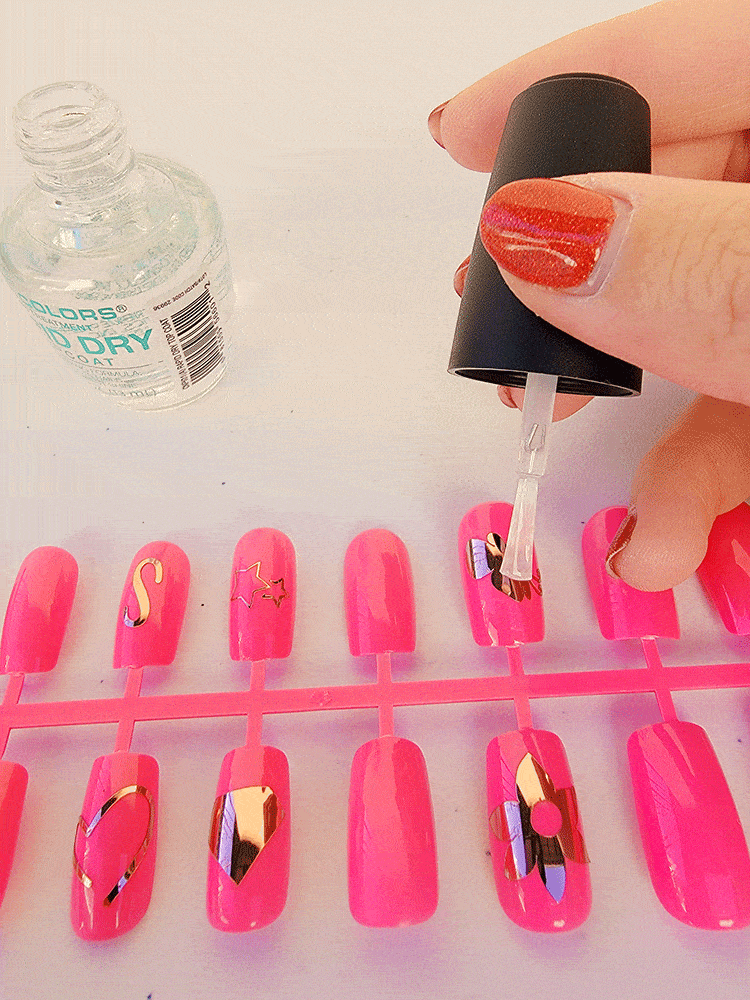
- Next decide which nail you would like to place the sticker on. I’m going to pop this one on my thumb. If you are using press on nails, decide which size nail works best for you. If you are placing it onto your nails, I recommend doing a layer of clear nail polish first.
- Place the design on the nail, making sure there are no bubbles or bumps. You can place the image however and where you want.
- Once again, use the scraper to rub over the design. This time we want it to stick to the nail and to release from the transfer tape. I found that in some cases rubbing your finger over the design worked better than a scraper in the curved sections.
- Slowly peel back the transfer tape. Once again if your decal or sticker lifts, simply place the tape back down and rub over the problem area again. Place your transfer tape back on the backing paper (you can reuse transfer tape so don't throw it away).
- Go ahead and complete your nails this way, customizing each nail at a time. You can also play with your nail color selection.
- Once all the decals are on, you will want to paint over each nail with a clear coat to make sure the vinyl does not fall off. Let the coat rest for about 20 minutes.
- Last, you will want to place on your nails – follow instructions from the packet on how to do this.
Finally, you have your very own personalized press on nails.
Now that you know how to make nail stickers, it is time to step it up. See if you can customize the design, color and even color of nails. You can create your own decals using press on nails or your own with a coat of paint.