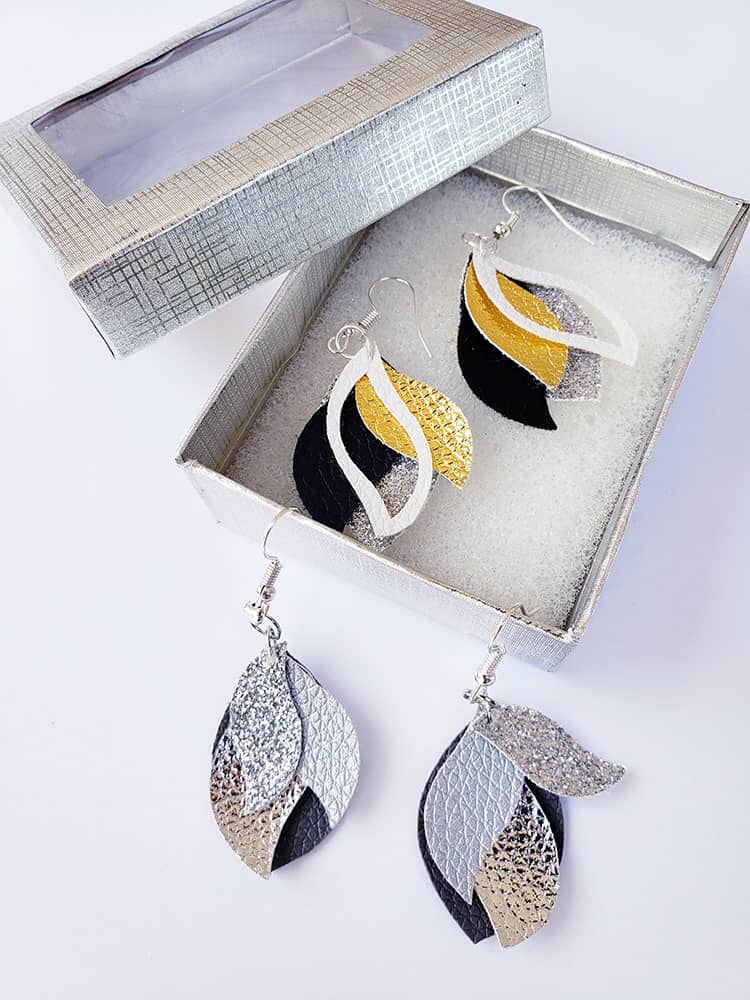
With Mother's Day right around the corner, our design team decided to create personalized Cricut earrings. The beauty of it is you can mix and match colors, shapes, and sizes to really suit the personality of the person you are gifting it to.
Today you will learn the basics of how to create Cricut Earrings with some gorgeous faux leather. These are perfect gifts for not only Mother’s Day but also for birthdays, Christmas presents, and just random gifts of love and appreciation. They also sell really well.
To make life even easier we have also decided to include some FREE Cricut Earring SVG files for you to use as well.
How to Make Cricut Leather Earrings
Follow our step-by-step tutorial below to create these gorgeous Cricut Leather Earrings that make lovely gifts!
Supply List
- Cricut Cutting Machine (I used an Explore Air 2)
- Cricut StrongGrip Mat
- Faux Leather Earring Making Kit
- Cricut Deep Point Blade
- Rotary Hole Punch (optional)
- Precision Blade
Step 1: Download and Upload your FREE Cricut Earring SVG Files
The first part of creating beautiful earrings is deciding which design to cut. In this tutorial, you will get access to 16 Cricut leather earring templates. Nine of those are provided by freepatternsarea.com and the rest have been created by our design team member Sandra.
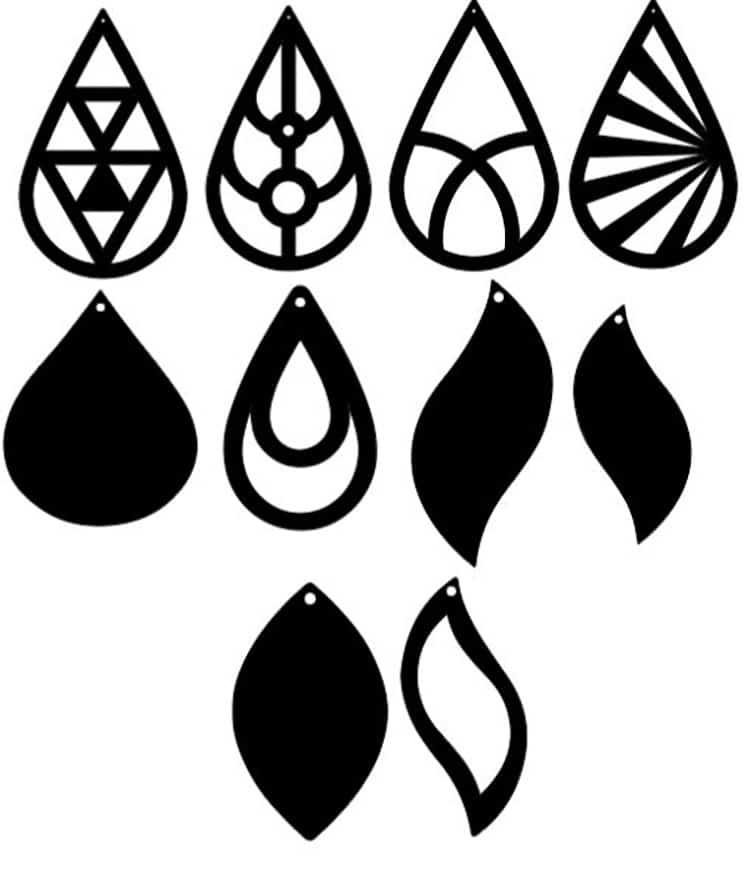
Here is a list of the SVG Files for your use. Earrings Designed by Sandra:
- Download Earrings 2
- Download Earrings 3
- Download Earrings 4
- Download Earrings 5
- Download Earrings 6
- Download Earrings 7
- Download Earrings 8
Earring SVG file on freepatternsarea.com
- Download your desired earring SVG file. For this project, we used the following two SVG files “Earring 2”’ and “Earring 7.”
- Open Cricut Design Space and select “New Project”.
- Select “Upload – Upload Image – Browse” and navigate to your desired downloaded SVG file and finally you may choose to rename the file and select “Upload”.
- From there the file will appear under “Recent Uploads,” select the image and “Insert images”.
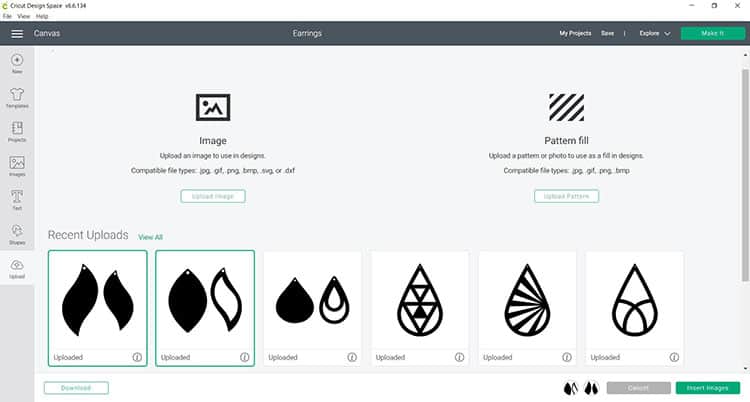
- Once the file or image appears on your Canvas in Design Space, you will need to resize the image. Our design was resized to 1.5 inches in height.
- After resizing you will want to duplicate the designs as we want to make a pair of earrings and not a single earring.
- From there feel free to customize the color templates as this will help when cutting the designs and placing them in different color mats. You may do so by selecting the image to the right and changing the color from the top panel.

- Once you are satisfied with the design you may move forward with cutting the design
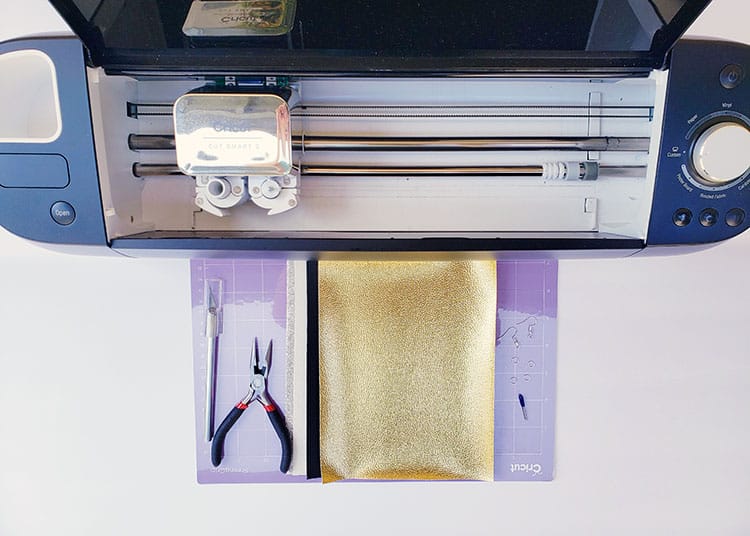
Step 2: How to Cut the Leather Earrings with Your Cricut
Next, it is time to cut your design. This project will have you load the project into four different mats.
- When you are happy with the size and color of your design click on “Make It”.
- If you are using the Cricut Explore Air 2 like me, move the dial icon on your device to “Custom”.
- On Design Space select “Browse All Materials”.
- From there type in “Leather” in the search box.
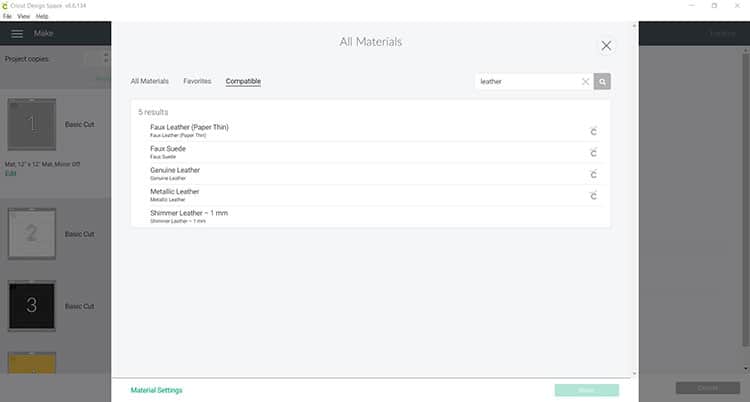
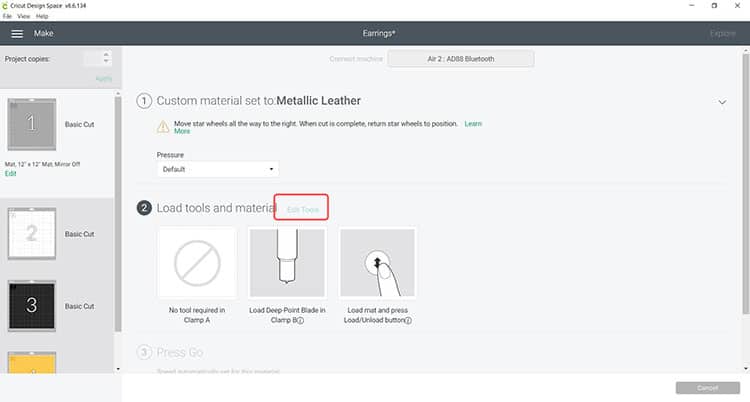
- Now select the correct leather material that you are using. For this project, we used “Metallic Leather,” leave the pressure as “Default”.
- On your Cricut machine, you will want to swap out the Fine point blade to the Deep-Point blade. Though a fine point blade may work, the deep point will result in a better cut. You can change the settings for which blade your machine uses by clicking on ‘edit tools’.
- Smooth out your faux leather on your purple mat. A brayer will be useful here to ensure you remove bubbles and wrinkles.
- Load the StrongGrip mat into your cutting machine and follow the instructions to cut the vinyl.
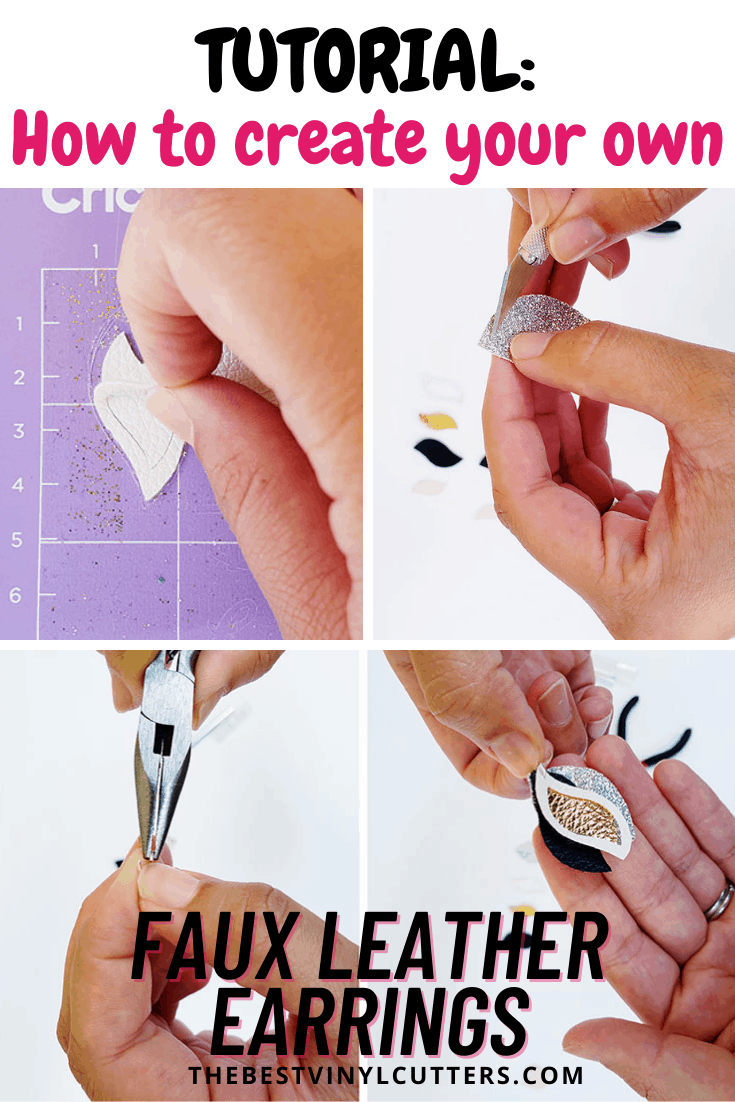
Step 3: Weed your Faux Leather
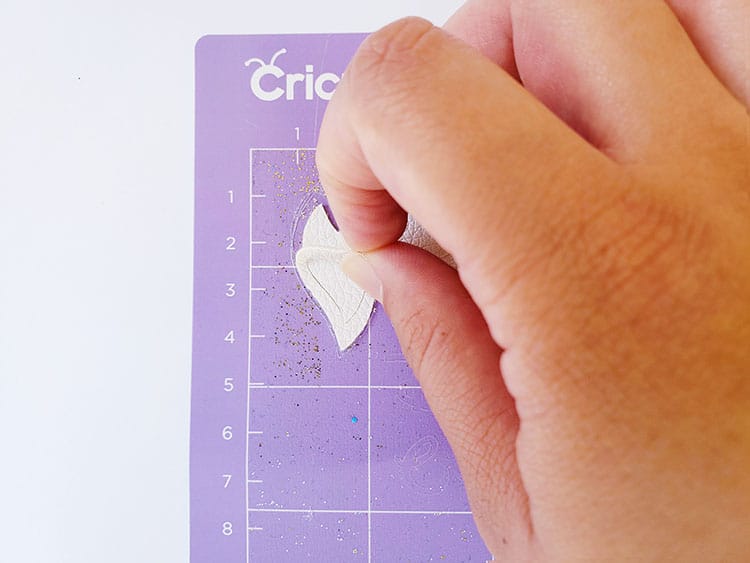
Next is to remove the cut leather from the mat.
- Trim down the leather around your cut parts.
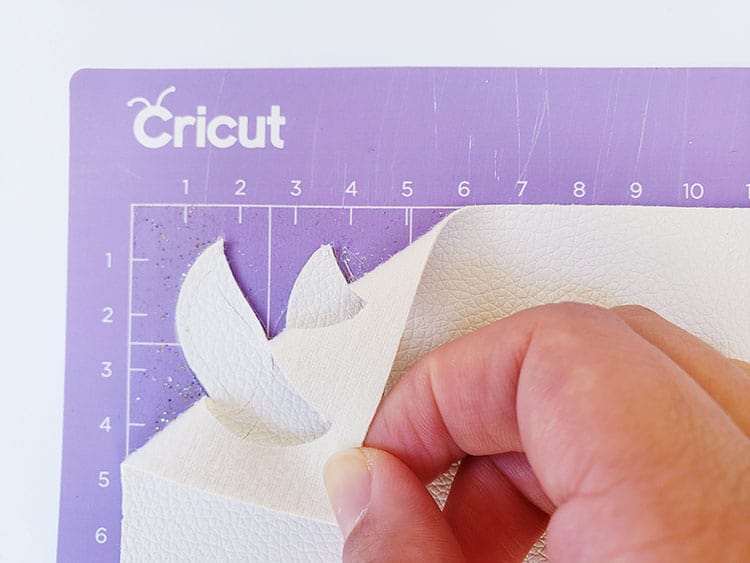
- Remove the unneeded pieces of your design. For this you do not need a weeding tool, you can simply use your fingers to remove the unwanted pieces
- Carefully separate the parts of an earring (where applicable) and carefully pull the pieces off the mat ensuring that you do not rip the design.
Step 4: Assemble the DIY Cricut Leather Earrings
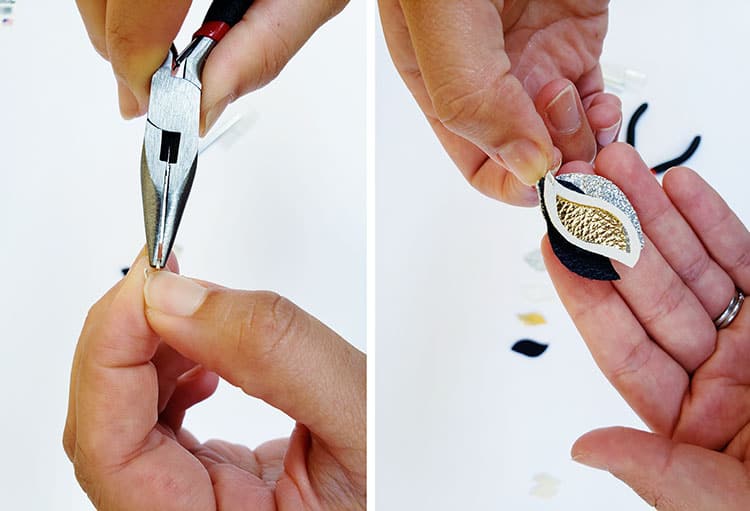
- Start by making sure the holes in the designs were cut through correctly, if they were not you can use either a precision knife to make small incisions or use a rotary hole punch and make the smallest holes possible. A good hole punch will allow the cut leather pieces of the earring design to move around freely for more jazz.

- From there grab an open jump ring and open it a little and begin inserting the designs one at a time. You can use the pliers to open the jump ring slightly.
- Use the flat nose pliers to close the jump ring once all the leather pieces are added.
- Then, grab a second jump ring, open it up and attach it to the last jump ring containing the designs.
- Now using a french hook ear wire, place it inside the second jump ring.
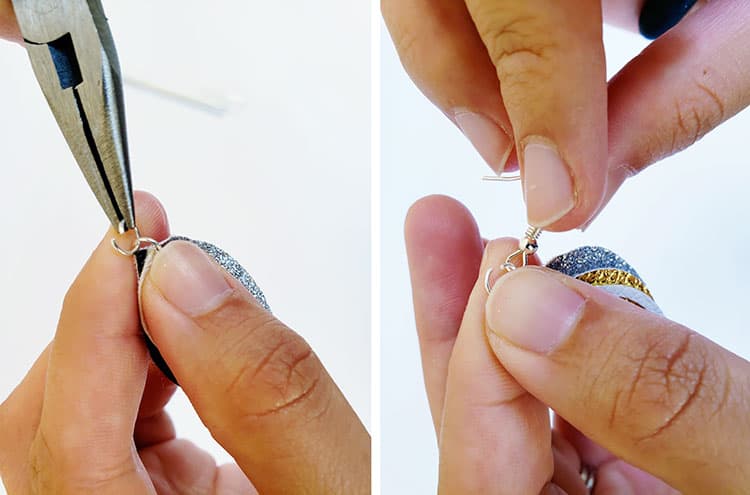
Note: Make sure the french hook ear wire is facing the correct way
- Once the french hook ear wire is in place, you may close the second jump ring with the flat nose pliers.
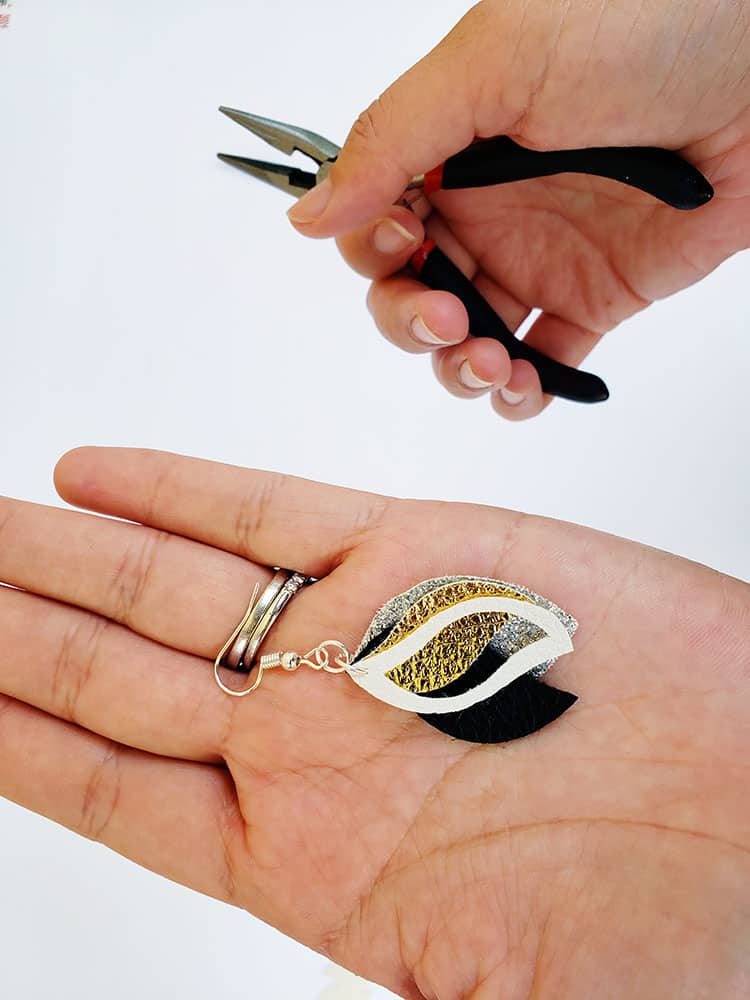
- Finally, repeat steps one to five one more time to obtain the second earring to the pair.
Just like that, you have created your very own earrings with a Cricut. They just look so stylish in the ear! I love them.
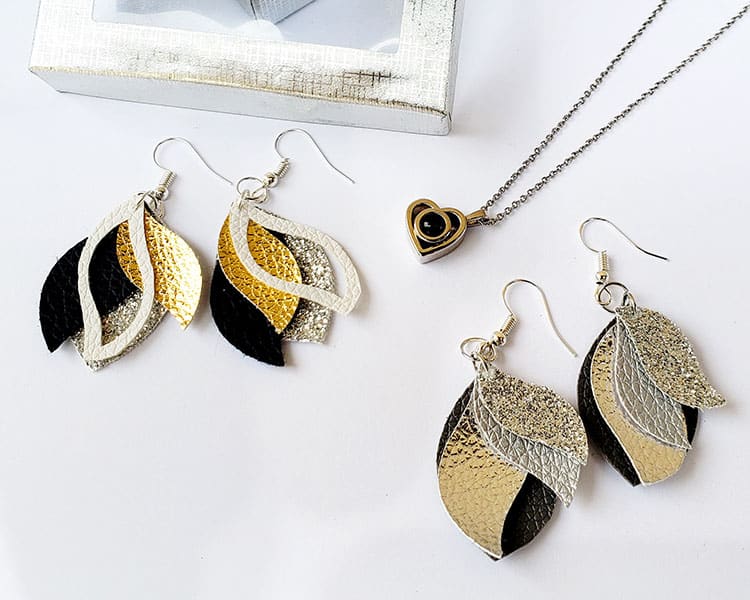
Place them in a beautiful jewellery box or gift bag and they will make wonderful love-filled gifts to hand out.
You can also go ahead and add some HTV on the leather to add more detail as well. You can find our tutorial on how to apply HTV on leather here.
LOVE this tutorial? Pin it to Pinterest for future reference.
Have you made Cricut leather earrings with your Cricut? I would love to see them!