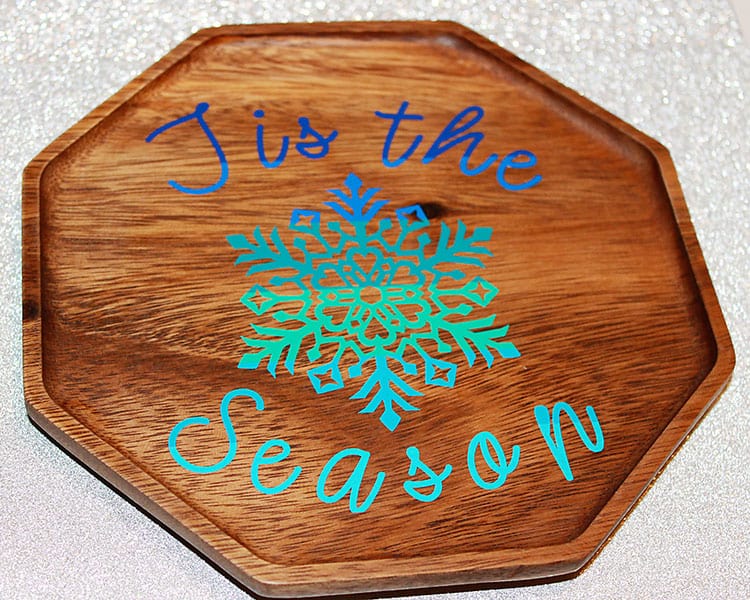
Ever wondered how to create an ombre design with your vinyl? Well… look no further as today we will show you how to create a blue ombre look on a traditional winter table tray!
Once you have mastered the ombre technique, you will be able to use the same technique on other vinyl designs for future projects, from cards, tumblers and more!
How to Create an Ombre Vinyl Decal
Find below the steps to follow in order to create this gorgeous ombre vinyl decal. You can, of course, do exactly the same thing with any decal, so feel free to customize it for your needs.
Supply List:
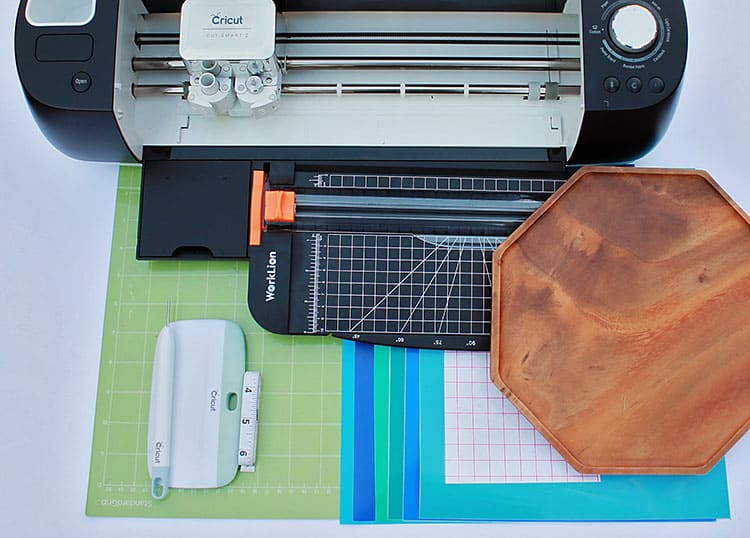
- Cricut Cutting Machine (I used the Explore Air 2)
- StandardGrip Cutting Mat
- An assortment of Vinyl (I used six different shades of blue and green)
- Transfer Tape (I love the YRYM)
- Wooden Tray (Or another surface of your choice)
- Paper Cutter
- Measuring Tape
- Cricut Weeding Tool
- Cricut Scraper
Step 1: Choose your Colors and Cut your Vinyl Strips
Size your design to figure out what size you would like your decal to be.
For this particular project, we will be creating an ombre look by utilizing six different shades of blue vinyl. You can do the same thing with any color and you can also go from one shade of color to another, for example from shades of pink to shades of orange.
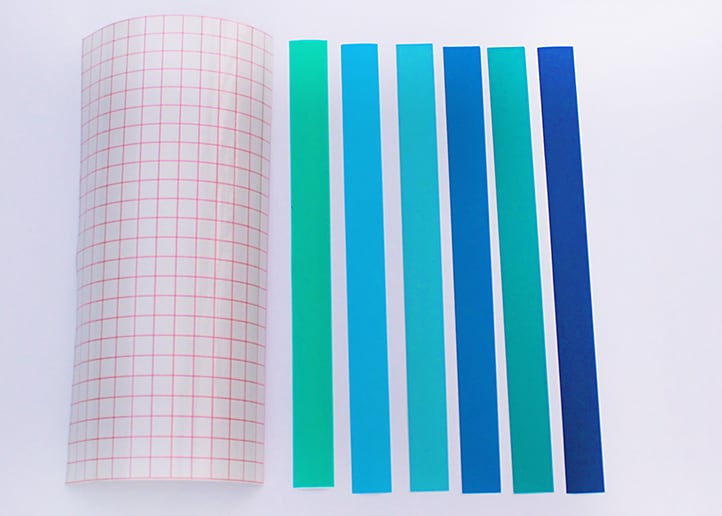
Choose and arrange your vinyl sheets. I recommend that you choose between 6-8 different shades. Think about using shades that go up in subtle increments rather than going straight from light to a dark color.
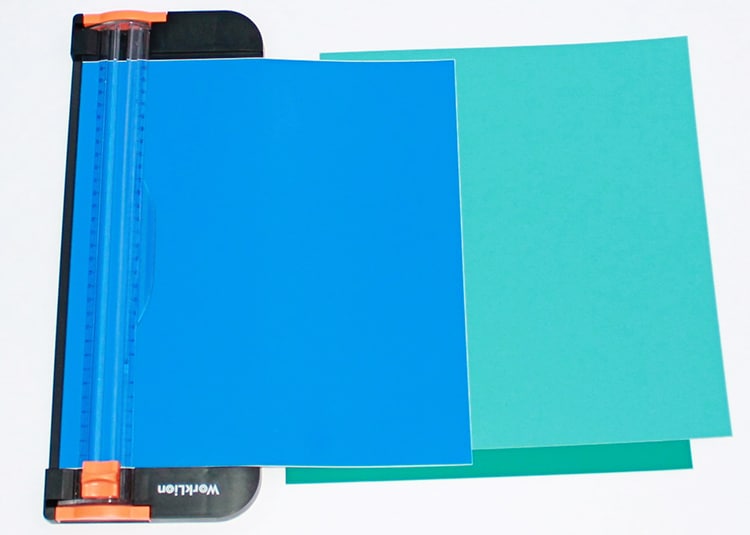
- Now have a look at the size of your decal and divide the size by the number of shades you will be using. For our example, we will be cutting our shades into one-inch strips.
Tip: You will want to use a paper cutter to ensure straight cuts
- Once you have all your colors cut, you will want to place them on your mat. Place your vinyl with the shiny side face up on your StandardGrip Cutting Mat.
- It is important to arrange your shades so that it looks visually appealing. Begin by placing the first shade (we started with the darkest blue), followed by the other shades. Make sure you adhere the strips close together.
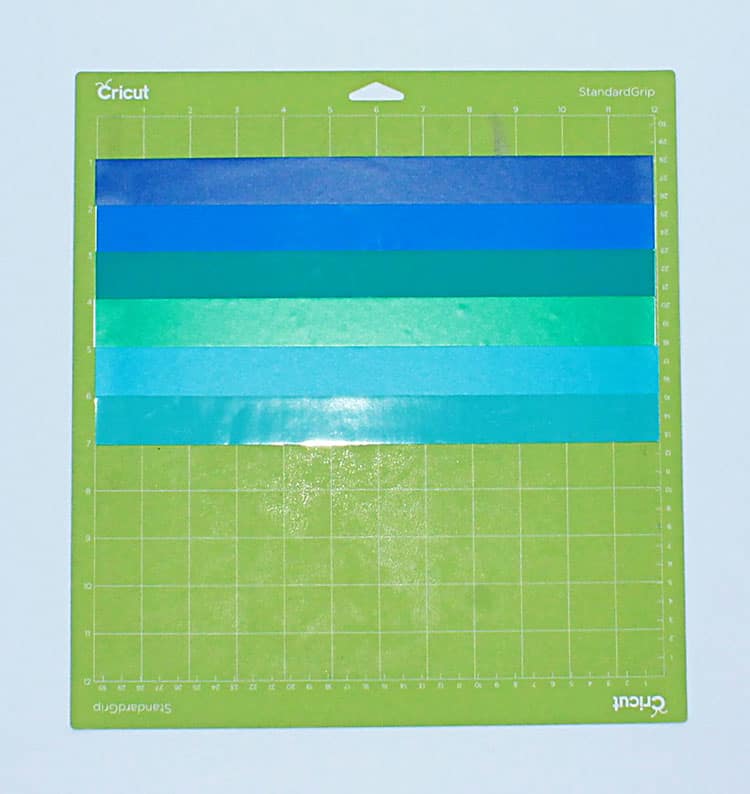
Tip: In order to obtain the ombre look, you will want to make sure there are no gaps/space in between the colors
- Load the mat into your cutting machine and cut the vinyl design.
- Go ahead and weed and transfer your design as you normally would.
Step 3: Weed your Design
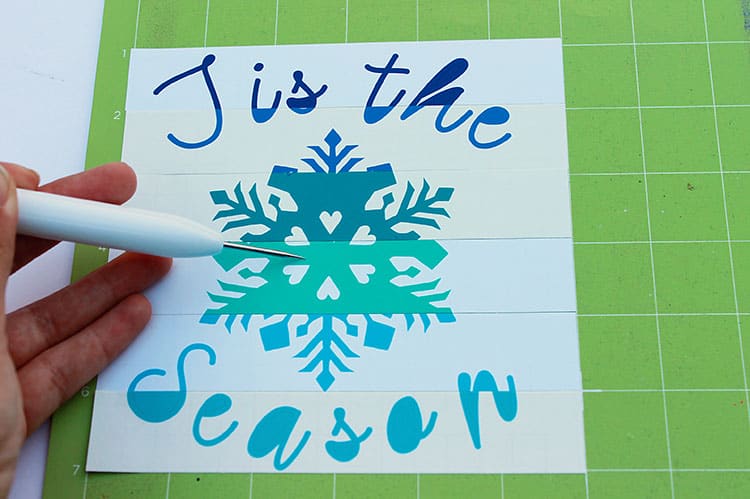
Next, use your weeding tool to help you lift up the unneeded pieces of your design. Go slowly around the letters and fine details. Don’t forget to weed out the inside pieces. It is important to keep your cut vinyl shades as one piece, don't try to separate them.
Step 4: Transfer the Vinyl to your Surface
- Cut your transfer vinyl so that it is the same size or slightly larger than your design vinyl.
- Place the transfer tape on top of the vinyl and be sure not to have any bubbles or bumps.
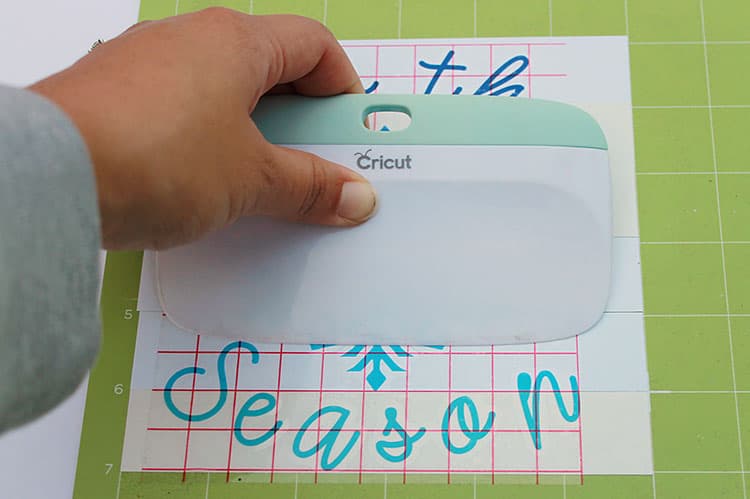
- Use your scraper to rub over both the front and the back of the design. We want the image to stick to the sticky transfer tape, so that it will lift up off the vinyl backing sheet.
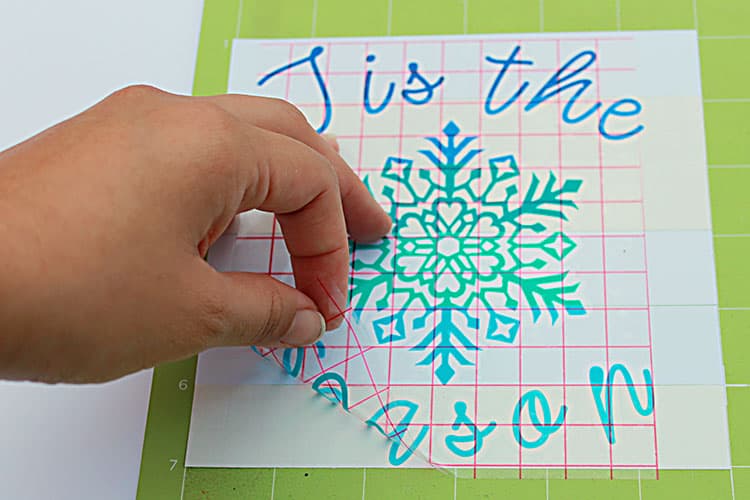
- Slowly peel up the transfer tape and design from the top left-hand corner. Move slowly and try to work in a semi diagonal angle. If your stencil is not lifting up with the tape, place it back down and give it another good rub with the scraper.
- Place the image on your surface, making sure there were no bubbles or bumps. Try to make sure that it is in the centre and that it is straight.
- Once again, use the scraper to rub over the design. This time we want it to stick to the new surface and to release from the transfer tape.
- Slowly peel back the transfer tape. Once again if your design lifts up, simply place the tape back down and rub over the problem area again. Place your transfer tape back on the backing paper (you can reuse transfer tape so don't throw it away).
And there you have it, it is actually super simple and easy. I think the hardest step can be to try and find a selection of shades that work well and to arrange them in an appealing way. Once you have that done, the rest is actually super simple.
And the result is truly elegant and unique. Take your adhesive vinyl project to the next level and try out an ombre look.