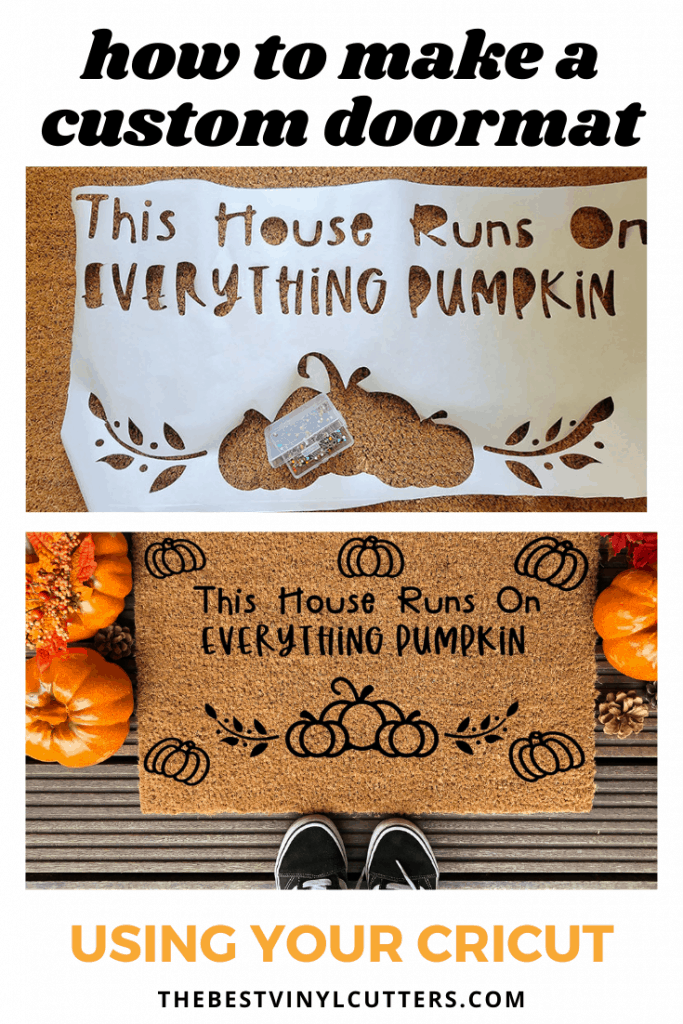
What is the first item your guests see when they come to visit? Think about it… if you answered your doormat, then you are correct! In this step-by-step tutorial we will walking you through the steps on how to create your very own DIY Cricut Doormat.
The best thing about this tutorial is that you can use it for virtually any design. For this tutorial we have tailored it towards a Fall festive mood, but you can also make it comical and adjust it based on the seasons and holidays.
DIY Cricut Doormat Tutorial
Follow our step-by-step tutorial to create your own DIY Cricut Doormat. Once you have followed this tutorial you will be able to create your own Cricut doormat ideas!
Supply List
- Cricut Cutting Machine (I use a Cricut Explore Air 2 – see the review for the machine here)
- 12″ x 24″ LightGrip cutting mat (We used the FabricGrip mat (12″ x 24″/30.48cm x 60.96cm)
- Freezer paper (We used ReynoldsKitchens Plastic Coated Freezer Paper)
- Doormat
- Flex Seal
- Cricut Weeding Tool
- Cricut Scraper
- Cricut EasyPress 2
- Sewing Pins
Step 1: Preparing Your Cut File for Cutting
Find below the step-by-step instructions on how to prepare your doormat SVG for cutting.
- You can either use your own design, or if you want to use the same design as we did, you can simply upload the doormat SVG files by clicking here.
Note: The designs are obtained through the Cricut Assess profile

- Select “Open”.
- Next select “Open Cricut Design Space Application”.
- From there you can select “Edit Copy” or “Make It”.
Note: If you are using the same doormat as we are, you can simply select ‘Make It’. If you need to resize, please “Edit Copy”. In addition, please note that the design is tailored to best fit the Cricut cutting machine size.
- Once you are satisfied with the design you may move forward with cutting the design.
- Ensure you have the “mirror” option selected prior to cutting.
Step 2: Cutting & Weeding the Freezer Paper
Now that you are ready to cut the design you will need to place the freezer paper onto the Cricut mat.
- Place your freezer paper shiny side down your cutting mats (the blue LightGrip mat is best, but we used the pink mat as that was what we had on hand). The main text design will be using the 12×24 cutting mat while the pumpkin designs will be on the 12×12 mat but you could also use your 12×24 cutting mat again.
Note: The freezer paper is a little bigger than the mat, therefore you will need to cut out the excess paper with scissors.
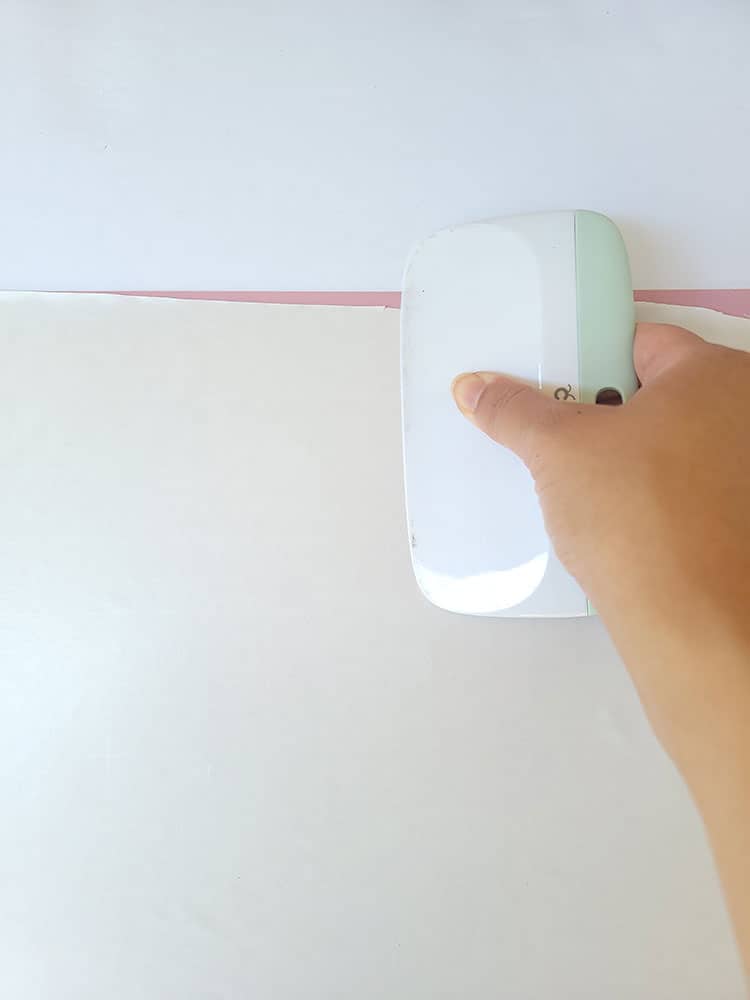
- Once the paper is cut to size you, use your scrapper to press the freezer paper onto your cutting mat making sure it is well secured onto the mat
- Load your mat into your cutting machine. Select Freezer Paper from the material list in Cricut Design Space and cut away.
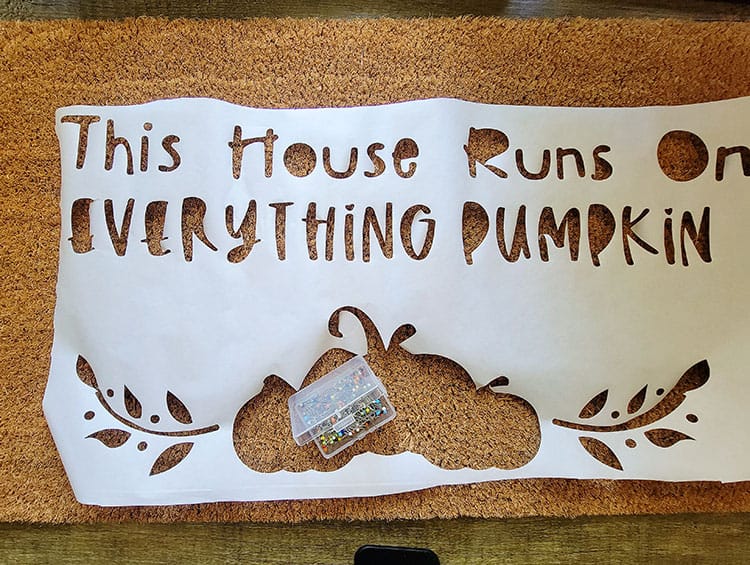
- Once the design is cut, leave the freezer paper on the mat whilst you weed. As we are creating a stencil, you will need to remove all the individual letters and pumpkin pieces.
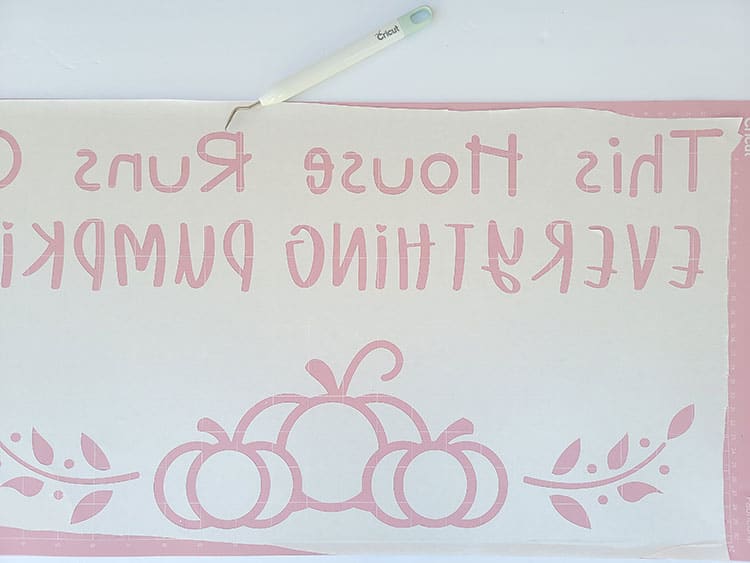
- Once all the pieces are removed, simply flip your mat upside down and carefully peel the mat away from the freezer paper stencil.
- For the smaller mat, simply weed and peel. And then cut your pumpkins into individual pieces as we will be placing them in each corner of the mat. You will need to cut the frame and then build these small pumpkins on the mat, so keep the pieces nicely organised together.
Step 3: How to Transfer Freezer Paper to Doormat
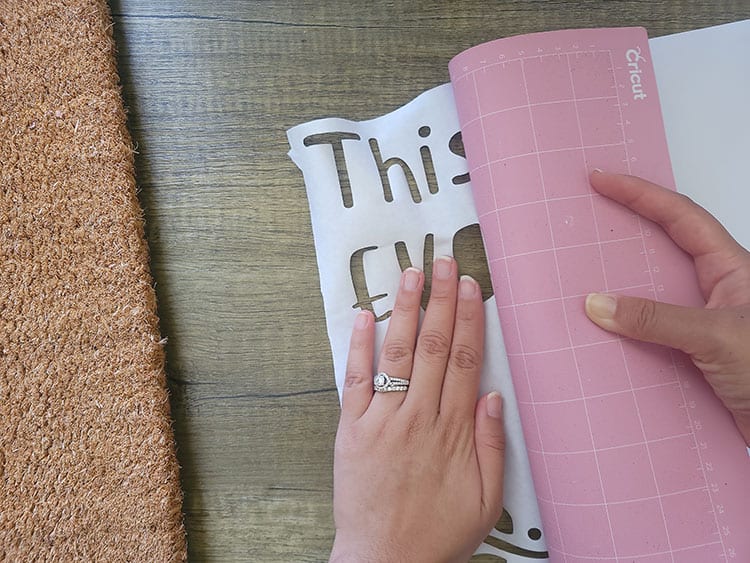
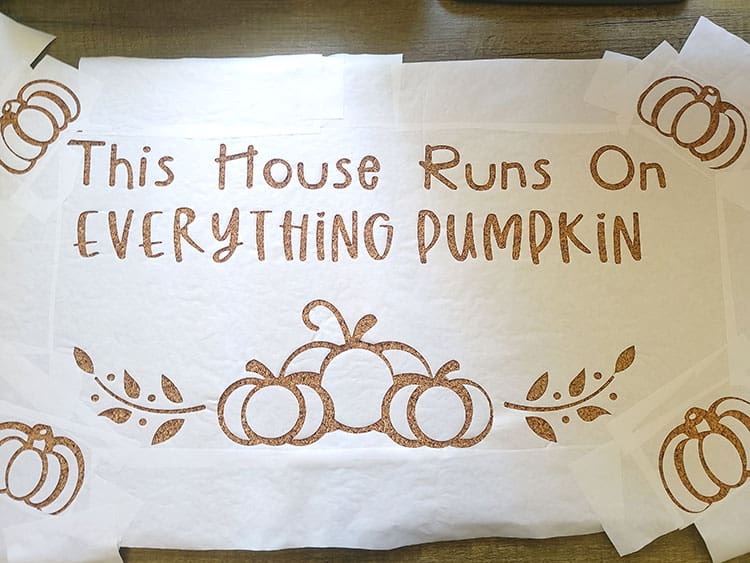
Once you have weeded out the doormat design you will need to place the freezer paper on the blank doormat.
- Place the freezer on top of the doormat, after placing to the best of your ability, use the fabric pins to hold down the freezer paper.
- After the main text is added you will need to place the additional pumpkin designs around the doormat, to do this, you will need to cut the designs into individual pieces and place them to where you prefer.
- Once the entire design has been placed and pined, you still need to make sure any part of the doormat that you don’t want to get spray paint on gets covered with more freezer paper, for this you will need to cut the sections with scissors.
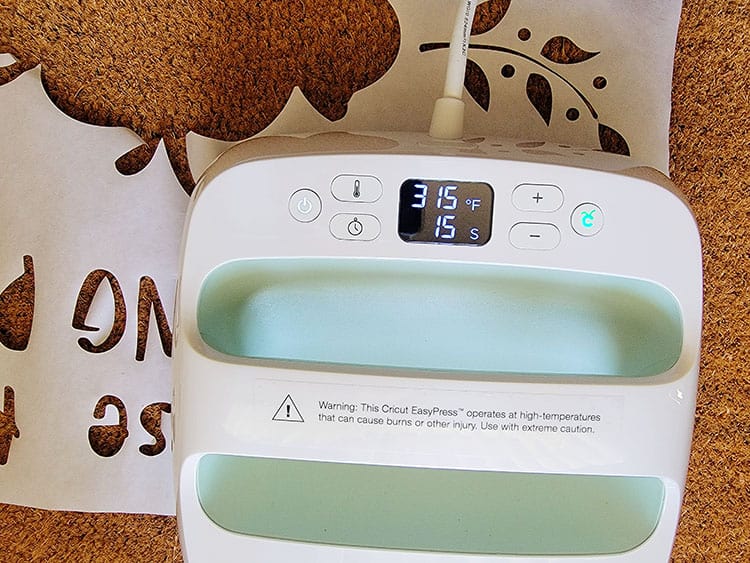
- Next use the Cricut EasyPress 2 to press the freezer paper, remove the pins as you go. I popped the press on 315°F and pressed in sections for 15 seconds. Don’t worry it will be easy to remove the freezer paper even though we are doing this.
- Finally pop the pins back in place.
Step 4: Spray Painting Over Your Stencil
Once the stencil is on the doormat, you will need to spray on the spray paint (you could also use paint with a sponge paint brush). To avoid paint on your fingers, you can wear gloves.
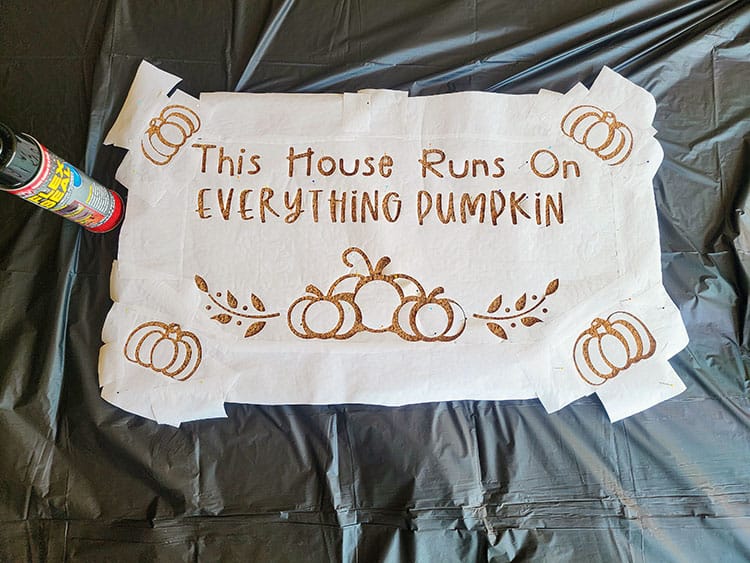
- Place gloves on both hands.
- Place some scrap paper, disposable table cloth, or board underneath the doormat to ensure you do not get paint all over the floor. We used a table cloth and sprayed the mat outside in the garage in a well ventilated area.
Note: When you move the doormat, make sure you are very careful to not bend it, otherwise the freezer paper may begin to peel off.
- Once satisfied, and you have the mat on the ground, you may begin to spray.
Note: We still had the pins in at this point, we pinned down all the middle pieces of letters and smaller edges or points of the design. It might not be necessary but I love to double check things are secure so that I get it right the first time.
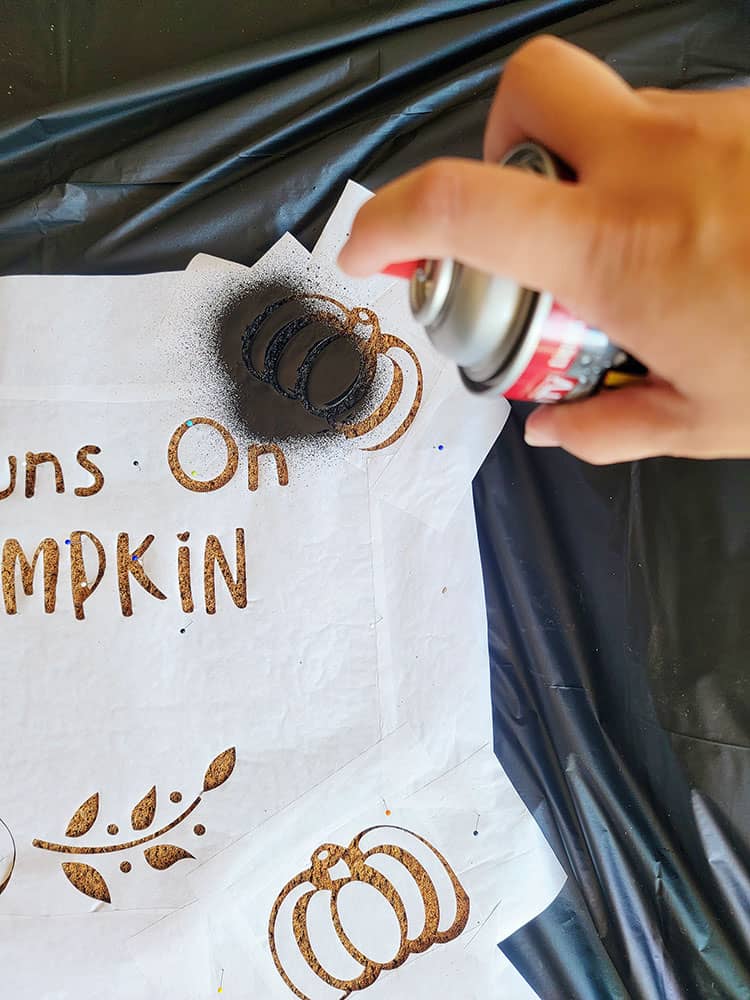
- Spray at an angle, and place at least two coats.
- From there allow the paint to dry for a minimum of 30 minutes.
- Last, slowly remove the stencil while still wearing your gloves. Use the pin needles to pick out the inner pieces from letters and then simply use your fingers to peel the larger pieces off slowly.
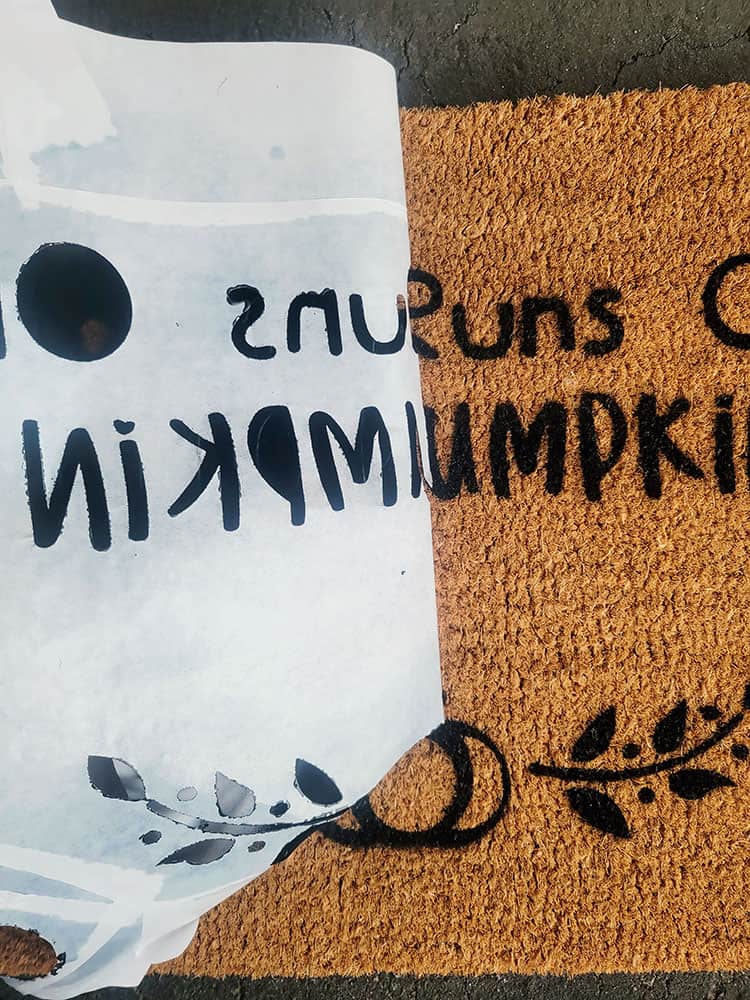
Vuala! Your work is finished!
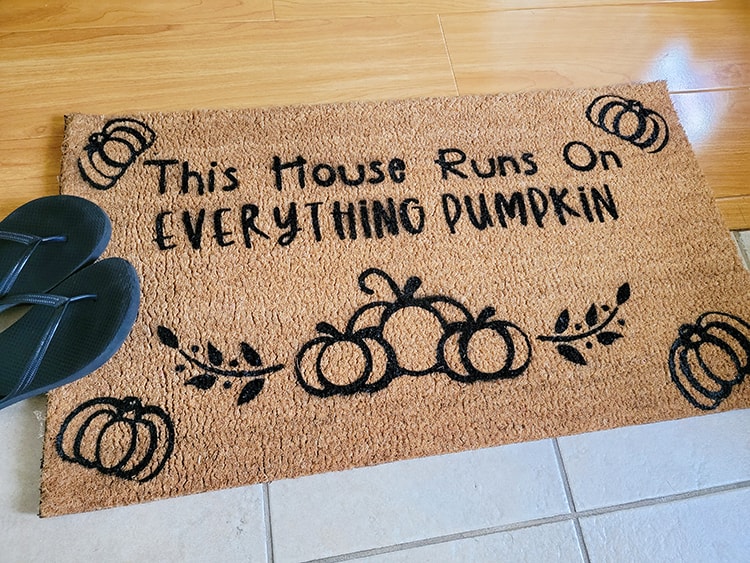
I hope you enjoy creating your very own doormat. This is sure to make your guests smile and feel welcome when they visit…… or have a little giggle!
What will your Cricut Doormat say?