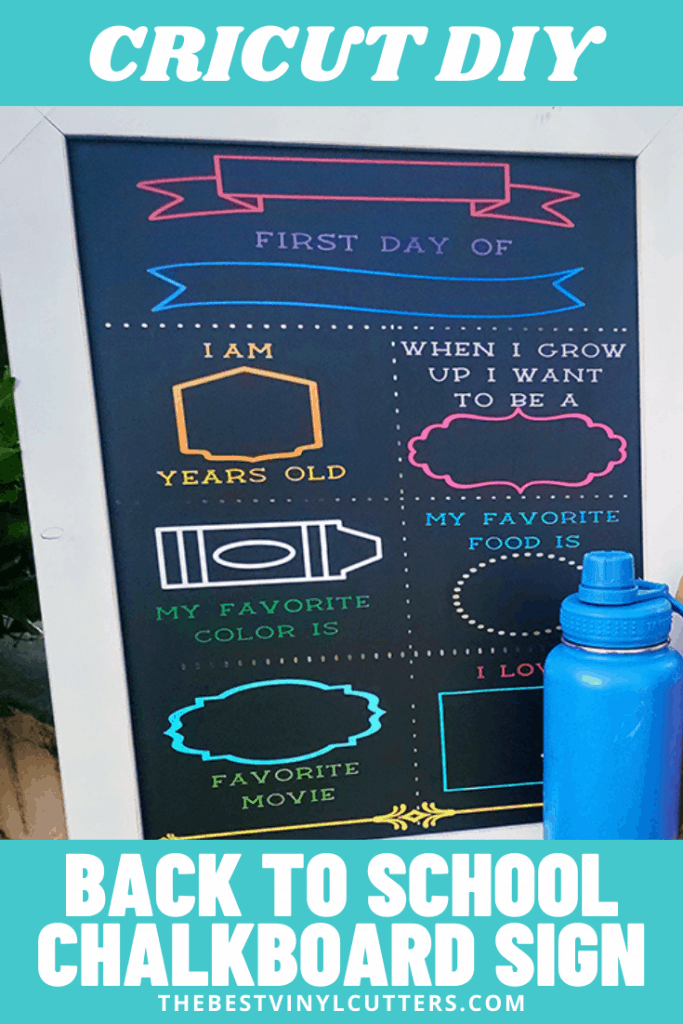
With school just around the corner, capture a memorable first day of school using this DIY Cricut chalkboard sign. The fun questions are a great way to capture exactly who your child is that year.
This First day of school chalkboard sign is something you can use year after year to make your first day of school pictures extra special.
Find the full tutorial on this adorable Cricut first day of school sign below.
Cricut First Day of School Chalkboard Sign Tutorial
Follow our step-by-step tutorial to create your own school chalkboard sign to capture all those special details on their first day of the school year.
Supply List
- Cricut Cutting Machine (I used the Cricut Explore Air 2 – see the review for the machine here)
- StandardGrip Cutting Mat (12×12)
- StandardGrip Cutting mat (12×24)
- Adhesive Vinyl (We love this variety bundle on Amazon)
- Transfer Tape (This is the transfer tape we love)
- Cricut Weeder Tool
- Cricut Scraper
- 18 x 22” Chalkboard
- Liquid Chalk Markers
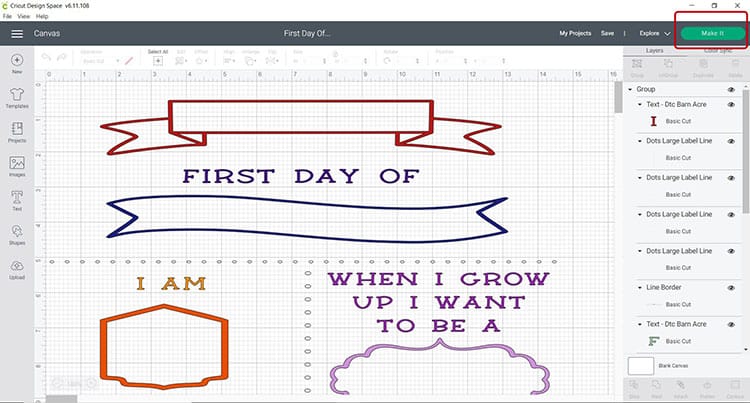
Step 1: Prepare Design in Cricut Design Space
Find below the step-by-step instructions on how to prepare your Chalkboard SVG for cutting.
- To begin, get direct access to the project in Cricut Design Space and upload the chalkboard SVG files by clicking here.
Note: The designs are obtained through the Cricut Assess profile

- Next select “Open”.
- After select “Open Cricut Design Space Application”.
- From there you can select “Customize” or “Make It”.
Note: You may select “Customize” if you want to change the color and size.
- The design is sized for the chalkboard from Amazon, so if you are using a different chalkboard, make sure to measure and adjust the sizing accordingly. If your chalkboard is the same size as ours which is 14.5 inches x 18.5 inches and you love the color selection, you can simply click on “Make It”.
- Once you are satisfied with the design you may move forward with cutting the design.
Step 2: Cut Design with Cricut Machine
For this step, we will be cutting the design out of adhesive vinyl. The project will show 15 mats (two large 12×24 cutouts and thirteen 12×12 mat cutouts) that are sorted by the different colors we are using for the project & design.
- When you are happy with the size and color of your design click on “Make It”.
- Select continue, make sure that your Cricut machine is turned on, and connect to your Cricut machine.
- You will now be able to pick your material and cut settings.
- If you have an Explore Air 2 – Select “Vinyl” on your material dial.
- Place the vinyl, shiny side up on your green StandardGrip mat.
- Load the mat into your cutting machine and follow the instructions to cut the vinyl sheets
Tip: By color coordinating the design with the color vinyl you are using for the project, Cricut Design Space will instruct you on which color mat to load next for cutting so you know which color vinyl and part of the design is being cut.
Step 3: Weed your Design
- Next, use your weeding tool to help remove the pieces of vinyl from your design that you will not be using. Go slowly around the letters and fine details and don’t forget to weed out the inside pieces for any text or images.
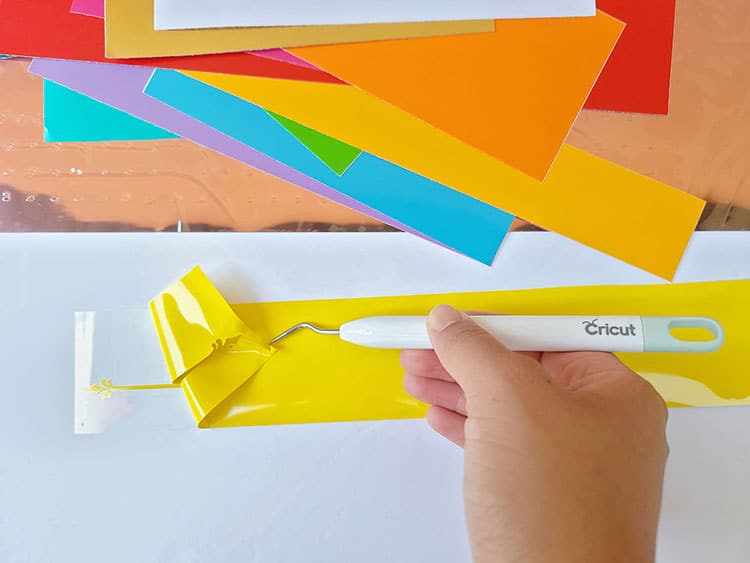
Tip: You should be able to do your weeding with your fingers, but use a weeding tool for smaller detail if required.
Step 4: How to Transfer Adhesive Vinyl to the Chalkboard
Before we apply the adhesive vinyl to the chalkboard, please ensure that your board is dry and clean.
- It is much easier to use transfer tape to move your design over to the board. Cut your transfer tape so that it is the same size or slightly larger than your cut-out vinyl deisgn.
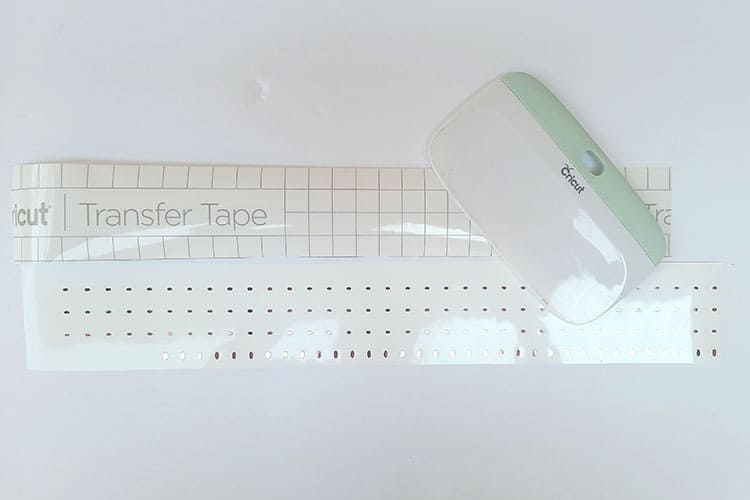
- Place the transfer tape on top of the vinyl and be sure not to have any bubbles or bumps.
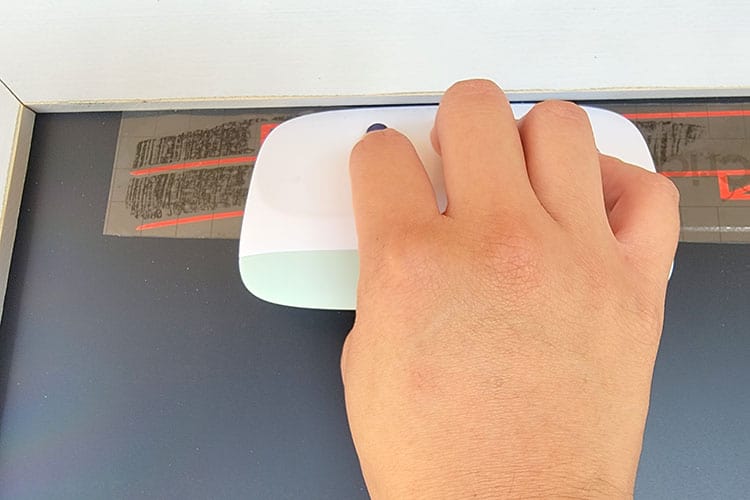
Tip: Use the scraper to get rid of any bubbles or imperfections
- Use your scraper to rub over both the front and the back of the design. We want the adhesive vinyl to stick to the sticky transfer tape, so that it will lift up off the vinyl backing sheet.
- Slowly peel up the transfer tape and design from the top left-hand corner. Move slowly and try to work in a semi-diagonal angle. If your vinyl design is not lifting up with the transfer tape, place it back down and give it another good rub with the scraper.
- Place the design on the chalkboard, making sure there are no bubbles or bumps. Try to make sure that it is in the centre and that it is straight.
- Once again, use the scraper to rub over the design. This time we want it to stick to the board and to release from the transfer tape.
- Slowly peel back the transfer tape. Once again if your vinyl lifts up, simply place the transfer tape back down and rub over the problem area again. Place your transfer tape back on the backing paper (you can reuse transfer tape so don't throw it away).
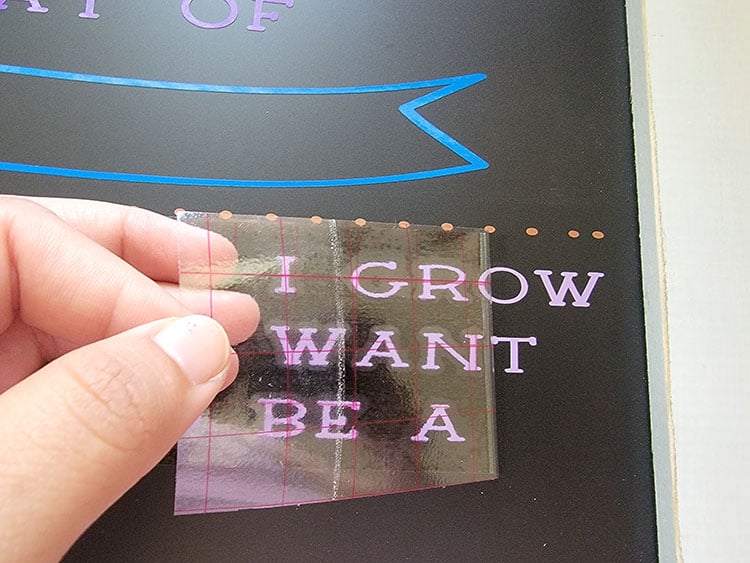
Note: If you open the design on your computer or device it will be easy to mimic the placement of each design on the board.
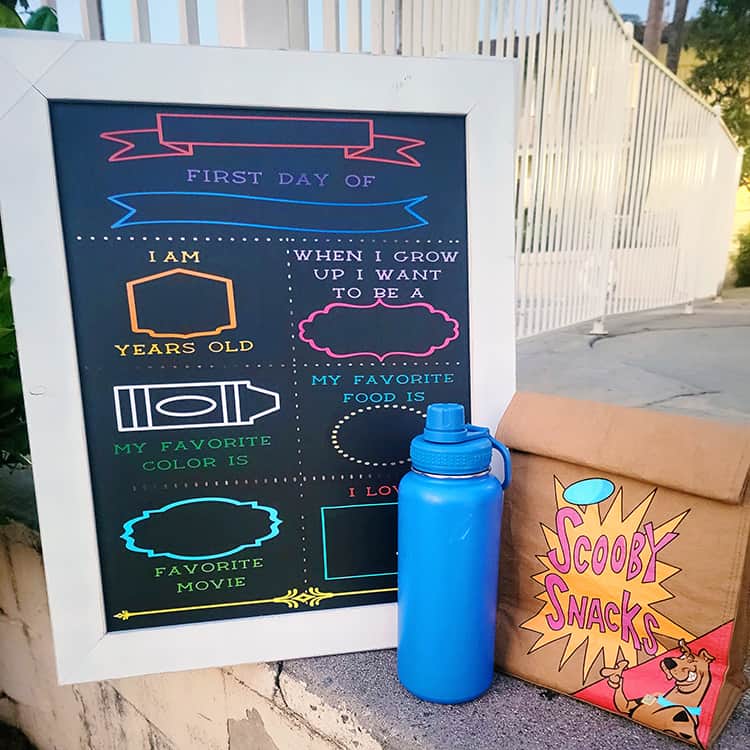
Congratulations! You’ve just made a back to school chalkboard sign using your Cricut! I hope you had as much fun with it as I did!
Now all that is left is to fill out each section with the colorful liquid chalk markers and clean it off once complete for future reuse. Such a great way to capture your children's answers over the years as they grow up!