Cutting machines are simply amazing for small companies or freelance crafters. They can help you create such a variety of personalized merchandise for branding and advertising purposes. They can also help you make gifts or work on fun craft projects for leisure or teaching purposes.
Whichever way you cut it (pun intended), a cutting machine is a great thing to have if you’re into crafts, especially given how many of them are affordable and compact enough to be used at home.
But, not all cutting machines are created equal. And, there’s probably no better way to highlight this than with this Brother Scan N Cut review.
Brother Scan and Cut Reviews
[easyazon_image align=”none” height=”750″ identifier=”B07FY6C9DH” locale=”US” src=”https://www.thebestvinylcutters.com/wp-content/uploads/2019/05/915qOpdb2BQL.jpg” tag=”bestvinylmachines-20″ width=”750″]
What is the Brother Scan and Cut (aka Brother ScanNCut)? It’s a line of cutting machines manufactured by Brother which also feature a scanning function alongside the cutting component. This makes them unique and revolutionary in the world of electronic cutting machines.
Who Is This Product For?
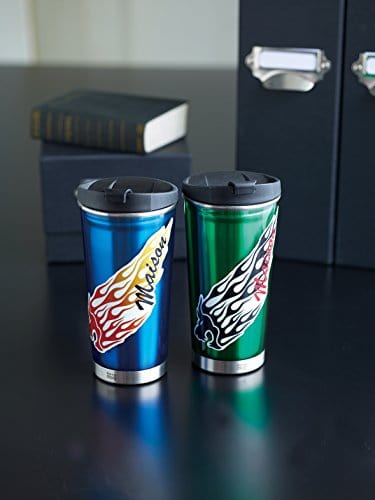
The Brother ScanNCut is designed as a one-stop shop for all artists, designers, quilters, and anyone else that might need to do their own branding by creating stickers, cards, etc.
The machine is also a space-saver and time-saver which is why it’s a perfect solution for anyone that doesn’t have the time to switch back and forth from the computer and the cutting machine.
It is also the only vinyl cutting machine that has the functionality of scanning, so if you love drawing your own designs that you wish to scan in and cut out on vinyl or paper, then this is a great option for you.
What’s Included?
[easyazon_image align=”center” height=”750″ identifier=”B014T1CI1E” locale=”US” src=”https://www.thebestvinylcutters.com/wp-content/uploads/2019/05/71zcewX2n9L.jpg” tag=”bestvinylmachines-20″ width=”750″]
All Brother ScanNCut machine packages usually contain the following gadgets and accessories:
- 1x die cutting machine with scanner
- 2x cutting mats
- 2x support sheets
- 2x contact sheets
- 1x spatula
- 1x accessories holder
- 1x manual
Here’s a list of accessories which can be used with the machine but are not usually included in the package:
- Pens
- Pen holders
- Extra mats
- USB sticks
Overview of Features
[easyazon_image align=”center” height=”750″ identifier=”B07FY6C9DH” locale=”US” src=”https://www.thebestvinylcutters.com/wp-content/uploads/2019/05/910IIhglN5L.jpg” tag=”bestvinylmachines-20″ width=”750″]
The Brother ScanNCut machine is loaded with features, and since it’s a dual workstation of sorts, there’s a lot to cover.
1. Cutting Mats
Whatever you’re doing – scanning, cutting, or drawing – you’ll always have to use the cutting mat. The ScanNCut usually comes with two mats. One is 12” x 12” and the other is 12” x 24”.
The mats also come in different types. One is basic and can be used for a variety of applications and one is an adhesive mat. The low tack adhesive model will help you when working with delicate paper or fabrics. Its main use is to help the image stick to the mat and eliminate any air pockets that might interfere with pattern recognition.
2. Scanner
The first function of scan and cut machines is that of pattern recognition. ScanNCut is designed around a 300DPI scanner. This can be used to recognize, scan, and save patterns from fabrics, photos, hand-drawn paper artwork, and various other materials.
While the material is scanned, the machine will create cut lines based on the outlines that are more heavily pronounced. Although the scanner is very accurate, it helps if you highlight outlines better especially when working with soft or faded colors.
The scanner has a couple of modes too. It can be set to scan black & white images or color images. It’s important to note that one of the best things about the scanner is that sometimes the black and white setting is enough even for hand-drawn colored artwork. That speaks volumes about its accuracy.
3. Cutting Options
[easyazon_image align=”center” height=”750″ identifier=”B07FY6C9DH” locale=”US” src=”https://www.thebestvinylcutters.com/wp-content/uploads/2019/05/91ljZtX6VL.jpg” tag=”bestvinylmachines-20″ width=”750″]
The secondary function is the cutting function. This scan and cut machine can do three types of cutting.
Line Detection
When using this selection, the machine cuts only along interior lines.
Region Detection
This selection makes the blades follow outside lines as well as any inside lines recognized during the scan or drawn by you using the machine.
Outline Detection
With this setting, you can ensure that the machine only cuts along the outside lines. Nothing inside the outline is touched, even if the lines are recognized during the pattern recognition process.
4. Blades
As already mentioned, the Brother ScanNCut machines can work on a variety of materials. This is possible due to the inclusion of two different blades into the machines’ design.
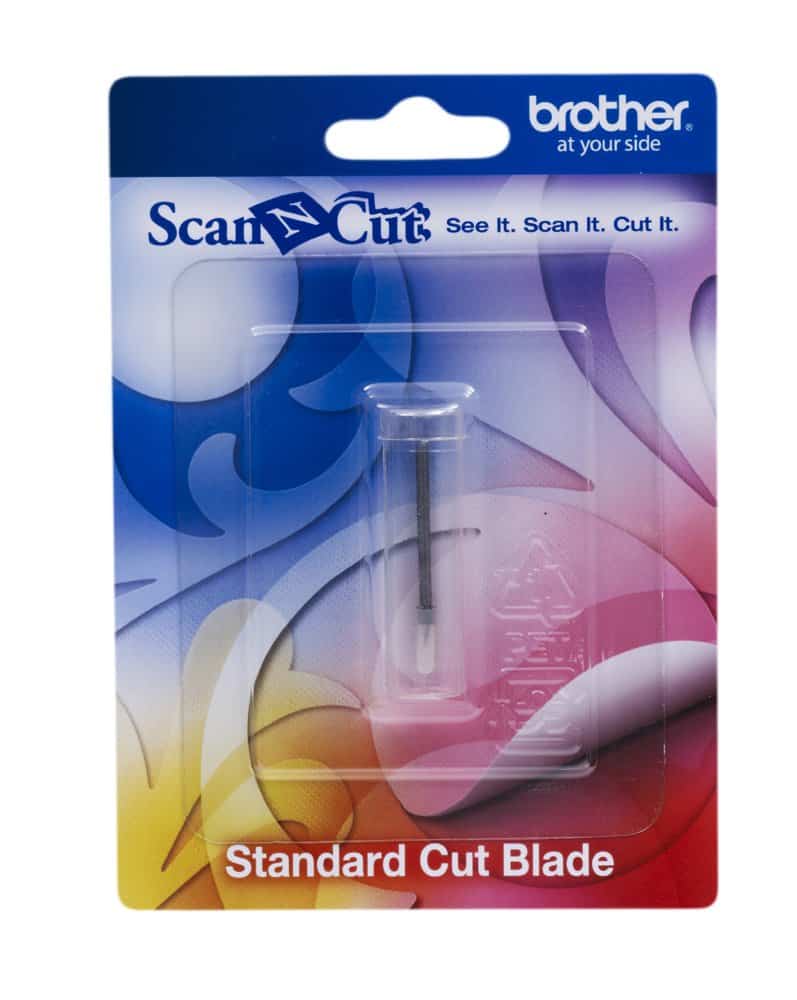
The regular blade can perform most shallow cuts and it’s ideal to use for stickers and basic cutouts. The secondary blade is a deep cut blade. This is the one you want to use when working with thick materials and sometimes fabrics too.
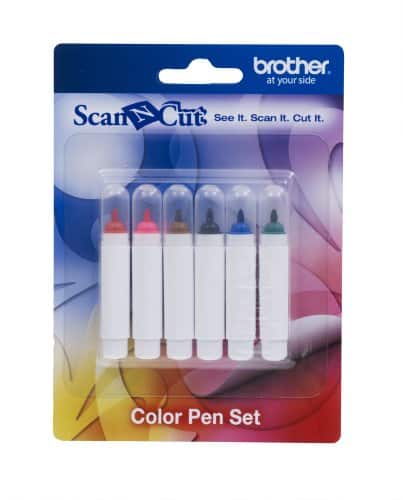
5. Drawing Function
Along with scanning and cutting, this machine also lets you draw using its touchscreen. It’s not the most amazing feature for the non-artists among us, but it’s certainly useful if you want to correct some outlines, draw new lines, or write certain phrases.
You can also use pens to draw patterns from scratch and then have the machine cut them.
6. Software
Just because the Brother scan and cut machines are designed as standalone machines doesn’t mean that they don’t come with their own software.
The app is called ScanNCut Canvas. It’s a cloud-based program that you can use to import various file formats such as .SVG and .JPG. The app is not exactly easy to use if you don’t know what you’re doing and have no previous experience with tracing.[easyazon_image align=”center” height=”750″ identifier=”B014T1CI1E” locale=”US” src=”https://www.thebestvinylcutters.com/wp-content/uploads/2019/05/81phJhqE0jL.jpg” tag=”bestvinylmachines-20″ width=”750″]
What’s nice is that there are plenty of designs and fonts readily available. Those provided by Brother are found in .FCM formats. This means that you can transfer them to a USB and then upload them to the ScanNCut.
However, when working on editing and converting other files, you may need to consult some online tutorials. This is not as scary as it seems but it is somewhat time-consuming to a total beginner. Luckily, Brother scan and cut machines are so popular that it’s not hard to find step-by-step tutorials posted by artists, crafters, sewers, and hobbyists.
7. Uploading Images
Brother Scan and Cut machines can be supplied with patterns in two ways. You can scan an image and save it into the machine or you can upload a pattern via an external USB drive.
Note that to upload a pattern, you must first use the Canvas app to trace the pattern and export the file in .FCM format.
8. Ease of Use
[easyazon_image align=”center” height=”750″ identifier=”B07C4P1P7P” locale=”US” src=”https://www.thebestvinylcutters.com/wp-content/uploads/2019/05/712Vs6HlSgL.jpg” tag=”bestvinylmachines-20″ width=”750″]
The overall ease of use is kind of hard to determine. On one hand, the Brother ScanNCut can do scanning, editing, and cutting. So it’s easy in a way since you don’t need any additional hardware for your crafts.
The interface is also intuitive and the touchscreen will automatically display the available editing options based on what you’re doing.
On the other hand, finding the right settings for each type of material, determining the correct blade depth, and editing patterns using the die cutting machine’s interface all have a certain learning curve.
The manual provides plenty of instructions for each feature, be it complex or basic. And, there are also tutorials that you can follow online which are loaded with tips and tricks on how to get the best results out of your Brother ScanNCut machine.
For some users, the time investment may be associated with a certain degree of difficulty when it comes to learning how the machine works. It’s also worth pointing out that since there is more than one model of the Brother ScanNCut, it’s hard to say definitively how easy or hard it to use all the different machines.
–
Brother Models Comparisons and Reviews
There are two major ScanNCut machines that you need to be familiar with. The two models are fairly similar but all the minor differences matter in terms of pricing and overall performance.
1. Brother ScanNCut CM100DM Review
[easyazon_image align=”center” height=”750″ identifier=”B00F3J38GQ” locale=”US” src=”https://www.thebestvinylcutters.com/wp-content/uploads/2019/05/91873KxZDtL.jpg” tag=”bestvinylmachines-20″ width=”750″]
This is the basic or entry-level model, also known as ScanNCut DM. It comes with a standard mat and an adhesive mat as well as high tack and iron-on fabric contact sheets, two of each. It has a capacity of 300 objects and a nominal cut size of 12” x 24”.
The machine’s memory comes with plenty of built-in designs too. The total is 600 with 500 of those being for paper and 100 for quilting. Five built-in fonts are also available. Although drawing accessories are not included, you do get a spatula and a touch pen, plus an accessory bag with which to hold them.
>>> Click here to check out more info and prices on the Brother ScanNCut CM100DM
2. Brother ScanNCut CM550DX Review
The CM550DX also known as ScanNCut DX is better overall, which you might expect at almost twice the market value. The machine uses the same 1mm and 1.5mm blades. Both standard and low tack adhesive mats are included with the added bonus of a secondary mat.
The support sheets also come in pairs like the DM. Both machines are capable of a 400% zoom and the difference in clarity is virtually nonexistent. The same screen and scan size are available for both machines and there’s no difference in readable object capacity or cut size.
The advantage of the DX is file compatibility and preloaded designs. You could say that the difference in price is in more internal memory and intellectual property. Unlike the DM, the DX can be fed PES and PHC files, not just .SVG file formats.
This model also comes with 140 built-in quilt designs and 762 built-in regular paper and fabric designs. This puts the total at 902 designs, 302 more than what the CM100DM model comes with. The same five built-in fonts are found in both machines.
Last but not least, the CM550DX includes a pen holder, two erasable pen sets, a six-color pen set, along with the standard accessories.
3. Brother ScanNCut 2 Review
[easyazon_image align=”center” height=”750″ identifier=”B014T1CI1E” locale=”US” src=”https://www.thebestvinylcutters.com/wp-content/uploads/2019/05/71zcewX2n9L-1.jpg” tag=”bestvinylmachines-20″ width=”750″]
Since the first Brother scan and cut review and the product’s upward trajectory, the company has released more than a few models. Eventually, the entire line was upgraded to the Brother ScanNCut2 series which features multiple models worth checking out.
If you want an upgrade from the first line of scan and cut machines, or if you’re looking for something slightly more advanced, the ScanNCut CM350 or CM650 models may be of interest to you.
Both machines can pretty much do anything that older ScanNCut models can do. The scanners are slightly improved and the compatibility with 6 color pen sets has been drastically improved for the CM650 model.
The Brother CM350 ScanNCut2 happens to be the most popular of all the Brother ScanNCut models. One thing that makes any Brother ScanNCut2 die cutting machine even more appealing: the wireless functionality. The original Canvas software had to be used on a separate computer or tablet as it is cloud-based.
Because of that, uploading an image onto the machine was a multi-step process and required an external USB drive. With ScanNCut2 machines, you don’t have to worry about all that.
The machines can establish a wireless connection to a PC, tablet, or iPad. This means that you can immediately send files to the machine and you don’t have to leave the room to do so every time.
[easyazon_image align=”center” height=”750″ identifier=”B014T1CI1E” locale=”US” src=”https://www.thebestvinylcutters.com/wp-content/uploads/2019/05/712B53WT3GL.jpg” tag=”bestvinylmachines-20″ width=”750″]
You can also scan images directly to the system with the built-in 300 DPI scanner.
The Brother ScanNCut2 CM350 can cut a maximum width of 11.5″, which is all that is needed for most hobbyist crafters. It has a large 4.85” LCD touch screen to enable easy operation. The larger screen which is roughly 30% bigger than on the original ScanNCut models. This certainly helps when trying to edit intricate patterns. The DX models also come with middle tack adhesive mats instead of low tack adhesive mats which help a lot with pattern recognition.
[easyazon_image align=”center” height=”750″ identifier=”B014T1CI1E” locale=”US” src=”https://www.thebestvinylcutters.com/wp-content/uploads/2019/05/81UF7pH6b2BL.jpg” tag=”bestvinylmachines-20″ width=”750″]
The machine includes over 600 designs, including 100 quilt patterns and 7 lettering fonts. It also has the ability to read SVG data files.
The good thing about the ScanNCut2 line is that there are budget-friendly entry-level models and up to expensive ones suitable for demanding crafters. However, whether or not you need to upgrade from the original ScanNCut to the newer versions is up to you.
It’s also worth pointing out that machines in the Brother ScanNCut2 series are quieter. It’s not way quieter but for some people it may be worth paying the extra buck.
You can also see how the CM350 compares to the Brother ScanNCut DC2000 and the Brother ScanNCut 650W by clicking on this PDF link here.
>>> Click here to check out more info and prices on the Brother ScanNCut CM350
Important Note about Models
Brother is a global manufacturer based in Japan. Therefore, you may find different model names for various regions around the globe. What’s sold in the US markets may be identical in features and performance to something sold in the UK, Europe, or Australia, but they may not have the same name.
This is also true for Brother ScanNCut2 die cutting machines. All Brother products are based on its main regional offices. If you’re in Mexico or Canada, for example, your Brother products would be supplied by Brother USA.
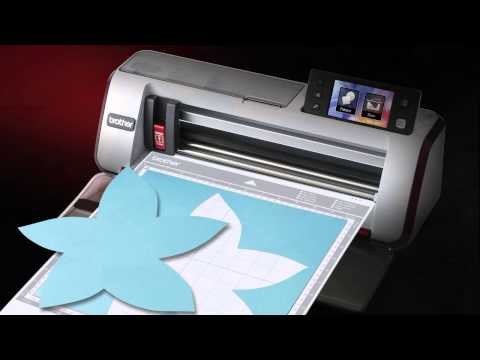
How to Use the Brother Cutting Machine
[easyazon_image align=”center” height=”750″ identifier=”B01L0HTEYO” locale=”US” src=”https://www.thebestvinylcutters.com/wp-content/uploads/2019/05/71CHRbRCmRL.jpg” tag=”bestvinylmachines-20″ width=”750″]
The Brother ScanNCut doesn’t need a computer or any other gadget with an operating system in order to function. Using the machine is pretty straightforward as its user interface and control panel have everything you need to configure for various materials.
There are three main steps to using the Brother ScanNCut:
1. Scanning
This step involves scanning the pattern into the machine and saving it, either in the machine’s memory or in its software. Choose black and white mode or color mode depending on what image you have on paper.
Stick the material to the mat and feed it into the machine. It’s best to hold the picture until the top edge reaches the machine.
2. Editing
After scanning an image, you can then do quite a bit of editing directly from the machine’s touchscreen interface. You can remove unclear patterns, choose the width and length of the cut, choose the size of the line, and much more.
3. Cutting
Cutting is what you make the machine do after the image has been scanned and after you’re satisfied with the edits you’ve performed.
4. Extra Useful Tips
Sometimes you may need to do some prepping before operating it. For example, if you want to work with fabrics you have to prepare the material first. The recommended adjustments involve starching and ironing the fabric until flat.
You should then apply the sheet to the standard mat. Press down against the fabric to remove any air pockets so that the ScanNCut sensors don’t make any errors in calculations. If it’s the first time working with a piece of fabric, a test run is not a bad idea either.
This would allow you to see if the blade speed and blade depth settings are what you need or if they require further adjustments.
When placing a piece of paper on the mat, it’s a good idea to keep it centered. The ScanNCut machine seems to do a much better job of recognizing patterns when the paper is centered. Other machines might favor off-centered positions.
You usually discover the sweet spot after doing some trial runs. But with the ScanNCut, “X” marks the spot.
Choosing the black and white pattern recognition usually speeds up the scanning process. But you might want to avoid doing this for colored artwork or photos that have too many faded colors and faded outlines.
When sticking a piece of paper on the mat, it’s best to do it slowly. After adhering the bottom edge, hold the top of the edge with one hand and then gently press the paper onto the mat from the bottom up. You can use a roller for this or you can use a ruler, since it’s likely long enough to cover the width of the paper. Doing this eliminates air pockets.
Conclusion
Any Brother Scan and Cut machine is going to be an amazing addition to your workshop. Whether you work with vinyl, paper, or fabrics, having two machines built into one will save you space, money, and a lot of time.
What’s even better about the original ScanNCut series is the fact that you have a model suitable for any type of activity. You can get the entry-level machine to continue your hobby or you can get the more advanced model to scale up your production and start entering the commercial scene.
The original ScanNCut machines are just as revolutionary today as they were at introduction. And, although some people have since upgraded to various models in the ScanNCut2 series, don’t feel pressured until you’re ready. Maybe you’ve saved enough money from lower business taxes or something?